
The Making of "Toms Branch Falls"
Smokey Mountain National Park, NC
By PF Staff in Favorite Photos on Jan 19, 2013
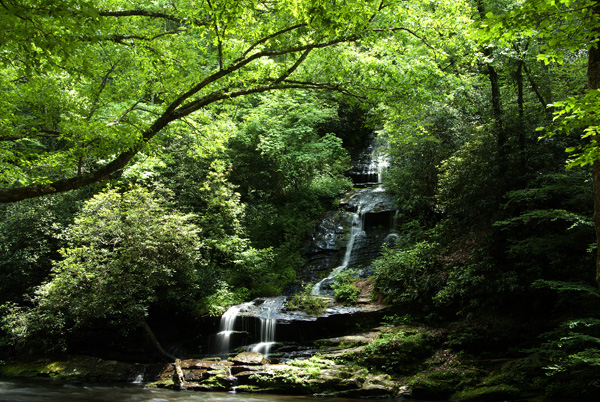
This is a picture of Toms Branch Falls in North Carolina outside of Bryson City, NC. I picked this photo because I like the way the tree branch helps lead the eye into the photo while outlining the bushes. The bushes and shadows in turn help frame the waterfall.
I used the Pentax K10D camera with the Tamron 18-250mm lens with a circular polarizer filter.
The camera was mounted on a Slik Universal U-212 Deluxe tripod while using the 2 sec delay (mirror-up) option on the camera to avoid vibration. Shake reduction was turned off while using the camera on the tripod. White balance was set on daylight although the camera says manual. (I keep the white balance on daylight 99% of the time since I shoot RAW) The photo was shot in RAW and post processed using Adobe Photoshop CS5.
The technical information is as follows:
| F-stop | F29 |
| Exposure | 2 sec |
| ISO Speed | ISO-250 |
| Exposure Program | Manual |
| Focal Length | 27 mm |
| Metering Mode | Spot |
| White Balance | Manual |
The first thing I do when working on the computer is make a folder for the pictures of the event and label it as such. Then I make two folders inside the first and label them RAW and JPEG. Next I download the files into the RAW folder after which I open photoshop and scroll down the File menu to Scripts and Image Processor. I locate the event folder and open the RAW folder for the images to process, then locate the JPEG folder to receive the processed images. When they are finished converting I then pick the photos for the digital dark room.
The first thing I do is go to Image, Adjustments and Levels. I slide the outside arrows at the bottom of the Input Levels histogram to the side of the curves if need be to lighten and darken the extremes to get pure black (0) and pure white (256). I then use the middle arrow to brighten or darken the mid tones of the photo to my liking.
 |
| Original photo |
On this photo I just adjusted the center arrow to the right to darken the image some. Then I went to Filter, Sharpen, Unsharp Mask and adjusted the image. I don't recall the exact numbers that were used for Amount or Radius. Again I just use the sliders until I like the picture. For the contest I then went to Image, Image Size and adjusted the width to 600 pixels. If need be, I'll use the Crop tool and/or the Spot Healing Brush Tool. I'm picking up bits and pieces like Content Aware as I go along.
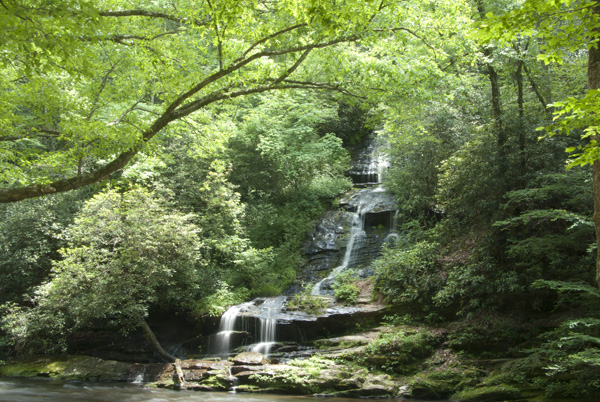
|
| Final result |
I hope you found this information helpful. The picture looks much better full size, the post processed picture is sharper than it appears. I try to get the image as close as possible in camera so the post processing is minimal for two reasons. One, it's less work on the back side because two, I'm not a professional photoshop user. Good luck to all and I look forward to others' posts to see what nuggets of info I can learn from you.
- Jack
More from the Pentax Forums Homepage
- March 2024 "Flowers up Close" Photo...
- Ricoh updates the K-1, K-1 II, GR III, GR IIIx
- March "Flowers up Close" Contest...
- HD FA 50mm F1.4 vs. SMC 50mm F1.4 Classic Review
- Announcing Our April, 2024 Photo Contest
- Introducing Pentaxify AI by PentaxForums.com
- The Making of "Autumn Draws"
- Ricoh launches the RICOH GR III HDF and RICOH...

 Various writers regularly contribute articles to the Pentax Forums homepage blog. More recent articles are published under each author's forum username. We hope you enjoy our guides and news...
Comments