
Pentax K-5 Review
Walkthrough
Note that this section is written, in the most part, for current or future K-5 owners. If you haven't ordered your K-5 yet, you should skip this section.
Getting Started
Before unboxing your camera, make sure that you have plenty of free time, as you'll likely be tempted to start exploring it right away. A very good practice with Pentax DSLRs is to leave the original packaging intact, as this helps preserve resale value and will make it easier to locate your less-used accessories. Start by removing the essentials: the body, the strap, and the battery and charger. As we mentioned earlier, it is recommended that you charge the battery prior to using it. The first thing you should do is install the camera strap, install the battery, and pop in an SD card (be careful when inserting it - try not to use your fingernail unless absolutely necessary to avoid damaging the card). The K-5's JPEG files use between about 6-7 megabytes each, so we recommend using an 8Gb or a 16Gb card. Keep in mind that the larger your card, the more data you risk losing should you lose or break the card. Therefore, we don't recommend anything about 16Gb. Due to the K-5's large buffer, a card with high writing performance isn't required, but you might find it more convenient when copying files or frequently using continuous mode.
Finally, you'll want to mount your lens. If you're new to Pentax, start with the DA 18-55mm WR kit lens that comes bundled with the camera, as it's an ideal beginner lens and also boasts weather sealing like the K-5 itself. Important note: make sure you push in the lens release button near the mount while putting the lens on. If you don't do this, both the mount and the lens will be subjected to unnecessary wear.
Now comes the moment you've been waiting for- powering up the camera. When you turn the camera on, you'll be prompted for basic settings, such as language, date, and time. Once those settings are saved, you can begin using the camera normally! We hope you enjoy your K-5! One important thing to note is that you may hear a noise inside your camera as if something were loose. This is perfectly normal and is due to the way the shake reduction system works.
Firmware Update
On November 17th, Pentax released K-5 Firmware v1.01, which introduced a larger RAW continuous shooting buffer as well as some stability fixes. For instructions on how to update, visit the K-5 firmware announcement on our homepage. The update will only take about 5 minutes, and we recommend you apply it right away. (Update: the latest firmware, v1.11, also adds support for the O-GPS1 accessory).
The Menu
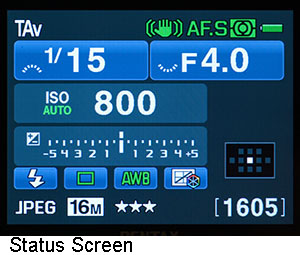
The K-5's menu system is broken up into a variety of screens. The main menu, accessible by pressing the "Menu" button once, contains four tabs: one with image recording settings, one with playback settings, one with system and time settings, and one with the Pentax "custom functions" that allow you to change how the camera behaves. You'll likely find yourself using the first and the last tabs the most. In addition to the main menu, there are three other screens: the Fn screen, the Status Screen, and the Control Panel. The Status Screen is shown (by default) after you press the "Info" button, and shows relevant image information similar to what is shown on the top LCD. It can be configured to be on all the time, or you can completely disable it if you feel it is redundant.
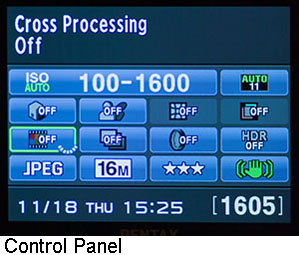
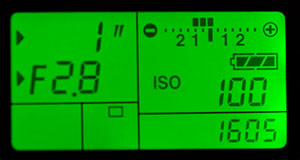
Pressing the "Info" button again will bring up the Control Panel and allow you to change image recording settings on the fly (rather than having to go into the main menu), and if you press it a third time, the electronic level will be shown, if enabled. Note that a lot of the information displayed on the Status screen is also shown in the viewfinder or on the top LCD, so it introduces a great deal of redundancy. Beginners may prefer to use the Status Screen, while more advanced users may prefer using the viewfinder and top LCD.
On the other hand, the Info screen should be appealing to all users, as it introduces many shortcuts and is very easy to use. The final screen worth noting is the Fn menu, accessible by pressing the four directional buttons located around the "OK" button. Through this menu, you'll be able to set the white balance, drive mode, custom image setting, and flash setting. While almost everything is accessible via the software menu, a few settings, such as AF point selection and metering type, can only be set by using external buttons.
 |  |
- The K-5 offers a Control Panel screen through which you can quickly modify image settings on-the-fly
- Real-time information can be viewed either on the top LCD, in the viewfinder, or through the Status Screen
- The K-5 has 40 "Custom Function" settings in the menu which allow you to customize the camera
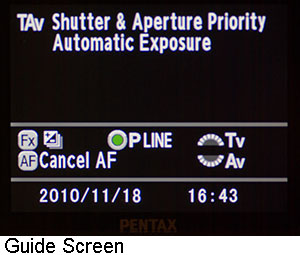
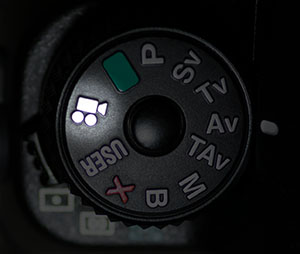
- There is also a Guide Screen shown whenever you switch modes, informing you of current settings
Recommended Settings
There is nearly an infinite number of setting combinations on the K-5, and there's a great deal of personalization involved. Therefore, there isn't really a universal camera configuration that works for everyone. You have to fine-tune the camera to your needs.
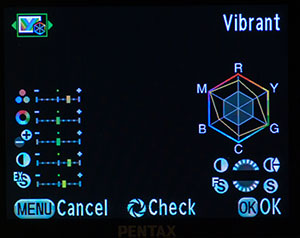
Start by setting your custom image setting (if you use JPEG) by pressing the right arrow button. We recommend the "Vibrant" image, with +2 for saturation and contrast, and +1 for sharpness. We found that this combination delivers appealing images; there will be a brief series of samples later on in the review illustrating this, even though this setting really depends on the individual more than anything else. An instructive way to experiment with the custom image settings is to open a RAW file in the Pentax Digital Camera Utility that is delivered with the camera, and select the Laboratory mode in which most of the image setitngs can be manipulated and the result instantly previewed (see screen shot).
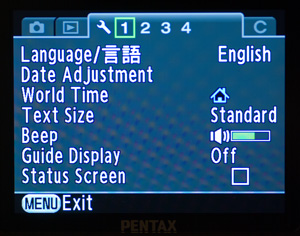
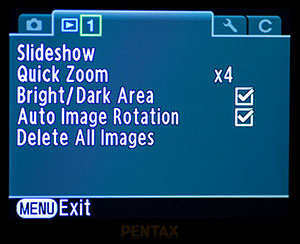
Next, we recommend that you disable the Status Screen - the option is found in the first page of the system (third) tab in the menu. In that menu, on the third page, you may also choose to add a copyright note to your photos. In the play menu, enable "Bright/Dark Area", as this will highlight over- and under-exposed portions of your photographs in red and yellow, respectively, and is very useful when shooting outdoors.
Finally, we suggest you set high-ISO noise reduction to Auto, and slow shutter speed noise reduction to Off (to be discussed later).
 | 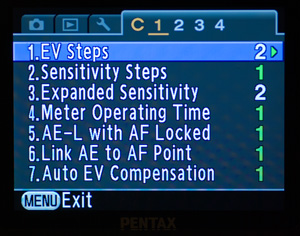 |
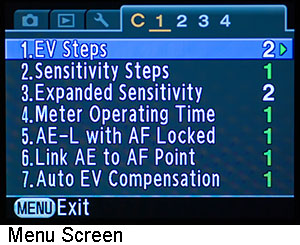
Under the Custom Function menu, set "EV Steps" to 2, as this will make the camera use half-stops instead of third-stops. Enable expanded sensitivity (we want to put that ISO 51200 to use, right?), and set the "Meter Operating Time" to 2 to save power.
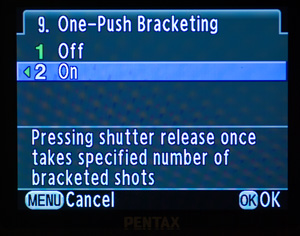
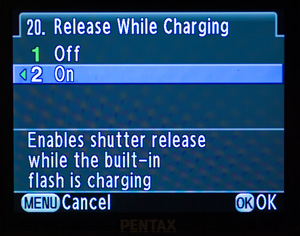
On page two of this menu, we recommend you set "One-Push Bracketing" to 2, so that one push of the shutter release button will take all 2, 3, or 5 photos at once. On page 3, enable "Release While Charging Flash", as you don't want to be stuck with the shutter not firing when you need it to.
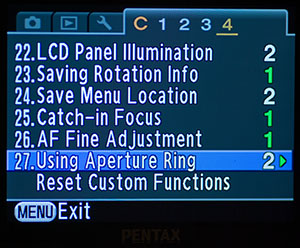
On page 4, we recommend you disable the top LCD illumination, and only enable it when needed, as it drains power. Last but not least, set setting #27 to 2, allowing the use of Pentax M/K lenses (lenses with an aperture ring, but without an "A" setting) on your camera. As you get used to the camera, you might also want to customize the way your e-dials behave in different exposure modes. This can be done on pages 5 and 6.
We hope that this brief walkthrough of setting up your camera was helpful, especially if you're new to Pentax!
Movie Mode
The K-5 features an improved movie mode over the K-7. It boasts full-HD video recording at 25FPS, and can go up to 30 FPS when recording in 720p or VGA resolution. However, the video recording functionality still isn't very refined, as auto focus and manual aperture control are unavailable in movie mode. Thus, the user is confined to a pre-set aperture and manual focus, which isn't always optimal. If one has a lens with an aperture ring (FA series or earlier), it may be used, however. Finally, the K-5 features an internal microphone, provisioning for an external microphone, and an HDMI port. You can also process videos minimally in-camera.
Our conclusion is that the K-5 is not meant to be used as a video camera. It's fine for quick amateur videos, but anything involving action is practically out of the question. Thus, movie mode isn't going to be an area of focus in this review. For samples of movie image quality, please scroll down to our AF test section.


