| Review of: PENTAX Stereo Adapter 49mm and 52mm by gofour3 on Sat August 26, 2023 | Rating: 7 | View more reviews | |

Views: 27050
Reviews: 3
| Versions:
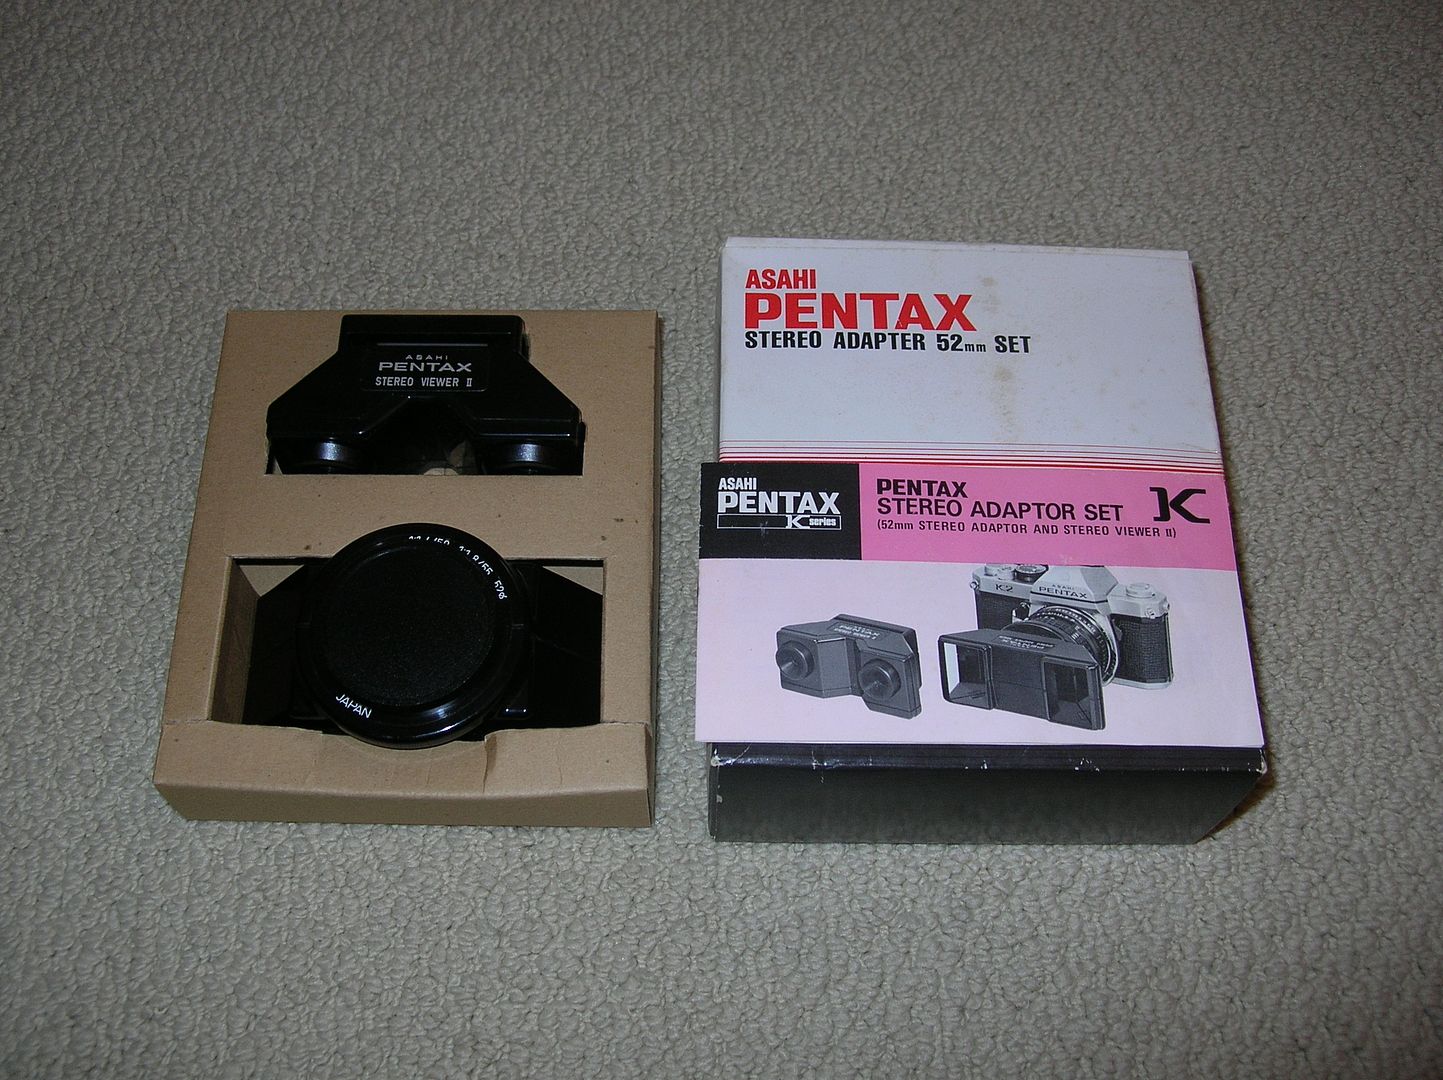
Pentax released various version of the Stereo Adaptor Set over the years and this review is for the K Series set released in 1975. (With the 52mm filter thread) This set includes the 52mm stereo adaptor and the stereo viewer II.
 Usage:
You will need to use the following gear & settings, to get a proper stereo (3D) image:
- 35mm film SLR loaded with 135 slide film. (Colour slide film is recommended)
- 50mm to 55mm standard lens with a 52mm filter thread. (Example:K or A50/1.2, K50/1.4, K55/1.8 & K55/2)
- Lens aperture setting between f/5.6 and f/8.
- Subject range between 1.5 to 4 meters or 5 to 13 feet.
- After processing the E6 slide film, you will need to have the slides mounted.
Observations:
The stereo adaptor screws in the lens filter thread just like a filter. When the adaptor is tight, you can adjust the adaptor to make it level.
Youll see two images of the main subject in the view finder with a black line down the center. Youll have to focus on the main subject outside of the center of the focusing screen, (you can't use any focusing aid) making sure you keep the main subject centered. Horizontal shooting works best, though you still can shoot vertically with adjustments.
Suitable subjects are people, flowers, pets, sculptures/art installations or anything that can be isolated as the main subject at a close range. Landscapes with no main subject, will not achieve a 3D effect.
No exposure compensation is required for using the stereo adapter, the SLRs metering will function normally. You can also use a filter as well between the lens and adaptor. (A skylight filter is recommended when shooting colour slide film)
When viewing the mounted slide you can adjust the space between the two eyepieces for optimal 3D effect, by turning the front of either eyepiece.
Summary:
The Pentax Stereo Adapter Set K can produce stunning 3D images if used correctly. However its still a novelty item that I dont see myself ever shooting an entire roll of film with it. There are way too many restrictions to get a proper 3D image and your lens choices are down to a handful, unless you have a 52mm to 49mm step-down ring. I purchased this set back in 2011 and finally just got around to using it earlier this month, thats how useful I find it. Even though I shoot slide film all the time, it will probably be another 10 years till I use the stereo set again
:eek:
Price:
I purchased the set online and it came in the original box will the manual. Its in LN condition and I paid $159.95 USD back in March, 2011.
Sample shot taken with the K Series Adaptor Set. Photo is a medium resolution scan from the original slide. The shot was taken in Vancouver, using my K55/1.8 lens & a Skylight filter.
Camera: KX Film: Kodak Ektachrome 100 ISO: 100 Usage:
You will need to use the following gear & settings, to get a proper stereo (3D) image:
- 35mm film SLR loaded with 135 slide film. (Colour slide film is recommended)
- 50mm to 55mm standard lens with a 52mm filter thread. (Example:K or A50/1.2, K50/1.4, K55/1.8 & K55/2)
- Lens aperture setting between f/5.6 and f/8.
- Subject range between 1.5 to 4 meters or 5 to 13 feet.
- After processing the E6 slide film, you will need to have the slides mounted.
Observations:
The stereo adaptor screws in the lens filter thread just like a filter. When the adaptor is tight, you can adjust the adaptor to make it level.
Youll see two images of the main subject in the view finder with a black line down the center. Youll have to focus on the main subject outside of the center of the focusing screen, (you can't use any focusing aid) making sure you keep the main subject centered. Horizontal shooting works best, though you still can shoot vertically with adjustments.
Suitable subjects are people, flowers, pets, sculptures/art installations or anything that can be isolated as the main subject at a close range. Landscapes with no main subject, will not achieve a 3D effect.
No exposure compensation is required for using the stereo adapter, the SLRs metering will function normally. You can also use a filter as well between the lens and adaptor. (A skylight filter is recommended when shooting colour slide film)
When viewing the mounted slide you can adjust the space between the two eyepieces for optimal 3D effect, by turning the front of either eyepiece.
Summary:
The Pentax Stereo Adapter Set K can produce stunning 3D images if used correctly. However its still a novelty item that I dont see myself ever shooting an entire roll of film with it. There are way too many restrictions to get a proper 3D image and your lens choices are down to a handful, unless you have a 52mm to 49mm step-down ring. I purchased this set back in 2011 and finally just got around to using it earlier this month, thats how useful I find it. Even though I shoot slide film all the time, it will probably be another 10 years till I use the stereo set again
:eek:
Price:
I purchased the set online and it came in the original box will the manual. Its in LN condition and I paid $159.95 USD back in March, 2011.
Sample shot taken with the K Series Adaptor Set. Photo is a medium resolution scan from the original slide. The shot was taken in Vancouver, using my K55/1.8 lens & a Skylight filter.
Camera: KX Film: Kodak Ektachrome 100 ISO: 100 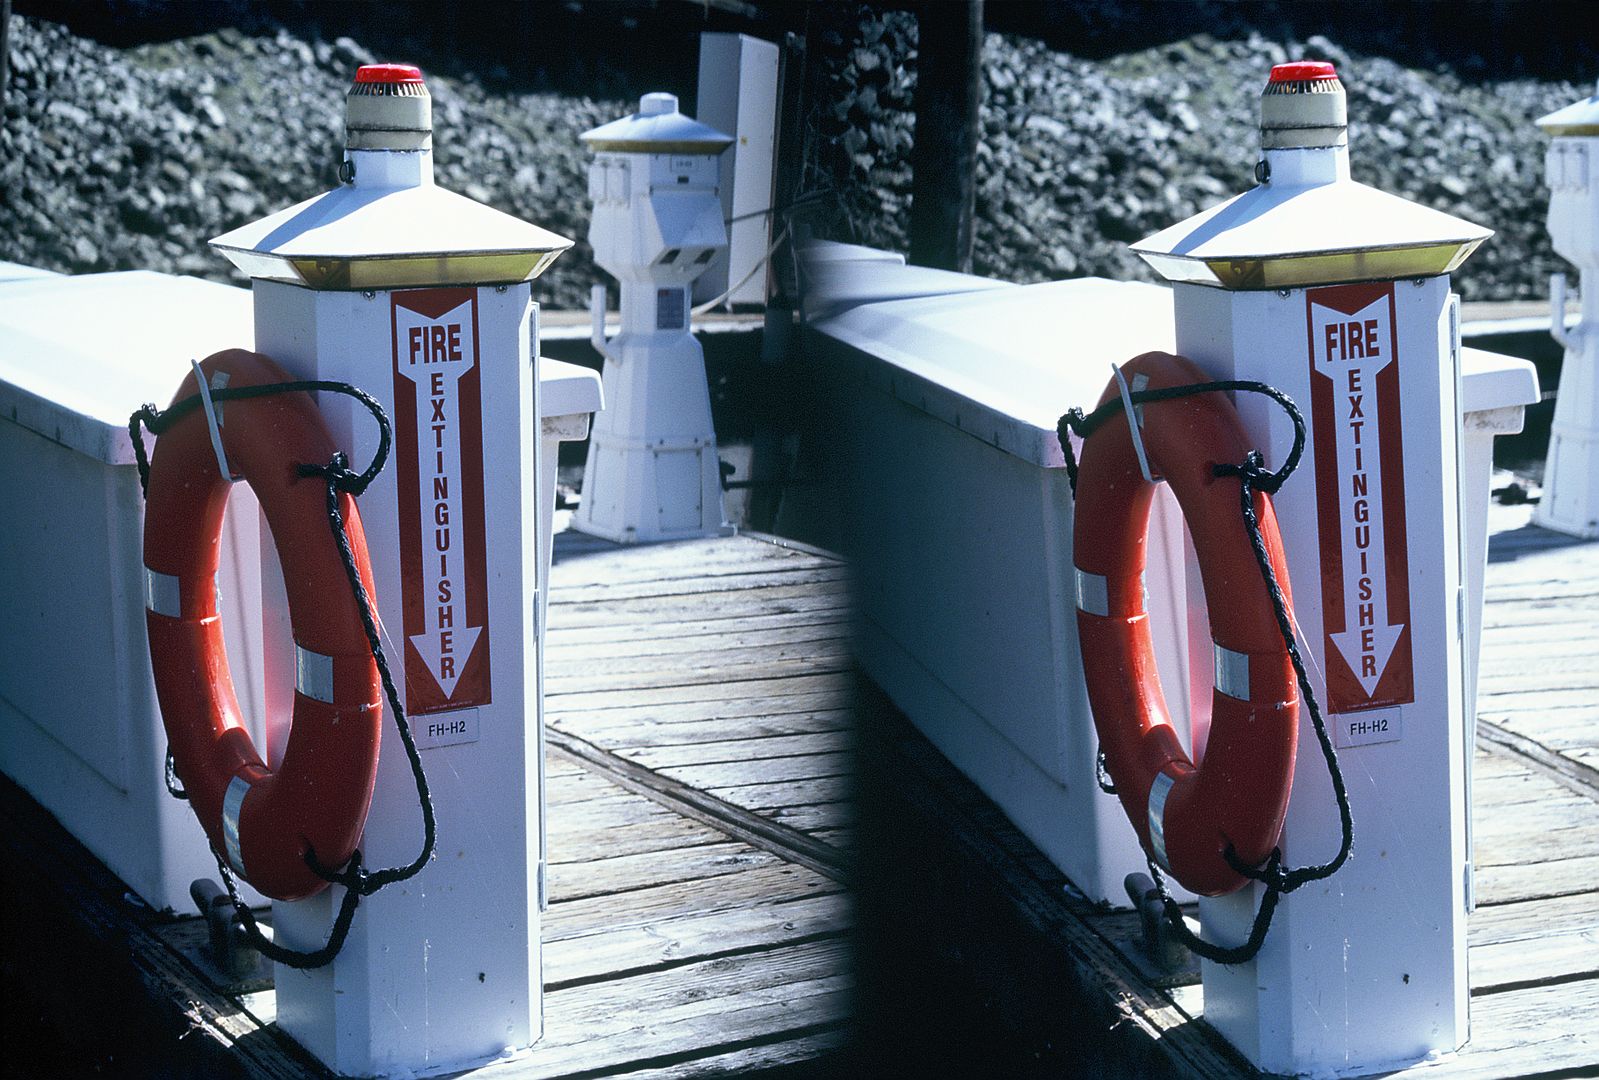 | |
| Review of: PENTAX AF 540FGZ by gofour3 on Sat January 23, 2021 | Rating: 10 | View more reviews | |

Views: 75075
Reviews: 25
|
Pentax released the AF540FGZ in 2005 as the second P-TTL flash designed for the new *ist Series auto-focus film/digital cameras. (Its a bigger brother to the AF360FGZ that came out four years earlier).
I bought my AF540FGZ for use on my Pentax MZ-S & *ist film cameras and together this combo enables you to use all of the flashs features in the P-TTL mode. (Along with a F, FA or FAJ Series lens) Note Pentax also indicates using A Series lenses with the P-TTL flash can result in incorrect exposure, so AF lenses are recommended.
The great thing about this flash is that its backwards compatible the older TTL flash 35mm/645/6x7 film cameras and will automatically switch to using that mode when mounted on a LX/645NII/67II or other TTL flash cameras. Note the older the film camera the less features are available on the flash. (Refer to the AF540FGZ flash manual for what functions are available for each camera group.
This is also the second Pentax flash to feature a wireless control option as well as a format setting to switch between 35mm, 645 and 67 camera formats.
The AF540FGZ has a tilting head for bounce flash and the head also swivels. The flash also has a built-in catchlight & wide-angle panel.
The build of the AF540FGZ is OK and if treated carefully you should not have any issues with the battery door either. This flash weighs 380 grams without the four AA batteries installed. Compared to its little brother, the AF3600FGZ weighs 270 grams without the batteries installed.
Overall an excellent flash if you have a mixture of TTL and P-TTL film cameras and if you are looking for a more powerful flash than the AF360FGZ.
I found my NOS open box AF540FGZ at a local store, it cost $100.00CDN.
| |
| Review of: PENTAX AF 360FGZ by gofour3 on Sat January 23, 2021 | Rating: 9 | View more reviews | |

Views: 81963
Reviews: 26
|
Pentax released the AF360FGZ in 2001 as the first P-TTL flash designed for the new MZ-S & MZ-6/ZX-L auto-focus film cameras. (Its bigger brother the AF540FGZ came out four years later as part of the *ist Series).
Pentax introduced the P-TTL flash system as it was more accurate with the newer multi-segment metering AF film cameras available at that time, than the older TTL system.
I bought my AF360FGZ for use on my Pentax MZ-S & *ist film cameras and together these combos enables you to use all of the flashs features in the P-TTL mode. (Along with a F, FA or FAJ Series lens) Note Pentax also indicates using A Series lenses with the P-TLL flash can result in incorrect exposure, so AF lenses are recommended.
The great thing about this flash is that its backwards compatible the older TTL flash 35mm/645/6x7 film cameras and will automatically switch to using that mode when mounted on a LX/645NII/67II or other TTL flash cameras. Note the older the film camera the less features are available on the flash. (Refer to the AF360FGZ flash manual for what functions are available for each camera group.
This is also the first Pentax flash to feature a wireless control option as well as the first to feature a format setting to switch between 35mm, 645 and 67 camera formats.
The AF360FGZ has a tilting head for bounce flash, but the head does not swivel. (The AF540FGZ does tilt/swivel) The flash also has a built-in catchlight & wide-angle panel.
The build of the AF360FGZ is OK and if treated carefully you should not have any issues with the battery door either. This is a smallish flash and it weighs 270 grams without the four AA batteries installed. Compared to its bigger brother, the AF540FGZ weighs 380 grams without the batteries installed.
Overall a good flash if you have a mixture of TTL and P-TTL cameras and if you are looking for a smaller camera bag friendly option. Though if you are looking for a really good high-powered P-TTL/TTL flash with all the bells & whistles, then the AF540FGZ is a better albeit more expensive choice.
I found my NOS AF360FGZ online, it cost $130.00EUR.
| |
| Review of: Pentax CS-205 Wired Remote by gofour3 on Fri December 18, 2020 | Rating: 10 | View more reviews | |

Views: 16131
Reviews: 8
|
The Cable Switch CS-205 (0.5 meter) was originally introduced for the Pentax MZ-L/MZ-6/ZX-L film camera. It also works on the *ist Series film/digital cameras and some newer DSLRs. I bought the CS-205 cable switch to use with my Pentax *ist film camera.
Pentax finally standardized on the CS-205 cable switch after going through Cable Switch F that worked on the SF Series, Z/PZ Series, 645N and some MZ/ZX series film bodies. (Not the MZ-S or MZ-L/MZ-6/ZX-L) and cable switch CS105/130 that only worked on two cameras, the MZ-S and 645NII!
The phono plug style connector is better than the above older cable switch connectors, as you can insert it into the camera in any orientation.
The CS-205 cable switch is pretty basic, one press activates the meter/autofocus (if you are using AF) and a second press trips the cameras shutter. You push up the button to lock the shutter open for long exposures. (Bulb)
There is a slot on the cable switch that holds the plastic cap that covers the port on the camera, so it doesnt get lost when the cable release is in use.
I bought my cable switch CS-205 online and it was new. I paid $49.95 USD.
| |
| Review of: Pentax Cable Switch CS-105 and Cable Switch CS-130 by gofour3 on Tue May 26, 2020 | Rating: 8 | View more reviews | |

Views: 1812
Reviews: 1
|
I bought the CS-105 ½ meter cable switch to use with my Pentax MZ-S camera. The cable switch is pretty basic, one press activates the meter/autofocus (if you are using AF) and a second press trips the cameras shutter. You push up the button to lock the shutter open for long exposures in Bulb mode.
A couple useful extra features:
1)There is a slot on the cable switch that holds the plastic cap that covers the port on the camera, so it doesnt get lost when the cable switch is in use.
2)There is a metal ring at the camera end of the cable that you need to pull down to disconnect it from the camera, as its locked into place. So no worries of accidently pulling out the cable when in use.
The only issue with the CS-105/130 cable switches is that they should never have existed. Pentax already had the older Cable Switch F that worked on the SF Series, Z/PZ Series, 645N and some MZ/ZX series film bodies. As well as the newer Cable Switch CS-205 that worked on the MZ-6/ZX-L, *ist film cameras and future DSLRs.
https://www.pentaxforums.com/accessoryreviews/pentax-cable-switch-f.html https://www.pentaxforums.com/accessoryreviews/pentax-cs-205-wired-remote.html
Instead Pentax came up with this third cable switch (CS105/130) that only works on two cameras, the MZ-S and 645NII! As a result these cable switches are hard to find and expensive. I dont see any reason that the MZ-S or 645NII cameras could not have used either the older cable switch F or newer cable switch CS-205 instead.
I bought my cable switch CS-105 online and it was NOS. I paid $73.00 USD.
| |
| Review of: PENTAX Magnifier Eyecup O-ME53 by gofour3 on Mon October 28, 2019 | Rating: 9 | View more reviews | |

Views: 51343
Reviews: 41
|
I bought the O-ME53 eyecup for my Pentax Z-1P Autofocus film camera.
It solved two issues that I was having:
1) My Z-1P's OEM eyecup broke into three pieces when I removed it, as the hard rubber dried up due to old age. So I needed a replacement eyecup.
2) The standard focusing screen for my AF Z-1P is not very good for manual focusing, when compared to the screens on my Pentax manual focus film bodies. So I was looking for some sort of focusing aid for my Z-1P.
The O-ME53 eyecup solves both issues and fits nicely on the Z-1P. This eyecup does not block the viewfinder metering info on the Z-1P, so that's a big bonus. The extra magnification also helps a lot when doing any closeup/critical manual focusing.
The only cons I found were the O-ME53 eyecup does not block light from the sides as well as the older round rubber eyecups from the SP to P Series manual focus film bodies. I also have to move the O-ME53 up slightly to open/close the Z-1P's film door.
Overall I'm very happy with this Pentax accessory.
I bought my Pentax O-ME53 eyecup new from a local camera store and it cost $49.99 CDN.
Update November, 2020:
I'm also using this eyecup on my SF1n, MZ-S & *ist auto-focus film cameras and it works great on those bodies as well.
| |
| Review of: PENTAX AF 330FTZ by gofour3 on Sat July 6, 2019 | Rating: 9 | View more reviews | |

Views: 17293
Reviews: 1
|
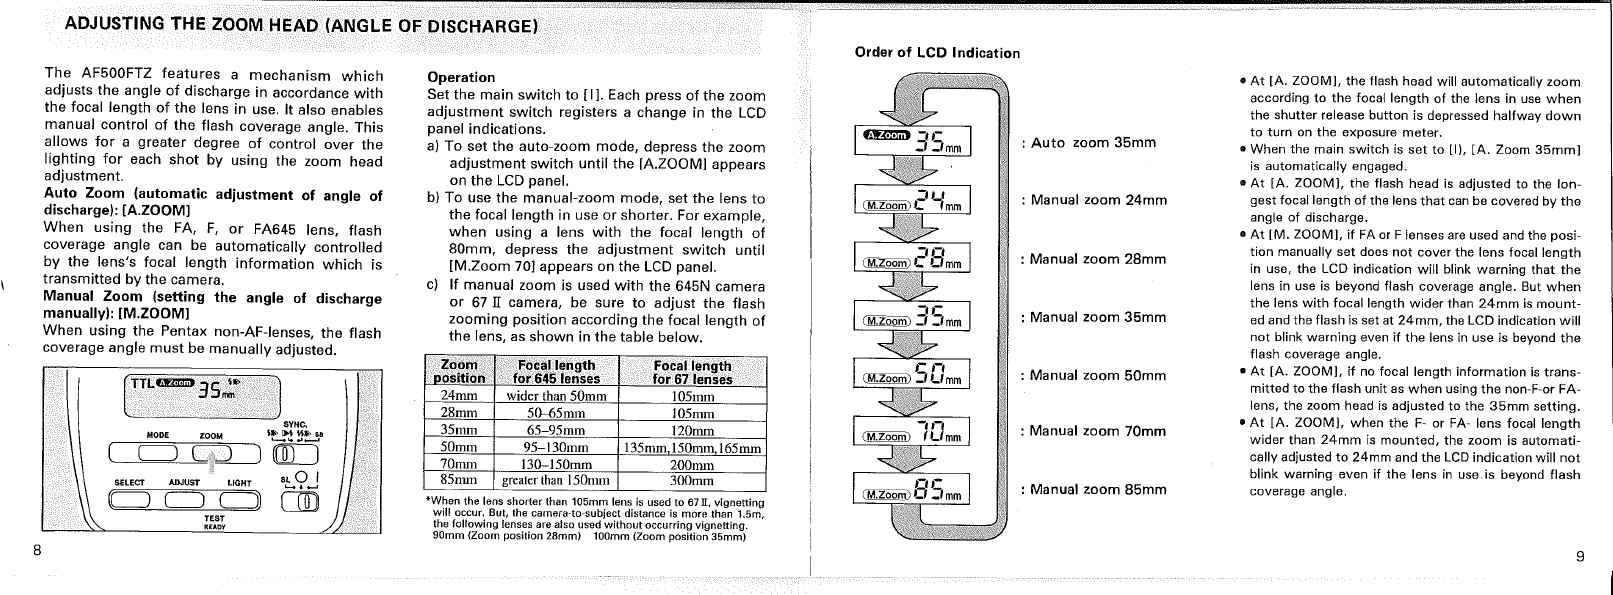
Pentax released the AF330FTZ in 1991 as one of two new TTL flashes designed for the new Z/PZ series auto-focus cameras. (The AF500FTZ was the other TTL flash and it came out a year later in 1992). This is the first Pentax flash to feature a motorized zoom head function.
I bought my AF330FTZ for use on my Pentax Z-1P film camera and together this combo enables you to use all of the flashs features. (Along with a F or FA Series lens) You can of course use this flash with any Pentax camera or K/M/A Series lens, but you will not be able to use the TTL Auto feature or some of the flashs other functions.
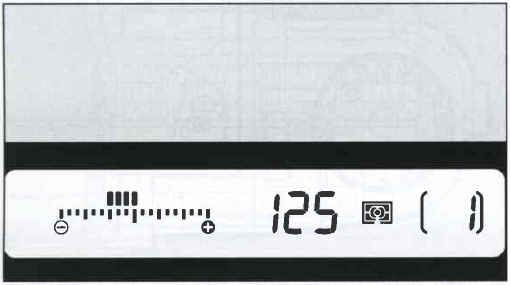
The AF330FTZ has the new-style LCD panel on the back of the flash, along with various switches. The only thing you really need to set is the Flash mode to TTL and the Sync mode to leading curtain, for regular use. If you are using a Z/PZ Series camera and a F or FA lens, the zoom head will automatically be adjusted to the appropriate coverage angle and the flash effective range will be displayed on the LCD panel. The flashes range depends on the cameras ISO setting & the lens focal length/aperture setting. (There is a little switch inside the battery compartment, where you can change the range from feet to meters.)
Along with the leading curtain sync mode, you also have trailing curtain, contrast control and spot beam. The contrast control setting can be used with my Z-1Ps built-in flash, for twin flash photography. The spot beam setting is for a focusing aid in low lighting, when the Z-1P has issues auto focusing.
The AF330FTZ has a fixed head, so if you want to use bounce flash you will need to use the flash off camera, with two Hot Shoe Adapter F and an Extension Cord F 5P.
The build of the AF330FTZ is pretty good and the battery door is OK as well. This is a small flash and it only weighs 331 grams with the four AA batteries installed. Compared to its bigger brother, the AF500FTZ weighs 502 grams with the batteries installed!
Overall a good flash for the Pentax Z/PZ Series cameras, if you are looking for a smaller camera bag friendly option. Though if you are looking for a really good high powered TTL flash with all the bells & whistles, then the AF 500FTZ is a better albeit more expensive choice.
I found my EXC+ AF330FTZ in a local camera store, it cost $20.00CDN.
| |
| Review of: PENTAX AF 400FTZ by gofour3 on Sun June 2, 2019 | Rating: 8 | View more reviews | |

Views: 18728
Reviews: 5
|
Pentax released the AF 400FTZ in 1987 as one of two new TTL flashes designed for the new SF series auto-focus cameras. (The AF-240T was the other TTL flash). This is the first Pentax flash to feature the zoom head function.
I bought my AF 400FTZ for use on my Pentax SF1n film camera and together this combo enables you to use all of the flashs features. (Along with a F or FA Series lens) You can of course use this flash with any Pentax camera, but you will not be able to use the TTL Auto feature or some of the flashs other functions.
The AF 400FTZ has the old-style calculator board on the back of the flash, this is where you set the ISO and zoom scale for the film & lens you are using. The ISO range is 25 to 1600 and the flash has zoom settings of 24mm*, 28mm, 35mm, 50mm and 105mm. (* only with the wide-angle adapter FWA) This calculator board has no impact on the flash operation and just serves a reference for checking the flash distance range. This is useful in a retro way! :cool:
The zoom head is manually set, by pulling out the flash head and positioning it to the focal length of the lens being used. If the lens focal length is not one of the choices listed above, you then use the next smaller zoom setting. This manual zoom head setting is clunky to use and if you bump the zoom head you can accidentally change the setting. The automatic zoom head setting on the newer AF 500FTZ is much better.
The flash has various angles for bounce flash, it tilts upwards and to the left & right. Ive had the best results with the 60-degree setting for bounce flash.
The build of the AF 400FTZ is pretty good and the battery door is OK as well. This is a big heavy flash and with the four batteries installed, weighs over 500 grams! :eek:
The AF 400FTZ has a storage slot for the SFX/SF1 hot shoe cover, so thats kind of a neat feature. The flash also has a built-in spot-beam for focusing the SFX/SF1 in the dark.
Overall a good flash for the Pentax SF Series cameras. Though if you are looking for a really good high powered TTL flash with all the bells & whistles, then the AF 500FTZ is a better albeit more expensive choice.
I found my EXC+ AF-400FTZ in a local camera store, it cost $19.50CDN.
| |
| Review of: Pentax Cable Switch F by gofour3 on Mon May 20, 2019 | Rating: 9 | View more reviews | |

Views: 17175
Reviews: 4
|
The Pentax "Cable Release F" was released in conjunction with the new "F" series auto-focus cameras & lenses in 1987.
It's works with the above mentioned "SF" cameras, as well as the Z/PZ, and some MZ/ZX series film bodies. (Not the MZ-S or MZ-6/ZX-L)
I bought the cable release for use on my SF1n & Z-1p cameras. It works well and reminds me of my remote control for my Kodak Carousel slide projector. :) I also like the small slot for storing the cameras plastic tab.
The only negative is this cable release only works on some Pentax cameras.
Overall I'm happy with it.
| |
| Review of: Pentax Bayonet type 6x7 mount body cap by gofour3 on Wed April 17, 2019 | Rating: 10 | View more reviews | |

Views: 2235
Reviews: 2
|
This is the 6x7 version of the K-Mount bayonet body cap, which you can also use for Pentax 6x7 accessories like Teleconverters and extension tubes.
You mount them just like a 6x7 lens and remove them the same way. They are made of hard plastic and are well built. Unlike the K-Mount version, the 6x7 caps bayonet tabs are reinforced with metal.
I don't have a price listed, as I have gotten these caps at various prices over the years, as well as free with cameras.
| |
| Review of: Pentax Bayonet type K mount body cap by gofour3 on Wed April 17, 2019 | Rating: 9 | View more reviews | |

Views: 4353
Reviews: 4
|
I have dozens of these K-mount bayonet body caps, which you can also use for Pentax accessories like Teleconverters and extension tubes.
You mount them just like a K-mount lens and remove them the same way. They are made of hard plastic and well built, but it's still possible to have one of the bayonet tabs break off if they are abused. That would be the only negative, having a broken piece of plastic end up inside your camera is not something you want! The K-mount caps bayonet tabs should have been reinforced with metal, like the Pentax 6x7 bayonet body caps were.
However with normal use they will last forever and I still have my original body cap from 1975, when I purchased my Pentax KX SLR.
I don't have a price listed, as I have gotten these caps at various prices over the years, as well as free with cameras.
| |
| Review of: PENTAX AF 200SA by gofour3 on Sun September 30, 2018 | Rating: 7 | View more reviews | |

Views: 14300
Reviews: 3
|
Pentax released the non-TTL AF-200SA flash in the mid 1980s, for use with the A & P series program mode film bodies. (Note the only camera in these two series that supported TTL flash was the Super A/Program, so I would use a TTL supported flash on that camera.) The AF-200SA has a fixed flash range with no controls other than the on/off switch and the flash test button, so this is a pretty basic flash.
I bought the AF-200SA for use with my P50 camera when I travel. If the camera is set to one of the two program modes, the shutter speed and aperture are automatically set when the flash is powered on. If Im using aperture priority, I just set the lens to the aperture that matches the films ISO in the table below. The cameras shutter speed is automatically set to 1/100, which is the P5/P50 flash sync speed. If using the cameras manual mode, the shutter must be set to 1/100 and the lens to the appropriate aperture depending on the film ISO. (see table below)
Here is the AF-200SA flash table: (flash range is fixed at 0.8 to 5 meters or 2.6 to 16.4 feet)
ISO 25 F/2
ISO 50 F/2.8
ISO 100 F/4
ISO 200 F/5.6
ISO 400 F/8
ISO 800 F/11
ISO 1600 F/16
The AF-200SA is OK as a basic flash for general use if Im travelling with my P50, but is not a good option for more technical work. The flash is pretty small/light, so it does not take up a lot of room in your camera bag. The flash output is also pretty week, so you will not get much DOF with slower ISO films.
I found my new old stock AF-200SA online and it cost $24.99 USD.
| |
| Review of: Pentax Cable Release by gofour3 on Mon July 2, 2018 | Rating: 10 | View more reviews | |

Views: 2378
Reviews: 1
|
Not much to review here, these are traditional cables releases from the Pentax film days and will work on any camera or leaf shutter lens with a cable release socket..
I have both the 30cm and 50cm versions and they come in a plastic slip case. Both have a locking function that will keep the release pin engaged, so you can let the cable hang during a long exposure. These cable releases are very well made and covered in a threaded material. "Pentax" and "Japan" are written on the top, under the auto stopper locking ring.
A must have for low shutter speeds in macro/night work or for timed long exposures.
| |
| Review of: Pentax Hot-Shoe Adapter LS by gofour3 on Sun June 17, 2018 | Rating: 9 | View more reviews | |

Views: 4900
Reviews: 2
|
I bought this hot-shoe adapter LS (leaf-shutter) to connect my AF500FTZ flash to my Pentax 67 165/4 LS lens, while using my Pentax 67II camera. This is the only Pentax option that lets me to do this, as Pentax never made a 5P to X-Sync cable.
The setup on my Pentax 67II is easy. I just mount the hot-shoe adapter LS on my 67II hot-shoe wooden grip and connect the X-Sync end to the 165/4 LS lens. Both the hot-shoe end and the X-Sync end have tighteners to secure the connection. The cable is just the right length, so there is no extra cable in the way. Then I mount my AF500FTZ flash on the hot-shoe adapter LS. The hot-shoe adapter LS has no contacts on the bottom, so it does not communicate with my Pentax 67II camera when the AF500FTZ flash is mounted on it. (No TTL flash is possible) The leaf-shutter lens controls the flash discharge and the flash range is determined by the AF500FTZ settings.
The hot-shoe adapter LS is designed to work with any Pentax 645 or 6x7 body (via the wooden grip) and lets you connect any Pentax flash to your Pentax 645 or 6x7 leaf-shutter lens.
The hot-shoe adapter LS does the trick and is well built, so overall Im happy with it!
| |
| Review of: Pentax Gelatin Filter Holder by gofour3 on Sun January 29, 2017 | Rating: 9 | View more reviews | |

Views: 3838
Reviews: 1
|
In addition to the 6x7 Gelatin Filter Holders, Pentax also made gelatin filter holders for the 35mm format. This filter system was released around 1978, midway through the M series. 49mm, 52mm, 58mm & 77mm filter holders were initially released and later on a 67mm holder was added. Not sure how long these gelatin filter holders remained in production, but judging by the box style, it looks like till the late 1990s to early 2000s. You can also purchase extra filter frames separately.
The holder flips open by turning a lever on the top and has a cut-out area where the filter frame fits into. The gelatin filter frame has two parts, you insert the gelatin filter into the smaller frame and slide that frame into the bigger one, so the frame is closed on all sides. The frames rests in the holder and then sandwiched into place by closing the holder and locking it shut. Both the frame and holder are made of metal, so are very well constructed.
The filter holder clips on to the front of the lens, just like a clip-on lens hood. The front of the filter holder, also has the same filter thread as the lens mount, so you can add a second regular screw-in filter or clip-on/screw-in lens hood to the filter holder front. For wide angle lenses there was a wide front filter holder with a wider front than the lens mount, so vignetting was not an issue. Example the 67mm holder had a 77mm front.
With this wide front version you could not mount the original lens hood, unless you use a step down adapter. Also any lens with a built-in hood could not be extended with any of these filter holders. Bayonet tulip style lens hoods are also probably not going to work with these gelatin filter holders.
The filter frame accepts 75mm x 75mm (3 x 3 inches) gelatin filters, Kodak Wratten 2 Optical Filters work perfectly and there are a wide range of choices:
Kodak Wratten 2 Optical Filters
Overall these gelatin filter holders are a good accessory and can be used on any format lenses. I use mine (67mm wide front holder and the regular 77mm holder) on my 35mm and 6x7 lenses using Kodak Wratten 2 ND gelatin filters.
The average cost for my two filter holders was about $25.00 each, both are boxed and in like new condition.
| |
| Review of: ASAHI PENTAX 6X7- Gelatin Filter Holder by gofour3 on Mon December 26, 2016 | Rating: 7 | View more reviews | |

Views: 6590
Reviews: 3
|
Pentax made three 6x7 Gelatin Filter Frames/Holders in 67mm, 82mm & 100mm sizes. These are an old accessory from the early days of the 6x7 system and use the bayonet filter mount to attach to the front of the lens. You can mount either a screw-in, bayonet or clip-on lens hood to the front of the filter frame/holder, or a second filter or a lens cap.
The filter frame/holder accepts 75mm x 75mm (3 x 3 inches) gelatin filters, which you slide into the slot in the top of the mounted fame/holder.
Kodak Wratten 2 Optical Filters work perfectly and there are a wide range of choices:
Kodak Wratten 2 Optical Filters
The problem with these frames/holders is that over the years Pentax moved away from the bayonet filter system to the standard screw-in type. A lot of the last generation Pentax 67 lens dropped the bayonet filter thread and were screw-in only.
As a results you are limited to using the three frames/holders to the following lenses:
45/4 all versions (82mm)
55/3.5 all versions (100mm)
75/4.5 all versions (82mm)
75/4.5 Shift all versions (82mm)
90/2.8 all versions (67mm)
105/2.4 all versions (67mm)
135/4 Macro all versions (67mm)
150/2.8 all versions (67mm)
165/2.8 all versions (67mm)
200/4 early Takumar versions only (67mm)
The non ED 300/4 lenses (82mm) will accept the frame/holder but you will not be able to extend the built-in lens hood unless you cut the square corners off the gel filters. :eek:
These gelatin filter frames/holders were not a bad idea back in the day, but are pretty obsolete now. They would have been a lot more useful if they were screw-in and there were also versions in 77mm & 95mm. That way you could use them on almost all the Pentax 6x7 lenses as well as some 35mm format lenses.
Pentax also made clip-on gelatin filter frames/holders for 35mm format lenses in 67mm & 77mm sizes, that you can also use on 6x7 lenses:
https://www.pentaxforums.com/accessoryreviews/pentax-gelatin-filter-holder.html | |
| Review of: Pentax 6X7 Auto Bellows by gofour3 on Tue December 29, 2015 | Rating: 6 | View more reviews | |

Views: 11243
Reviews: 4
|
The 6x7 Auto Bellows was the one and only bellows unit available for the Pentax 6x7 system. Its an original accessory from 1969, when the Pentax 6x7 system was first launched. An updated 67 Auto Bellows came out around the time of the 67II camera release and it's identical except for the addition of the #1 Outer Bayonet Extension tube included in the bellows kit. (See below under usage/handling)
Build:
The build of the 6x7 Auto Bellows is superb! Its well constructed and well put together, but its also very heavy. Like with any 40 + year old bellows you run the risk of buying one that is damaged with a light leak. The bellows material can be punctured or crack over the years if not properly used and stored.
Usage/Handling:
I bought my Auto Bellows back in the summer of 2013 with the intention of using it for my indoor 6x7 macro work. However after reading the manual and playing around with it for a while, I never actually got around to using it. Why? Because I found it to be redundant, too heavy and too cumbersome to use.
I also have the Pentax 6x7 Auto Extension tubes, Helicoid Extension tube, 49mm & 67mm reverse adapters and the 67 100/4 Macro lens. With all this existing macro equipment it turned out to be completely unnecessary for me to buy the Auto Bellows, as it did not offer me anything I did not already have.
For macro work up to 1x magnification, I use my 67 100/4 Macro lens. No extension tubes or bellows are necessary and using either with a regular Pentax 6x7 lens just cant compete with the stellar optics of the 67 100/4 Macro lens.
For macro work over 1x magnification, where a lens should be reversed for better performance, I use the helicoid extension tube & a reverse adapter. The 67mm adapter lets me use any 6x7 lens with a 67mm filter thread and the 49mm adaptor can be used with any 35mm SLR Takumar or K-Mount lens with a 49mm filter thread. This setup is way easier to use than the 6x7 Auto Bellows and weighs a lot less. Also I can get much higher magnification reversing a 35mm SLR lens on the Helicoid extension tube with the 49mm adapter, than you can with any 6x7 lens reversed on the Auto Bellows. (You can only use a lens with a 67mm filter thread reversed on the Auto Bellows)
When mounting a Pentax 67II & the AE Metered prism on the Auto Bellows, you will also have to use the 6x7 Outer Bayonet extension tube #1. The 67IIs AE prism will not clear the bellows unit without the extension tube mounted between the bellows unit and the 67II body. This #1 Outer Bayonet Extension tube is available separately as part of the "6x7 Outer Bayonet Extension Tube set" or was included in the "67 Auto Bellows kit".
Long exposure times are also a worry when using the 6x7 Auto Bellows, as the bellows is mounted on the tripod and the camera body hangs off the end of the bellows. Youre less likely to get camera movement using the Helicoid extension tube/reverse adapter system, as the camera body is mounted on the tripod.
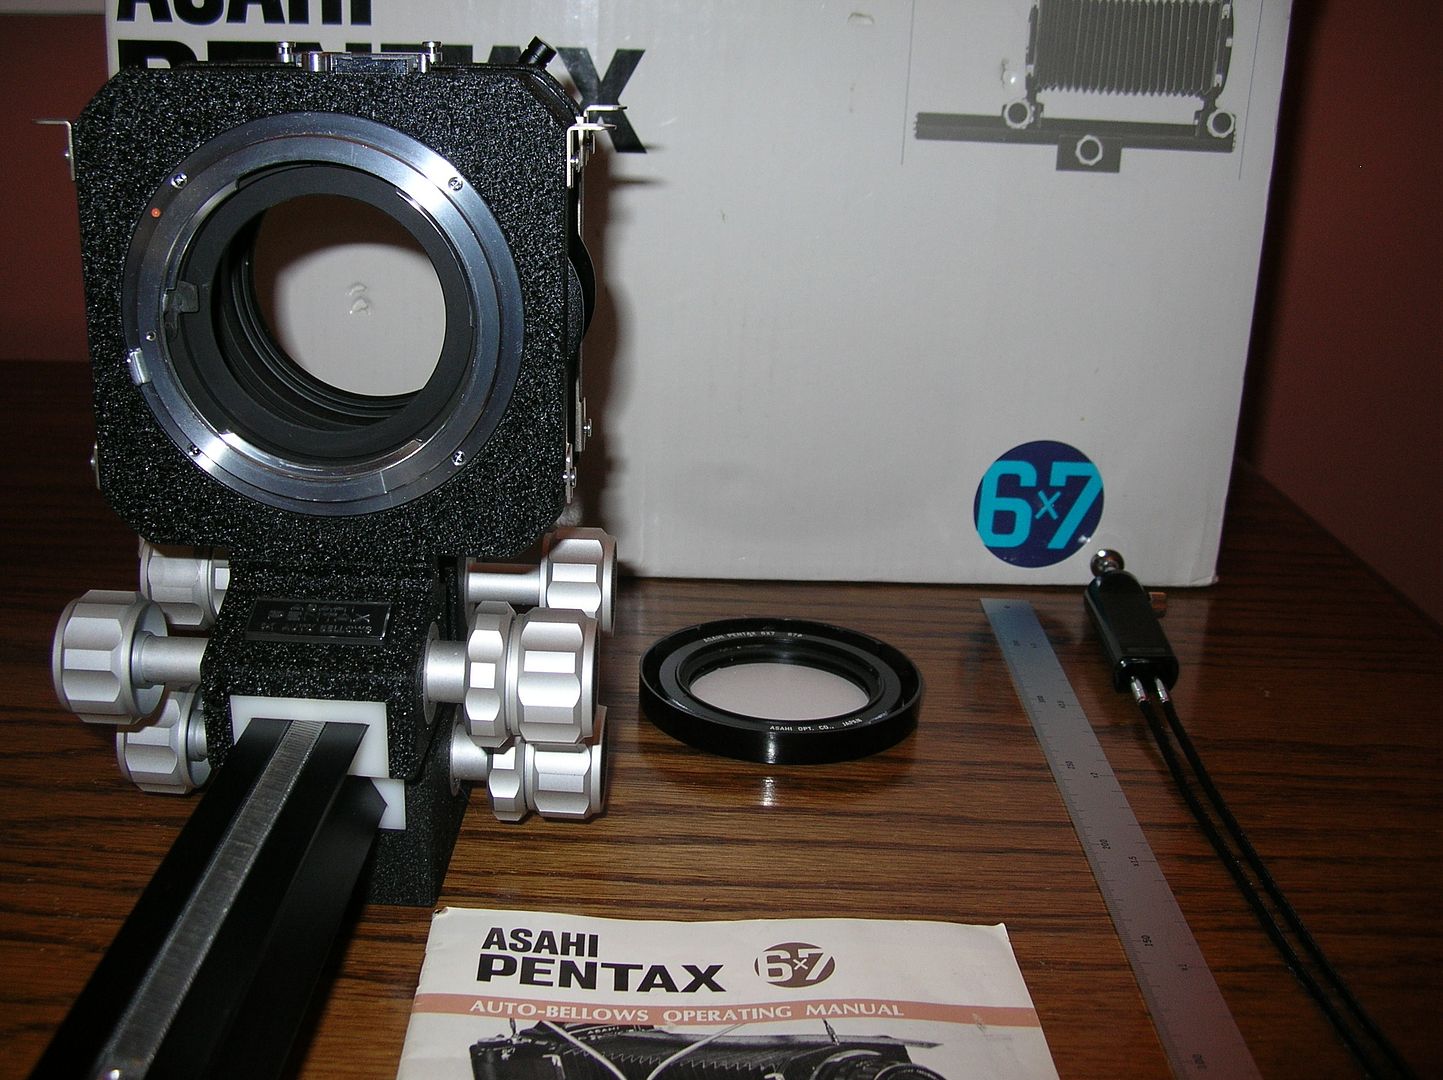
Here is a picture of my 6x7 Auto Bellows:
 Summary:
I cant really recommend buying the 6x7 Auto Bellows as its expensive, cumbersome to use and very heavy. For higher magnification you can get by with the Helicoid & Auto Extension tubes and a reverse adapter, all at a cheaper price. Also this system is lighter and much easier to use. If you are only interested in 6x7 Macro work up to 1x magnification, then the 67 100/4 Macro lens should be your first purchase. It will blow your socks off when you see the images that lens can produce. If I ever get around to actually using my 6x7 Auto Bellows with a loaded camera, then I may change my rating but I doubt it.
Price:
I bought my Auto Bellows online and paid $399.00. It was in mint- condition and came with the original box, scale, cable release and manual. Summary:
I cant really recommend buying the 6x7 Auto Bellows as its expensive, cumbersome to use and very heavy. For higher magnification you can get by with the Helicoid & Auto Extension tubes and a reverse adapter, all at a cheaper price. Also this system is lighter and much easier to use. If you are only interested in 6x7 Macro work up to 1x magnification, then the 67 100/4 Macro lens should be your first purchase. It will blow your socks off when you see the images that lens can produce. If I ever get around to actually using my 6x7 Auto Bellows with a loaded camera, then I may change my rating but I doubt it.
Price:
I bought my Auto Bellows online and paid $399.00. It was in mint- condition and came with the original box, scale, cable release and manual.
| |
| Review of: PENTAX AF 280T by gofour3 on Fri November 20, 2015 | Rating: 9 | View more reviews | |

Views: 67808
Reviews: 27
|
Pentax released the AF-280T in 1981 as one of two new TTL flashes designed for the LX. (The AF-400T was the other TTL flash). In 1981 the LX was the only Pentax body with TTL flash support. The Super A/Super Program was released two years later in 1983 and is the next body with TTL flash support.
I bought my AF280T for use on my LX, Super A and Super Program and its the perfect size for those film bodies. I also own the more powerful AF400T, but it is way too big and requires a special bracket & 4P sync cables to attach. (Your nice little SLR ends up looking like a Speed Graphic press camera with the AF-400T attached, so I only use the it on my Pentax 6x7 bodies!)
Flash shooting is simple using the AF-280T on the TTL supported LX, Super A/Super Program. Just set the ASA film speed on the flash, move the mode button to TTL Auto, mount the flash and turn it on. The camera bodies should be in the Auto shutter setting for off the film plane metering. These TTL film bodies will recognize the flash and set the shutter speed to the flash sync speed. Just pick a lens aperture in the flashes operating range for the selected film speed and thats it. The LX, Super A/Super Program off the film plane metering will adjust the flash output to match the distance and ambient lighting.
The AF280T also has flash modes for use with other non TTL cameras, but this flash really shines when used on a Pentax TTL supported body. The AF-280T also features a rotating head that adjusts up or down for bounce flash.
For me the AF-280T is a perfect flash for the early Pentax TTL film bodies.
I found my Mint- AF-280T in a camera store, it cost $85.00CDN and came with the case and instructions.
| |
| Review of: PENTAX 6x7 Outer Bayonet Extension Tube Set by gofour3 on Thu July 9, 2015 | Rating: 8 | View more reviews | |

Views: 9068
Reviews: 2
|
This hard to find outer bayonet extension tube set comprises two tubes:
No. 1 - Length 23mm (110g)
No. 2 - Length 46mm (150g)
They can be used separately or in combination on any 6x7 lens with the outer bayonet mount, Takumar 400/4, 600/4, 800/4 and 1000/8 Reflex lens. There is a separate inner bayonet tube set for most other lenses.
These extension tubes are used to reduce the minimum focusing distance of the above older telephoto lenses, which all have poor close focusing capabilities.
The table below shows the lenses minimum focusing distance with no tubes and then with both tubes used:
Takumar 400/4:
No tubes 8.0 meters
#1 & 2 tubes: 2.76 meters
Takumar 600/4:
No tubes 12.1 meters
#1 & 2 tubes: 5.35 meters
Takumar 800/4:
No tubes 20.1 meters
#1 & 2 tubes: 8.05 meters
Takumar 1000/8 Reflex
No tubes 35.0 meters
#1 & 2 tubes: 12.52 meters
The tubes work well in reducing the minimum focusing distance, but there is the light loss penalty associated with using any extensions tubes that you also have to consider. I find these outer bayonet tubes are more difficult to mount than the inner ones and I also find its hard to judge the lenses minimum/maximum focusing distance when using these tubes. So its trial and error on which combination you need to use for a particular shot. You cant zoom with your feet as you will be using a tripod for all these big lenses. You probably wont use these tubes very much, but they are a necessity if you have any of the older Takumar telephotos and want to closer focus them.
Another use for the #1 tube is with the Pentax 67II/AE prism and the 6x7 Auto Bellows. You need to use this tube in order for the AE prism to clear the bellows unit and it's mounted between the camera body and bellows. The #1 Outer bayonet extension tube was included in the updated "67 Auto Bellows kit", released around the same time as the 67II camera.
This extension tube set is very well built and comes with a leather case.
Price: The price I paid is for an MINT- set with case.
| |
| Review of: Pentax Soft Eveready Case by gofour3 on Sat June 20, 2015 | Rating: 10 | View more reviews | |

Views: 5247
Reviews: 3
|
The Pentax Soft Eveready case is the Rodney Dangerfield of Pentax accessories!
A lot have been abused over the years and get chucked when people buy camera kits. Also some film shooters didnt bother with them at all, as they are a hassle or did not look professional.
Trust me if you travel with an old Pentax film body and want to keep it & the attached lens in pristine condition, you will use an Eveready case.
Versions:
Some Eveready cases were designed for just a specific camera body and others for similar camera bodies in a Series.
Example the Pentax LX had a dedicated Eveready case and there was an Eveready case for the similar K Series KM/KX/K1000 MIJ bodies. Note the LX case will only fit over the LX if one of the eye-level finders are attached and with no grip installed.
The Standard Eveready case was by far the most popular. It was designed to fit the specific camera and attached standard lens (Exception the 50mm f1.2), or similarly sized wide or zoom lens.
The Telephoto outer case was another one part option and was designed to cover attached short telephoto lenses. It also attached to the Standard inner case as above.
The Short outer case was another option if you did not want to cover the lens, but fit around it. It also attached to the Standard inner case as above.
There were also other specialty cases that even covered attached winders & data backs.
Material:
The Eveready cases were made of a vinyl leather looking material. The older Spotmatic and K Series were thicker and more durable with a grainy finish. Starting with the M Series body the cases were a smoother/shinier finish that did not hold up as well and had a tendency to crack with age.
The inside of both parts was finished in a coloured velvet fabric.
Usage:
The idea of the Eveready case was you walked around with the camera on a strap around your neck and when ready to shoot you just dropped down the outer part and left it attached. This was great for occasional picture taking.
If you were shooting for awhile, you could remove the outer part completely and just walk around with the inner part covering the camera bottom & sides. When finished shooting you reattached the outer part.
These cases were great for protecting the camera and lens if you did not have or want to carry a camera bag. I purchased an Eveready case with my KX when it was new in 1975 and it has protected the camera body and attached lens very well. Without one I would have numerous scratches, dings & bents on both the camera and lens.
When loading/unloading film you will have to remove both the inner & outer parts.
Hunting for the correct Eveready Case:
Finding the right Eveready case can be a challenge at times. Most eBay sellers have no clue which case is which and what camera bodies they fit. They also have the tendency to mix the inner and outer cases from different cameras.
The best bet is to buy a camera kit with the Eveready case included. These tend to be the right version, as the seller purchased the case at the same time as the camera body.
You can also find boxed cases which are in like new condition. The boxes will have the correct camera model on them.
Before buying make sure to research the correct case by reading your cameras manual or Pentax accessories brochures for that period. They will show an illustration or picture of the correct case.
Summary:
I have the matching Eveready cases for all of my 15 working Pentax 35mm film cameras and would not dream of not using one. Just wish Pentax made an Eveready case for my 6x7 bodies!
| |
| Review of: PENTAX AF 16 by gofour3 on Sat February 7, 2015 | Rating: 5 | View more reviews | |

Views: 12715
Reviews: 2
|
Pentax in the 1970s had a great lineup of cameras and lenses, however when it came to flashes things were not so good. Until the very late 70s Pentax had a total of ONE flash available, if you lived in the USA during the Honeywell period then the total was zero!
The AF-16 was released in 1977 and it replaced the Autorobo as the only flash in the Pentax line-up. The MFSP in January 1978 was $49.95.
Pentax obviously went for small & economical when it released the AF-16, keeping with the M Series miniature trend. The AF-16 was half the size, one third the weight, half the cost and used two instead of four AA batteries compared to the Autorobo flash it replaced.
Unfortunately the AF-16 is pretty weak in flash power (GN 16) and you are going to have to either sacrifice DOF or use a higher ISO to compensate. Remembering that when this flash was released most folks shot 64 or 100 ASA film. Shooting at a subject with a typical distance of 10 feet or 3 meters, you would have to set your lens to f/4 with 64 ISO or f/5.6 with 100 ISO film. That limits your DOF with most lenses and the older Autorobo was one stop better (GN 24).
The AF-16 was typical of flashes of that period with two Auto settings and a manual. The AF-16 is not capable of communicating with any camera and does not swivel.
I found my AF-16 at a local camera swap meet and it looks like it was used only a few times and came with its original soft case. I was hoping it would be a smaller alternative to the heavier Autorobo flash that I had been using on my K Series film bodies. But after trying it out and checking its specifications, the AF-16 is just too under powered to be your main flash. The only situation I would ever use it for might be a head shot with a portrait lens using 400 ISO b&w film. That way I can get decent DOF and distance.
Otherwise Ill keep using the older Autorobo as the main flash on my K Series film bodies.
| |
| Review of: Pentax 6x7 Reverse Adapter 49mm & 67mm by gofour3 on Tue January 13, 2015 | Rating: 8 | View more reviews | |

Views: 6247
Reviews: 2
|
Not much to review here as you are dealing with a simple device for reversing lenses on the Pentax 6x7 system. There are two reverse adapters you can use on the Pentax 6x7 bodies, a 49mm and a 67mm. Both will work on either the 6x7, 67 or 67ii Pentax bodies.
It is recommended to use these reverse adapters along with the Pentax 6x7 Helicoid Extension Tube.
The Helicoid tube is mounted to the 6x7 body, then the reverse adapter is mounted on the Helicoid tube, then the reversed lens is screwed into the front of the reverse adapter.
I have both adapters and here is a quick usage summary:
49mm Reverse Adapter:
Yes you can take a 35mm format lens with a 49mm filter thread and reverse it on a Pentax 6x7 body!
You can get very high magnification rates, close to 5x magnification with my Super Takumar 28/3.5 reversed with the Helicoid extension tube at full extension. However you also have a high light loss, with an exposure factor between x23.1 to x30.1. The results are pretty amazing for a medium format system, where you typically are lucky to get 2x magnification with a 6x7 lens. Recommended lenses are in the 28mm to 55mm focal length range.
67mm Reverse Adapter:
Your magnification rate is much lower using a 6x7 lens reversed with a Helicoid extension tube. The best lens I have used is the 67 75/2.8 reversed and I can get around 1.75x to 2x magnification. If you want higher magnification then you need to add the Auto Extension No. 1, 2 or 3 tubes. Usable lenses are the 75/2.8, 90/2.8, 105/2.4 and the 135/4 macro.
Usage notes for either adapter:
There is a screw on both adapters that allows you to adjust the orientation of a mounted lens so that the index mark is at the top. The tightening screw is a bit small and hard to use, so when you move the lenses aperture ring to stop down you might also adjust the lens orientation.
If you have a Pentax 67ii, then using a telephoto bright screen is very helpful in focusing at these higher magnifications.
If you are using a Pentax 6x7 or 67 with the TTL metered prism or a 67ii with the AE metered prism and an AUTO diaphragm lens please note the following:
YOU CAN FOCUS WITH THE LENS DOF LEVER IN THE AUTO POSITION,. HOWEVER YOU MUST SET THE LENS DOF PREVIEW LEVER TO MAN TO GET A METER READING. THE 6X7/67 TTL OR 67II AE METERS WILL NOT GIVE A READING IF THE DOF LEVER IS IN AUTO. IF YOU ARE USING APERTURE PRIORITY ON THE 67II/AE YOU MUST LEAVE THE LEVER IN THE MAN POSITION WHEN YOU PRESS THE SHUTTER, OR THE APERTURE WILL DEFAULT TO WIDE OPEN. THE AE METER WILL ALSO DEFAULT TO CENTRE-WEIGHTED METERING WHEN USING AN EXTENSION TUBE. | |
| Review of: Pentax 6x7 SMC Close-up Lenses by gofour3 on Sat November 22, 2014 | Rating: 9 | View more reviews | |

Views: 6861
Reviews: 1
|
I have the S82 and T132 close-up lenses and use them traveling in place of extension tubes or my 6x7 macro lenses. They are slightly larger than a Pentax 6x7 67mm bayonet filter and screw on the front filter thread of the lens. You can also attach a screw-on filter on top of the close-up lens, as well as the lens hood. You cant attach the Pentax 67mm bayonet filters on the 6x7 close-up lenses.
I use the S82 (S is for standard lenses) on my 90/2.8, 90/2.8LS & 105/2.4 lenses. I can get up to .24x magnification on the 90/2.8, .32x on the 90/2.8LS and .27x on the 105/2.4. Focusing distance is around .5 to 1 meter.
I use the T132 (T is for telephoto lenses) on my 150/2.8 & 165/2.8 lenses. I can get up to .24x magnification on the 150/2.8 and .27x on the 165/2.8. Focusing distance is around .9 to 1.53 meters.
The image quality of both is very good, however they are not as good as a macro lens. The close-up magnification/quality is similar to as you would get using a #1 Auto Extension tube on the same lens. But with no exposure factor/light loss and with no issues with metered prisms & the lenses AUTO lever.
The 6x7 close-up lenses are a simple/light way to get more magnification or better minimum focusing distance with specific Pentax 6x7 lenses.
| |
| Review of: PENTAX AF 500FTZ by gofour3 on Sat November 15, 2014 | Rating: 10 | View more reviews | |

Views: 50007
Reviews: 9
|
I bought two AF500FTZ flashes to use on my Pentax 67II MF film camera.
Usage notes on the Pentax 67II:
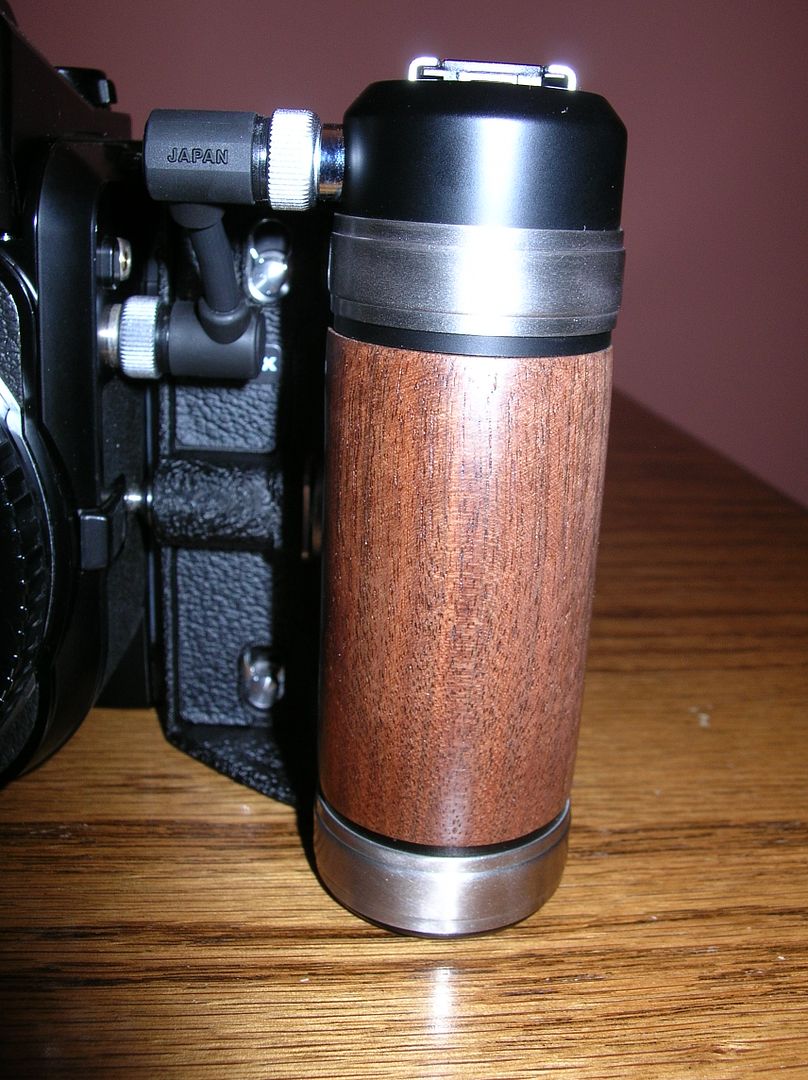
I also needed to get a Pentax 67II hot shoe grip, as none of the Pentax 67II viewfinders have a hot shoe.
The 67II grip has a short 5P sync cable that attaches to the cameras 5P terminal, which enables full TTL flash support.
Close-up of Pentax 67II, 67II hot shoe grip and 5P sync cable:
 The flashes Auto Zoom function does not work on the P67II as it is a manual focusing body, so you need to manually select the focal length of the lens. (The flash manual has a table that converts the 6x7 focal lengths to the 35mm flash settings)
Here is the zoom table for use with a Pentax 67ii:
The flashes Auto Zoom function does not work on the P67II as it is a manual focusing body, so you need to manually select the focal length of the lens. (The flash manual has a table that converts the 6x7 focal lengths to the 35mm flash settings)
Here is the zoom table for use with a Pentax 67ii:
 If you want to use the AF500FTZ off camera, then you need to add a Pentax Hot Shoe Adapter F/Off-Camera Adapter F and a 5P sync cable.
If you want to connect the AF500FTZ to your Pentax 645/6x7 Leaf-Shutter lens, then you need to mount the Pentax Hot Shoe Adapter LS between the 645 camera/6x7 wooden grip and AF500FTZ flash. The X-Sync end of this adapter connects to the LS lens and the flash output needs to be manually adjusted to match the distance to the subject/lens aperture. The LS lens will then discharge the AF500FTZ flash.
While the AF500FTZ would not be your first choice for a Pentax DSLR, it is the flash of choice for any Pentax film camera that supports TTL flash. As a result I give it a 10, you are not going to find a better flash for a Pentax TTL supported 35mm, 645 or 6x7 film body. Highly recommended.
If you want to use the AF500FTZ off camera, then you need to add a Pentax Hot Shoe Adapter F/Off-Camera Adapter F and a 5P sync cable.
If you want to connect the AF500FTZ to your Pentax 645/6x7 Leaf-Shutter lens, then you need to mount the Pentax Hot Shoe Adapter LS between the 645 camera/6x7 wooden grip and AF500FTZ flash. The X-Sync end of this adapter connects to the LS lens and the flash output needs to be manually adjusted to match the distance to the subject/lens aperture. The LS lens will then discharge the AF500FTZ flash.
While the AF500FTZ would not be your first choice for a Pentax DSLR, it is the flash of choice for any Pentax film camera that supports TTL flash. As a result I give it a 10, you are not going to find a better flash for a Pentax TTL supported 35mm, 645 or 6x7 film body. Highly recommended.
| |
| Review of: Pentax 67II BA-81 Focusing Screen by gofour3 on Sun May 18, 2014 | Rating: 9 | View more reviews | |

Views: 3524
Reviews: 1
|
This is a specialty screen for macro and telephoto lenses that makes the viewfinder brighter to aid in focusing. I use mine for macro work, with my 6x7 Takumar 400/4 or 600/4 & rear converter, or when Im using a dark red filter. I use this bright screen when I need the micro-prism focusing aid, I use my BG-80 bright screen cross-lined when I dont.
Pentax recommends caution when using this screen with stopped-down metering or rear converters. The brighter screen may affect exposure when metering with the AE prism. I have not noticed this yet.
This screen works best when the telephoto lens/rear converter combination have a maximum aperture of f5.6 or over.
Price: I purchased this screen new from a store in the USA on eBay.
| |
| Review of: Pentax 67II BG-80 Focusing Screen by gofour3 on Sat February 15, 2014 | Rating: 9 | View more reviews | |

Views: 4115
Reviews: 1
|
This is a specialty screen for macro and telephoto lenses that makes the viewfinder brighter to aid in focusing. I use mine only with my 6x7 Takumar 400/4, 600/4, M*800/6.7 & rear converter when I want to keep the horizon straight and I dont need to critical focus, I use my BA-81 "bright" screen when I do. The viewfinder is much brighter and does help in focusing, even though the centre circle has no focusing aid.
Pentax recommends caution when using this screen with stopped-down metering or rear converters. The brighter screen may affect exposure when metering with the AE prism. I have not noticed this yet.
This screen works best when the telephoto lens/rear converter combination have a maximum aperture of f5.6 or over.
Price: I purchased this screen new from a store in Japan on eBay.
| |
| Review of: Pentax 67II BG-60 Focusing Screen by gofour3 on Sat February 15, 2014 | Rating: 9 | View more reviews | |

Views: 4634
Reviews: 1
|
Works well for landscape shooting when you are using hyperfocal focusing and want to keep the horizon straight. There is no center circle focusing aid on this screen.
Price: I purchased this screen new from a store in Japan on eBay.
| |
| Review of: Pentax 67II BB-61 Focusing Screen by gofour3 on Sat February 15, 2014 | Rating: 10 | View more reviews | |

Views: 5164
Reviews: 2
|
Works well for general use when close-up focusing is required and I prefer it over the microprism BA-61 screen. The center split-image area will darken when used with some telephoto lenses, so other screens like the BE-80 & BG-80 are recommended.
Price: I purchased this screen new from a store in Japan on eBay.
| |
| Review of: Pentax 67II BA-61 Focusing Screen by gofour3 on Sat February 15, 2014 | Rating: 9 | View more reviews | |

Views: 5605
Reviews: 1
|
This is the standard focusing screen shipped with the Pentax 67II body. Works well for general use when close-up focusing is required, though Im finding that the split-image BB-61 screen is easier to use as I get older. The center microprism area will darken when used with some telephoto lenses, so other screens like the BE-80 & BG-80 are recommended.
Price: This screen came with my P67II body, so no price is indicated.
| |
| Review of: Pentax 67 Helicoid Extension Tube by gofour3 on Mon January 13, 2014 | Rating: 9 | View more reviews | |

Views: 16767
Reviews: 3
|
This helicoid extension tube gives you variable extension between 32.2mm and 52mm.
It can be used separately or in combination with the 6x7 Auto Extension tubes. The Helicoid tube is also recommended when using one of the 6x7 reverse adapters. (49mm or 67mm)
This tube can be also used to make fine focusing adjustments. Its a must for any 6x7 macro work.
This extension tube is very well built and easy to use and comes with a leather case.
The Helicoid tube will let you focus with the lens DOF lever in the AUTO position. However please note the following if using a 6x7/67/67II camera and a TTL/AE metered prism:
YOU MUST SET THE LENS DOF PREVIEW LEVER TO MAN TO GET A METER READING. THE 6X7/67 TTL OR 67II AE METERS WILL NOT GIVE A READING IF THE DOF LEVER IS IN AUTO. IF YOU ARE USING APERTURE PRIORITY ON THE 67II/AE YOU MUST LEAVE THE LEVER IN THE MAN POSITION WHEN YOU PRESS THE SHUTTER. THE AE METER WILL DEFAULT TO CENTRE-WEIGHTED METERING WHEN USING AN EXTENSION TUBE. Price: The price I paid is for a LN Helicoid tube and a Pentax SMC 6x7 67mm UV filter. Both came with original box, instructions and case.
| |
| Review of: PENTAX 6x7 Inner Bayonet Extension Tube Set by gofour3 on Mon January 13, 2014 | Rating: 9 | View more reviews | |

Views: 8689
Reviews: 3
|
This inner bayonet extension tube set comprises three tubes:
No. 1 - Length14mm (75g)
No. 2 - Length 28mm (90g)
No. 3 - Length 56mm (125g)
They can be used separately or in combination on any 6x7 lens with the inner bayonet mount, excluding the 35mm fish-eye. There is a separate outer bayonet mount set (23mm & 46mm) for the older 6x7 Takumar 400mm, 600mm, 800mm and 1000mm Reflex lenses.
For macro work generally a lens with a shorter focal length will give you the higher magnification. (The 45mm f/4 will get 2.27x magnification using all three tubes.)
The tubes also work well with telephoto lenses to get a shorter minimum focusing distance.
This extension tube set is very well built and easy to use and comes with a leather case.
The tubes will let you focus with the lens DOF lever in the AUTO position. However please note the following if using a 6x7/67/67II camera and a TTL/AE metered prism:
YOU MUST SET THE LENS DOF PREVIEW LEVER TO MAN TO GET A METER READING. THE 6X7/67 TTL OR 67II AE METERS WILL NOT GIVE A READING IF THE DOF LEVER IS IN AUTO. IF YOU ARE USING APERTURE PRIORITY ON THE 67II/AE YOU MUST LEAVE THE LEVER IN THE MAN POSITION WHEN YOU PRESS THE SHUTTER. THE AE METER WILL DEFAULT TO CENTRE-WEIGHTED METERING WHEN USING AN EXTENSION TUBE. Price: The price I paid is for an EXC+ set with case.
| |
| Review of: Pentax 6x7 Grip by gofour3 on Fri December 27, 2013 | Rating: 9 | View more reviews | |

Views: 9236
Reviews: 4
|
This regular wooden grip can be used on any 6x7 body and provides an accessory (cold) shoe to mount a flash or light meter. Unlike the 67II hotshoe grip you will need a flash sync cable to connect the flash to the camera bodys x-sync terminal in order to fire the flash. Note this grip will not provide TTL Auto flash support on the 67II.
This old wooden grip adds extra character to the older Pentax 6x7 & 67 bodies and provides a good handle to stabilize these large cameras. This grip also has two lugs to attach a camera strap.
Price: I have two 6x7 grips, one is EX+ and cost $56.00, the other was new old stock and cost $178.00. The price indicated is an average of the two.
| |
| Review of: Pentax 67II Hotshoe Grip by gofour3 on Fri December 27, 2013 | Rating: 10 | View more reviews | |

Views: 6405
Reviews: 1
|
This 67II hotshoe grip is on the pricy side compared to the regular 6x7 wooden grip. However its a must if you want to use an Auto TTL flash unit like the AF500FTZ, AF360FGZ, AF330FTZ, AF400FTZ, AF240FT & AF280T with your P67II.
Just make sure when you purchase one that you get the small 5P sync cable that is used to connect the hotshoe grip to the 67II 5P terminal for TTL flash. The grip also comes with a plastic hotshoe cover and a 5P plug.
This grip connects to the left side of the P67II camera just like a regular grip, except for the 5P sync cable which should be connected to the camera body first. It can also be used on the older 6x7 & 67 bodies, but without the hotshoe flash support. This grip also has two lugs to attach a camera strap.
Price: The price is for a new old stock grip with the original box, manual and accessories.
| |
| Review of: PENTAX 4P Synch Cord C by gofour3 on Fri December 27, 2013 | Rating: 9 | View more reviews | |

Views: 9398
Reviews: 2
|
I bought this flash sync cable to connect my AF400T flash to my Pentax 6x7 and 67 cameras. The 4P end plugs into the flash and the x-sync end into the camera body or 90mm/165mm leaf shutter lenses.
The cable does its job and the x-sync end has a ring to tighten the connection so it does not pop out.
Note this cable nor the Pentax 6x7 and 67 cameras support TTL flash.
| |
| Review of: PENTAX AF 400T Bracket for 6x7 Camera by gofour3 on Fri December 27, 2013 | Rating: 9 | View more reviews | |

Views: 12820
Reviews: 1
|
Not much to review here, the AF400T 6x7 bracket lets you connect the flash to a Pentax 6x7, 67 or 67II body. The bracket takes a few minutes to install and the two rings fit around the AF400T handle. The bracket itself attaches to the left side of the Pentax 6x7 body just like a wooden grip. You can adjust the flash position so that it clears the shutter dial on the camera body. The flash handle is now a grip, just like the wooden one.
You also need the Pentax 4P Sync Cord C to attach the flash to the 6x7 or 67 bodies, no TTL support with these cameras. Or you need a Pentax 4P Sync Cord A to attach the flash to the 67II body, TTL support with this camera.
Price:The price indicated is for a new old stock grip, with box and manual.
| |
| Review of: PENTAX 67II AE Pentaprism Finder by gofour3 on Sat December 14, 2013 | Rating: 10 | View more reviews | |

Views: 15311
Reviews: 1
|
If there was ever a Pentax product that needed a redesign it was the old 6x7/67 TTL metered prism.
The original 6x7 TTL prism was released in July 1969 and finally upgraded in September 1998 when the new 67II & AE metered prism were released. During this 29 year period the 6x7 TTL meter went from being on par with the Pentax 35mm Spotmatics meter, to being a dinosaur compared to the Pentax 35mm MZ film body meters of the late 1990s.
New Features introduced on the P67II AE Prism:
- Aperture Priority
- Multi (6)-Segment Metering Mode
- Spot Metering Mode
- Exposure Compensation (-3 to +3 EV)
- Viewfinder Diopter (-2.5 to +1.5 DP)
- Eyepiece Shutter
Improvements over the 6x7 TTL Metered Prism:
- The AE prism installs just like the other Pentax 6x7 viewfinders. The coupling system and shutter dial adaptor from the old TTL are gone.
- Meter range has been improved from EV 2.5 - 19 to EV 2 21
- Weight has been reduced from 520g to 450g
- Two extra metering modes have been added to the existing Center-weighted
- The viewfinder display now has a bar graph instead of the needle between the +/-
 - The viewfinder display also shows the shutter speed, metering mode and film counter as standard. As well it indicates if memory lock, flash, bulb mode and exposure compensation are being used.
Usage:
The AE prisms build and finishing are excellent and it has an unreversed laterally correct image. (Only 90% of the focus screen is visible ) The AE prism also accepts the Magnifier, Right Angle Finder, Eyecup and Correction Lens as attachments. (Same as the old metered TTL prism)
The Multi segment meter is the most accurate for normal shooting and has done very well with any difficult metering scenes I have tested it with. The 67II body has a memory lock function that can be used with the spotmeter mode, if you want to meter on one area and center the viewfinder on another.
Also being able to mount/dismount the AE prism like a regular viewfinder, without having to remove your lens first, is a HUGE plus.
Summary:
The 67II AE metered prism is so far advanced from the old 6x7/67 TTL meter, its like driving a new Porsche after owning a Model T Ford. If you want to use a metered prism with a Pentax 6x7 medium format body, then the 67II & AE Prism are the best choice. The old TTL meter is too unreliable & outdated to bother with and if you have a 6x7/67 body then a hand held light meter is recommended instead. The 67II AE prism is a real gem, its a shame that it is not backwards compatible with the older 6x7 and 67 bodies..
Price:
As I bough this AE prism as part of a 67II kit, I have not indicated a price for it
- The viewfinder display also shows the shutter speed, metering mode and film counter as standard. As well it indicates if memory lock, flash, bulb mode and exposure compensation are being used.
Usage:
The AE prisms build and finishing are excellent and it has an unreversed laterally correct image. (Only 90% of the focus screen is visible ) The AE prism also accepts the Magnifier, Right Angle Finder, Eyecup and Correction Lens as attachments. (Same as the old metered TTL prism)
The Multi segment meter is the most accurate for normal shooting and has done very well with any difficult metering scenes I have tested it with. The 67II body has a memory lock function that can be used with the spotmeter mode, if you want to meter on one area and center the viewfinder on another.
Also being able to mount/dismount the AE prism like a regular viewfinder, without having to remove your lens first, is a HUGE plus.
Summary:
The 67II AE metered prism is so far advanced from the old 6x7/67 TTL meter, its like driving a new Porsche after owning a Model T Ford. If you want to use a metered prism with a Pentax 6x7 medium format body, then the 67II & AE Prism are the best choice. The old TTL meter is too unreliable & outdated to bother with and if you have a 6x7/67 body then a hand held light meter is recommended instead. The 67II AE prism is a real gem, its a shame that it is not backwards compatible with the older 6x7 and 67 bodies..
Price:
As I bough this AE prism as part of a 67II kit, I have not indicated a price for it
| |
| Review of: PENTAX 6x7 Pentaprism Finder by gofour3 on Sat December 7, 2013 | Rating: 9 | View more reviews | |

Views: 11623
Reviews: 3
|
I got this standard 6x7 prism as part of a kit, along with the MLU 6x7 and 90/2.8 LS lens.
Pros:
The build and finishing are very good.
Unreversed laterally correct image.
The standard 6x7 Prism accepts the Magnifier, Right Angle Finder, Eyecup and Correction Lens as attachments. (Same as the metered TTL prism)
Cons:
Only 90% of the focus screen is visible when using this prism, so keep that in mind when composing a shot.
A bit on the heavy side.
These older prisms may need a seal replacement, if its a loose fit when attached to the camera body.
Summary:
I use this prism when hand holding my Pentax 6x7 and meter with a Gossen light meter. This original 6x7 prism is the same as the newer ones, other than it has ASAHI PENTAX on the front. For sentemental reasons having ASAHI on the prism makes it my favorite, the newer ones just have PENTAX.
Price:
As I bough this prism as part of a 6x7 kit, I have not indicated a price for it.
| |
| Review of: PENTAX AF 400T by gofour3 on Fri December 6, 2013 | Rating: 9 | View more reviews | |

Views: 24864
Reviews: 8
|
I bought my AF400T last year for use on my Pentax 6x7 & 67 film bodies.
I also needed to get a Pentax 6x7 AF400T bracket and the Pentax 4P sync cord C to connect the flash. The 6x7 AF400T bracket attaches to the Pentax 6x7/67 like a regular wooden grip. The 4P plug attaches to the flash and the X sync connection to the camera body or a leaf shutter lens. (See attached picture.)
Since neither of these Pentax 6x7 bodies or the sync C cord support TTL flash I have been only able to use the AF400T in Auto and Manual mode. This has not been an issue and the flash works perfectly. However the flash does add a fair amount of extra weight to an already heavy 6x7 camera!
I also have the Pentax 67II camera that does support TTL flash, but use my AF500FTZ as it's a better option for this newer and last 6x7 body.
Overall this is the flash of choice for the Pentax 6x7 or 67 bodies, along with the 35mm Pentax LX which does support TTL flash. Highly recommended!
 | |
| Review of: Pentax 67 Magnifier by gofour3 on Mon August 12, 2013 | Rating: 8 | View more reviews | |

Views: 16425
Reviews: 4
|
The 6x7 magnifier mounts between the pentaprisms eyepiece frame and the camera body. It flips up for composing the shot and then you flip it down for critical focusing. It accepts the pentaprisms rubber eyecup
I use it for eye level tripod work when I need magnification. For waist level shooting, both the folding & rigid hoods have magnification, so you are covered there. Its really hard to use when hand holding your 6x7 camera, as you end up poking yourself in the eye with it.
The 67 magnifier works ok, but is a bit cumbersome to use. It would have been better if the 67 right angle finder had built in magnification, then you wouldnt need this second accessory.
The 67 magnifier is inexpensive, so if you dont use it very often its no big deal.
Price: The price I paid is for a boxed, EX+ magnifier with instructions and case.
| |
| Review of: Pentax 67 Right Angle Finder by gofour3 on Mon August 12, 2013 | Rating: 9 | View more reviews | |

Views: 8139
Reviews: 2
|
This is the one and only right angle finder for the Pentax 6x7 system.
It works like any 35mm version, except that it screws into the pentaprism. You will need to remove the prisms eyepiece frame first.
It has a laterally correct & unreversed image and a diopter adjustment, so thats about all you really need in a right angle finder. The magnification is fixed at 1x and it accepts the pentaprisms rubber eyecup.
I use mine for some tripod work when I want to keep the image unreversed. It does its job and is a must have for any Pentax 6x7 system.
Price: The price I paid is for a New Old Stock finder.
| |
| Review of: Gossen Luna-Pro sbc by gofour3 on Sun August 11, 2013 | Rating: 10 | View more reviews | |

Views: 11388
Reviews: 1
|
I bought this Gossen meter to use with my Pentax 6x7 & 67 after I ditched the TTL prism.
The Luna-Pro can be used as an incident or reflected light meter by moving the spherical diffuser dome on the top of the meter. There is also an optional spot measuring attachment.
This is a great analog hand-held meter for film users, as the shutter speeds & apertures correspond to older manual film camera/lens dials.
There is also an exposure factor scale that allows you to correct for filters, extension tubes, and bellows light loss. For me this is an absolute must and is something I really miss on the Pentax Spotmeter V. After you take a meter reading you can also adjust it -3 to +3 EV for exposure compensation.
The Luna-Pro meter readings can be set as continuous or stored. (About 30 seconds) The meter also uses one easy to find 9 volt battery.
This is the best and most accurate light meter that I have ever used and it has nice big dials to see your choice of shutter speeds & apertures. The incident meter is also a must if you do any portrait work.
If you shoot film and want a good versatile inexpensive analog hand-held light meter, the Luna-Pro sbc is highly recommended.
| |
| Review of: ikan Trekker Lens Bag by gofour3 on Sat July 27, 2013 | Rating: 9 | View more reviews | |

Views: 5588
Reviews: 1
|
I bought an older version of the ikan Trekker bag, which is an olive green colour with grey divider inserts. The current version is black/orange as shown in the pictures.
I needed a large shoulder bag thats carried upright, which will hold my Pentax 6x7 and a couple lenses or small 35mm & 6x7 kits.
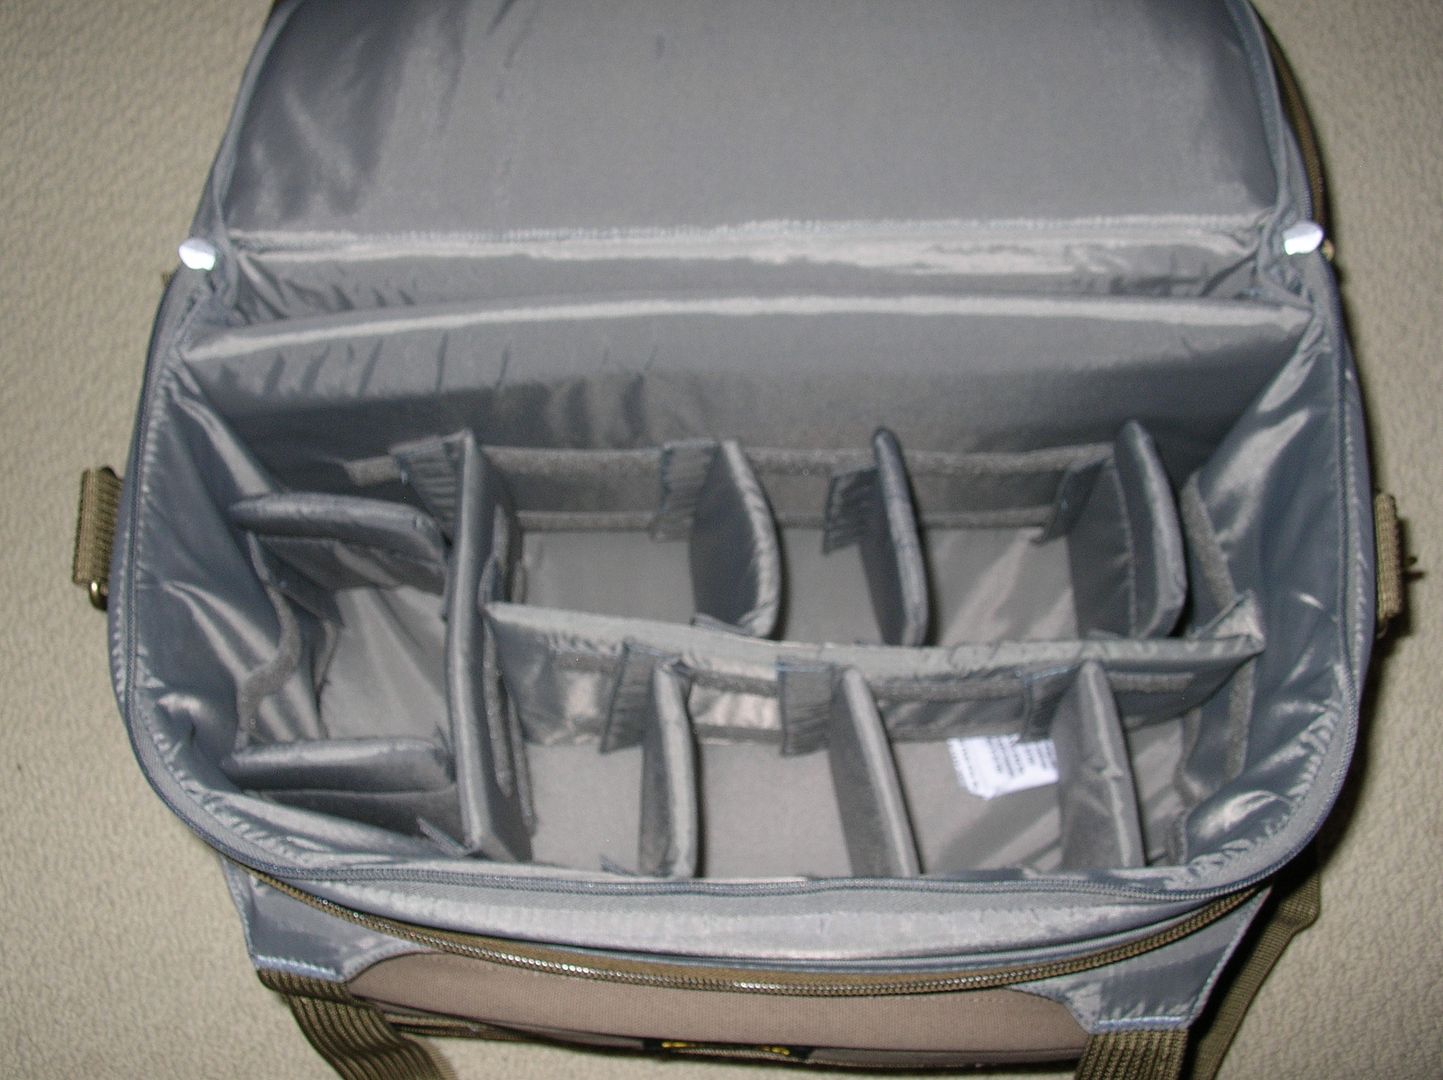
The ikan Trekker does the job, is very well built and is a decent price. The inner equipment compartment is removable and has its own zippered top. A rain cover is included in the back compartment and fits over the bag like a shower cap. The bag also has lots of compartments for storing accessories, but there is no provision for a laptop.
The only problem I have with the bag is the divider layout, it could be more flexible with extra inserts available. The divider layout is better suited for lenses than camera bodies.
This is a picture of my bag and shows the layout/inserts:
 | |
| Review of: PENTAX Refconverter A by gofour3 on Tue July 16, 2013 | Rating: 10 | View more reviews | |

Views: 29521
Reviews: 18
|
This is a review for the Pentax Refconverter A which was introduced in 1983 as part of the A Series launch.
I picked up the Refconverter A for use on my Pentax M, A & P Series film bodies. The A version has a slightly bigger viewing area than the M version, so you can see the shutter/aperture windows on the A Series film bodies. Otherwise the A & M versions are identical.
The 2x magnification switch is the best feature of the Refconverter A and eliminates the need to buy a magnifier for critical focusing. This is a feature that is greatly missed on my Refconverter II.
The rubber eye-cup is also recommended for the Refconverter A and I found the Pentax 6x7 eye-cups fit perfectly.
The only gripe I have with the Refconverter A, is that it just slides over the viewfinder. The older Refconverter II has a locking clamp over the bottom of the viewfinder window, so there is no chance the Refconverter will slide off, even if the camera is turned upside down. Not sure if the Refconverter A is that secure. Also note that even though the Refconverter A will fit on the viewfinder windows of a K Series or Screw-mount film body, the fit is very loose and the Refconverter is likely to fall off. Get the Refconverter II for those older films bodies with a smaller viewfinder window.
The Refconverter A is the best overall of the four released for the Pentax 35mm film bodies. I paid $69.00 for my Refconverter A and it came with the leather case.
| |
| Review of: PENTAX 67 Folding Focusing Hood by gofour3 on Sat January 5, 2013 | Rating: 8 | View more reviews | |

Views: 9655
Reviews: 1
|
The 67 is the second version of the folding hood.
Pros:
The build and finishing are very good.
100% of the focus screen is visible when using this prism.
Small size and weight.
3.8X magnification with a magnifier which can be flipped up so the entire focusing screen is visible.
Cons:
Laterally reversed image.
No diopter adjustment.
No eyecup to block stray light outdoors.
Summary:
I use this hood mostly indoors when doing macro work with a tripod. The folding hood is very light and folds up nicely when not in use. Outdoors its not as good as the rigid hood for blocking stray light. You also see 100% of the focusing screen but the image is reversed. This hood has better magnification than the rigid hood and the magnifier can be flipped up out of the way, which is a nice feature. You will need a separate hand held light meter when using this prism.
Price:
The price I paid is for a boxed new hood with case.
| |
| Review of: PENTAX 67II Rigid Magnifying Hood by gofour3 on Sat January 5, 2013 | Rating: 9 | View more reviews | |

Views: 10132
Reviews: 1
|
The 67II is the last version of the rigid magnifying hood.
Pros:
The build and finishing are very good.
100% of the focus screen is visible when using this prism.
Diopter adjustment.
3X magnification.
Movable eyecup.
Cons:
Laterally reversed image.
The rigid magnifying hood does not accept the Magnifier, Right Angle Finder, Eyecup and Correction Lens as attachments.
Summary:
This is my most used finder when Im using a tripod outdoors and blocks stray light better than the folding hood. You also see 100% of the focusing screen but the image is reversed. It takes a bit getting used to but is really a non issue when using a tripod. You will need a separate hand held light meter when using this prism.
Price:
The price I paid is for a boxed like new hood with case.
| |
| Review of: PENTAX 67II Pentaprism Finder by gofour3 on Fri January 4, 2013 | Rating: 9 | View more reviews | |

Views: 9374
Reviews: 1
|
I bough the standard prism to replace my TTL metered prism. The 67II is the last version of the standard prism.
Pros:
The build and finishing are very good.
Unreversed laterally correct image.
The standard 67II Prism accepts the Magnifier, Right Angle Finder, Eyecup and Correction Lens as attachments. (Same as the metered TTL prism)
Cons:
Only 90% of the focus screen is visible when using this prism, so keep that in mind when composing a shot.
A bit on the heavy side.
Summary:
This is my most used finder and is the one I use when hand holding my Pentax 67. Its basically the same as the TTL prism, but without the meter. You will need a separate hand held light meter when using this prism.
Price:
The price I paid is for a boxed camera store demo with a small mark on the outside of the prism.
| |
| Review of: PENTAX 67 TTL Pentaprism Finder by gofour3 on Fri January 4, 2013 | Rating: 5 | View more reviews | |

Views: 21273
Reviews: 3
|
This is the last version of the Pentax 6x7/67 TTL metered prism.
Pros:
When the meter works I find it very accurate and have had no issues with any shots being way over or way under exposed.
The build and finishing are very good.
Unreversed laterally correct image.
The meter has an on/off switch to save on battery life.
The TTL Prism accepts the Magnifier, Right Angle Finder, Eyecup and Correction Lens as attachments.
Cons:
The mounting of the TTL prism to the 67 body is antiquated, as well as the coupling system when using an Automatic Diaphragm lens. A poor design in my books.
The meter is also prone to breaking down, or only working when a lens is in the MAN. position. My TTL meter only works properly when a lens is in the MAN. position, so its frustrating to use.
Only 90% of the focus screen is visible when using this prism, so keep that in mind when composing a shot.
The TTL prism weighs 520g/1lb. 2oz. so it's on the hefty side.
Summary:
Unfortunately the TTL metered prism is the Achilles heel of the Pentax 6x7 & 67 bodies. I have benched my TTL metered prism and purchased a Gossen Luna-Pro sbc to use instead. I cant recommend the TTL prism as there are too many reported problems on this and other forums. Do yourself a favor and get a good hand held meter instead, you will feel liberated. The other three Pentax 67 finders are great and you will need a hand held meter to use them.
Rating:
I rate the Pentax 67 TTL metered prism as a 7 for usage, however because of the reliability issues I have to drop this to a 5 overall.
Price:
The TTL metered prism was included in the price of my Pentax 67 camera, so I have no price for it.
| |
| Review of: PENTAX Close-up Lens by gofour3 on Mon October 8, 2012 | Rating: 8 | View more reviews | |

Views: 20234
Reviews: 3
|
With the release of the K Series in 1975 Pentax introduced a new set of close-up lenses.
Six were available in two filter thread sizes and all had SMC coatings:
S25 (52mm: K50/1.4 & K55/1.8)
S40 (52mm: K50/1.4 & K55/1.8)
T80 (52mm: K85/1.8, K105/2.8, K120/2.8, K135/3.5 & K150/4)
T95 (58mm: K135/2.5 & K200/4)
T160 (52mm: K105/2.8, K120/2.8, K135/3.5 & K150/4)
T183 (58mm: K135/2.5 & K200/4)
S indicates the close-up lens is for standard lenses and T is for telephoto lenses. The number indicates the focal length of the close-up lens in cm. (The distance from film to subject, the shorter the focal length the bigger the magnification.) Usable/recommended K Series lenses are in brackets.
These are great close-up accessories that look & work exactly like a Pentax SMC fitter. They take up little space in your camera bag and are perfect for close-ups if you dont own a macro lens or extension tubes. Unlike a macro lens or extension tubes there is no exposure factor or light loss.
The highest magnification you can get with a K Series close-up lens is 0.42x with a S25 and a K55/1.8 lens. Thats close to a K50/4 or K100/4 Macro lens, which both have 0.5x magnification.
I have the S25, T80 and the T95. The image quality is very good with these close-up lenses, but they will not replace a macro lens or extension tubes. I use my close-up lenses only when I travel and dont want to bring/carry a macro lens or extension tubes due to space issues.
| |
| Review of: Tenba Messenger: Large Photo/Laptop Bag by gofour3 on Sun July 1, 2012 | Rating: 10 | View more reviews | |

Views: 7301
Reviews: 3
|
For long distance traveling the Tenba Messenger Large is the best camera bag that I have ever used.
Not only can it hold a reasonable amount of photo gear, it also has numerous compartments for your travel documents, keys, coins, pens, phone and laptop. Being a messenger bag that comes in seven colours, you can walk around a big city and not scream tourist with a black camera bag.
On a recent trip I took a Pentax K2 film body with attached FA43/1.9 for my standard lens, plus a K20/4 for my wide and an A70-210 for my telephoto lens. I also took the K20 hood, five extra filters and 10 rolls of film. This kit was easy to carry around (the padded shoulder strap is great) and still left lots of room for maps and other travel things. You can also remove the camera section and just use it as a laptop messenger bag.
I have taken two major trips with this Tenba bag and it is rugged and very well built. There are no issues taking this bag as a carry-on and putting it under the airplane seat. Also the Tenba is inexpensive compared to the price of other camera/laptop messenger bags.
Now that I have tried the Tenba bag Ill likely never take one of my black Lowepro shoulder bags again on a long distance trip. They are too bulky and do not have the extra space for travel items. The Lowepro bags also label you as a tourist with a camera, depending where you travel this can be an important factor.
| |
| Review of: PENTAX AUTOROBO by gofour3 on Mon December 27, 2010 | Rating: 8 | View more reviews | |

Views: 14144
Reviews: 1
|
The Pentax Autorobo flash unit is unique and on the rare side. It was introduced in 1973/74 and was designed for use with the new Pentax ES & ES II screw-mount film bodies. The Autorobo was carried over to the K series in 1975 & the M series in 1976 and was eventually replaced by the AF16 in 1977. Honeywell was the sole Pentax importer for the US market and chose not to make the Autorobo flash available for sale, most likely as they had their own line of Strobonar flashes. So the Autorobo was available for sale in all Pentax markets worldwide, except the USA.
To operate the Autorobo first set the ASA/ISO speed of the film you are using, with the dial on the top of the flash. Next choose either of the two Auto settings (blue or red) or the manual (M) setting.
For auto BLUE or RED you manually set the lens aperture corresponding to the selected setting, as per the dial on the top of the flash. The Autorobo has a sensor that will measure the light reflected from the subject and automatically control the flash duration.
Example using ASA 100 film:
F-stop: F/4
Subject distance: 0.5 ~ 6 meters
Flash Setting: Auto BLUE
F-stop: F/8
Subject distance: 0.5 ~ 3 meters
Flash Setting: Auto RED
If you use the manual (M) setting, you use the F-stop corresponding to the exact distance to the subject and the flash will fire at full power.
I tried the Autorobo in a studio setting, in place of the strobe lighting. I used my K2 film camera as it has a faster flash sync shutter speed of 1/125. I used the auto BLUE setting, as the model was between 3 and 6 meters away. The Autorobo worked well and all my shots came out fine. Not bad for a 37 year old flash!
Due to its age the Autorobo is more of a collectors item, as it is rare and rather outdated. However it still can produce good shots if used correctly.
Price: I have three Autorobo flashes and paid $66.00, $20.00 and $15.00, averaged to $34.00 each.
| |
| Review of: Pentax Spotmeter V by gofour3 on Wed December 15, 2010 | Rating: 9 | View more reviews | |

Views: 38596
Reviews: 5
|
I was hunting for a used Spotmeter V last year and came across a brand new one in a local Vancouver camera store. New old stock, as I dont think Pentax has manufactured the Spotmeter V for about 10 years. I paid the list price, so it was rather expensive compared to what you can get one for on the used market. A case, wrist strap, front cap, manual and batteries come with a new Spotmeter V.
To use just set the Spotmeters main dial to match your ISO setting and youre ready to go. Aim the Spotmeter at your subject, record the indicated EV number and turn the outer dial to match the EV number. You then have a combination of speed/aperture setting that you can choose from. Calculating in the exposure factor for filters or magnification can be somewhat of a pain, as the Spotmeter does not have a scale like my Gossen.
The Spotmeter V manual goes over the various ways to meter and the multiple applications that you can use it for. I recommend you get the manual if you dont already have one. You can find an original on eBay or download one from the Pentax website.
Note a spot meter is best used for metering a scene where you want to concentrate only on a specific spot, like a persons face or a flower and ignore the rest for metering purposes. If you want to use a spot meter for everyday shooting then you will need to deploy an averaging or zone system, where you take multiple meter readings for each shot. I mostly use the Spotmeter V with the averaging system, when I'm using my Pentax 6x7 & 67 film cameras. (I no longer use the 6x7 TTL Metered prism on these bodies). I take one reading of the darkest area in the shot, then one of the brightest, then add the two EV readings. The EV number you use is half this total. If there is a difference of more than 5 EV (colour reversal film) or 7 EV (b&w film) between the darkest & brightest areas, then I take a third reading of the middle tone areas.
The manual/analog Spotmeter V is a good product and is still relevant for use in todays digital era. A good used one can be picked up for a reasonable price and there seems to be plenty for sale on eBay. Just make sure you have the meter tested before you start to use it, as some used ones may not be accurate any longer. Any decent camera repair shop should be able to do this for you.
If you want a meter that is similar to a cameras built-in TTL , then an ambient light meter that supports incident & reflected metering is a better choice. I have a Gossen Luna-Pro for this purpose.
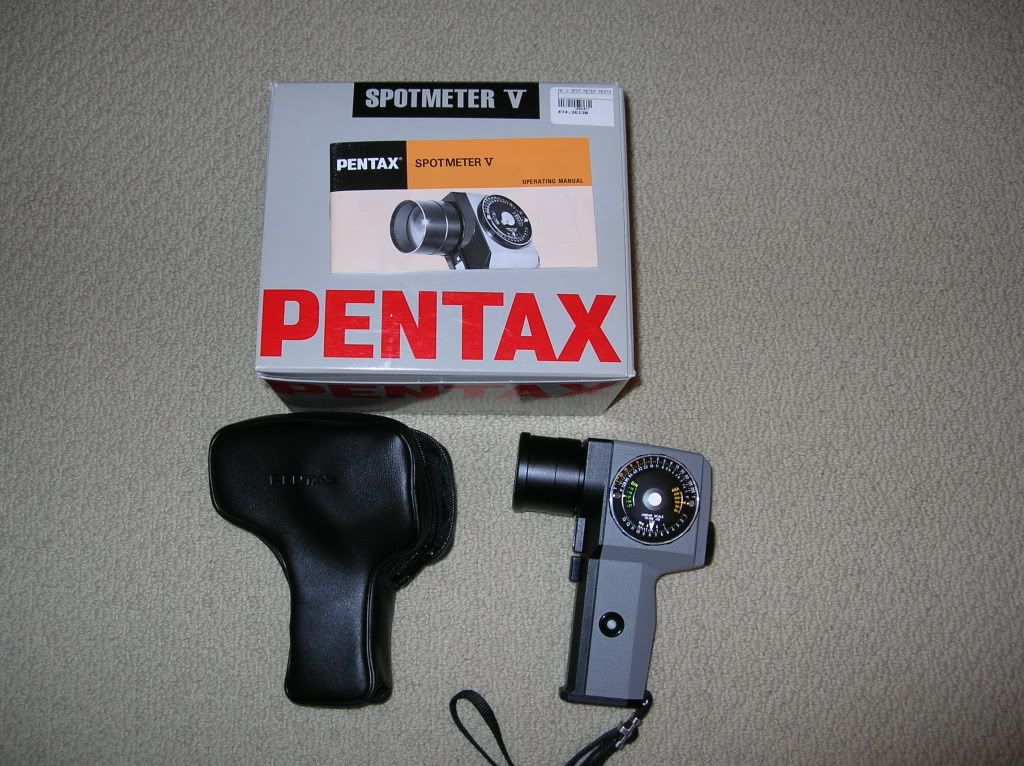 | |
| Review of: PENTAX Bellows Unit K by gofour3 on Wed July 7, 2010 | Rating: 8 | View more reviews | |

Views: 15798
Reviews: 3
|
The Bellows Unit K (II) is the first K-Mount version released by Pentax. It has a bellows extension of 32mm to 137mm. It was later replaced by the Bellows Unit III which has a slightly longer extension (33mm 140mm) and a Front Plate Clamp Knob instead of a Lever.
The Bellows K is the manual version and does not maintain the full aperture metering mechanism of the attached lens, so you will have to use stop-down metering. I only use my Bellows unit indoors on a tripod, so this is not a big issue. I find the Bellows to camera mount ring a little on the unsecured side, so I use extension tubes and my rail kit outside as they are more durable.
You can achieve some pretty high magnification rates with the Bellows K unit and a reversed lens. Using a K28/3.5 lens reversed and the Bellows unit extended fully to 137mm, you will get a magnification of 6.72:1. Unfortunately at these very high magnification rates the amount of light entering the viewfinder in your camera is very low. Its hard to focus and if you use an old film camera see the metering needles. This gets even worse when you have to stop-down, a spot-meter and magnifier will help.
Overall a good Macro accessory.
| |
| Review of: PENTAX Reverse Adapter K by gofour3 on Wed July 7, 2010 | Rating: 9 | View more reviews | |

Views: 19675
Reviews: 4
|
The Pentax reverse adapter is a must for Macro work over 1:1 magnification.
It comes in two sizes 49mm for M & A series lenses and 52mm for K series.
The reverse adapter can be mounted directly to the camera body, extension tubes or a bellows unit. The lens is screwed into the outside edge of the adapter like a filter.
Lenses with a focal length between 28mm and 55mm, work best reversed. Due to the optical design of telephoto lenses, there is no point in reversing them as you will not gain magnification. A 28mm lens reversed will give you the highest magnification. All reversed lenses will require stop-down metering.
The reverse adapter is metal so it will last for decades and there is nothing that can break on it. The reverse adapter is a great product, but one that you will probably not use that often.
The price is for a 52mm version in its origial box with instructions.
| |
| Review of: PENTAX Helicoid Extension Tube K by gofour3 on Tue July 6, 2010 | Rating: 9 | View more reviews | |

Views: 23804
Reviews: 5
|
Pentaxs only variable extension tube for 35mm cameras. It works like the zoom function on a lens and you can adjust the extension anywhere from 26.5mm to 46.5mm. (20mm log helicoidal thread) At minimum extension the Helicoid is the equivalent of a No. 3 tube in the auto/manual set. Fully extended it is the equivalent of a No. 2 & 3 tube in the auto/manual set.
As this tube does not maintain the full aperture metering mechanism of the attached lens, you will have to use stop-down metering. Pentax does not recommend using the Helicoid on a Macro lens for this reason and recommends the Auto Extension Tube set instead. The other reason is the Helicoid tube and the Macro lens could both be used for adjusting the magnification ratio, so this would be cumbersome. Pentax recommends using the Helicoid extension tube with a lens in the 35mm to 200mm range or a reversed lens in the 28mm to 55mm range. (The 50mm Macro lens included, as it will be manual lens reversed)
This tube is very well built and is very small when closed to its minimum extension. Its just too bad that its manual or Id use it even more.
| |
| Review of: PENTAX Manual Extension Tube Set K by gofour3 on Tue July 6, 2010 | Rating: 8 | View more reviews | |

Views: 13370
Reviews: 4
|
I bought this manual extension tube set for my K85/2.2 Soft lens, so I can do soft focus close-up work.
The manual extension tube set works well but does not maintain the full aperture metering mechanism of the attached lens, so you have you use stop-down metering. The K85/2.2 Soft lens has a manual diaphragm, so this is not an issue for me.
The manual tube set is a simpler design and is more reliable than the Auto versions.
The price is for a mint set with case and manual.
| |
| Review of: PENTAX Auto Extension Tube Set K by gofour3 on Tue July 6, 2010 | Rating: 8 | View more reviews | |

Views: 38698
Reviews: 5
|
I only really use the No. 3 tube (26mm) for my K50/4 Macro lens, so I can get 1:1 magnification with a single tube.
The Auto extension tube set works well and maintains the full aperture metering mechanism of the attached lens.
The only issue with this extension tube set, which applies to all the auto versions, is that the diaphragm mechanism becomes sticky and makes it hard to turn the aperture dial on the lens. This issue gets worse when you use multiple tubes at the same time. A good CLA by Eric will solve this issue.
I have two sets and the average price was $90.00.
A mint set with box, case and manual cost $110.00.
An excellent condition set with case and manual cost $70.00.
| |
| Review of: PENTAX Auto Extension Tube K 50mm by gofour3 on Tue July 6, 2010 | Rating: 9 | View more reviews | |

Views: 18063
Reviews: 5
|
I bought this extension tube for my K100/4 Macro lens, so I can get 1:1 magnification with a single tube.
The 50mm Auto extension tube works well and maintains the full aperture metering mechanism of the attached lens.
The only issue with this extension tube, which applies to all the auto versions, is that the diaphragm mechanism becomes sticky and makes it hard to turn the aperture dial on the lens. A good CLA by Eric will solve this issue.
| |
| Review of: PENTAX Macro Focus Rail III by gofour3 on Wed June 30, 2010 | Rating: 9 | View more reviews | |

Views: 15230
Reviews: 2
|
The focus rail is another must have accessory for macro/close-up shooting. It fits between your tripod and your camera and features a fine focusing knob. The focus rail is very well built and is small/light enough to carry in your camera bag.
The focus rail takes seconds to mount on your tripod and has its own base with a nice rubber mount where you attach your camera body.
The recommended focusing procedure is to set the macro lens magnification ratio and to move the camera, using the focus rail, for final focusing adjustments. The focus rail also has a lock for when you have finished focusing. (Remember that when you move the focus ring on a macro lens you also change the magnification.)
The focus rail works very well, but does not have the ultra fine focusing adjustment that you get when you use a macro lens focusing ring. As a result I usually make the last very finest focusing adjustment on the lens itself.
I have two focusing rails, one that came with my copy stand and a separate one I use for outdoor macro work with my K100/4 Macro lens and 50mm auto extension tube. This gives me a 1:1 magnification ratio and around a six inch working distance from my subject. The focus rail really comes in handy, but does require a bit of time to get the tripod the right distance and leaving enough movement front & back with the rail for the final focusing adjustment.
Highly recommended as long as you dont mind a bit of fiddling.
| |
| Review of: PENTAX Copy Stand III and IIIP by gofour3 on Sat June 26, 2010 | Rating: 10 | View more reviews | |

Views: 17417
Reviews: 1
|
This review is for the Copy Stand III P, which is the portable version. This is another great Pentax accessory and is very useful for macro/copy work. Of all the Pentax gear I own the wood construction of the baseboard/carrying case ranks near the top in quality. The dovetail joints and inside compartment are better made than 99% of todays wood furniture. The case also has a metal plate indicating its an Asahi Pentax Copy Stand IIIP, just like the plates used on the super telephoto trunks! There is no way you will see a wooden case of this quality made today, especially by a camera company! The case also has a thick leather carrying handle.
The copy stand IIP comes with its own macro focusing rail and it takes only a minute to assemble the stand. There are two metal tubes that screw together and then into the baseboard. The support arm fits over the top of the tube and you attach the macro rail to the support arm. The best feature is that when you are finished you just dissemble it and its easy to store, unlike the regular copy stand. The baseboard is also heavy enough that you do not need a table clamp to secure it. The entire unit weights 5.1kg and the inside has enough room to store a camera body and lens.
I use this copy stand for overhead macro work using a 100mm macro lens and extension tubes. I also have some portable studio lights that are easily adjusted to illuminate the baseboard surface. You can also remove the macro rail and attach a bellows unit if you wish.
This portable version of the copy stand is on the rare & pricy side, but well worth seeking out. I found mine at a local camera store that has a good selection of used Pentax gear.
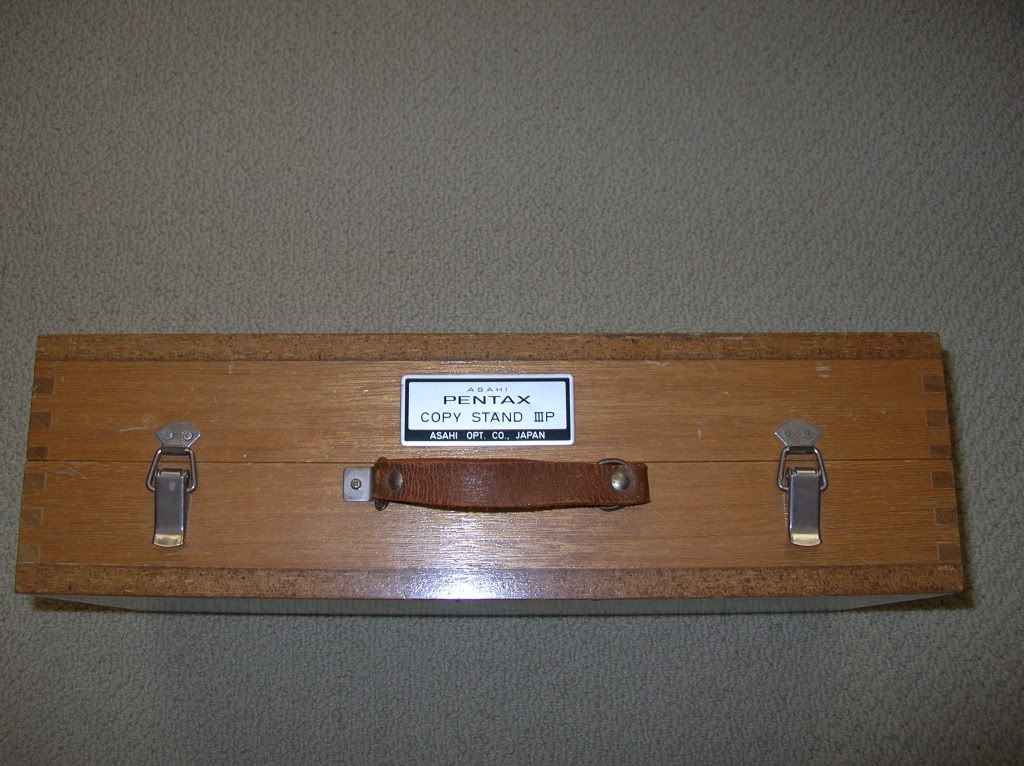 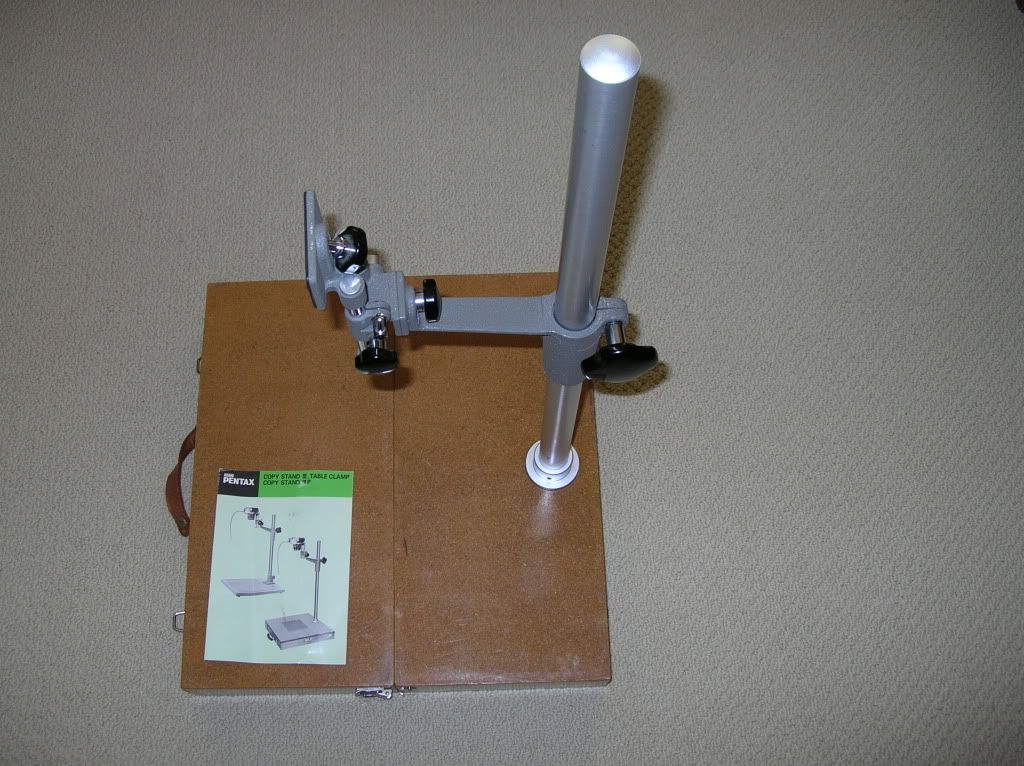 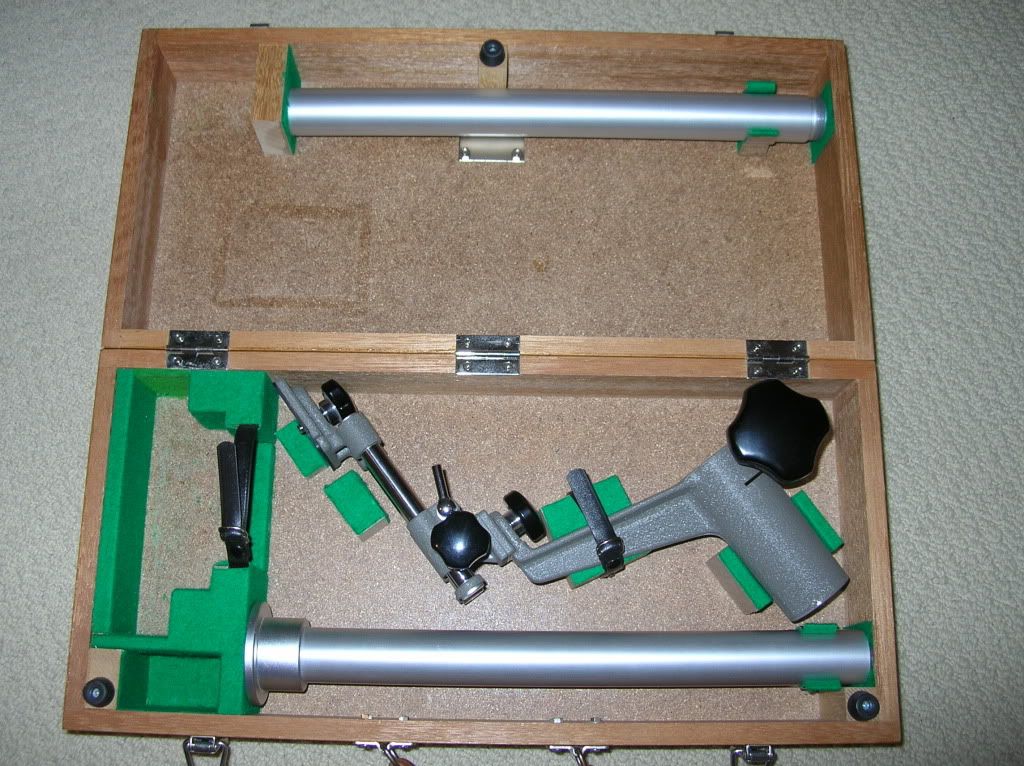 | |
| Review of: PENTAX Refconverter by gofour3 on Sat June 26, 2010 | Rating: 9 | View more reviews | |

Views: 12763
Reviews: 3
|
This review is also for the Refconverter II right-angle finder and not the simpler Refconverter pictured in the item description.
This is a must have accessory for me in any outdoor daylight tripod work. Im nearsighted and dont like wearing glasses when using my camera, so the built in diopter adjustment is wonderful. This is especially useful when Im focusing using my large telephoto lenses. (K400/5.6, K500/4.5 & K1000/8).
I recommend getting the optional rubber eye cup, as it helps reduce reflections when its sunny out. The only issue I have with this refconverter is that it blocks some of the viewfinder area when attached and makes it a little hard to see the meter needles.
I highly recommend getting the Refconverter II if you are looking for a right-angle finder for a K series or screw-mount film body. Dont bother with the regular Refconverter, which has a reduced +2 to -2 diopter adjustment, has a laterally incorrect image and is not as well built.
Refconverter II: 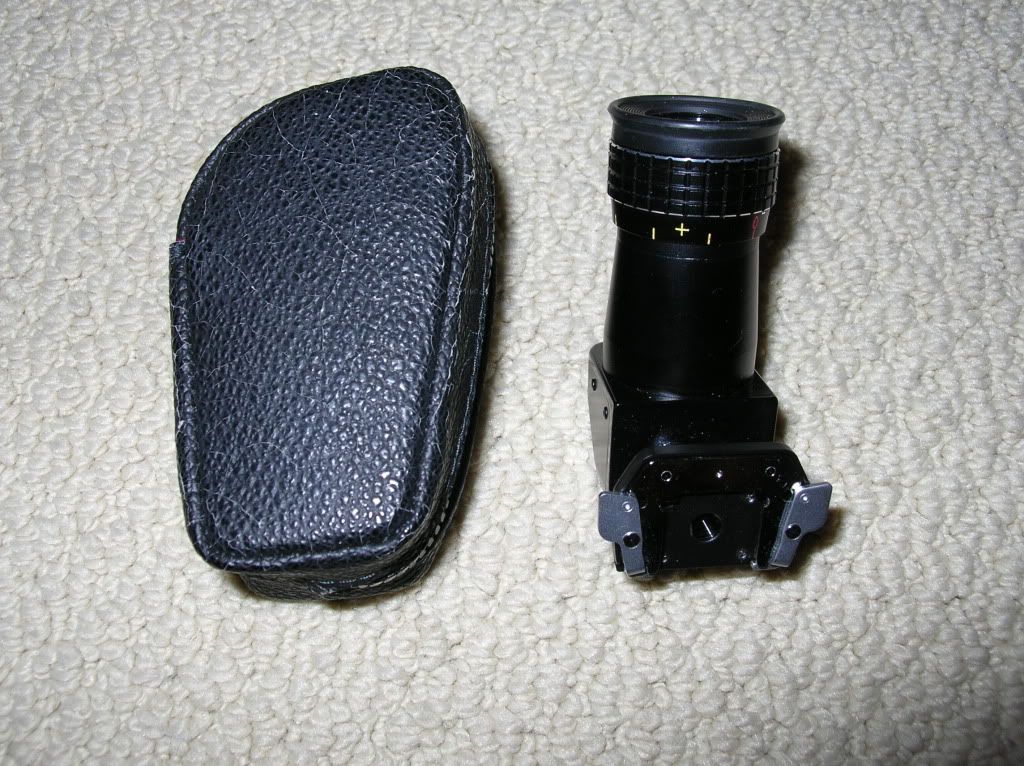 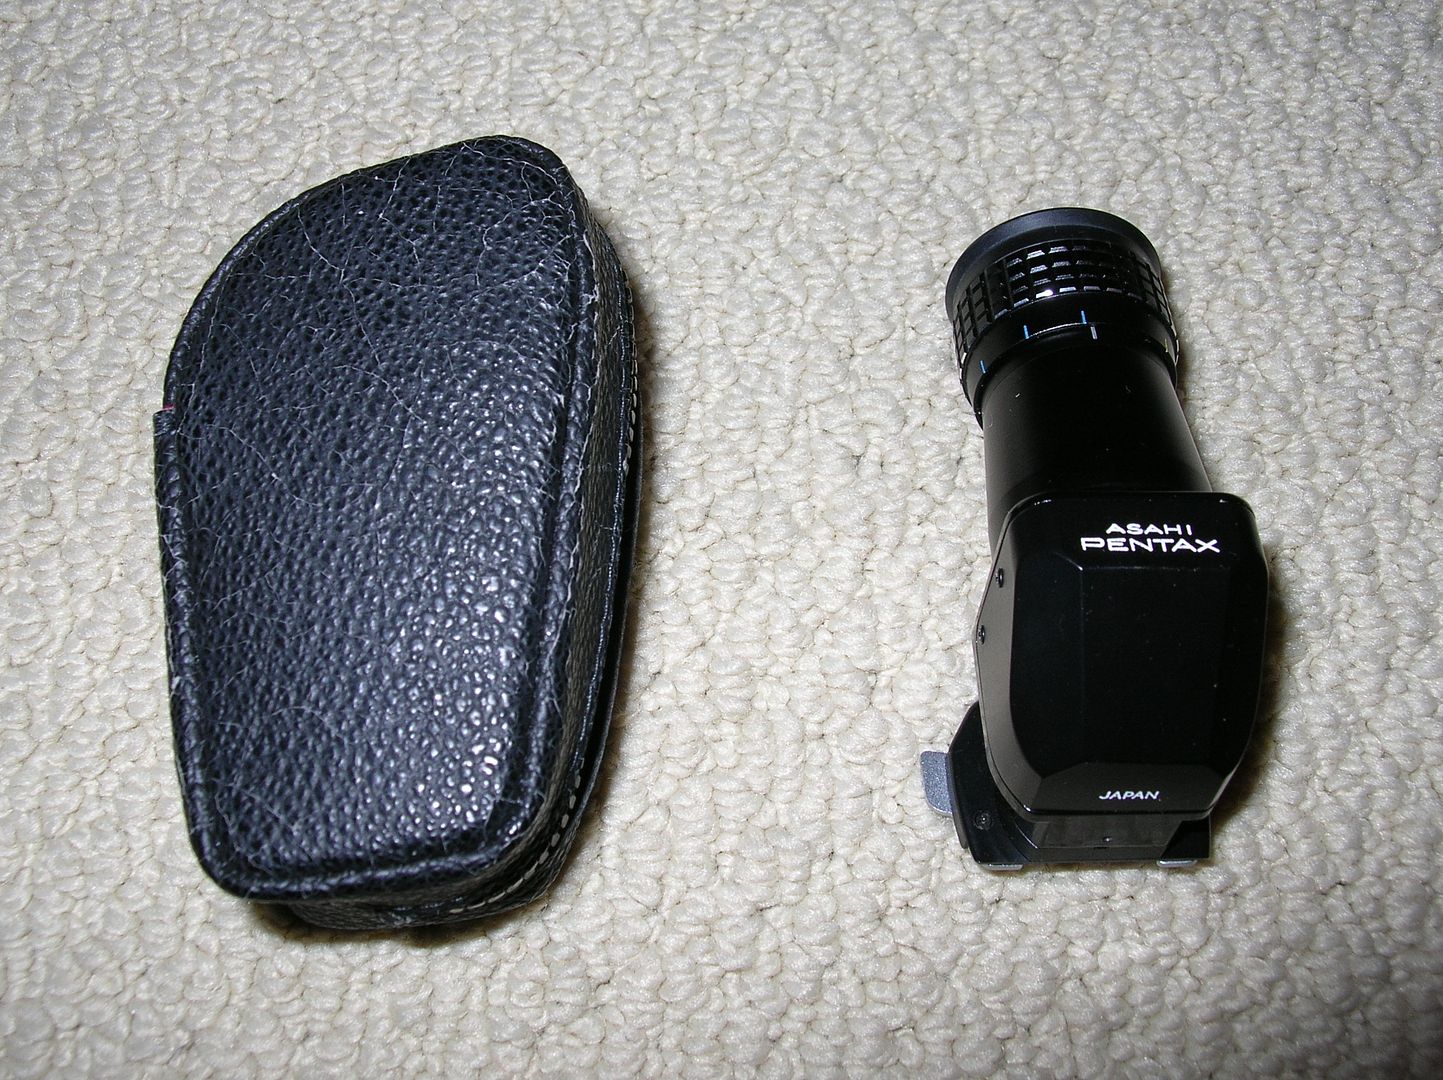 | |
| Review of: PENTAX Magnifier by gofour3 on Sat June 26, 2010 | Rating: 8 | View more reviews | |

Views: 13999
Reviews: 4
|
An essential accessory for macro work, this magnifier fits over the viewfinder eyepiece on any K series film body. (As well as late model screw-mount body) It features 2x magnification and flips up out of the way when not in use without having to remove it from the eyepiece.
Not much to review here as this is a pretty simple item that does a good job when you need help focusing with high magnification rates and shallow DOF in macro work. Works best when the camera is mounted on a tripod, bellows unit, slide rail or copy stand and you are photographing still objects. Its too hard to use with a hand held camera or on gently moving flowers outdoors. A higher adjustable magnification rate would have been nice.
| |


