
The Making of "Look at the Camera"
How the winning photo of the "Pets" contest was made
By darthwolf in Photo Contests on Nov 2, 2020
 "Look at the camera!"
Dear Pentaxians!
First of all, I would like to say thank you for all your nominations and votes!
Here is the story behind the photo:
The cat on the picture didn't dare leave our house until he was two years old. His curiosity was stronger than his fear, which is why he longed for the outdoors, but only in human company. Usually he'd stand in the window and ask to be allowed to climb up on our shoulders and watch the outside world from there.


The winning photo was taken on the same occasion. After my birthday party (so winning the contest is a kind of a posteriori gift for me) I thought I'd try out my new lens (Pentax HD DA 55-300mm F4.5-6.3 ED PLM WR RE) before dark. Borzi (the name of the cat) was standing in the window and demanded that I put him on my shoulder. Before that, however, I took advantage of the fact that he wasn't running and the photo was taken.
It was far from the final picture at the time, but I knew it would be worth post processing.
 The original image to be processed in Lightroom
 It was too dark, so first of all, I increased the exposure a little bit. (+0.60)
(click image to enlarge abd browse the processing steps)
 Dehaze (+43)
 Usually this is my first step: highlights decrease (-26)
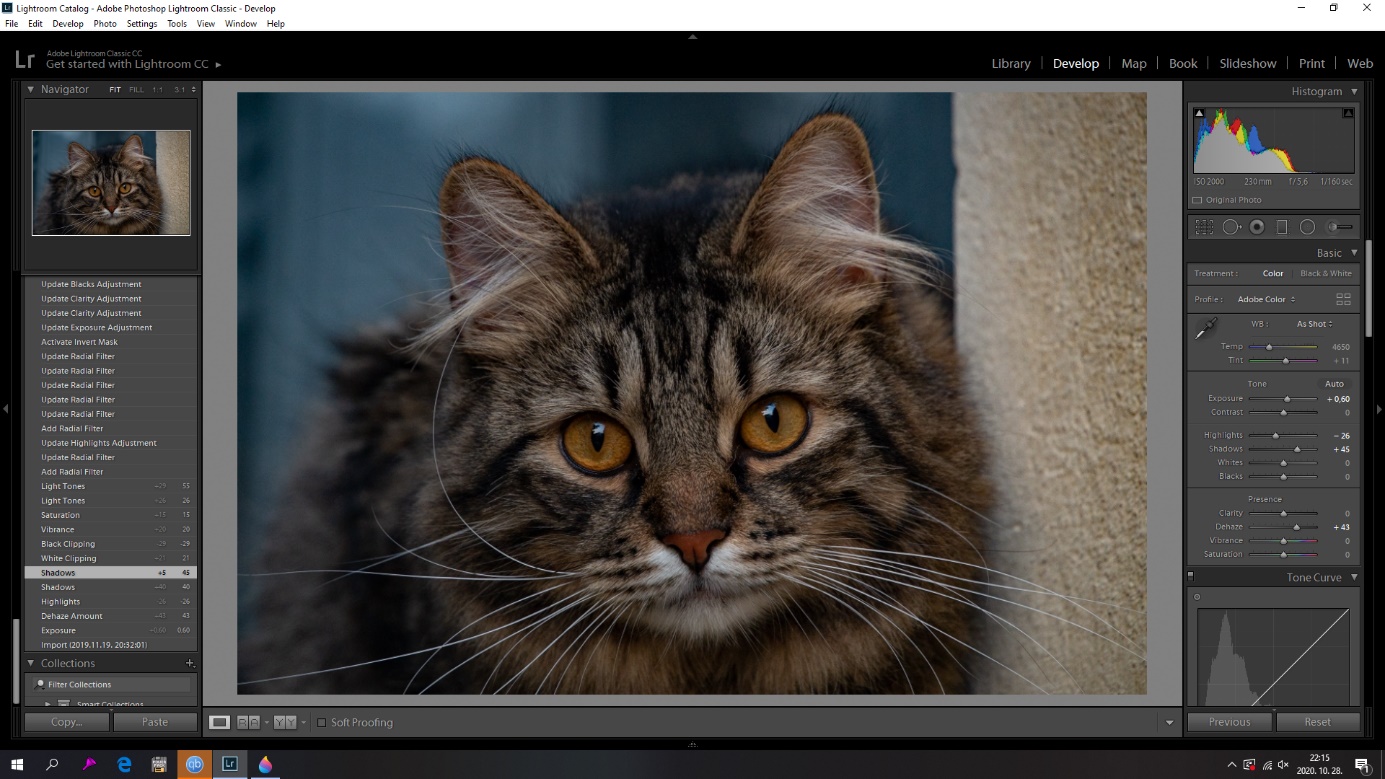 Open up the shadows (+45)
 Adding some whites (21) and blacks (-26)
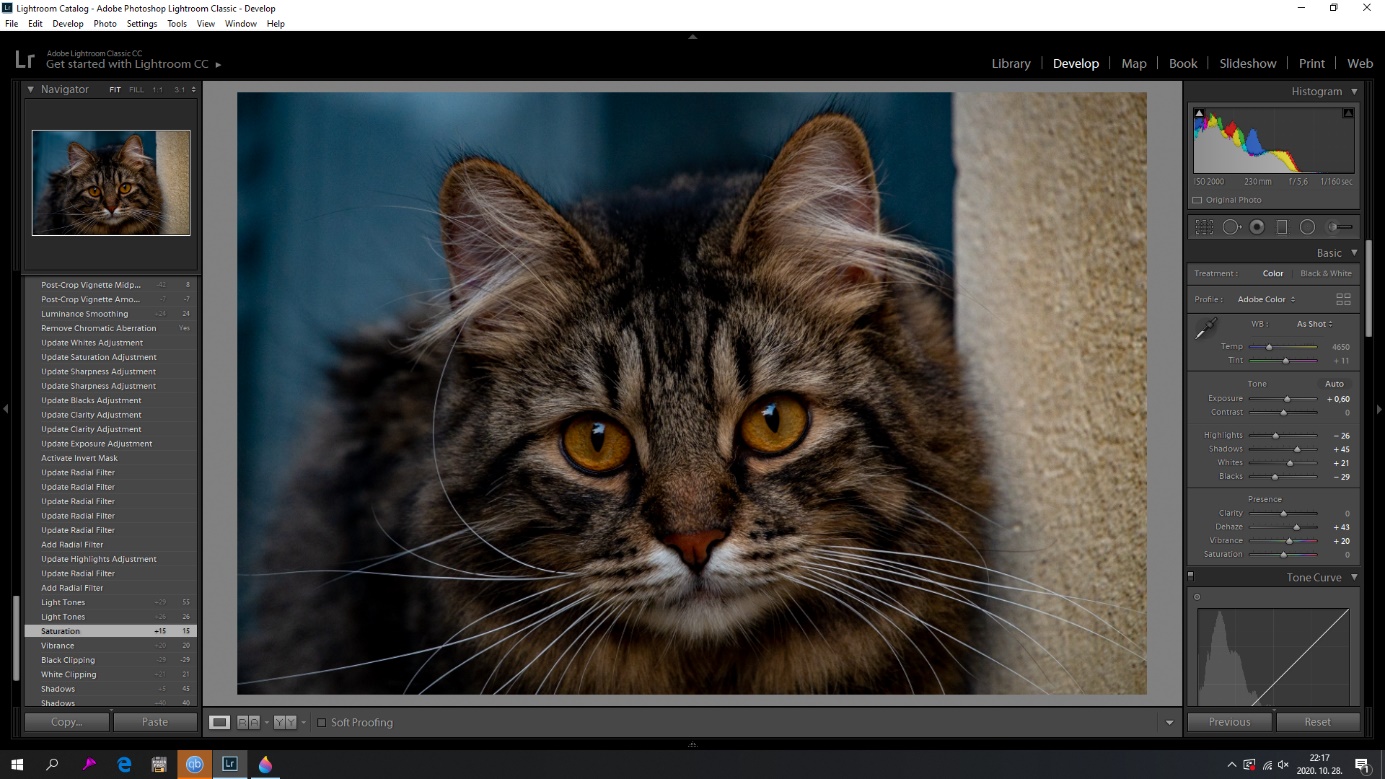 The world is colorful, so we need more vibrant colours, right? (Vibrance +20, Saturation +15)
 Then I scrolled down to Region panel. The picture was still too dark, lights up! (Lights +55)
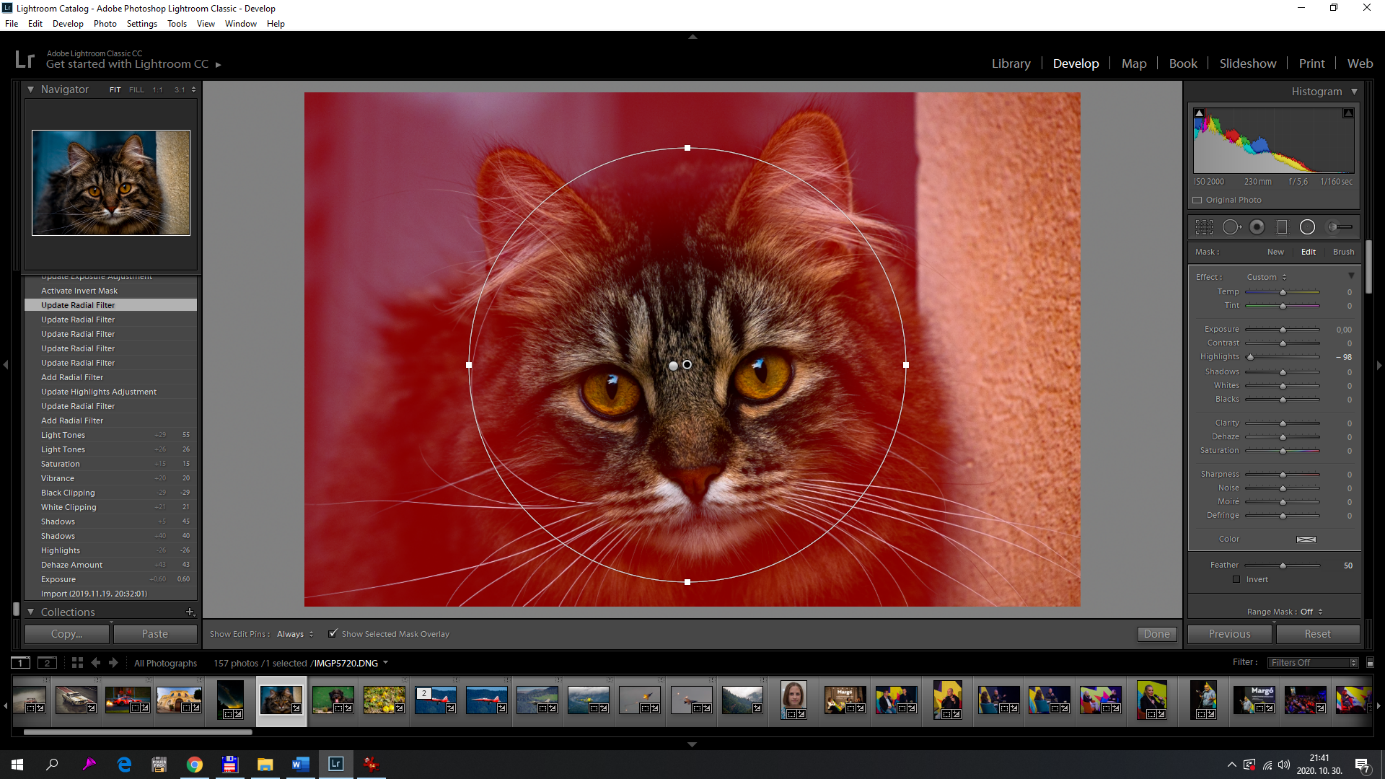 I used the Radial Filter to decrease the highlights around the face and increase on it. Also added more exposure on his face
This area was the most important, so I made some more improvements on the face:
 Radial Filter, Exposure +0,61 Highlights +25 Whites +57 Blacks -7 Clarity +15 Saturation +30 Sharpness +52
 Almost done! Just small corrections at the end: add some vignetting and remove chromatic aberrations (fortunately the 55-300mm PLM lens doesn’t need too much from this correcting!)
This was the step by step processing in Lightroom CC. The final thing was to remove the noise but I don’t like the result when done in Lightroom. There is a better way (IMO), so I used Topaz Denoise AI.
I want to congratulate all the participants of the „Pets” photo contest, specially to the finalists. You are great! I hope some of you got some inspiration from my „step by step” processing article.
Best wishes,
Tamás (darthwolf)
More from the Pentax Forums Homepage
- Ricoh updates the K-1, K-1 II, GR III, GR IIIx
- March "Flowers up Close" Contest...
- HD FA 50mm F1.4 vs. SMC 50mm F1.4 Classic Review
- Announcing Our April, 2024 Photo Contest
- Introducing Pentaxify AI by PentaxForums.com
- The Making of "Autumn Draws"
- Ricoh launches the RICOH GR III HDF and RICOH...
- Join Ricoh for the April 6 GR Photo Walk in Las...


Comments