 Originally posted by cyclone3d
Since I am going to have to dissasemble the lens to clean it up, has anybody done the 2.0 to 1.8 modification?
I couldn't find any specific instructions online; only that it can be done.
I have a pretty nice copy of your lens and thought about converting it, but decided it wasn't worth it. With your lens, I might have tried it, since it already has a lot of wear and the wrong trim ring. It is not as easy as you would hope for but not too hard.
First you need to remove the trim ring that says Super-Takumar. It's supposed to unscrew via the filter threads, which don't look that great on your lens. That could be your biggest obstacle. We know it's been off the lens at least once. You'll need some kind of friction tool to grip the thing and unscrew it. When that's off, you'll see three screws that hold on the short barrel with the filter threads. It looks almost like this lens, which is the M50/1.7. Some have slotted screws, some cross-point.
Take those off and remove the filter ring. Now you can unscrew the front lens group. It has slots for a lens spanner (the outermost ones for the whole group, inner ones for individual elements). But you can often get a good enough grip on it to unscrew it without tools at all. Now your lens looks just like this:
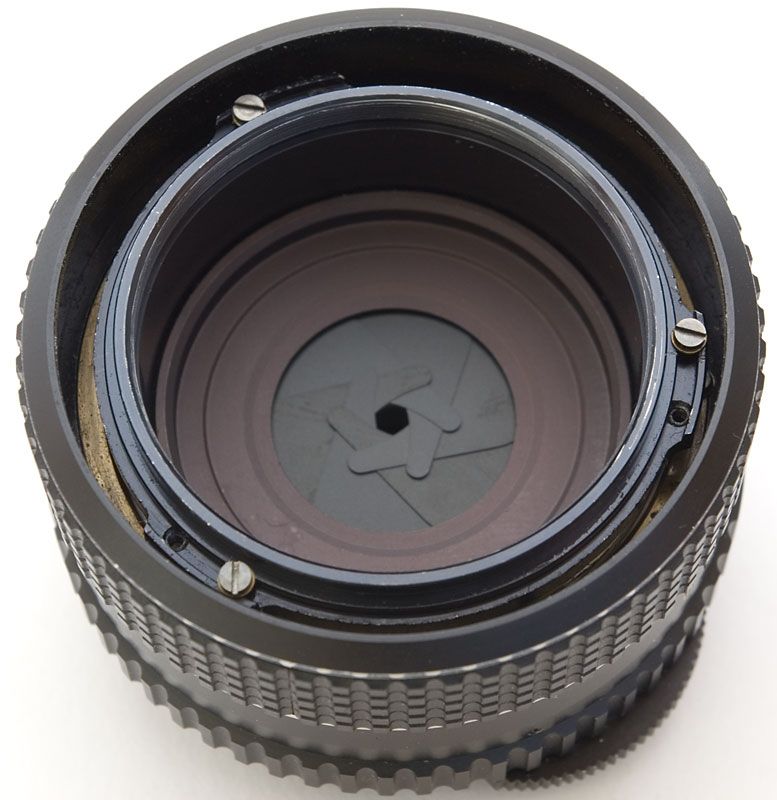
The offending part is the slightly purple ring just in front of the aperture blades. I was hoping it had a little snap-in collar choking the lens down to f2, but no, it is a unique part to the f2 version, and has another function (holds down the aperture blades). So you can't just discard it either. You have to remove it, file a larger hole in it and reinstall it.
To remove the part, the lens tube needs to be removed. I
think that removing the other three screws (prominent in the last photo) allows you to do that. It has been a while so I'm not 100% sure here, only 85%. This is the whole tube removed:
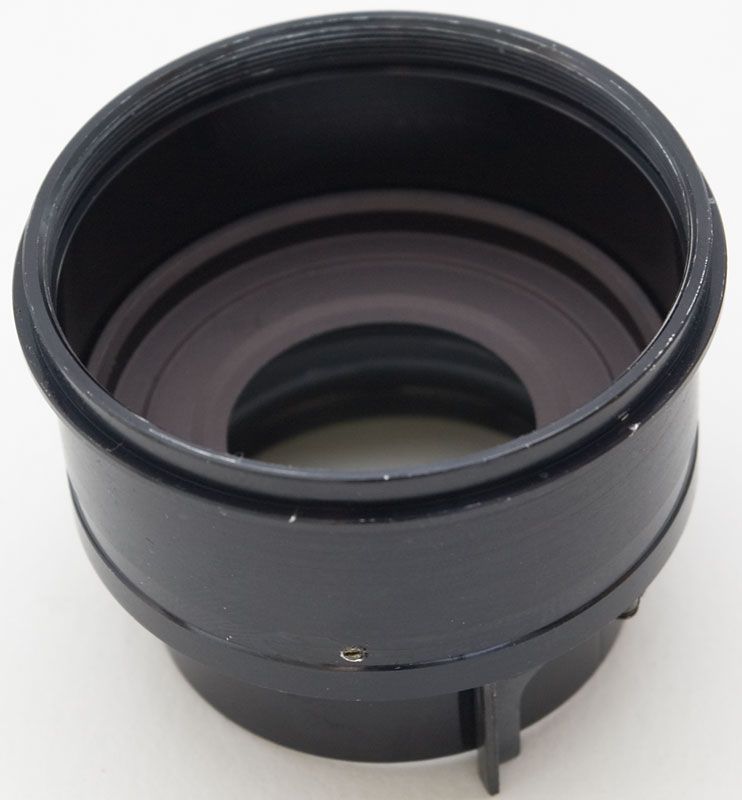
That tube has the rear lens group screwed into it. The arm on the side moves the aperture blades. You'll need to slide that arm into its proper slot in the base when reassembling. There are three small slotted grub screws (one visible in photo) around the tube side that hold in the part. Hold the tube upright and loosen each screw a few turns. Then you can remove the part. If you forgot about the "upright" bit, all the aperture blades fall out too. Here's the part removed from the lens, and the aperture blades safely undisturbed:
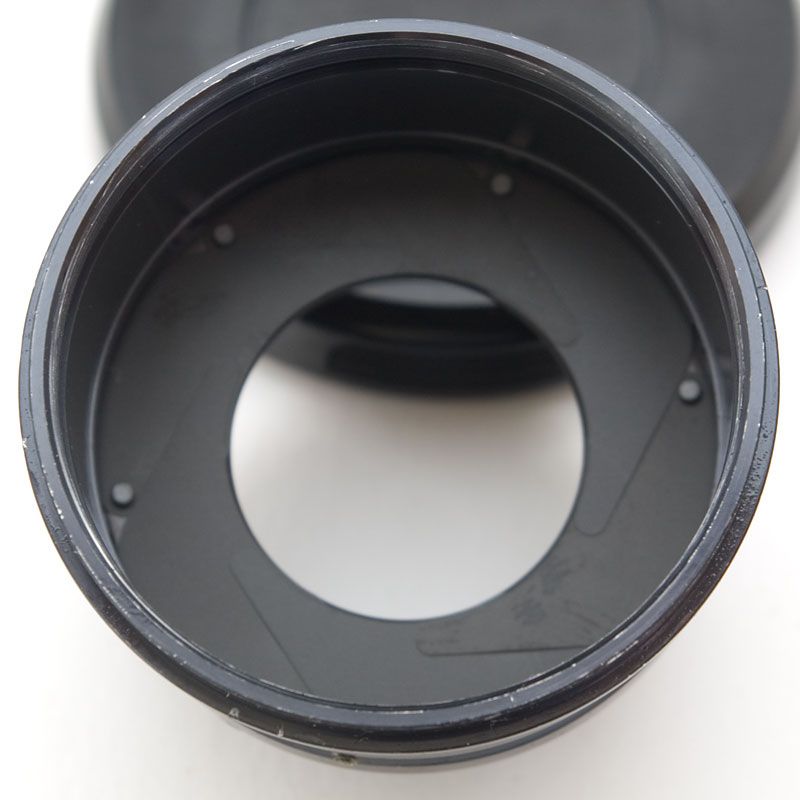
The part is aluminum so easily filed. You want smooth edges so it doesn't affect the aperture blades. You only need to make the hole as large as the opening in the last photo above. I'd blacken the edges with a Sharpie to reduce stray reflections. Reassembly is just the reverse of assembly, but make sure the aperture blades are just fully open when the ring is at f2. If not rotate the tube slightly until this setting is correct. That makes the f16 position correct too.
The f2 setting will now be f1.8. The other labeled stops are correct, but I don't know what the unlabeled first click down from f2 is.
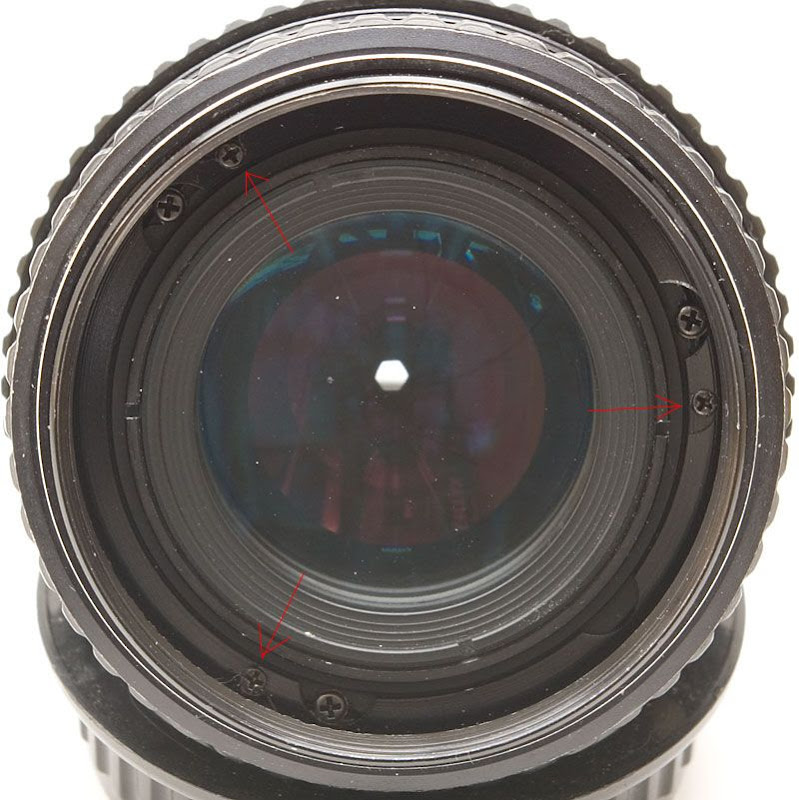
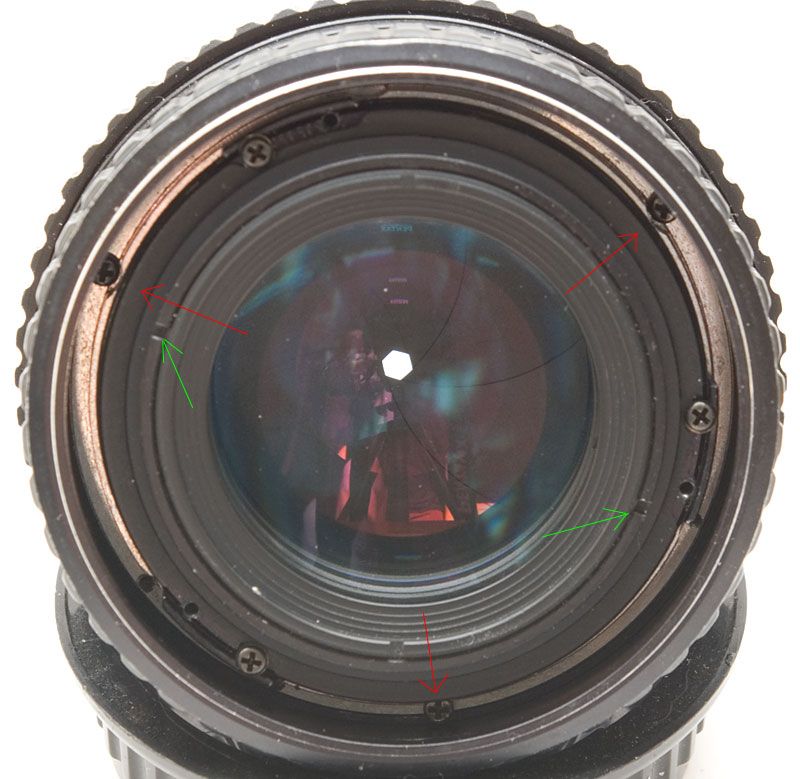
When you have this lens apart, I'd take the extra time to reglue the distance scale. I find a lot of these loose on the versions with rubber focus grips. It's extra steps and maybe an adjustment too. Focus to infinity. Remove the three screws holding the focus ring on. They will look like the screws marked with red arrows here:
Take off that ring. The scale is a metal strip glued to it. If it loosens, it starts scraping the lens body, sounding and feeling terrible. I mark the seam location, peel it off, clean off the old glue and reglue with super-glue. I clamp it with a rubber band. If you reinstall it with the infinity mark pointed at the orange diamond, you probably don't need to reset the infinity position. I'd at least check it now to be sure you can focus to infinity. If not, you can loosen the screws, slightly change the position of the ring, tighten them and focus again. Eventually you can get the setting perfect.
Also you can remove dust and grit with a toothbrush. It's a good time to straighten the filter ring dents while it's off the lens. I might paint the trim ring black, so it looks like a gray-market lens imported through Customs in the 70s instead of a false Super-Tak. Markings can be cleaned with a toothbrush and Windex.


 Post #9 by Just1MoreDave
 Similar Threads


