Using a fisheye lens, the main thing to assume is that you'll get a fisheye shot! Part of the fun is playing even more with perspective by angling the shot (not shooting horizontally or vertically level) or by placing some object in the foreground which can be exaggerated. As I noted in my initial post, however, I'm trying to determine if I can use the DA 10-17 FE as a wider, smaller (and hopefully better) lens to obtain rectilinear views and replace the Sigma 10-20 f4.5-5.6 I have been carrying around. I.e., I need to defish the shots.
There are a number of ways I found to defish a fisheye shot. (If someone has found a great and easy way to work with the DA 10-17 FE, please let me know.)
- In Lightroom, there is a profile for the DA 10-17 FE. Enabling the lens profile does a fair job. I could still fix things a bit more by then using the manual correction to adjust distortion and make other tweaks.
- In Photoshop, the image can be edited using Transform > Warp. It takes a little longer, but I could probably get better results this way.
- Following links in my initial post, I found suggestions for using PTLens (a standalone program or Photoshop plugin), Hugin (standalone program also used for panoramas), and Image-Trends Fisheye-Hemi (Photoshop Plugin). (This person does some especially nice work using Fisheye Hemi with the Rokinon 8mm FE.) Hugin is free, but I couldn't get it to work properly. PTLens and Fisheye Hemi are available for reasonable costs, but it doesn't appear they really support the DA 10-17 FE. (Someone correct me if I'm wrong.) One of these may simplify and speed up the process of defishing, but they didn't help me much in my quick trials with them.
So, below are some examples of defishing using Lightroom and/or Photoshop. (As noted before, at this point I'm still just working with perspective. The other qualities that make a good photo--color, contrast, resolution, etc.--will come later. I also apologize for not being more consistent in the order in which pics appear in the comparison. Be sure to check each heading to see what each one is.)
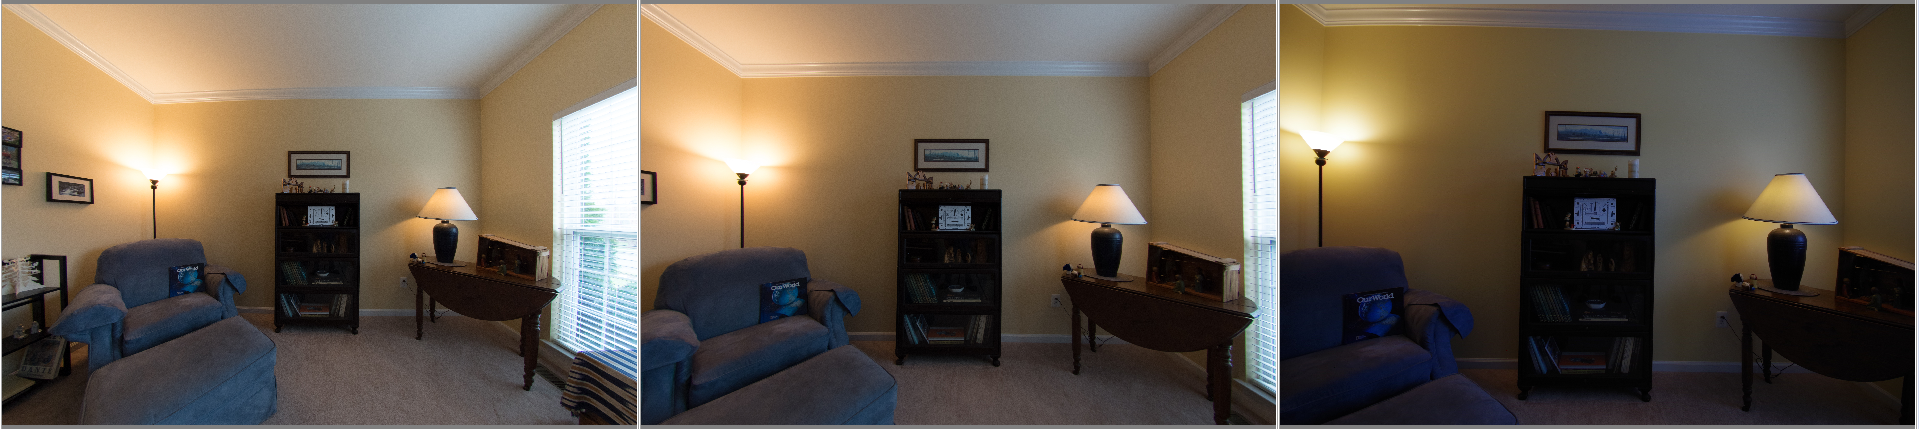
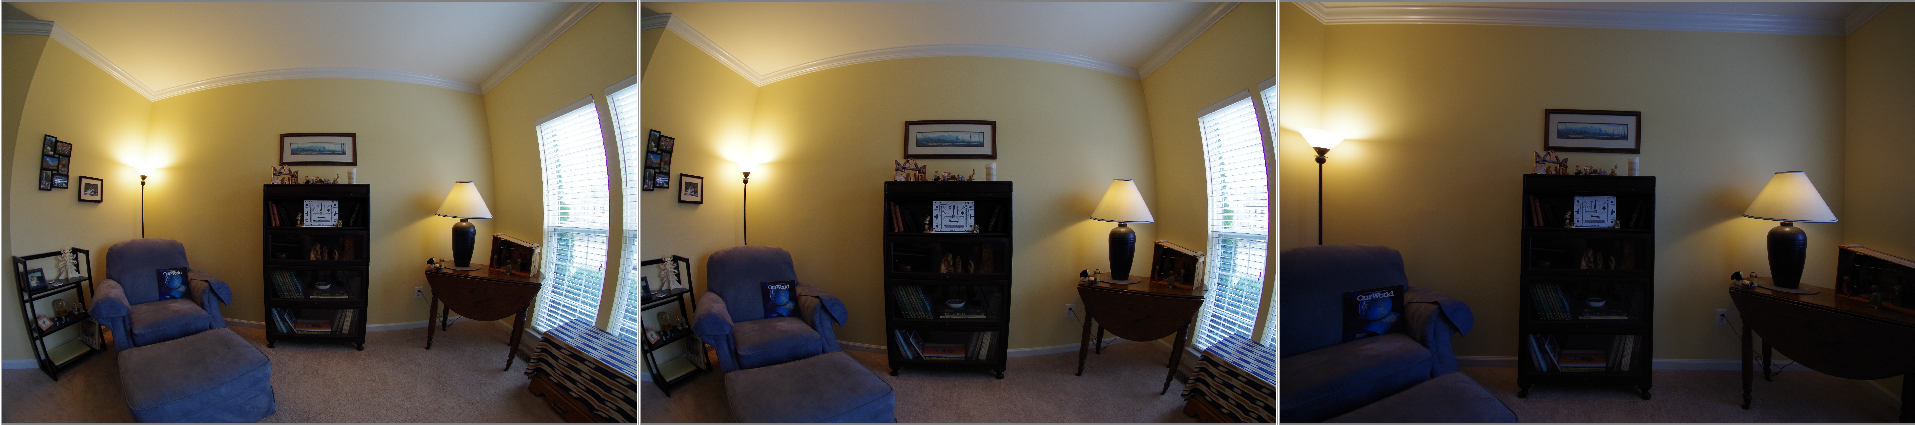
Rokinon 8mm with LR lens profile correction > DA 10-17 @10mm with lens profile correction > Sigma 10-20 at 10mm
As was evident in the initial post, and as you may well expect, the Rokinon 8mm FE was wider than the DA 10-17 FE at 10mm which was wider than the Sigma 10-20 at 10mm. We can expect, however, that some of the frame will be cropped with defishing. Using the lens profile correction is the quick way to get things straightened out, and this shows you how they match up. The book on the chair on the left is a square book, and the Rokinon 8mm does the best job with the sizing of it and the lamp. It's only as you move further to the edges that the Sigma 10-20 looks more natural. The dropleaf table is round to help you assess. (I should have applied the lens profile correction to the Sigma which would have gotten rid of some of that moustache distortion evident on the ceiling line.)

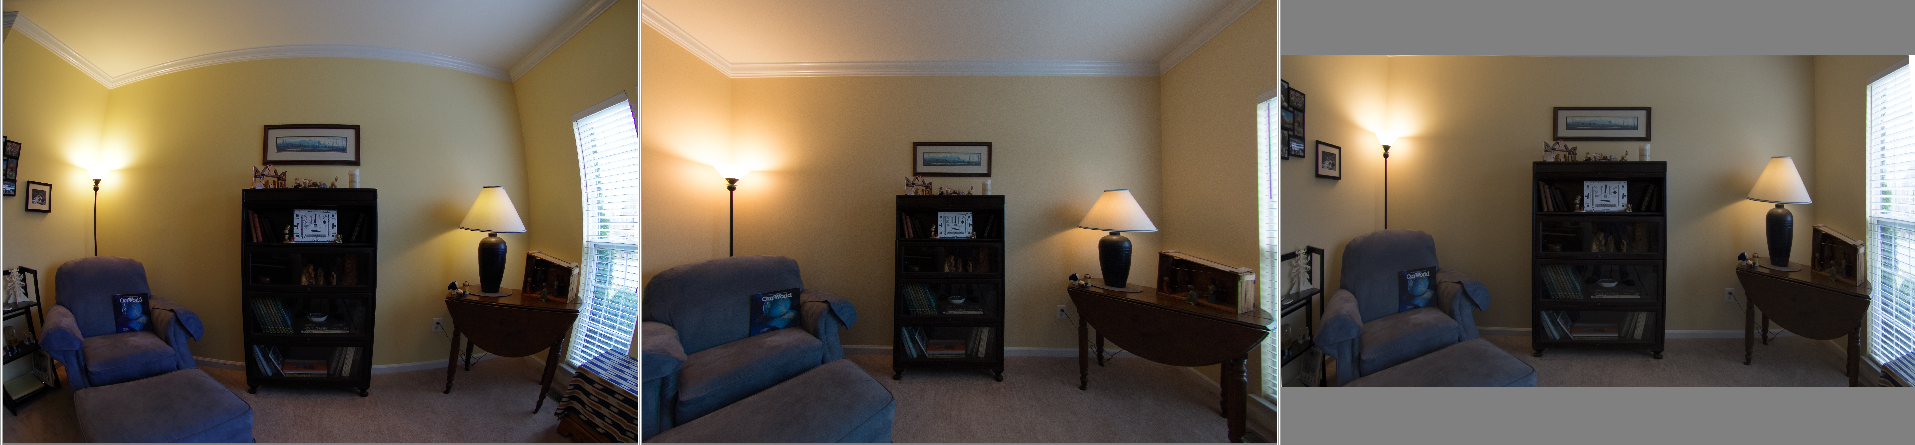
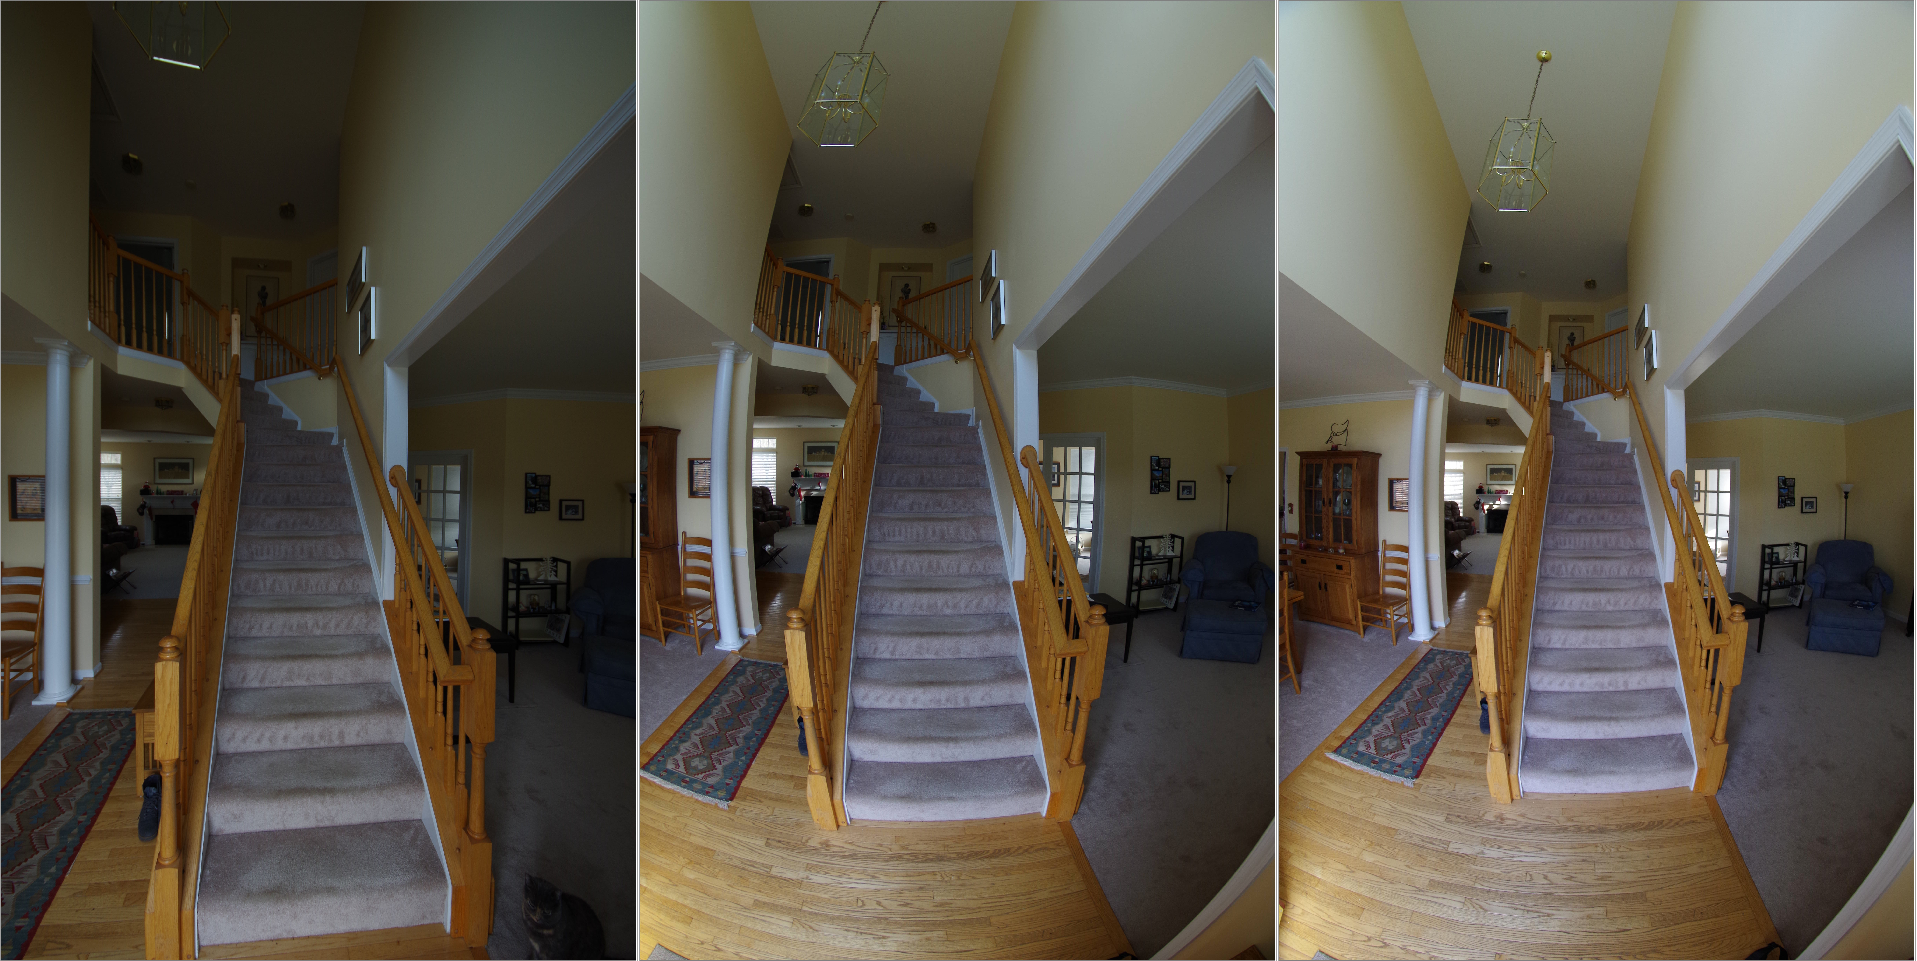
Original DA 10-17FE at 10mm > enabling lens profile correction in LR > manual adjustments in Photoshop using Transform / Warp
You can see that the profile correction does a pretty good job of straightening things out, but it does so at the expense of stretching the left/right edges quite a bit. Manually warping actually yields a pretty good perspective, but it comes at the cost of needing to crop off a bunch at the top and bottom.

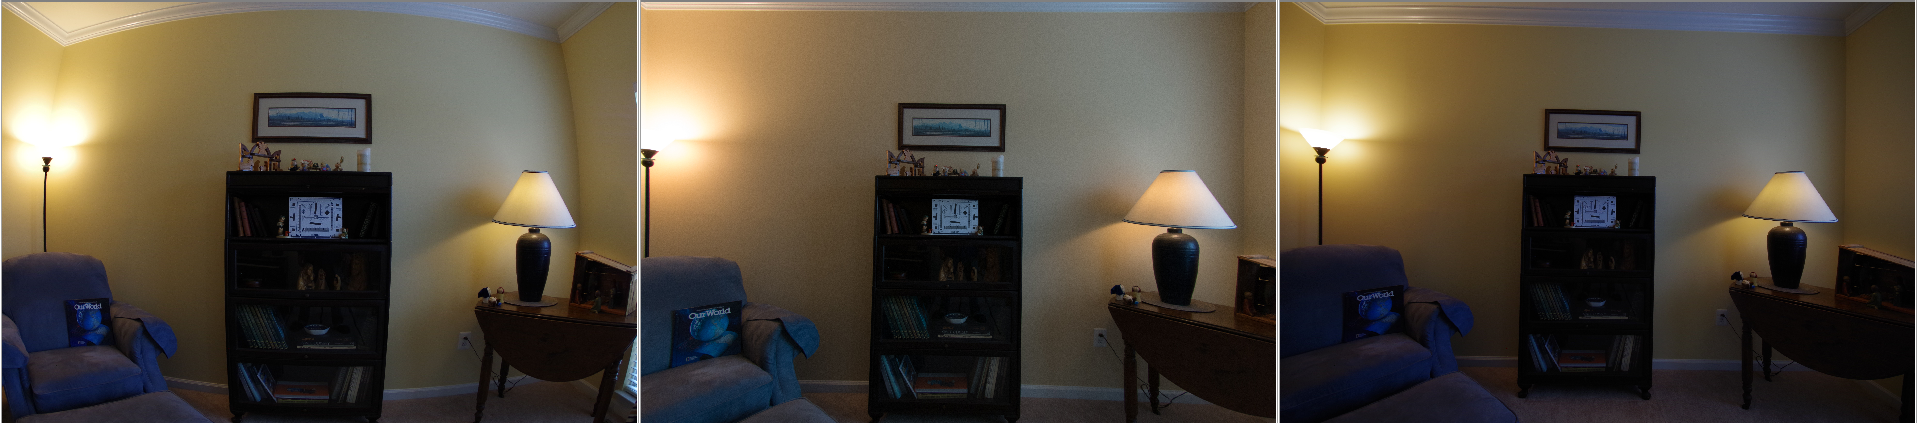
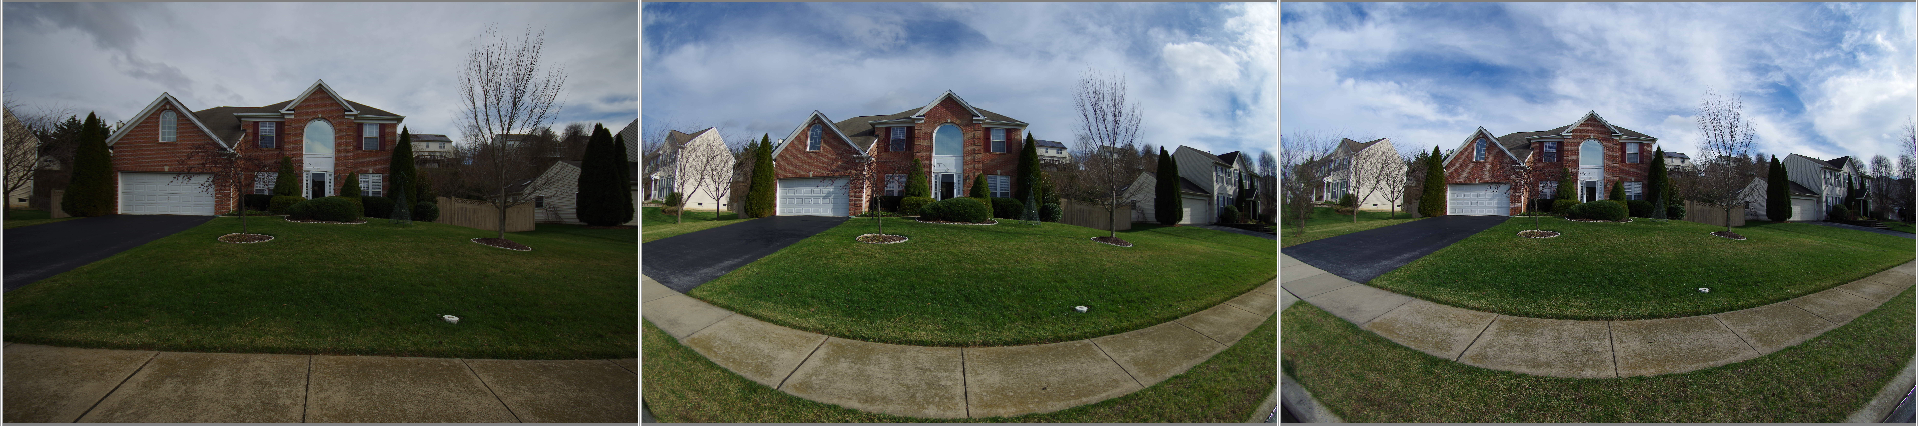
Original DA 10-17FE at 13mm > after adjustments and cropping > Sigma 10-20 at 10mm original
This was my first attempt, and after cropping, it looks like closer to 12mm on the DA 10-17FE will match the field of view of the Sigma 10-20 at 10mm. You can see how nicely the cabinet in the middle straightens out. You can also see the kind of stretching the Sigma at 10mm has to do to render a rectilinear image. Again, the book on the chair on the left is a square book.

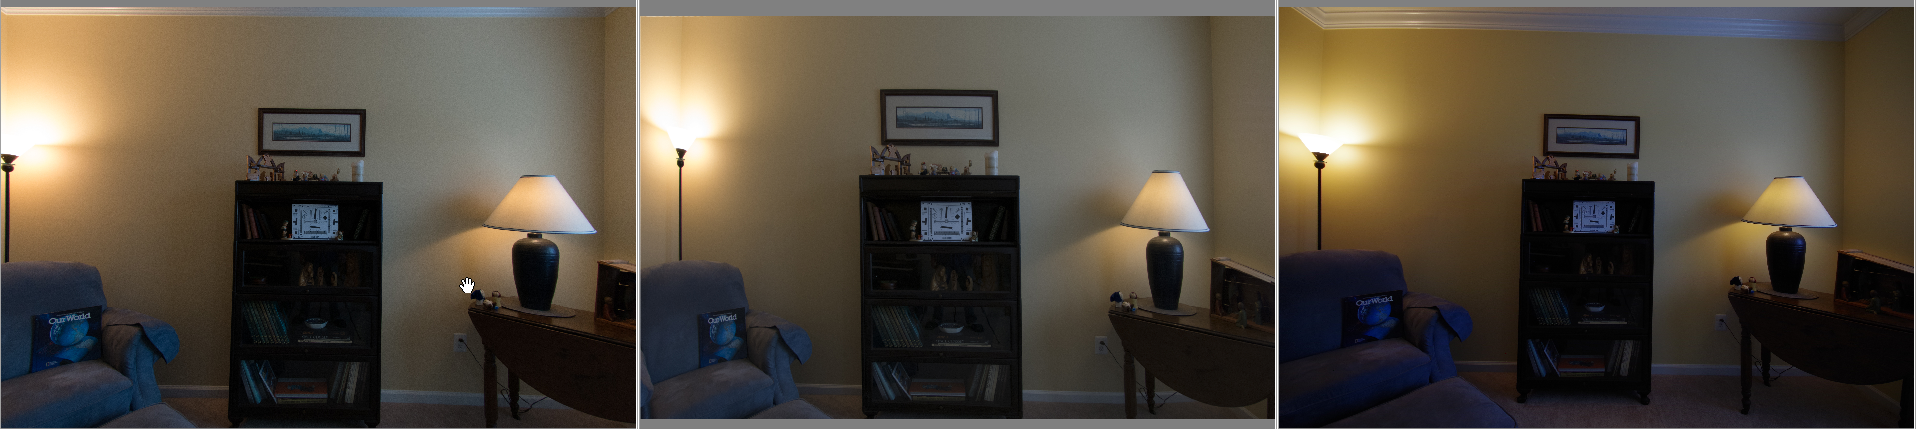
DA 10-17 @ 13mm with LR lens profile correction > DA 10-17 @ 13mm with PS warp adjustments > Sigma 10-20 @ 10mm
At 13mm, I don't need to crop off so much on the top/bottom when adjust warp. That book on the chair is square, so the warping did a pretty good job. Note the perspective/distortion shifts, however. Compare the wideness of the cabinet in the middle with the wideness of the chair and table. Again, the dropleaf table is round, so it appears to me that a better rendering would be somewhere between the view of the warped shot and the Sigma at 10mm.

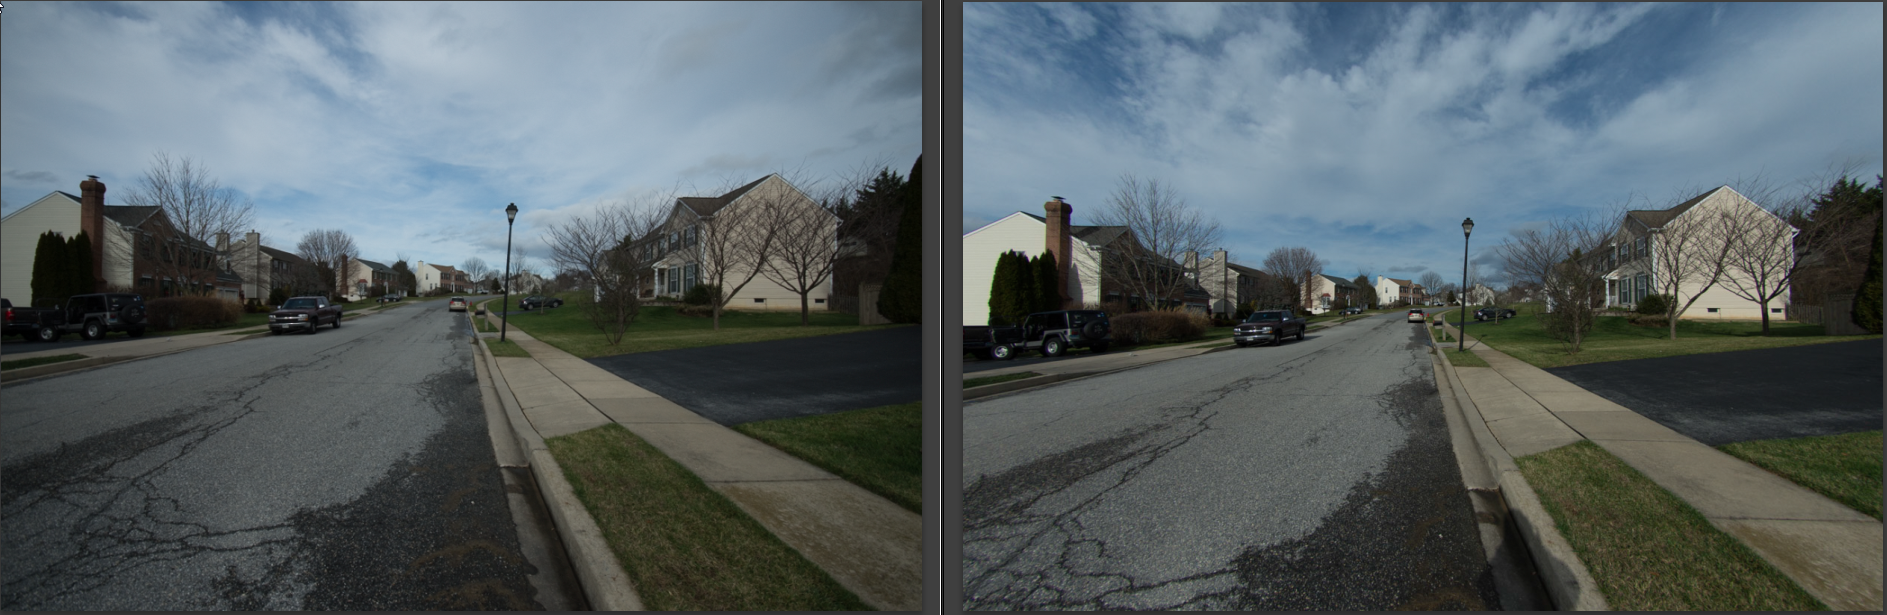
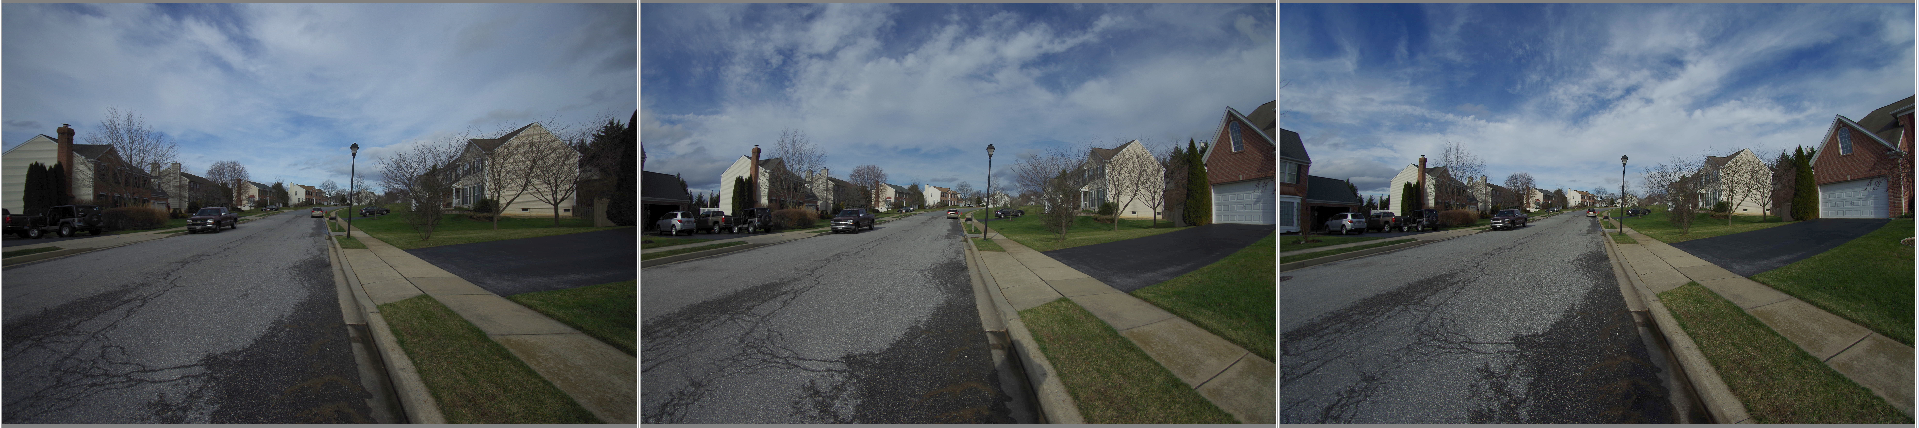
Sigma 10-20 at 10mm > DA 10-17 @ 11mm with LR lens profile correction
This outdoor shot didn't look very fishy to start with, and just using the lens profile correction really tidied up the pic with only a minor loss of frame on the right and left.

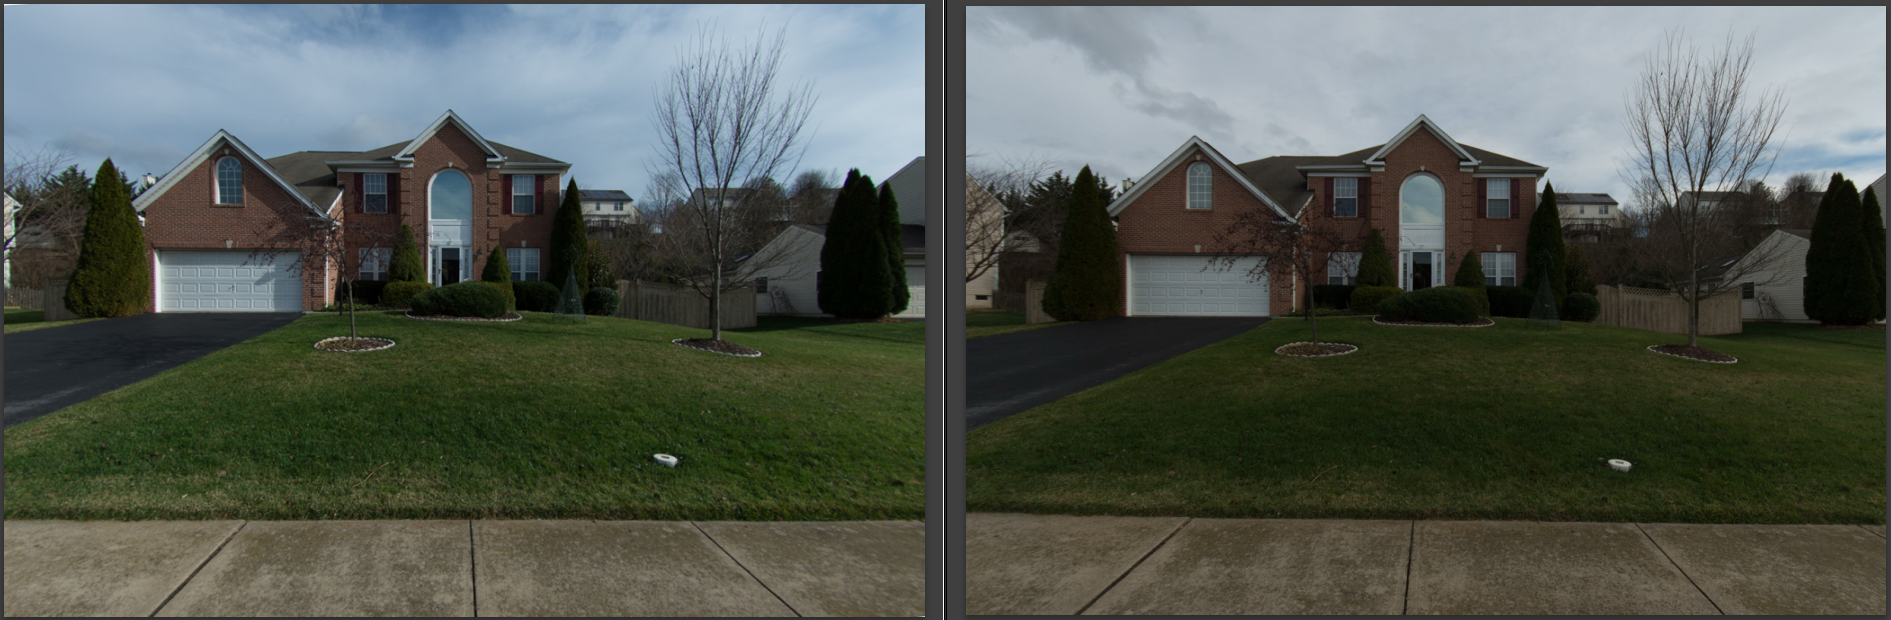
DA 10-17 @ 11mm with PS warp adjustments > Sigma 10-20 @ 10mm
These two look quite similar. You may notice that the center section of the house with the DA is slightly thinner than that section on the Sigma. The objects on the sides of the DA, however, are slightly wider.

BOTTOM LINE: In terms of field of view and perspective only, I am satisfied that the DA 10-17 FE will be able to deliver satisfactory rectilinear renderings that can match the wideness of the Sigma 10-20. It will take a bit of extra work, however, and I will need to assess the effect on the quality of the picture. My initial impressions are that the DA 10-17 FE does quite well even after distortion correction. Also note that I've mainly been looking at the widest end of the DA 10-17 FE. Fishiness is much less pronounce from 14-17mm and takes much less effort to correct.
Last edited by mgvh; 01-02-2016 at 10:40 AM.


 Similar Threads


