Hi,
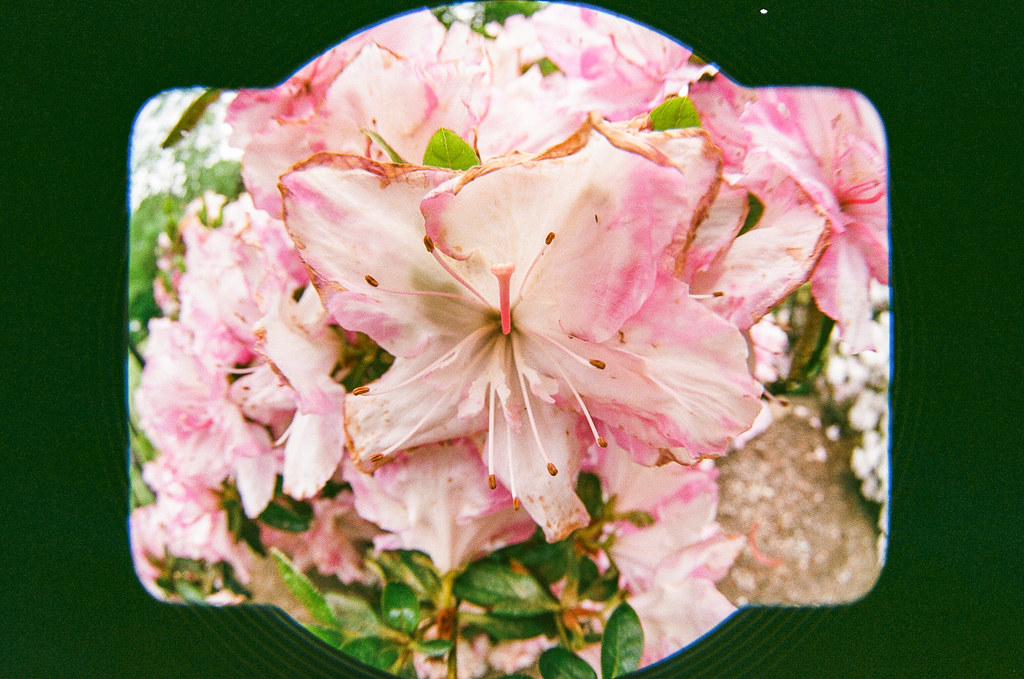
I had bought the beloved Pentax 10-17mm when I had a Pentax DSLR. I now switched to Sony full frame and that lens was useable from 15mm but i was tempted to remove the hood not to see it appearing in the frame from 10mm, to get an almost circular fisheye.
So here’s a process, the highlight compared to other tutorials I had found being the information that you can remove the front element not to damage it. I’m sharing because I didn’t find that information anywhere else, and I've seen some people thinking about it on old threads.
It is obviously risky, so I decline all responsibility. Only proceed if you feel confident and are not traumatized by an eventual damaging of the lens, and if you do try, always take more time than necessary !
Also note that in Europe, you can get it done professionnaly, safer and nicer by 360pano.de
I didn’t take proper pictures in the process but I can post a few later if people are interested.
---------------------
Required tools:
masking tape
electrical soft tape
blue tack
a 33cl metal can
hacksaw with the thinnest possible metal blade (or a dremel or lather if you can)
a small metal file
general purpose glue
1)
Take measurement / make marks on the hood for where to saw
The best is to saw so that the retainer ring sitting between front glass and the hood is flush (level) with the hood. Everything higher on the hood side will show on the picture.
But don’t cut too much because i’m not sure the retainer ring will fit properly after otherwise (it is quite tight and has a screw thread.on its bottom)
2)
Remove front element
Use a lens spanner to grab the very thin circular retainer ring sitting between glass edge and hood internal side.
I used a curved lens spanner set with center of both arcs outside, and the very pointy ends
The two holes in the holder are very very small. The retainer ring didn’t seem to be glued, it unscrews easily if not for the friction between the lens spanner and the hood.
Place the lens spanner carefully, firmly press it down on the lens. Hold both the lens and the spanner firmly.
Give small rotating strokes to unscrew (turning counter clockwise). Don’t intend to unscrew continuously in one movement because that’s where your gesture may be to ample and you’d risk the spanner to slip and scratch the very close convex front element glass.
When you see the circular holder is free, put a microfiber cloth on top of the lens and put the lens upside down. The front and retainer ring will fall.
3)
Make protections to prepare for sawing
Cut a 33cl aluminium can or similar into a band.
Measure length of the retainer ring : outside and inside, make the average and roll the can band into a tube with that diameter. Put chatterton band / electrical soft tape to keep it in shape and tape on all of the bottom edge to make it less damaging when you’ll press it into the lens.
Put a 1mm thick blue tack thread all around the outside of the bottom of that can tube (for sealing against dust).
Place this inside the lens, push the blue tack in.
This will protect the inside from all metal dust.
Tape the lens from bottom to just under the hood with masking tape.
4)
Gently saw the 4 hood bits
Start gently to make a path for the blade. It goes quite fast after to saw the hood bits.
The tricky part is to saw where you want. My saw’s blade was too thick, i was lucky to cut on the right area. I had trouble making it totally flat, it’s slightly uneven and rough but functionnal.
I initially intended to use a jubilee clip to guide the saw, but the one I had was finally to wide (12mm) and couldn’t fit below the part to saw. If you find a slimmer one...
5)
Vacum clean every dust bit before removing protections.
Remove protections
6) Put the lens facing down and
gently grind the edges of the sawed hood to make it more even. Go gently on the inside part of the cut hood because you need to be able to put the retainer ring in after.
Gently vacuum clean the inside.
7)
Put back the front element in the retainer ring and in the lens
Remember the glass goes into the retainer from the inside of the lens, and the retainer’s outside/up side is the one with the holes for the lens spanner.
Put the lens down toward the front element assembly.
Hold it and put it front side up, screw clockwise by hand first, finish with the lens spanner. Be more careful than for disassembly because you don’t have the edges of the hood anymore to help hold the lens spanner in position.
8)
Vacuum everything again, you don’t want any metal dust when cleaning the glass after.
9)
Modify the lens cap
Grind the rough edges of the hood bits you sawed and glue at least the longest 2 bits to the inside of the lens cap.
You can tape some adhesive band inside the lens cap on the edges so it’s a tighter fit, which will compensate the shorter contact length of the cap with more friction when mounted on the lens.
10) Enjoy. I find it quite fantastic to have a lens that can both be almost circular fisheye and full frame diagonal fisheye !
P.S.: Some might be shocked i modified such a nice lens. i hesitated, but my lens already had lost resale value since the autofocus had became inoperant on my pentax (it was making the autofocus noise but nothing was moving).
P.S.2: not a native english speaker, sorry for the grammar and spelling mistakes
Last edited by Pattok; 02-08-2019 at 10:35 AM.


 Post #2 by pepperberry farm
 Similar Threads


