Forgot Password
Pentax Camera Forums Home
 

Reply
Show Printable Version Search this Thread
02-12-2020, 10:06 PM   #1
Site Supporter
Site Supporter


Join Date: Sep 2006
Location: midwest, United States
Photos: Gallery | Albums
Posts: 5,713
3D part for Pentax 60-250 zoom?

I have a 250 on the way and will probably eventually modify it for full frame. I've seen references to a modified 3D printed tube that fits right in. Where do I get one of these in the USA?
Thanks,
barondla

02-13-2020, 05:51 AM - 1 Like   #2
Pentaxian
bdery's Avatar

Join Date: Mar 2008
Location: Quebec city, Canada
Photos: Gallery
Posts: 9,357
You can get the source files here:

Modifying the DA* 60-250mm F4 for Full Frame - Introduction - In-Depth Articles

Then you need to find a shop willing to print for you. There are so many such services, I'm sure you will find one close to you. In my area, public libraries even have 3D printers.
02-13-2020, 07:24 AM - 1 Like   #3
Loyal Site Supporter
Crooski's Avatar

Join Date: Feb 2013
Location: Rozenburg , Zuid-Holland
Photos: Gallery
Posts: 3,672
I completely removed the baffle with a large round file
02-13-2020, 11:08 AM   #4
Site Supporter
Site Supporter


Join Date: Sep 2006
Location: midwest, United States
Photos: Gallery | Albums
Posts: 5,713
Original Poster
QuoteOriginally posted by bdery Quote
You can get the source files here:

Modifying the DA* 60-250mm F4 for Full Frame - Introduction - In-Depth Articles

Then you need to find a shop willing to print for you. There are so many such services, I'm sure you will find one close to you. In my area, public libraries even have 3D printers.
Thanks. Studied the article many times and never thought to click the high lighted first & second to download the files. Duh. Now to find a 3D printer.

Thanks,
barondla

02-13-2020, 03:04 PM   #5
Loyal Site Supporter


Join Date: Dec 2014
Location: Marietta, GA
Posts: 51
I went through this process recently with absolutely no experience or familiarity with 3D printing, materials, or online services.

After doing a bit of research, I used Sculpteo | Online 3D Printing Service for your 3D designs.

After creating an account and uploading the 3D file without the cutout from the article referenced above, I chose the Multijet Fusion PA12 material and added the matte black Color Resist dying as I was not interested in painting the baffle myself. The price for a single baffle without the cutout was $8.40 USD. Unfortunately, the minimum cost for the dying process was $15.00 USD. To meet the minimum cost for the dying process, I ordered two of the baffles for a total of $16.80. Shipping to the US was an additional $6.50 resulting in a grand total of $23.30 for two baffles to be printed, dyed, and shipped to the US.

I created the account, uploaded the files, and placed the order on Jan 31, 2020. The notice that the baffles shipped was sent on Feb 6, 2020. The baffles were delivered by UPS on Feb 10, 2020.

The baffle was installed the next day on Feb 11. My experience was not quite as straightforward as I had hoped.

Following the instructions from article, the baffle assembly was easily removed from the lens and the baffle was easily removed from the plastic ring. Unfortunately, the 3D printed baffle was ever so slightly larger that the ring into which it was supposed to be inserted. Using really fine automotive sandpaper, I slowly worked the outer edge of the baffle until it could be successfully snapped into place. At some point, I removed a little too much of the material and effectively lost the ability to "snap" it into the ring. Since I had a second baffle on hand, I started the process over again using the second baffle. Without a second baffle on hand, I would have been far more careful and deliberate the first time. At some point, the baffle would snap into the plastic ring. The baffle seemed as if it would/could "pop" out a little more easily than I was comfortable with. As suggested in the article, I applied silicone sealer the keep the baffle affixed to the plastic ring. Once the silicone sealer dried, the baffle assembly was cleaned and re-installed in the lens.

I am not particularly handy, so your experience will likely be much smoother/easier. Preliminary tests yielded results consistent with the other threads and I am very happy with the end result.
02-13-2020, 10:49 PM   #6
Site Supporter
Site Supporter


Join Date: Sep 2006
Location: midwest, United States
Photos: Gallery | Albums
Posts: 5,713
Original Poster
QuoteOriginally posted by jbrill Quote
I went through this process recently with absolutely no experience or familiarity with 3D printing, materials, or online services.

After doing a bit of research, I used Sculpteo | Online 3D Printing Service for your 3D designs.

After creating an account and uploading the 3D file without the cutout from the article referenced above, I chose the Multijet Fusion PA12 material and added the matte black Color Resist dying as I was not interested in painting the baffle myself. The price for a single baffle without the cutout was $8.40 USD. Unfortunately, the minimum cost for the dying process was $15.00 USD. To meet the minimum cost for the dying process, I ordered two of the baffles for a total of $16.80. Shipping to the US was an additional $6.50 resulting in a grand total of $23.30 for two baffles to be printed, dyed, and shipped to the US.

I created the account, uploaded the files, and placed the order on Jan 31, 2020. The notice that the baffles shipped was sent on Feb 6, 2020. The baffles were delivered by UPS on Feb 10, 2020.

The baffle was installed the next day on Feb 11. My experience was not quite as straightforward as I had hoped.

Following the instructions from article, the baffle assembly was easily removed from the lens and the baffle was easily removed from the plastic ring. Unfortunately, the 3D printed baffle was ever so slightly larger that the ring into which it was supposed to be inserted. Using really fine automotive sandpaper, I slowly worked the outer edge of the baffle until it could be successfully snapped into place. At some point, I removed a little too much of the material and effectively lost the ability to "snap" it into the ring. Since I had a second baffle on hand, I started the process over again using the second baffle. Without a second baffle on hand, I would have been far more careful and deliberate the first time. At some point, the baffle would snap into the plastic ring. The baffle seemed as if it would/could "pop" out a little more easily than I was comfortable with. As suggested in the article, I applied silicone sealer the keep the baffle affixed to the plastic ring. Once the silicone sealer dried, the baffle assembly was cleaned and re-installed in the lens.

I am not particularly handy, so your experience will likely be much smoother/easier. Preliminary tests yielded results consistent with the other threads and I am very happy with the end result.
Thank you for this valuable information. If I chose to 3D print the part, it will probably be done by Sculpteo. Did you pick the circular opening or the more complicated one?
Thanks,
barondla
02-14-2020, 04:28 AM - 1 Like   #7
Loyal Site Supporter


Join Date: Dec 2014
Location: Marietta, GA
Posts: 51
I chose the baffle with the circular opening. I did not want to deal with having to properly align the cutout in the more complicated baffle. For me, it was one less thing that could go awry.

09-03-2020, 11:55 AM   #8
Site Supporter
Site Supporter


Join Date: Jan 2010
Location: Netherlands
Photos: Gallery
Posts: 438
I've been looking for a print service here in The Netherlands. 3D pint services enough, but with a minimum order of 100 euro..... not really an alternative...
I think i will place the order also at Sculpteo.
09-09-2020, 12:13 PM   #9
Site Supporter
Site Supporter


Join Date: Jan 2010
Location: Netherlands
Photos: Gallery
Posts: 438
Anyone know what kind of glue to use. In the treath he is talking about Silicone sealant. But what is that exactly?
09-09-2020, 01:54 PM   #10
Veteran Member


Join Date: Mar 2012
Location: Chicago
Photos: Gallery
Posts: 360
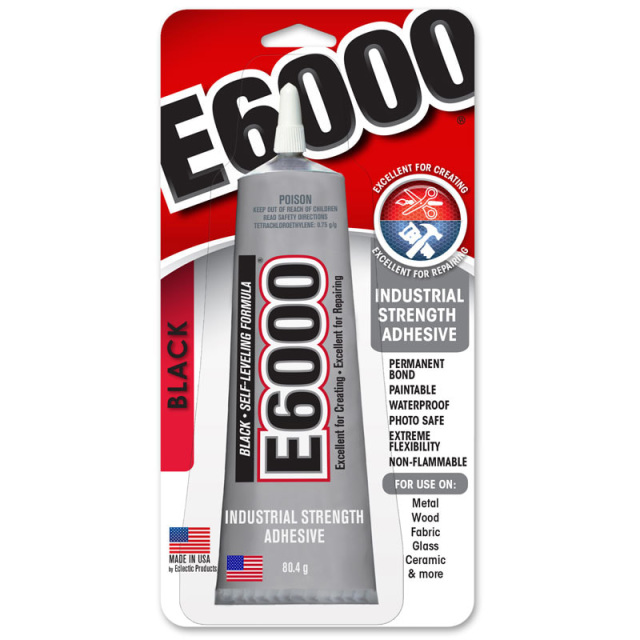
I plan to use E6000, unless someone here tells me otherwise.
09-09-2020, 03:51 PM   #11
Loyal Site Supporter


Join Date: Dec 2014
Location: Marietta, GA
Posts: 51
QuoteQuote:
For a more robust link, place a few drops of adhesive outside the baffle. We do not recommend using hot glue, as it could soften or melt if the lens is used in a hot environment. Silicone sealant, or any soft and easy to remove adhesive, will be a better choice.

Read more at: Modifying the DA* 60-250mm F4 for Full Frame - Lens Re-assembly - In-Depth Articles
I used Loctite Clear Silicone Waterproof Sealant. It is an adhesive that creates a waterproof seal. I am pretty sure that I already had it on hand.
09-11-2020, 12:14 PM   #12
Site Supporter
Site Supporter


Join Date: Jan 2010
Location: Netherlands
Photos: Gallery
Posts: 438
I checked the specs of both E6000 and loctite, Loctite can give some problems with some type of plastics. So i guess E6000 is the better way to go. And it is also available in black

E6000 Adhesive - 80.4g 2oz Black Opaque

09-18-2020, 06:40 AM   #13
Site Supporter
Site Supporter


Join Date: Jan 2010
Location: Netherlands
Photos: Gallery
Posts: 438
I tested the E6000 before at an old trow-away-lens. Drying time is 42 hours, and after 72 hours it is at it's strongest. So, after 72 hours i tried to remove it from the glass of that old lens with no problem, and no resideu.

In the mean time i ordered both type of baffels, and already recieved them and removed the original baffel. The 3d printed baffels where a tiny bit to large, but some very fine sandpaper solved that problem in 5 minutes.

So i used E6000 to glue the baffel to the ring. It is drying right now. This evening i can place it back in the 60-250.
I am very happy
09-18-2020, 01:55 PM - 2 Likes   #14
Site Supporter
Site Supporter


Join Date: Jan 2010
Location: Netherlands
Photos: Gallery
Posts: 438
New baffel in place
Attached Images
View Picture EXIF
VTR-L09  Photo 
09-20-2020, 02:00 AM - 1 Like   #15
Site Supporter
Site Supporter


Join Date: Jan 2010
Location: Netherlands
Photos: Gallery
Posts: 438
The difference is really unbelievable. It really changed it to a full frame lens. It now really has become a D-FA* 60-250.
Attached Images
View Picture EXIF
PENTAX K-1 Mark II  Photo 
View Picture EXIF
PENTAX K-1 Mark II  Photo 
Reply

Bookmarks
  • Submit Thread to Facebook Facebook
  • Submit Thread to Twitter Twitter
  • Submit Thread to Digg Digg
Tags - Make this thread easier to find by adding keywords to it!
3d, k-mount, pentax lens, slr lens
Thread Tools Search this Thread
Search this Thread:

Advanced Search


Similar Threads
Thread Thread Starter Forum Replies Last Post
Pentax 60-250mm 3D printing Gareth Pentax SLR Lens Discussion 11 01-31-2020 03:39 PM
DA* 60-250 owners: How do you carry your 60-250 at the ready? apisto Pentax SLR Lens Discussion 25 12-30-2017 01:49 PM
For Sale - Sold: Pentax DA* 60-250, 16-50, Sigma 10-20 3.5, Pentax 18-250 millertime Sold Items 9 10-04-2015 07:23 PM
Cheap 3D - Sony Bloggie, Fuji W3, LG Optimus, HTC Evo 3D... or? Unsinkable II Canon, Nikon, Sony, and Other Camera Brands 7 06-23-2012 09:36 PM


All times are GMT -7. The time now is 07:01 AM. | See also: NikonForums.com, CanonForums.com part of our network of photo forums!
  • Red (Default)
  • Green
  • Gray
  • Dark
  • Dark Yellow
  • Dark Blue
  • Old Red
  • Old Green
  • Old Gray
  • Dial-Up Style
Hello! It's great to see you back on the forum! Have you considered joining the community?
register
Creating a FREE ACCOUNT takes under a minute, removes ads, and lets you post! [Dismiss]
Top