@
awscreo
Jean has more experience tinkering than I, but here's what I know about element reversing on my 44-2:
The only tool that's really necessary is a lens spanner wrench (or a
reasonable facsimile) However, I've found it helpful to also have on hand a rubber glove and an air blower.
The glove is for handling the element to keep it free from fingerprints and smudges, and the blower helps to minimize dust on the glass.
In this case, fingerprints and dust might actually enhance the "image quality"

, but they might also provide potential nutrients for fungal growth.
Better safe than sorry, I think.
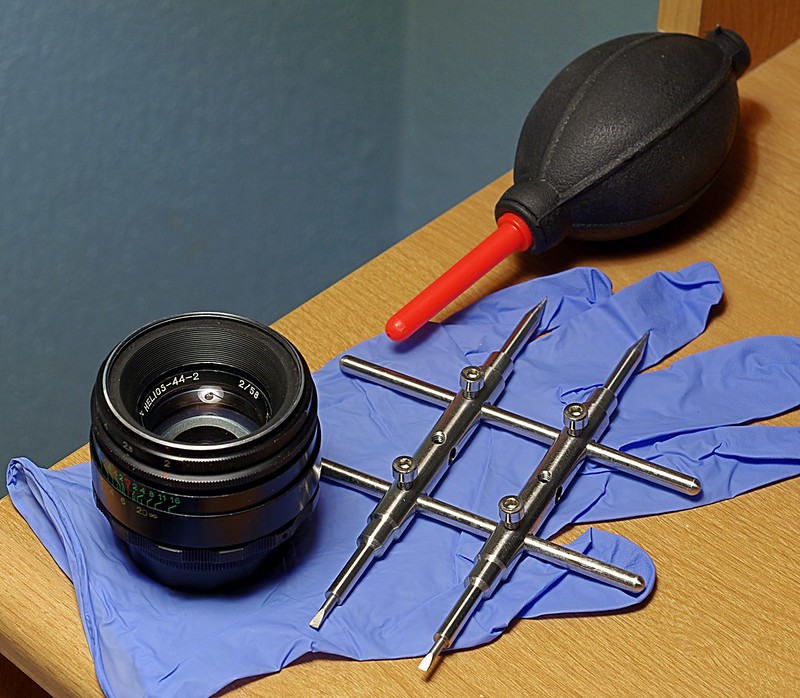
The front element retainer / name ring has two notches for the spanner blades to fit into. Then it's just the conventional counter-clockwise motion to loosen the ring.
If your spanner is built like mine, be careful when inserting and adjusting it into the name ring. If the blades on my spanner are spaced too wide, they'll gouge the surrounding parts of the lens. And when you have your spanner in place, apply firm, consistent pressure to keep the blades inserted into the notches. It's easy for the spanner blades to jump out of the notches and leave scratches.
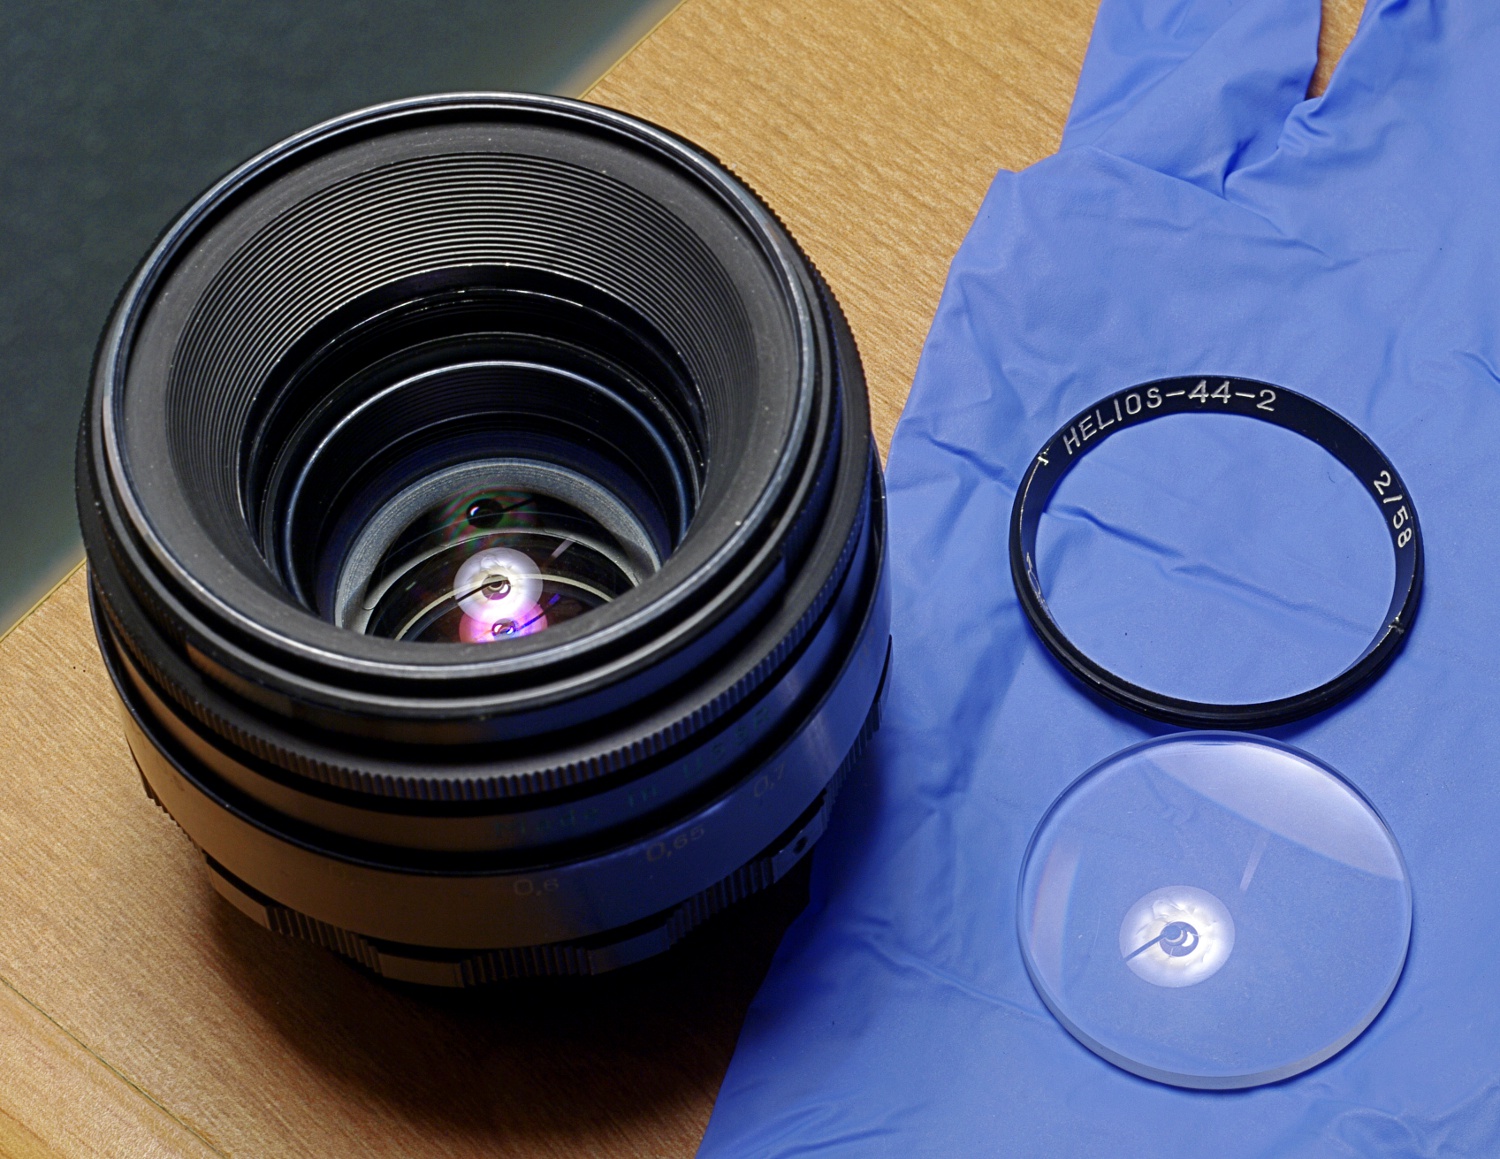
When you can feel the name ring is free, put on the rubber glove - or use a soft cloth - to catch the name ring and element. Tip the lens just far enough to get them to fall out. Don't turn the lens face down or the spacer and lens group beneath the front element may fall out, too.
A little wiggling or gentle tapping was enough to get my front element to come out.

Then, make everything as clean as you can, flip the element, and re-insert. It's a bit harder to get it back in because the of the distance to its resting place. I held the lens sideways to get the element as close as I could to the opening and then slowly tilted the lens up until the element slid down into place. Some sort of suction cup tool would make replacing the element easier, but I don't have anything like that
In normal orientation, the front element rests on the spacer I mentioned earlier, and the convex side faces up. When you reverse the element and the convex side now faces down, it no longer rests on that spacer but actually makes contact with the next element below. I've read some people put a (soft) washer between the elements to prevent scratching, but I haven't pursued that.
In fact, unless one wants to revert a lens to conventional orientation, I wouldn't worry much about scratching the coatings or the glass itself. If anything a reversed lens might benefit from some additional scratch induced flare effects!

I think the best option, as you mentioned awscreo, is to have two lenses. Then there's no need to switch back and forth.
Okay, returning to re-assembly... The reversed element will wobble around, but try to center it as much as possible. Then drop the name ring / retainer back into place. This is where having a two bladed spanner tool is important. It might be possible to
remove the ring with a small screwdriver, but re-installing it is much easier (for me) with the even pressure provided by my spanner wrench.
It'll probably take some fiddling to get the ring to thread on properly. Take your time and be gentle to avoid crossed threads. Once you have it threaded correctly, tighten it down and go out and shoot!
That's what I've been doing. And it was Jean's pictures which inspired me to try reversing my own 44-2. This is one of my favorites
(f/2 on Canon 5D with a cutout star shape 'filter' at the front of the lens):


 Post #482 by schnitzer79
 Similar Threads


