Forgot Password
Pentax Camera Forums Home
 

Reply
Show Printable Version 13 Likes Search this Thread
10-22-2014, 12:13 PM   #16
Veteran Member
artobest's Avatar

Join Date: Jul 2008
Location: Swansea, Wales
Posts: 455
QuoteOriginally posted by Swift1 Quote
I'm using the unexposed film base to set my black point, so by default nothing within the frame will/could possibly end up on the left side of the black point.
Only initially; if I read your original post correctly, you tinker with the black point later. Histograms in scanner software are quite imprecise - I think it's safest to back off your black point and set it properly later, when you have better tools to evaluate it.

10-22-2014, 01:22 PM   #17
Veteran Member


Join Date: Sep 2009
Location: Oregon
Photos: Gallery | Albums
Posts: 5,079
Original Poster
QuoteOriginally posted by artobest Quote
Only initially; if I read your original post correctly, you tinker with the black point later. Histograms in scanner software are quite imprecise - I think it's safest to back off your black point and set it properly later, when you have better tools to evaluate it.
I did tinker with the black point later, but also explained that I move the black triangle back to where it was before.
Yesterday, I played around with using the method that you recommended, and it definitely has it's merits. I had a tough time with getting good color balance after inverting though, but I imagine practice would help.
Also after all said and done, I couldn't see any real significant improvement one the final image, compared to the same image scanned my normal way.
Scanning as a positive has the benefit of being able to return to an unadulterated source file and re-processing, without rescanning, if you're unhappy with your initial results.

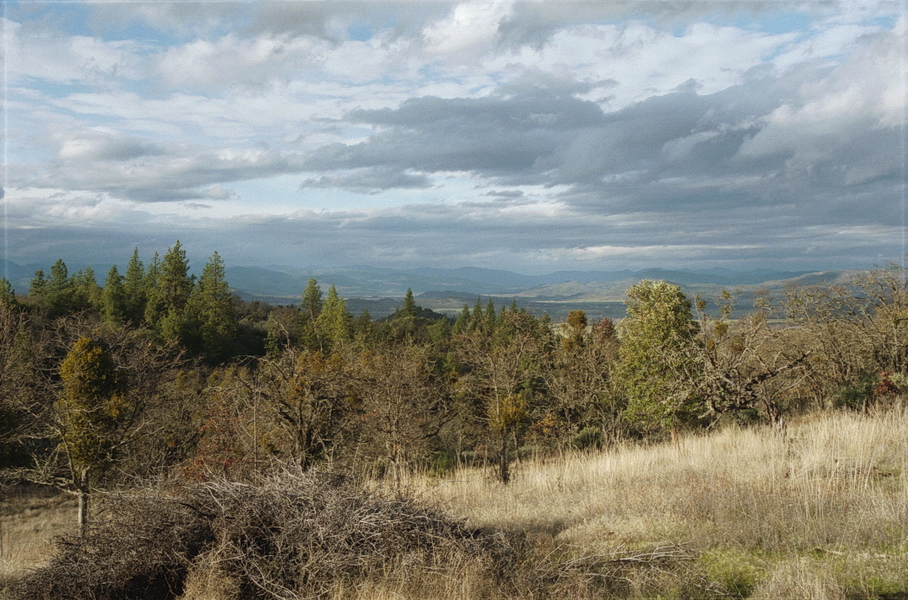
Here are my best efforts using each method.


10-22-2014, 10:50 PM   #18
Otis Memorial Pentaxian
stevebrot's Avatar

Join Date: Mar 2007
Location: Vancouver (USA)
Photos: Gallery | Albums
Posts: 42,007
QuoteOriginally posted by Swift1 Quote
As with most things, if something isn't working for you then you need to find a different method. For me currently, my method is working for me.
That is who counts, right?

I diverge from artobest on several points as well, but am generally happy with my results.


Steve
10-23-2014, 01:24 AM   #19
Senior Member


Join Date: Jan 2014
Posts: 151
Thank you for sharing your method!

I wanted to mention, you can scan at 48 bits and still save as a jpeg. That's what I do. I've compared the outputs, and the '48 bit' are definately better than the 24 bit ones imo.


10-23-2014, 08:59 AM   #20
Veteran Member


Join Date: Sep 2009
Location: Oregon
Photos: Gallery | Albums
Posts: 5,079
Original Poster
QuoteOriginally posted by Ranchu Quote
Thank you for sharing your method!

I wanted to mention, you can scan at 48 bits and still save as a jpeg. That's what I do. I've compared the outputs, and the '48 bit' are definately better than the 24 bit ones imo.

Did you test that using the same negative and same settings? Jpeg is only able to save 24bit data, so scanning at 48 bit and saving as a jpeg shouldn't yield results any different than scanning at 24 bit.
I tested it and as far as I can tell there is no difference between scanning at 48 bit and 24 bit and saving as a jpeg.
10-23-2014, 11:47 AM   #21
Senior Member


Join Date: Jan 2014
Posts: 151
QuoteOriginally posted by Swift1 Quote
Did you test that using the same negative and same settings?
Well, of course.

10-23-2014, 12:29 PM   #22
Veteran Member


Join Date: Sep 2009
Location: Oregon
Photos: Gallery | Albums
Posts: 5,079
Original Poster
QuoteOriginally posted by Ranchu Quote
Well, of course.

Just curious
I have tried your suggestion a few times, but I can't see that it's is better. I have found that scanning as a 48 bit TIFF file, then later convert to 24 bit jpeg in PS will give better results.

10-23-2014, 12:39 PM   #23
Senior Member


Join Date: Jan 2014
Posts: 151
No doubt. I scan a bit differently than your method here, so that might account for it. However, it does cost nothing to set it at 48..

10-23-2014, 01:46 PM   #24
Pentaxian


Join Date: May 2011
Location: Santa Cruz, CA
Photos: Albums
Posts: 3,235
QuoteOriginally posted by Ranchu Quote
I wanted to mention, you can scan at 48 bits and still save as a jpeg. That's what I do. I've compared the outputs, and the '48 bit' are definately better than the 24 bit ones imo.
I notice in ACDSee that they have a 48bit JPEG format. I am not sure if this is a standardized format or proprietary to this application only but it does save out 48Bits. These files are smaller than the original 48Bit TIF I get from my original scans. Is this how your 48Bit JPEG files are saved?

Or do you scan at 48Bits and save as regular JPEG in 24Bit?

Last edited by LesDMess; 10-23-2014 at 01:58 PM.
10-23-2014, 03:53 PM   #25
Veteran Member


Join Date: Sep 2009
Location: Oregon
Photos: Gallery | Albums
Posts: 5,079
Original Poster
QuoteOriginally posted by LesDMess Quote
I notice in ACDSee that they have a 48bit JPEG format. I am not sure if this is a standardized format or proprietary to this application only but it does save out 48Bits. These files are smaller than the original 48Bit TIF I get from my original scans. Is this how your 48Bit JPEG files are saved?

Or do you scan at 48Bits and save as regular JPEG in 24Bit?
AFAIK, Epson Scan doesn't have the ability to output 48 bit jpeg.
10-24-2014, 12:27 AM   #26
Senior Member


Join Date: Jan 2014
Posts: 151
Yes, they're definitely saved as regular 24 bit jpegs. I set the main controls to scan at 48 bits, but save regular jpegs. The only way I know how to use a piece of software is to to push all the buttons on and off and see what happens, so that's what I do...eventually...Epson Scan is very good software imo.

Your picture of the field and sky is quite beautiful btw, swift1.


Last edited by Ranchu; 10-24-2014 at 12:38 AM.
10-24-2014, 08:46 AM   #27
Veteran Member
LFLee's Avatar

Join Date: Aug 2009
Location: Southern California
Photos: Gallery | Albums
Posts: 2,292
QuoteOriginally posted by artobest Quote
While it's always interesting to see other people's working methods, your workflow concerns me for several reasons. First, and this may simply be a matter of preference, you are scanning as colour negative. This will cause your scanner driver to bake in a tonal response curve that, in my experience, is rarely desirable. Scanning as positive and inverting in Photoshop gives a more linear tonal response and, in my opinion, greater latitude for editing. You will need to set black and white points individually for each colour channel, which effectively eliminates the orange mask and provides a good basis for further tweaking in Photoshop or Lightroom, with their more advanced controls.

Secondly, you are scanning in 8-bits. This is a bad idea on several counts, not least because it reduces your leeway for post facto editing - you risk banding if you subsequently make colour or tonal adjustments in the finished scan. Solution: scan in 16-bits (ie 48-bit colour) and resave as 8-bit later if you really need to save space.

Thirdly, you are clipping the blacks in your scan. The black point should never intrude on the histogram as you show, since all the picture information to the left of it will be irretrievably cut from the scan. If you want deep, dark blacks, you can do that later with a non-destructive adjustment layer or Lightroom edit.

Lastly, saving as jpeg instead of tiff means you'd better be damn sure that your scan is perfect when it comes off the scanner, because any future saves will inevitably degrade the file.

Of course, there is another conversation to be had here about whether it is best to do as much as possible pre-scan, but I believe that scanning as 16-bit positive gives you the best of both worlds.
would definitely love to know your method of scanning, it would benefit the community if you can write a step-by-step tutorial like Colton did....

Please share your method when you have time!
10-24-2014, 02:13 PM   #28
Veteran Member


Join Date: Sep 2009
Location: Oregon
Photos: Gallery | Albums
Posts: 5,079
Original Poster
QuoteOriginally posted by Ranchu Quote
Your picture of the field and sky is quite beautiful btw, swift1.

Thank you
04-24-2015, 12:20 PM   #29
Veteran Member


Join Date: Sep 2009
Location: Oregon
Photos: Gallery | Albums
Posts: 5,079
Original Poster
I decided to move this entire article to my personal website.

It can now be found here,
Scanning Color Film | Photography by Colton Allen
04-24-2015, 01:25 PM - 1 Like   #30
Loyal Site Supporter
baro-nite's Avatar

Join Date: Aug 2011
Location: North Carolina, USA
Photos: Gallery | Albums
Posts: 5,295
Website looks great!
Reply

Bookmarks
  • Submit Thread to Facebook Facebook
  • Submit Thread to Twitter Twitter
  • Submit Thread to Digg Digg
Tags - Make this thread easier to find by adding keywords to it!
color, ektar, epson, film, histogram, photography, preview, results, scan, settings, software

Similar Threads
Thread Thread Starter Forum Replies Last Post
Ektar 100 5 rolls pack for $23.50 LFLee Pentax Medium Format 3 12-16-2013 08:58 PM
People Leah, Secret Beach (Pentax LX + Ektar) alan_smithee_photos Post Your Photos! 14 08-31-2013 07:19 AM
People Hannah at Secret Beach - Pt. 1 (Ektar vs. Portra) alan_smithee_photos Post Your Photos! 14 07-12-2013 09:45 PM
People Shooting my own pre-wedding w/ "Ryan Brenizer Method". LFLee Post Your Photos! 16 04-06-2013 09:13 AM
My first try at Ektar filmamigo Film SLRs and Compact Film Cameras 31 07-04-2009 07:40 PM


All times are GMT -7. The time now is 09:18 PM. | See also: NikonForums.com, CanonForums.com part of our network of photo forums!
  • Red (Default)
  • Green
  • Gray
  • Dark
  • Dark Yellow
  • Dark Blue
  • Old Red
  • Old Green
  • Old Gray
  • Dial-Up Style
Hello! It's great to see you back on the forum! Have you considered joining the community?
register
Creating a FREE ACCOUNT takes under a minute, removes ads, and lets you post! [Dismiss]
Top