Forgot Password
Pentax Camera Forums Home
 

Reply
Show Printable Version 6 Likes Search this Thread
05-23-2017, 04:45 PM   #31
Pentaxian


Join Date: May 2011
Location: Santa Cruz, CA
Photos: Albums
Posts: 3,235
QuoteOriginally posted by TonyW Quote
I did misunderstand with the assumption you were suggesting mine only observation with no data.
Actually, it wasn't until your fourth response that you listed the external references. So I take it that what you have represented as facts are corroborated by those external references you cited.

It should come as no surprise that I wouldn't know any of them as clearly we live in the information age and there's a lot of data out there. It's great that experts want to share their experiences.

05-24-2017, 02:41 AM   #32
Veteran Member


Join Date: Feb 2016
Posts: 706
QuoteOriginally posted by leekil Quote
It seems to me there are two factors; one is the size of the droplets of ink, and the other is the precision at which the printer can place a single drop. The printer also does not put one drop of ink on the paper, corresponding to one pixel of image data; in order to get certain colors, it needs to print two or more colors of ink at the same spot in order to achieve the precise color. So possibly when printing at different resolutions, it will achieve more precise color gradations, but not any higher image resolution? In this case, it would be that the "screen printing" resolution would be the resolution you set it at, and you get the equivalent of a finer dither pattern at higher resolutions?

Also at play is a different drop size that can be laid down. For the P800 it says:

Minimum Ink Droplet Size:
* 3.5 picoliters
* Variable Droplet Technology can produce up to 3 different droplet sizes per print line
Seems to me to be a fair assumption to make. The printer must lay down several droplets of ink to produce all colours, hence the resolution quoted 720, 1440, 2880, 5760 Epson (600,1200, 2400, 4800 Canon). These may be referred to as Draft, Standard, Fine, SuperFine, or whatever the manufacturer decides. Ink droplets will spread and dry into the paper surface and in the case of pigment inks particularly may actually also sit on the surface. Also the way that the droplets spread and dry will be very much influenced by the nature of the paper surface.

QuoteQuote:
apparently the smaller drop sizes are used to lay down different volumes of ink? Is this used in conjunction with the print resolutions, or separate from it?
The droplets are incredibly small volumes of ink the 3.5 picoliter for the P800 being 0.0000000035 millilitre and the 1.5 being 0.0000000015 millilitre. It would seem logical that the smaller droplets would be used mainly in lighter areas of the print that in theory should enable more subtle gradations in these areas - I do not have any proof that this is the case.

I think that the size and the number of droplets laid down overall relates to the print quality and yes this should I believe to a degree influence perceived print resolutions. That would require undertaking more testing under strict conditions to prove or disprove, I have not seen or actually looked for any learned examples.

However it should be relatively easy to prove (with good image data!) the effects of increasing / decreasing ppi on IQ. Assuming we want to get the maximum IQ just set the printer to its finest quality in the print driver and on our best paper stock (probably glossy or smooth satin etc.) produce a series of prints. For each print specify the required resolution while keeping the image size in pixels the same. Epson start with 180, 360, 720, 1440, for Canon 150, 300, 600, 1200. What you should see is a jump in IQ between each step, it may be gradual or quite noticeable depending on image content. But the IQ jump will eventually stop and you will not see any difference going any higher, this will be the limit of printer resolution although you should double check against different data to make sure you have presented the 'best' data. If you really have time and money on your hands you may want to try other intermediate resolutions and see what happens by changing printer quality dpi setting as well.

Doing this you will have to decide what suits the image type and your preferences, remembering that we are looking here at maximising the IQ to be viewed at close distances. If this is not a particularly strong requirement and larger prints are going to be viewed at 'normal' distances you can get away with lesser IQ which will not be noticed by the average user

---------- Post added 05-24-17 at 02:53 AM ----------

QuoteOriginally posted by LesDMess Quote
Actually, it wasn't until your fourth response that you listed the external references. So I take it that what you have represented as facts are corroborated by those external references you cited.
Exactly, what I have represented as fact is based on my own tests and has been corroborated by those references I cited. In fact it was likely that those references spurred me on to check for myself either that or I had observed something and looked for an explanation.

Wherever possible I will always strive to find corroborating evidence of my findings from my peers or try to remember to state that these are just my opinions. Until asked for proof (which is very fair in this world of net misinformation) I will not normally include references to others findings unless it clearly helps to clarify or illustrate a point.
05-25-2017, 06:53 AM   #33
Pentaxian


Join Date: Jul 2009
Location: Pugetopolis
Posts: 11,029
QuoteOriginally posted by Femto1969 Quote
Does quality increase if you buy the film holder for the scanner? I was definitely planning on getting one of those. It seems like I could get an outfit for around $300, which I am certainly willing to pay if it will provide me with the results I need.
A film holder that can hold 120 roll film flat will be essential for large prints. When you look a your BW film scan a can at 1:1 on your computer screen you really can see imperfections. You'll see that in a really big print when you walk up to it too.

I can only dream of getting a sharp scan edge-to-edge with my scanner. It had a glass carrier option that did fine in that regard but there was now 4 extra dust magnet surfaces to clean with micro fine dust that wouldn't blow off. And years of cleaning the glass it ended up with fine scratches that started to show up in the image like you had a bad filter on your camera lens or something.

And with the stock 120 film holder I now use (no glass), the images are clearer but impossible to get flat and looking at it close you see areas of sharp and blurry. It's not hardly noticeable on these scaled down computer images shared online. But you'd see it on a larger image.
05-25-2017, 07:33 AM   #34
Senior Member


Join Date: Apr 2017
Photos: Gallery
Posts: 120
Original Poster
QuoteOriginally posted by tuco Quote
A film holder that can hold 120 roll film flat will be essential for large prints. When you look a your BW film scan a can at 1:1 on your computer screen you really can see imperfections. You'll see that in a really big print when you walk up to it too.

I can only dream of getting a sharp scan edge-to-edge with my scanner. It had a glass carrier option that did fine in that regard but there was now 4 extra dust magnet surfaces to clean with micro fine dust that wouldn't blow off. And years of cleaning the glass it ended up with fine scratches that started to show up in the image like you had a bad filter on your camera lens or something.

And with the stock 120 film holder I now use (no glass), the images are clearer but impossible to get flat and looking at it close you see areas of sharp and blurry. It's not hardly noticeable on these scaled down computer images shared online. But you'd see it on a larger image.
I guess thats another case for using the Macro/DSLR method. Or just getting the film professionally scanned. I'll continue to think about it. Any tips on buying a lightbox suitable for this method?

I'm now trying to determine which film I should start off with. I bought a 10 pack of Ultrafine because it was the cheapest. Now I am seeing that I should me much more strategic about what kind of film I use. Since I will be shooting landscapes in Seattle and I want to turn the keepers into large print wallhangers I may want to buy film that has a high lines/mm and has decent reciprocity. Do you have any recommendations or good resources for evaluating/reviewing film? Or is film detail not that big of an issue?

05-25-2017, 09:33 AM   #35
Pentaxian


Join Date: Jul 2009
Location: Pugetopolis
Posts: 11,029
QuoteOriginally posted by Femto1969 Quote
I guess thats another case for using the Macro/DSLR method. Or just getting the film professionally scanned.
...
I may want to buy film that has a high lines/mm and has decent reciprocity. Do you have any recommendations or good resources for evaluating/reviewing film? Or is film detail not that big of an issue?

I haven't done any DSLR scanning to comment in depth on that process.

100ACR (Arcos) is a tabular grain film and pretty much has no reciprocity failure characteristics and is a good film for long exposures. But its data sheet does say to add 1/2-stop of additional exposure for exposures longer than 120 seconds, however.

And if you are new to BW film and developing your own you may have to put a lot of time in shooting and learning your film and process before expecting really good results. But no doubt some people will be faster at it than others. So you just need to try film out for yourself and your process and don't expect too much too fast.

So I think a good starting strategy is set your expectation somewhat modestly and work your way up to bigger prints over time and occasionally send out for a good drum scan to see if this is the path you want to take.

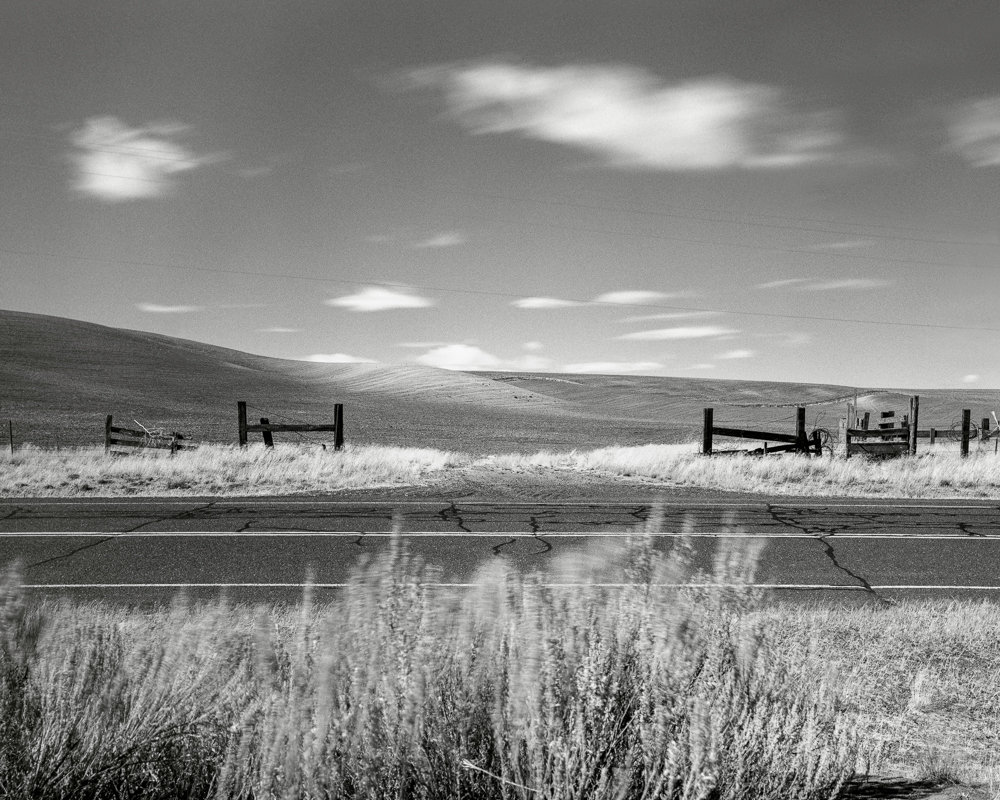
Here are a couple examples of long exposures on 100ACR and 400TMY. In the 400TMY case I wanted reciprocity failure because with a 9-stop ND + 2-stop Orange, I still didn't have a long enough exposure time to blur the clouds and foreground grass as much as like in the bright Sun. And in the Nautical Twilight shot, Acros worked out well to use because I didn't want a really long 45 min or 1 hour exposure time due to those clouds were moving my way and would have covered the sky.

500C/M, 50/4 FLE, 100ACR


Pentax 67, 55/4, 400TMY @ EI 100, NDX400 + O2 Orange


Last edited by tuco; 05-25-2017 at 10:07 AM.
05-25-2017, 10:32 AM   #36
Senior Member


Join Date: Apr 2017
Photos: Gallery
Posts: 120
Original Poster
QuoteOriginally posted by tuco Quote
I haven't done any DSLR scanning to comment in depth on that process.

100ACR (Arcos) is a tabular grain film and pretty much has no reciprocity failure characteristics and is a good film for long exposures. But its data sheet does say to add 1/2-stop of additional exposure for exposures longer than 120 seconds, however.

And if you are new to BW film and developing your own you may have to put a lot of time in shooting and learning your film and process before expecting really good results. But no doubt some people will be faster at it than others. So you just need to try film out for yourself and your process and don't expect too much too fast.

So I think a good starting strategy is set your expectation somewhat modestly and work your way up to bigger prints over time and occasionally send out for a good drum scan to see if this is the path you want to take.

Here are a couple examples of long exposures on 100ACR and 400TMY. In the 400TMY case I wanted reciprocity failure because with a 9-stop ND + 2-stop Orange, I still didn't have a long enough exposure time to blur the clouds and foreground grass as much as like in the bright Sun. And in the Nautical Twilight shot, Acros worked out well to use because I didn't want a really long 45 min or 1 hour exposure time due to those clouds were moving my way and would have covered the sky.
Thats really good advice, Tuco. Thanks for the examples - they really do help. I guess I'll take my current setup on my trip now, not expecting gallery-quality work, and hoping for the best. Film photography is about the process, after all. I'm very excited to try my best and have fun while I do it!
05-25-2017, 12:07 PM   #37
Pentaxian


Join Date: Jul 2009
Location: Pugetopolis
Posts: 11,029
QuoteOriginally posted by Femto1969 Quote
Thats really good advice, Tuco. Thanks for the examples - they really do help. I guess I'll take my current setup on my trip now, not expecting gallery-quality work, and hoping for the best. Film photography is about the process, after all. I'm very excited to try my best and have fun while I do it!
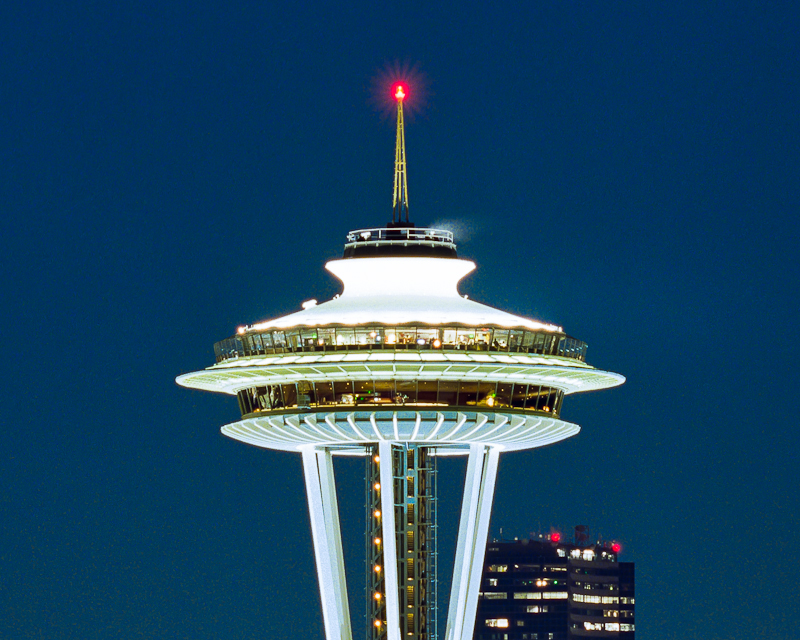
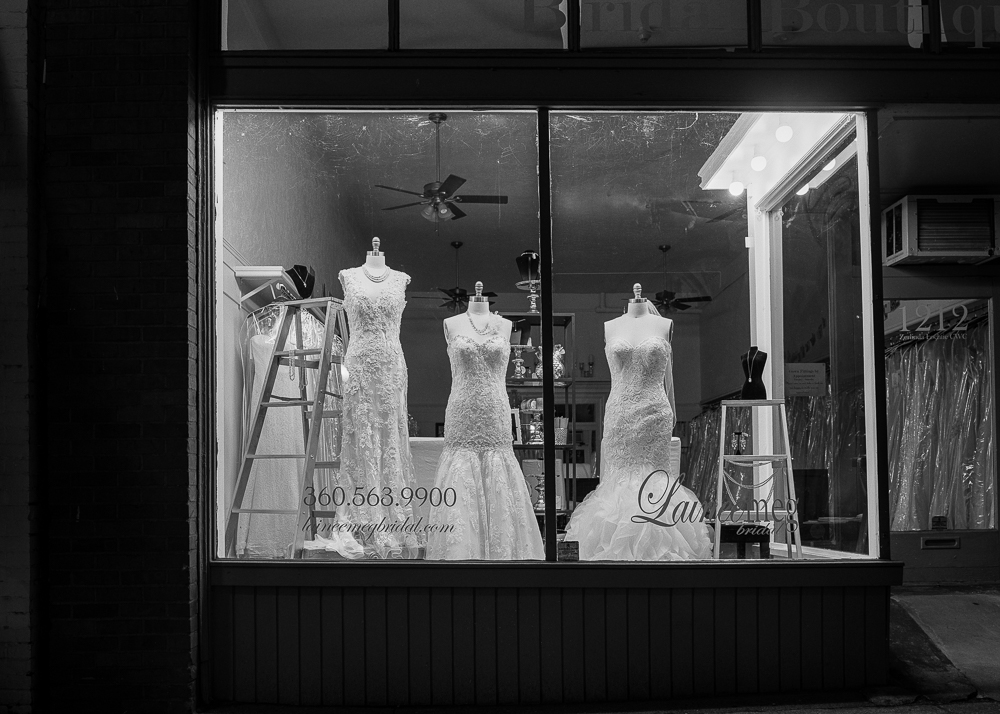
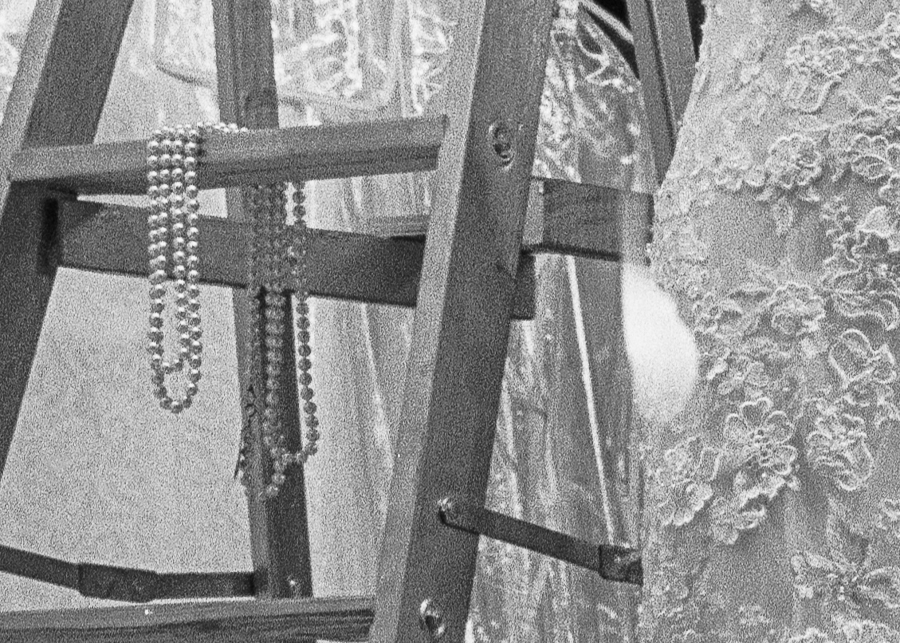
Also if you haven't purchased a light table and good loupe to look at and evaluate your negatives, you should invest in those. Record some of your exposures and metering info too so you can better evaluate and correct for the next time. I've posted these before and perhaps you've already seen them but they are two shots I made a crop for an idea of what you can expect for grain when you zoom in on film.

Pentax 67, New Portra 400, M* 300/4 EDIF, Jobo C-41 Press Kit


GSW690III, 400TMY @ EI 100

Here I was testing my highlight compression process by placing the wall below the window 3 stops below the middle gray and seeing if both my development time captured this placement and how much of the highlights I get. That area measured EV 2 and the light bulbs around EV 14+ if I recall correctly. I have it written down somewhere but I'm not at home. Anyway if you do something like this with your one-degree spot meter you can get a grip on how much light you can capture.


Last edited by tuco; 05-25-2017 at 12:19 PM.
05-26-2017, 06:51 AM   #38
Senior Member


Join Date: Apr 2017
Photos: Gallery
Posts: 120
Original Poster
Beautiful. I'm blown away by the detail in the space needle. These are all really great examples to drive home how I can learn the capabilities of my gear. I've I got exposures half that good I'd be thrilled.

I am planning on writing down all of my information in an exposure booklet to ensure that I can find out what worked and what didn't.

Do you have a recommendation for a lightbox and loupe? I want a lightbox or table that I can use to do DSLR scanning with as well.

Thanks so much again!
05-26-2017, 01:17 PM - 1 Like   #39
Pentaxian


Join Date: Jul 2009
Location: Pugetopolis
Posts: 11,029
QuoteOriginally posted by Femto1969 Quote
...
Do you have a recommendation for a lightbox and loupe? I want a lightbox or table that I can use to do DSLR scanning with as well.

Thanks so much again!
I'd look into getting an LED desktop light box. I've had mine a long time and it is just big enough to hold an archive sleeve full of negatives. It gets the job done. And I have a Schneider 10X Platinum Loupe but that's expensive and you could get by with a more economical loupe no doubt.
05-26-2017, 01:50 PM   #40
Senior Member


Join Date: Apr 2017
Photos: Gallery
Posts: 120
Original Poster
QuoteOriginally posted by tuco Quote
I'd look into getting an LED desktop light box. I've had mine a long time and it is just big enough to hold an archive sleeve full of negatives. It gets the job done. And I have a Schneider 10X Platinum Loupe but that's expensive and you could get by with a more economical loupe no doubt.
Thanks again. Don't know where I'd be without your help!
05-26-2017, 03:10 PM   #41
Otis Memorial Pentaxian
stevebrot's Avatar

Join Date: Mar 2007
Location: Vancouver (USA)
Photos: Gallery | Albums
Posts: 42,007
QuoteOriginally posted by Femto1969 Quote
I guess thats another case for using the Macro/DSLR method.
Not really, unless you shoot through glass. The flatness issue is a problem there too for most film bases.

QuoteOriginally posted by Femto1969 Quote
Or just getting the film professionally scanned
That would be my suggestion. I use my V700 essentially for proofing and if I ever want a fine-art print done, I will pay to have a commercial scan done.

QuoteOriginally posted by tuco Quote
Also if you haven't purchased a light table and good loupe to look at and evaluate your negatives, you should invest in those.
What he said ^^^


Steve

Last edited by stevebrot; 05-26-2017 at 03:19 PM.
05-30-2017, 07:01 AM   #42
Senior Member


Join Date: Apr 2017
Photos: Gallery
Posts: 120
Original Poster
QuoteOriginally posted by stevebrot Quote
Not really, unless you shoot through glass. The flatness issue is a problem there too for most film bases.


That would be my suggestion. I use my V700 essentially for proofing and if I ever want a fine-art print done, I will pay to have a commercial scan done.


What he said ^^^


Steve
Hmm... I didn't consider the issues with the film curling as you try to shoot it. And shooting through glass sounds like I would need a good polarizer or a few, even. Seems like the best way is just paying a professional.
05-30-2017, 08:48 AM   #43
Pentaxian


Join Date: May 2016
Photos: Albums
Posts: 2,003
You could get an enlarger film holder to keep the film flat. Someone on another thread was digitizing his negatives by photographing them while they were in an enlarger, but using the whole enlarger might be overkill.

---------- Post added 05-30-17 at 08:49 AM ----------

But I think also there are film holders for scanners that hold the film the same way?
05-30-2017, 09:22 AM   #44
Veteran Member


Join Date: Feb 2016
Posts: 706
QuoteOriginally posted by Femto1969 Quote
Hmm... I didn't consider the issues with the film curling as you try to shoot it. And shooting through glass sounds like I would need a good polarizer or a few, even. Seems like the best way is just paying a professional.
As the link stated
"For maximum sharpness, tape the film to the viewer, tensioning the film itself a bit to ensure maximum flatness; use painter’s paper masking tape — the kind that leaves no residue"

If you look again at the link you will see that the guy has a lens hood and this is giving him the focus distance and containing the image sections in an environment where reflections would be unlikely. Some tubing inner painted matt black at the right distance for focus should help eliminate reflections as will a dark shooting environment

If you did use glass to flatten film a polariser will not help you as there is an angle required to remove reflections and you will be shooting straight on
05-30-2017, 10:51 AM   #45
Pentaxian


Join Date: Jul 2009
Location: Pugetopolis
Posts: 11,029
Man, when I tape Retro 80S down by the perimeter even with tension its is not flat. There still some warp on that extra curly film. And to various degrees with other brands for me too. 120 film, especially 6x9+, is hard sometimes. It wants a drum or simulated drum to scan the film on a curve. Small format is easier to flat scan due to its small size to thickness of the base and sheet film is easier as well due to it just stays flat.

Last edited by tuco; 05-30-2017 at 11:20 AM. Reason: sp
Reply

Bookmarks
  • Submit Thread to Facebook Facebook
  • Submit Thread to Twitter Twitter
  • Submit Thread to Digg Digg
Tags - Make this thread easier to find by adding keywords to it!
canon, dpi, dr, enlarger, epson, film, holders, images, ink, jeff, ming, mpix, pentax, photography, ppi, print, printer, printers, prints, px, quality, quality scan, range, resolution, scale, scan, scans

Similar Threads
Thread Thread Starter Forum Replies Last Post
film scan quality soti Film Processing, Scanning, and Darkroom 22 01-17-2016 05:17 AM
I couldn't resist, scan vs scan. little laker Film SLRs and Compact Film Cameras 4 03-22-2010 04:01 PM
Who Process/Scan/Prints Your Film? k100d Film SLRs and Compact Film Cameras 14 09-04-2009 08:56 PM
Very, Very, Very Large Format Camera Available shutterdrone General Talk 22 03-22-2008 10:43 AM


All times are GMT -7. The time now is 10:07 AM. | See also: NikonForums.com, CanonForums.com part of our network of photo forums!
  • Red (Default)
  • Green
  • Gray
  • Dark
  • Dark Yellow
  • Dark Blue
  • Old Red
  • Old Green
  • Old Gray
  • Dial-Up Style
Hello! It's great to see you back on the forum! Have you considered joining the community?
register
Creating a FREE ACCOUNT takes under a minute, removes ads, and lets you post! [Dismiss]
Top