First of all, thanks 83N for the great tutorial. It got me started, but I also learned some more things that I think may help people. I had a hair caught in my camera that showed up in every photo. I tried vacuuming it to no avail.

- Use a piece of gaffer's tape to tape the battery door closed after removing the battery. Tape it firmly to the front housing. This will avoid having to get the spring loaded pin back correctly. The door can stay with the front the whole time.
- When removing the first screw that 83N calls out under the grip skin, there are three nearby screws. Remove the one he shows, <i>and</i> one of the other two, which will make it easier to remove the back because the top will be able to be lifted slightly. <b>DO NOT</b> remove all three. Basically all three go into a small metal plate with three threaded holes in it. If you remove all three, this plate will be loose inside the camera, and you won't have threads to let you replace the screws. Don't ask how I know this, or how long it took me to figure this out and get the plate back in place.
- The other three screws to remove are the two on the bottom that go through the back shell, and the one on the bottom of the left side, again through the back shell.
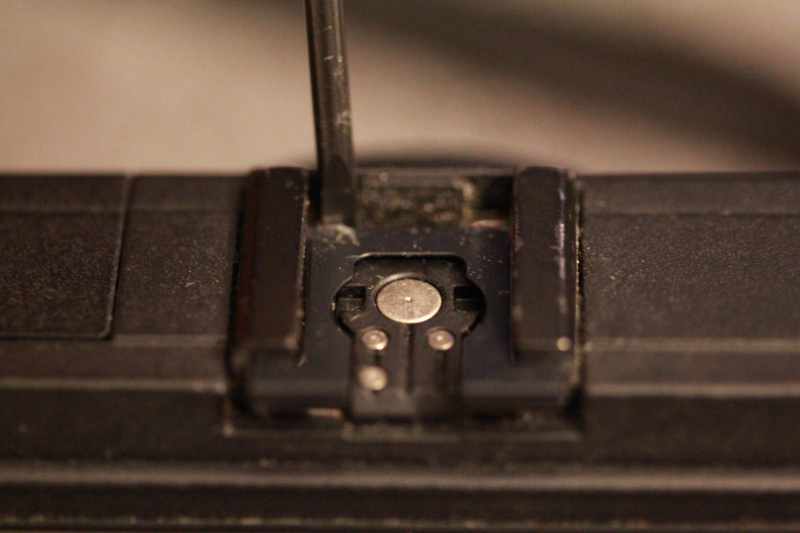
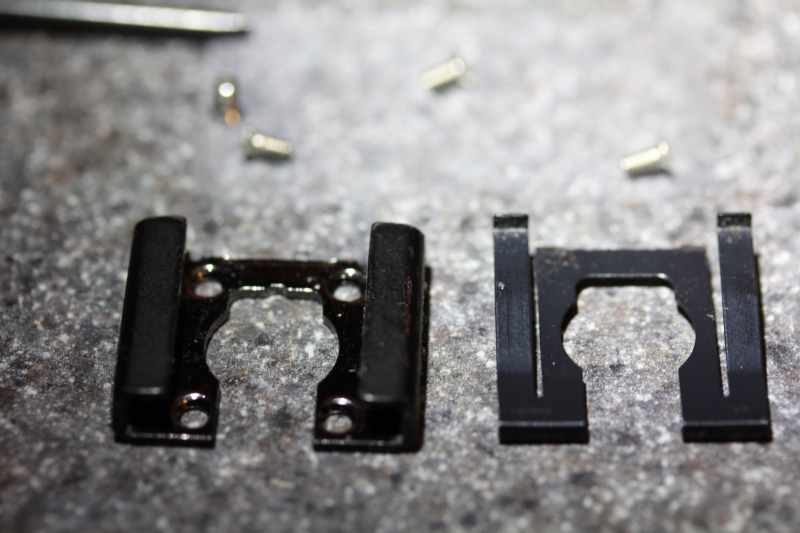
- Remove the hot shoe. The first piece to remove is the spring, which can just be pried forward after lifting the back slightly. Then remove four screws and remove the other metal piece. The pins stay behind. Don't pull on them, or a piece of ribbon cable will come out and it's a pain to get back in place. Again, don't ask.
- When removing the back start prying at the bottom, then the top left. To get the top right out, it is sort of trapped under the ADJ. ISO wheel. Just pry the top up a little (easy because of removing that extra screw earlier) and it will be freed up.
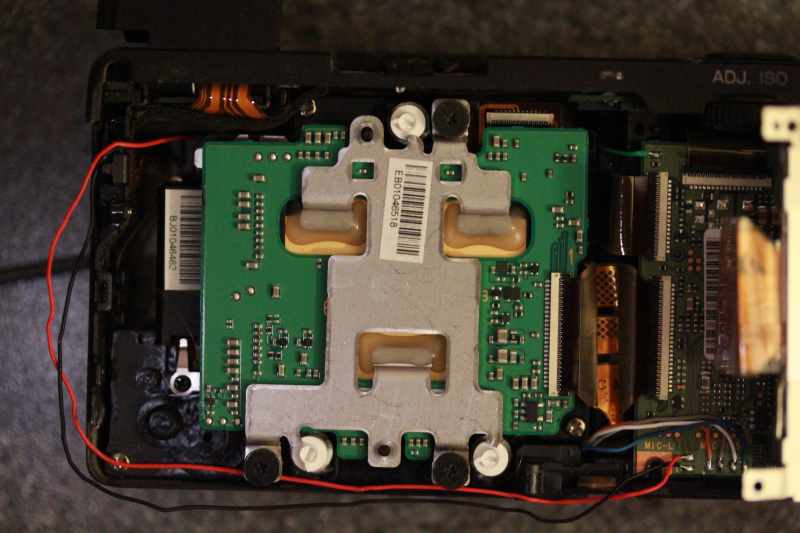
- I could not get the ribbon cable pulled to flip the display over to the left. I was afraid to break it. Instead, I removed the red and black wires all the way around and flipped it to the right.
- I had to go in deeper than the sensor to get the hair out. The next level of disassembly removes the blue-green filter shown below. You can see the hair behind it.
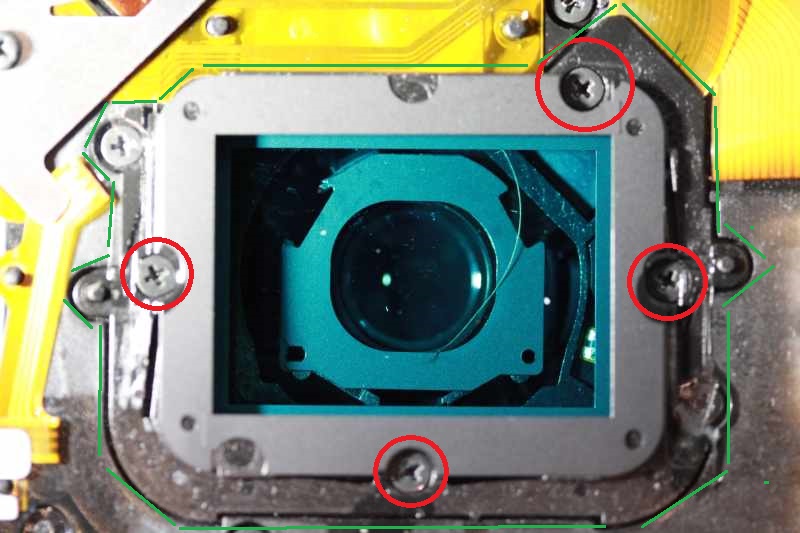
Remove the four screws shown circled in red, and pry up the entire cover outlined in green. The glass stays behind, and is loose in a depression. It can be lifted up carefully with a tool levered next to it. It's about 1/8" thick.
I hope this helps someone as much as finding this thread helped me.


 Similar Threads


