Forgot Password
Pentax Camera Forums Home
 

Reply
Show Printable Version 42 Likes Search this Thread
02-28-2020, 09:13 AM - 1 Like   #16
Site Supporter
Site Supporter


Join Date: Dec 2012
Photos: Gallery | Albums
Posts: 2,809
QuoteOriginally posted by cprobertson1 Quote
Hypothetically speaking, if I somehow could somehow spare £300 for the Nikon-F variant of the Lomography Daguerreotype, would it be possible to remove the nikon mount and add on a PK bayonet? Would it still be able to focus to infinity or would I also need to adjust the focusing endstops? I would assume the glass is the same, but I'm just not sure!


The Mk-19-C is now up and running, though I haven't had a chance to take real sample shots yet (that's what weekends are for!)

So far I've discovered:
  • Light leaks: the entire lens needs painted because PLA is in fact optically transluscent.
    • This is fine for short exposures of high contrast subjects.
    • If there's a light nearby (say, overhead) then everything gets washed out in a white haze.
    • I will paint the lens in future:
      • Matt-black-enamel on the inside surfaces and aperture plates.
      • Outside can be any colour - any suggestions for something funky?
  • The focal distance of the lens is somewhere in the 2-to-5m region
  • The lens is in desperate need of a lens hood. The 37-52mm adapter that will fit in the front should arrive soon, and then I can fit 52mm filters onto it.

Will hopefully have a gallery of sample shots for it soon I really like it - it has an industrial sort of look to it, and the photos it takes are bad in an awesome way!
This is great. Are you going to post the 3d files somewhere like Thingiverse? I would definitely print this out and go scavenge some old binoculars to make my own. Have you thought about printing in another color or material to avoid the light leaks? I'd probably print in black PLA because I have that lying around already.

I own the Lomography Daguerreotype Achromat 64mm. I'm not selling it, but if you have some specific questions I could potentially answer them.

And you definitely need to post some photos taken with this.

02-29-2020, 09:45 AM - 1 Like   #17
Veteran Member
cprobertson1's Avatar

Join Date: Nov 2018
Location: Irvine, Ayrshire
Posts: 386
Original Poster
QuoteOriginally posted by ThorSanchez Quote
This is great. Are you going to post the 3d files somewhere like Thingiverse? I would definitely print this out and go scavenge some old binoculars to make my own. Have you thought about printing in another color or material to avoid the light leaks? I'd probably print in black PLA because I have that lying around already.

I own the Lomography Daguerreotype Achromat 64mm. I'm not selling it, but if you have some specific questions I could potentially answer them.

And you definitely need to post some photos taken with this.
Thingiverse is the eventual plan! Unfortunately, the current design is specific to the lens I have. It will be a lot more forgiving once I figure out a focusing mechanism that can fit other lenses and focal lengths near ~50mm - but just now one would need to redesign the entire base plate for a different lens =/

Black PLA would help with the sides - but depending on what you're doing with the aperture plates, it might still be too translucent (for longer exposures). The other problem is reflections - you might find improvement from using a matt paint. coal or charcoal dust in a PVA glue binder would be even better - but it's overkill in this 10mm-thick setup!

It wouldn't be so bad if I could convert it to an openscad format that would fit the customiser - but I don't know how to use openscad properly, and as far as I know there's no way to convert freecad files for the customiser.

Anyway, will hopefully have sample photos up within a few hours - just developing the RAWs just now

---------- Post added 2020-02-29 at 10:33 ----------

Mk-19-C and some aperture plates.

I actually really like how it looks like a pipe flange!

Wide open (F/2) at a distance of 1m

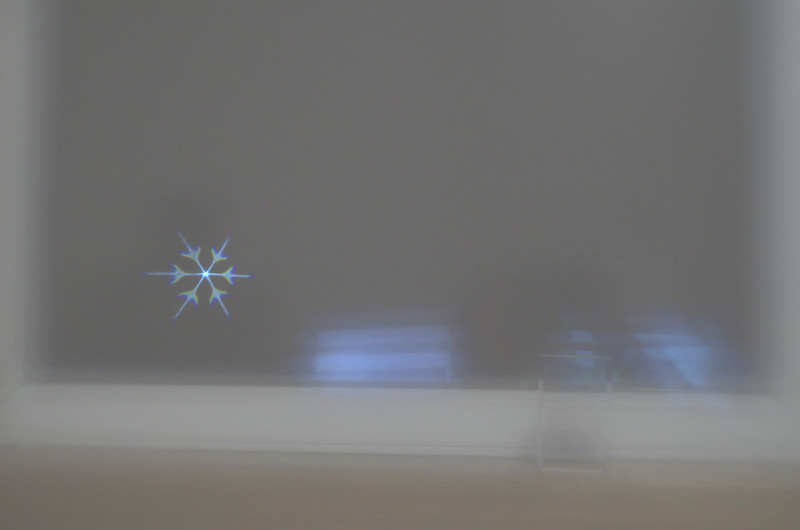
Snowflake bokeh showing some interesting patterning!

Snowflake bokeh and a tiny bit of CA

F/16 showing remarkable sharpness...


Finally, here's the 300mm test I done... demonstrating pretty much total chromatic aberration! It is, however, remarkably sharp, especially when you consider that the lens is hand-held with no attempt and stopping light leaks at all.
03-03-2020, 07:14 AM   #18
Veteran Member
cprobertson1's Avatar

Join Date: Nov 2018
Location: Irvine, Ayrshire
Posts: 386
Original Poster
Im a bit stuck: I need a focusing mechanism.

I have two competing ideas for how to actuate the focusing movement: helicoid and threaded bar.

In both ideas, the lens+aperture plate (the "central assembly") move backwards and forwards to achieve focus. This is to prevent weirdness from changing the aperture<->lens distance.1. The different "models" refer to how it is moved back and forward. This will sit inside the "outer assembly" which contains the PK mount, and whatever actuator I choose.

What do you guys think? Im leaning towards "1" for its simplicity... but it might look a bit strange having a forward-facing knob near the front (or back) of the lens. Actually, it could look pretty cool near the camera-side... might interfere with tripod mounting though......

While we're on the subject, can anybody think of any other ways of doing it? I've also considered the possibility of buying a cheap and nasty telescope from ebay and butchering the focusing rail and knob from that - though I'm not sure how that will turn out!

1) The simplest idea I have is a threaded bar attached to the outer assembly - rotate it and it moves the inner assembly along a dovetail, all inside the outer tube.

Pros:
-Simple
-Accurate
-Doesn't move once set
Cons:
-Very slow movement (front-to-back movement would be about 10mm... which is >10 revolutions of the thread. So we're talking making 20x hand movements (assuming you rotate it 180° in a movement) to go from infinite focus to... whatever the near focal distance is.

2) The more complex idea is to put a helical thread on the inner barrel (for those familiar with 3D printing, I plan on actually using 1.75mm filament, tightly wrapped in a little trench around the perimeter of the central assembly, forming a smooth thread (as smooth as the filament) of practically any pitch I can imagine.). A focusing ring would be attached to the front of the outer assembly, held on with a flange, allowing full 360°+ degree motion (sneaky engineering!) - by changin the thread pitch I can change how fast it would move - allowing it to be built with either fine control or courser control... the ambitious designer could actually CHANGE the pitch of the helicoid, allowing course movements at some part of the range, and fine movement at select parts.

Pros:
-Fast
-Variable movement speeds can be designed in.
-Movement can be reversed by reversing the helicoid's track, potentially allowing both fine and coarse movement in the same rotation
Cons:
-More complex to design
-More moving parts that can fail
-Can be moved if bumped or pushed.
-Focus control is not as fine as a threaded bar, even at the finest possible thread pitch

1 Speaking of aperture-lens distance... is there an optimum distance for that? Too far away and you get vignetting: too close and you let in stray light... and I haven't figured out the optimum distance yet!

--EDIT--
*Oh, I could also do a very simple push-pull design... which is basically option-"1" but without the threaded bar. Apparently you can use felt to get a nice smooth movement - but I would prefer an actual "mechanism" of some sort!
03-03-2020, 08:15 AM   #19
Site Supporter
Site Supporter


Join Date: Dec 2012
Photos: Gallery | Albums
Posts: 2,809
QuoteOriginally posted by cprobertson1 Quote
Im a bit stuck: I need a focusing mechanism.

I have two competing ideas for how to actuate the focusing movement: helicoid and threaded bar.

In both ideas, the lens+aperture plate (the "central assembly") move backwards and forwards to achieve focus. This is to prevent weirdness from changing the aperture<->lens distance.1. The different "models" refer to how it is moved back and forward. This will sit inside the "outer assembly" which contains the PK mount, and whatever actuator I choose.

What do you guys think? Im leaning towards "1" for its simplicity... but it might look a bit strange having a forward-facing knob near the front (or back) of the lens. Actually, it could look pretty cool near the camera-side... might interfere with tripod mounting though......

While we're on the subject, can anybody think of any other ways of doing it? I've also considered the possibility of buying a cheap and nasty telescope from ebay and butchering the focusing rail and knob from that - though I'm not sure how that will turn out!

1) The simplest idea I have is a threaded bar attached to the outer assembly - rotate it and it moves the inner assembly along a dovetail, all inside the outer tube.

Pros:
-Simple
-Accurate
-Doesn't move once set
Cons:
-Very slow movement (front-to-back movement would be about 10mm... which is >10 revolutions of the thread. So we're talking making 20x hand movements (assuming you rotate it 180° in a movement) to go from infinite focus to... whatever the near focal distance is.

2) The more complex idea is to put a helical thread on the inner barrel (for those familiar with 3D printing, I plan on actually using 1.75mm filament, tightly wrapped in a little trench around the perimeter of the central assembly, forming a smooth thread (as smooth as the filament) of practically any pitch I can imagine.). A focusing ring would be attached to the front of the outer assembly, held on with a flange, allowing full 360°+ degree motion (sneaky engineering!) - by changin the thread pitch I can change how fast it would move - allowing it to be built with either fine control or courser control... the ambitious designer could actually CHANGE the pitch of the helicoid, allowing course movements at some part of the range, and fine movement at select parts.

Pros:
-Fast
-Variable movement speeds can be designed in.
-Movement can be reversed by reversing the helicoid's track, potentially allowing both fine and coarse movement in the same rotation
Cons:
-More complex to design
-More moving parts that can fail
-Can be moved if bumped or pushed.
-Focus control is not as fine as a threaded bar, even at the finest possible thread pitch

1 Speaking of aperture-lens distance... is there an optimum distance for that? Too far away and you get vignetting: too close and you let in stray light... and I haven't figured out the optimum distance yet!

--EDIT--
*Oh, I could also do a very simple push-pull design... which is basically option-"1" but without the threaded bar. Apparently you can use felt to get a nice smooth movement - but I would prefer an actual "mechanism" of some sort!
Have you thought about scavenging the helicoid mechanicsm from a $5 eBay lens, and using that in your design? Or does that violate the spirit of the build-your-own ethos? That would probably be much smoother and allow for finer focusing adjustments than a 3D printed version.

03-03-2020, 09:04 AM - 1 Like   #20
Veteran Member
cprobertson1's Avatar

Join Date: Nov 2018
Location: Irvine, Ayrshire
Posts: 386
Original Poster
QuoteOriginally posted by ThorSanchez Quote
Have you thought about scavenging the helicoid mechanicsm from a $5 eBay lens, and using that in your design? Or does that violate the spirit of the build-your-own ethos? That would probably be much smoother and allow for finer focusing adjustments than a 3D printed version.
I have, actually! It'd be more accurate than a 3D printed helicoid, but not as accurate as a lead-screw type design.

The problem is that I have to make a slit for the aperture plate - which complicates the design a bit. I'd either have to have the aperture far in front of the single element | [///] (), or I would need to put it in front and extend the barrel backwards through the helicoid, which means Im printing a lot of material... which pushes the size of the entire structure up [///] | ().

It's certainly doable! In fact, it's preferable over a 3D printed helicoid... BUT the problem is that for this particular design, it pushes the size up, and adds complexity in different places.

It is certainly an idea for a future plan! For now, though, I think Im going to go with the leadscrew design - it's very simple, and although slow, very accurate (once set, it just won't move anywhere - it would be a true "set and forget" focus when set to infinite focus, and for close-in work, the size of the structure can be made pretty small, allowing for even macro shots (apparently, single-element lenses, when stopped down, rival multi-thousand pound/dollar macro lenses in center sharpness (but not in CA and distortion though - that's what you're paying for! That's also why lenses have tons of elements these days instead of "just one/two")

It's a fascinating subject actually - I would love to learn more. For now though, I think I'll draw up a CAD model for the leadscrew design. Barrel-in-a-barrel, leadscrew at the bottom, pull it out from the front along the dovetail, keeping everything straight - o-ring at the back damps wobble. I could really do some way of turning the screw from the side rather than the front: it'd keep the bottom of the lens clearer... maybe there's something to be said for using the rack-and-pinion movement from an old telescope after all - put the knob in and the rack in a little dovetail and move it forward and backwards. Small and very lightm but can be moved by pushing on it...

I'll draw up some sketches for each of the possibilities and do a quick cost/benefit estimate on them.

Note to self (list of ideas to sketch out)
  1. Helicoid from existing lens
  2. Rack and pinion
  3. 3d printed helicoid
  4. leadscrew

1 - needs investigating
2 - potentially very simple - check accuracy with the existing telescope and see what we could manage
3 - is probably more trouble than it's worth - check if it can be done simply and discard
4 - draw up detailed sketches for possibilities on reducing complexity and ease-of-use
03-04-2020, 08:34 AM   #21
Veteran Member
cprobertson1's Avatar

Join Date: Nov 2018
Location: Irvine, Ayrshire
Posts: 386
Original Poster
Investigation more-or-less complete.

1: Would be good if I used a fixed aperture, or borrowed a "real" aperture. Not good for this particular lens with the aperture plate.
2: Rack and pinion is very doable - recycled or printed. Printed would be less accurate.
3: Printed helicoid is doable but needless complicated.
4: Very simple to do: and can be replaced with a rack-and-pinion style system if I so choose (the leadscrew track and carriage will screw onto the lens barrels due to 3D printing constraints)

So, Im designing "4" for now and should have it printed sometime next week once I figure out how everything goes together.


Handy Tip: For those wanting to make similar things, an M42>PK adapter does work... but macro-reverser adapter gives you a male thread, which allows you more room to work. T (T2) to PK adapters would also work as well! For a less screwy setup, you can just steal the bayonet off the back of a cheap lens, and screw it onto your DIY lens.


How crazy is this... I just realised that since have extra space in the internal barrel, I could actually line up the leadscrew with the AF screwdrive on the body and drive it from there!

Just steal the driveshaft off the back of a scrap lens and put a flexible coupling onto it to drive the shaft - the lens itself would just use a bolt to move forward and backwards.

I'm not doing this as I don't have a sacrificial lens (and I suspect the thread on the current design will need to turn for a while to achieve focus) - but it is technically doable. 20 revolutions on the thread will move it the full range - so it wouldn't be hard to actually accomplish!

How exciting is that! The potential for DIY autofocus!

Last edited by cprobertson1; 03-04-2020 at 09:24 AM.
03-06-2020, 11:19 AM   #22
Veteran Member
cprobertson1's Avatar

Join Date: Nov 2018
Location: Irvine, Ayrshire
Posts: 386
Original Poster
Test (this isn't posting)

03-11-2020, 05:53 AM - 1 Like   #23
Loyal Site Supporter
UncleVanya's Avatar

Join Date: Jul 2014
Photos: Gallery | Albums
Posts: 28,468
QuoteOriginally posted by cprobertson1 Quote

How exciting is that! The potential for DIY autofocus!
Given the files needed aren't fully understood I'm not sure how complicated a task that would become.
03-11-2020, 07:23 AM   #24
Veteran Member
cprobertson1's Avatar

Join Date: Nov 2018
Location: Irvine, Ayrshire
Posts: 386
Original Poster
QuoteOriginally posted by UncleVanya Quote
Given the files needed aren't fully understood I'm not sure how complicated a task that would become.
It really depends on a whole bunch of things under the hood (speaking generally).

The simplest way to reverse engineer it woukd be to create a "breakout header" - a bit like a teleconverter, but with switches in between each pin, and a test point, so I can probe each pin and make or break connections at-will.

Using that, I'd be able to probe each pin to see if there is digital or analogue data, and from there I can attempt to change the parameters on an existing lens, and eventually fake a lens entirely.

I can also use this method with a working AF lens and just disable pins until I reach the bare minimum for autofocus to function, and then replicate that, if possible.

I only need to understand it enough to break it! :P

I'm assuming I'm leaving the "binary" aperture-encoding pins alone in the above procedure... Though one could readable replicate it with some sneaky "keying" in the aperture plates... Way too much work though, but technically possible.

In the meantime, I've almost finished designing the mark 20, with manual focus. The plan is to use a geared focus ring to turn some bolts that will move the inner barrel forward and backwards. Originally it was going to be a knob on the bottom, but I figured this would be neater if so could get it to work (time will tell!)
03-11-2020, 09:46 AM   #25
Loyal Site Supporter
UncleVanya's Avatar

Join Date: Jul 2014
Photos: Gallery | Albums
Posts: 28,468
QuoteOriginally posted by cprobertson1 Quote
It really depends on a whole bunch of things under the hood (speaking generally).

The simplest way to reverse engineer it woukd be to create a "breakout header" - a bit like a teleconverter, but with switches in between each pin, and a test point, so I can probe each pin and make or break connections at-will.

Using that, I'd be able to probe each pin to see if there is digital or analogue data, and from there I can attempt to change the parameters on an existing lens, and eventually fake a lens entirely.

I can also use this method with a working AF lens and just disable pins until I reach the bare minimum for autofocus to function, and then replicate that, if possible.

I only need to understand it enough to break it! :P

I'm assuming I'm leaving the "binary" aperture-encoding pins alone in the above procedure... Though one could readable replicate it with some sneaky "keying" in the aperture plates... Way too much work though, but technically possible.

In the meantime, I've almost finished designing the mark 20, with manual focus. The plan is to use a geared focus ring to turn some bolts that will move the inner barrel forward and backwards. Originally it was going to be a knob on the bottom, but I figured this would be neater if so could get it to work (time will tell!)
Only one pin carries the data if I recall. The others are passively encoding the aperture info for the a series type data.

Features and Operation of the KA Mount | The K-Mount Page

Also the communication through the lens is half the battle. You need to understand the lens rom codes. My understanding is that some of this encodes focus adjustments that are factory determined. Some carries lens basic info etc.

I applaud your enthusiasm and wish you luck. It's a fine goal.
03-11-2020, 01:21 PM   #26
Pentaxian
Arjay Bee's Avatar

Join Date: Sep 2006
Location: Horn Island, Torres Straits, Q
Photos: Gallery
Posts: 4,715
I have been reading this with interest. Couple of thoughts
- have you thought about the rack and pinion from a M42 or K mount bellows with the bellows removed.
- As an alternate mechanism to move the barrel have you thought of hydraulic systems? There are robotic set ups that use pneumatic or hydraulic activators to move servo arms - so as an alternative to using the camera's auto focus mechanism set up a witch on the side of your lens mount flange to move the barrel, powered from a button cell or two. Toggle switch with two contacts or button for fwd and button for backward
03-12-2020, 01:49 PM   #27
Veteran Member
cprobertson1's Avatar

Join Date: Nov 2018
Location: Irvine, Ayrshire
Posts: 386
Original Poster
QuoteOriginally posted by Arjay Bee Quote
I have been reading this with interest. Couple of thoughts
- have you thought about the rack and pinion from a M42 or K mount bellows with the bellows removed.
- As an alternate mechanism to move the barrel have you thought of hydraulic systems? There are robotic set ups that use pneumatic or hydraulic activators to move servo arms - so as an alternative to using the camera's auto focus mechanism set up a witch on the side of your lens mount flange to move the barrel, powered from a button cell or two. Toggle switch with two contacts or button for fwd and button for backward
Hydraulics are an interesting one, actually - I'll need to look into it (though I'd be challenging to fit tubes and stuff into the tiny envelope. Could be interesting though!)


Question for folks - does anybody happen to know how far the lens can intrude into the lens body (from the flange)? I'm having trouble figuring out how far back I can place the rear lens element without the mirror striking it during launch the shot.

--EDIT-- I actually wrote "launch" insteaed of "the shot"... I blame my love of all things rocket-based... including the archive footage of rocket development from the 50's I was watching right before I posted this!

Im calling it "launch" from now on though, because it sounds better than "taking the shot"
03-12-2020, 06:07 PM   #28
Pentaxian
Arjay Bee's Avatar

Join Date: Sep 2006
Location: Horn Island, Torres Straits, Q
Photos: Gallery
Posts: 4,715
QuoteOriginally posted by cprobertson1 Quote
Im calling it "launch" from now on though, because it sounds better than "taking the shot"
Cool -the shooting metaphor gets tired - good to get a reimage
03-13-2020, 03:52 AM   #29
Veteran Member
cprobertson1's Avatar

Join Date: Nov 2018
Location: Irvine, Ayrshire
Posts: 386
Original Poster
Printing underway - the Mk20 has 8 parts, six of them take ~2 hours to print.

The current design uses a focusing ring with teeth on the inside to turn two bolts which move the inner barrel (lens + aperture slides) forward and backwards.

It's much neater than the "knob sticking out the front" plan I originally had!

I'll get pictures of the cad model up shortly - won't be able to assemble until I get a selection of bolts though, but I'll at least he able to get everything printed today!
03-13-2020, 12:24 PM   #30
Veteran Member
cprobertson1's Avatar

Join Date: Nov 2018
Location: Irvine, Ayrshire
Posts: 386
Original Poster
There we go - pfft, that took a lot of designing.

Just need to finish printing it and screw it all together and it should be good to go.

Oh, and sanding - lots of sanding...
Attached Images
 
Reply

Bookmarks
  • Submit Thread to Facebook Facebook
  • Submit Thread to Twitter Twitter
  • Submit Thread to Digg Digg
Tags - Make this thread easier to find by adding keywords to it!
aperture, bokeh, camera, design, dia, diy, element, f/1.7, f/2.2, files, flickr, gear, lens, light, max, mount, photography, pla, plates, post, print, printer, robertson, share, support, test, thread, water, week

Similar Threads
Thread Thread Starter Forum Replies Last Post
Pro Photographers with Amateur Gear vs. an Amateur with Pro Gear alamo5000 Photographic Technique 35 07-02-2017 04:33 PM
Machinery Gear shooting gear Kay350 Post Your Photos! 3 01-05-2017 10:39 PM
Gear Advice. Tree month trip to Europe. What gear to take. carrrlangas General Photography 16 11-04-2014 07:02 AM
Question Marketplace Catch 22: Trading non-photo gear for photo gear Edgar_in_Indy Site Suggestions and Help 3 02-19-2013 10:13 PM
Strobist DIY Project: DIY Grid from Honeycomb Paper Noisychip Do-It-Yourself 0 03-23-2012 08:56 AM


All times are GMT -7. The time now is 05:39 PM. | See also: NikonForums.com, CanonForums.com part of our network of photo forums!
  • Red (Default)
  • Green
  • Gray
  • Dark
  • Dark Yellow
  • Dark Blue
  • Old Red
  • Old Green
  • Old Gray
  • Dial-Up Style
Hello! It's great to see you back on the forum! Have you considered joining the community?
register
Creating a FREE ACCOUNT takes under a minute, removes ads, and lets you post! [Dismiss]
Top