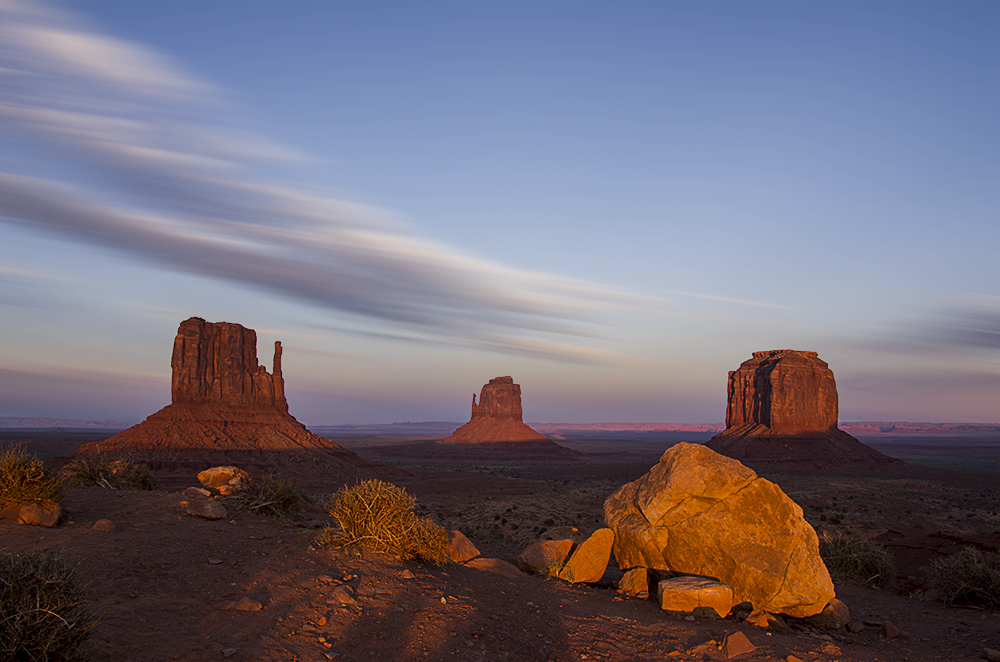
I thought about going the monochrome route and almost did with this image, but ultimately felt that color plays an important role. To make this image I adjusted the raw file to levels that I felt were pretty decent. After opening it, I masked off the sky and copied the sky as a layer. I reselected the whole sky and gave it motion blur that made the clouds look nice without looking like they were being moved by an off-camera tornado. I had to do that after re-selecting so that the clouds didn't overlap the mittens.
I then copied the sky layer again and did CTRL+SHIFT+B for an auto color and made the layer 20% transparent. That added color pop without unnatural coloration.
That result of the motion blur was some awful halo effect around the distant mesa. So I used the eyedropper to select a dark color from the top-most sky layer (the 20% layer) and then switched to the background layer. Using the brush set to 50% and darker color mode, I painted over the halos until they had blended with the sky and hill. This required a brush radius of 50 as the halos were a couple hundred pixels thick.
After that I selected all of the sky layer, inverted it, and selected the foreground. I duplicated the foreground and then set the blend mode to Overlay. Using the high pass tool at 9, I added some sharpening and detail to the rocks. That looked good but garish, so I set that layer to 80% transparency to take the edge off the sharpening layer. Then I flattened and re-sized the image to upload it.


 Post #9 by svreinis
 Similar Threads


