Ok, thought I'd keep you posted on some updates on this task and what I've discovered thus far.
So... although Hugins can accept and process different exposure values for stitching panoramas (in my case it was 6 images going left to right that needed stitched, and then 3 sets of different exposure values i.e. 0, -1 and +1 ev, a total of 18 files), I wasn't overly impressed by the automatic 'blend' of the hdr panorama it created. Perhaps there are more options required to be tinkered around, but what I felt I was left with was a picture very similar to the 0 exposure set of images.
So then I tinkered more with Hugins, what I wanted to achieve was to keep the control points FIXED from one set of stitched panorama files (the 0 exposure ones), and then create two more panoramas using the EXACT SAME control points for the -1 and +1 ev value files. Then I wanted to take the 3 stitched panorama files off to a separate program to create and HDR and hopefully have more say in how it turned out. This I managed successfully and here's how;
1) Fire Hugins up, Click 'Interface' and select 'Advanced' (you may also need to toggle between 'Advanced' and 'Simple' to generate TWO windows, one to get a kinda preview or interface for the stitching and the other Advanced window to select 'Apply Template' from the File menu, as this option is necessary at a later stage and not presented in the 'Simple' view File drop menu).
2) Now drop and drag the files required for panorama, it's prolly best to use the zero exposure set, but I may be wrong here, but that's the set I first used.
3) Tinker around (in the simple view window) what kinda perspective you think works best for you set (Lens Type etc.). Remember what you chose!
4) Click '2.Align'
5) Let that process, then click '3. Create panorama'
6) Choose Output, I used 'Exposure corrected, low dynamic range'
7) You will be prompted to save a .pto file, click ok here and save this file (you will need this .pto file later as this is the template needed with the fixed control points).
8) Next it will save the actual panorama, hopefully as a .tiff file (it was tiff files I used in the first place so perhaps it saves natively whatever you brought into the program, I'm not too sure).
9) Next click 'New' in Hugins and drag and drop the next 6 files for stitching across, obviously different ev value ones.
10) In the Advanced window of Hugins, select 'Apply Template' and select the .pto file from before.
11) If the Lens Type/perspective is different from before make sure you make it the same as the one previous.
12) DO NOT select '2. Align' as this creates a whole new set of control points based on the new exposure values, instead just skip right to '3. Create panorama'.
13) Follow the same prompts as before and do the same for the final set of exposure values (or more sets if you have more than 3 sets etc).
You should now have 3 panorama .tiff files ready for HDR merge that contain the same control points and perspective to make merging successful in any third party program.
I tried Photomatix (trial version only) but I liked the results best from using the Photoshop plugin Nik Collection/HDR Efex Pro 2 (as suggested above in a previous post). The only issue you might come across is during the Hugins Stitch process Exif data goes haywire and I had to tell both HDR programs the ev values of the 3 pics, but the programs 'guessed' right anyway...
After the HDR merge I then went to LR for further small adjustments (straightening pic, spot removal etc).
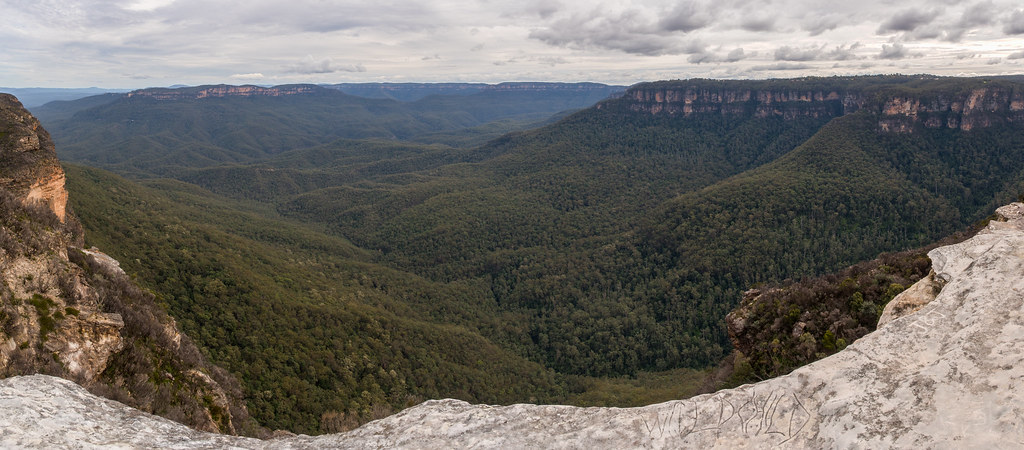
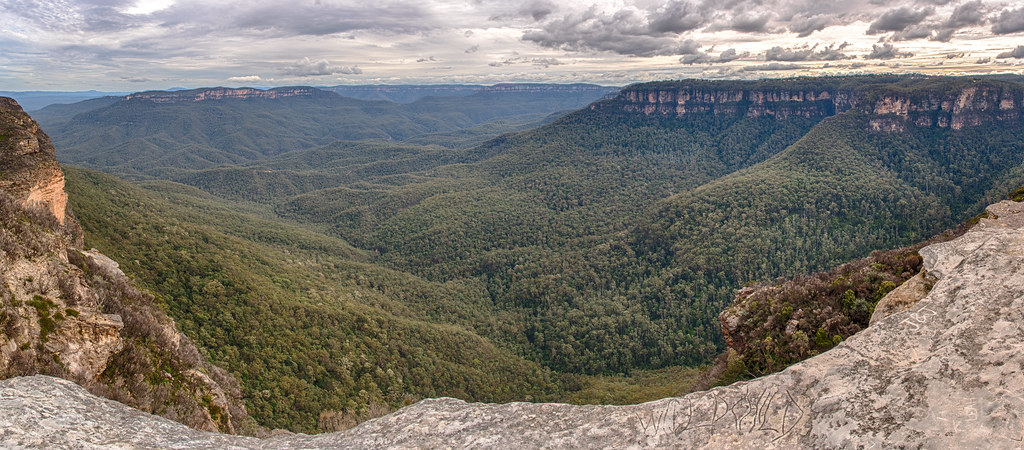
Below I show the comparison between the zero exposure set (ie non HDR but 6 files stitched) vs the Hugins/HDR Efex Pro 2 route (18 files merged in total).
Non HDR
Hugins/HDR Efex Pro 2
I hope this helps someone out there.
I now need to learn to pan and take better landscape pics in general, as the stitching job itself ain't that great...


 Post #18 by BruceBanner
 Similar Threads


