Forgot Password
Pentax Camera Forums Home
 

Reply
Show Printable Version 1 Like Search this Thread
06-12-2017, 09:13 PM   #1
Veteran Member
butangmucat's Avatar

Join Date: Jul 2016
Posts: 709
Help With Removing Print Film Orange Mask in Photoshop/Affinity

Hello,

I sent out a roll of Portra 160 out for scanning with a Hassie Flextight X5, and the lab returned files with the extension FFF. Photoshop can't open these files, but Affinity Photo can. However the manual mask removal process was described in Photoshop, so I exported them as PSDs and tried to demask them. The lab suggested inverting the images, and use "auto colors," "auto contrast," then "auto tones" to remove the mask.

Here are the originals before inverting and demasking:


Here are the ones demasked, with some camera raw dehaze and color balance adjustment:


However these still doesn't look like what I am looking for. I feel that the colors doesn't look like what I am expecting from Portra films and the sky seems to be too much blown out. I would like some input.

Sincerely

06-12-2017, 10:31 PM   #2
Pentaxian


Join Date: May 2016
Photos: Albums
Posts: 2,003
What is your expectation?

I suspect that using those auto settings would only make it look the way that Photoshop thinks is "correct", and therefore possibly not the same way that Portra would look.

---------- Post added 06-12-17 at 10:34 PM ----------

Scanning software I have used has settings for the type of film, in order to accurately translate the scanned orange negative into the colors. I'm not sure that you can accurately and simply reproduce the particular colors of any particular film type only using auto settings. You may have adjust it afterward to make it "look like Portra".
06-13-2017, 02:22 AM   #3
Veteran Member
G and T's Avatar

Join Date: Aug 2011
Location: Langwarrin Australia
Photos: Gallery
Posts: 382
Using a Lightroom preset is the easiest way I know of to get a film look. Google, Lightroom Portra Presets and you will find free and paid presets for Portra 160, 400 and 800, the instructions for installing them can also be found on these sites. The best way is to start with the free presets and because they are non-destructive you can try them and discard them as many times as you like with-out destroying your original file. I use many film presets, some are better than others, but it doesn't take long to find the ones that you like.

Glenn
06-13-2017, 04:13 AM   #4
Veteran Member


Join Date: Feb 2016
Posts: 706
I think that there are plugins available for .fff files - these are only TIFF with some added Tag information.

From what I can see from your screen shots the images do contain enough information, but will require a little work to arrive at your personal visualisation of the scene. This is most likely best achieved by using layers.

Attached is a quick and dirty play with a copy of your screen copy negative (cropped). Colour etc may not be to your liking but is presented as a starting point.

As I do not like automated methods (they usually get it wrong!) I usually follow the method shown i.e. Invert, Curves to neutralise mask and set contrast etc, Hue and Sat for areas to boost or demphasise colour to taste, Curves for DnB in this case sky. This point should get you close to a 'normalised' render of image data. After this point or even during you can apply the film 'look' as you see fit.

Hope this may help


Last edited by TonyW; 11-06-2017 at 09:24 AM.
06-13-2017, 05:15 AM   #5
Veteran Member
butangmucat's Avatar

Join Date: Jul 2016
Posts: 709
Original Poster
QuoteOriginally posted by TonyW Quote
I think that there are plugins available for .fff files - these are only TIFF with some added Tag information.

From what I can see from your screen shots the images do contain enough information, but will require a little work to arrive at your personal visualisation of the scene. This is most likely best achieved by using layers.

Attached is a quick and dirty play with a copy of your screen copy negative (cropped). Colour etc may not be to your liking but is presented as a starting point.

As I do not like automated methods (they usually get it wrong!) I usually follow the method shown i.e. Invert, Curves to neutralise mask and set contrast etc, Hue and Sat for areas to boost or demphasise colour to taste, Curves for DnB in this case sky. This point should get you close to a 'normalised' render of image data. After this point or even during you can apply the film 'look' as you see fit.

Hope this may help
Some follow-up questions:

So to neutralize the orange mask, I need to play with the curve on red and yellow channels?

The lab also suggested using levels to set black, grey, and white points. Are they the same as using curve correction?

Sincerely

通过我的 Nexus 6P 上的 Tapatalk发言

---------- Post added 06-13-17 at 05:20 AM ----------

QuoteOriginally posted by leekil Quote
What is your expectation?

I suspect that using those auto settings would only make it look the way that Photoshop thinks is "correct", and therefore possibly not the same way that Portra would look.

---------- Post added 06-12-17 at 10:34 PM ----------

Scanning software I have used has settings for the type of film, in order to accurately translate the scanned orange negative into the colors. I'm not sure that you can accurately and simply reproduce the particular colors of any particular film type only using auto settings. You may have adjust it afterward to make it "look like Portra".
My research tells me that I should be using FlexColor for this purpose but I don't have a license for that software.

通过我的 Nexus 6P 上的 Tapatalk发言
06-13-2017, 05:45 AM   #6
Veteran Member


Join Date: Mar 2007
Posts: 1,204
butangmucat the main problem is that the lab didn't properly scan your negatives from the start. First it looks like they scanned the whole stripes at once. Each image should be scanned separately. Second they didn't scan the negatives as positive images which would give you the correct color and not the orange color of the actual negatives.
06-13-2017, 06:45 AM   #7
Veteran Member
butangmucat's Avatar

Join Date: Jul 2016
Posts: 709
Original Poster
QuoteOriginally posted by Rico Quote
butangmucat the main problem is that the lab didn't properly scan your negatives from the start. First it looks like they scanned the whole stripes at once. Each image should be scanned separately. Second they didn't scan the negatives as positive images which would give you the correct color and not the orange color of the actual negatives.
I think you misunderstood something.

- Hassie Flextight X5 is a (virtual) drum scanner AFAIK and I believe it only scans in stripes. Correct me if I am wrong.

- The fff files, AFAIK are linear raw files, and I am supposed to do the demask by myself and then fine-tune the color.

通过我的 Nexus 6P 上的 Tapatalk发言

06-13-2017, 07:24 AM   #8
Veteran Member
butangmucat's Avatar

Join Date: Jul 2016
Posts: 709
Original Poster
QuoteOriginally posted by dcshooter Quote
There is a PS plugin called CF Systems Color Perfect that does the best job of removing negative color masks I have ever seen. It also unfortunately has the worst interface I've ever used. If you are doing a ton of slides, it might be useful, though, especially if you automate it as an action.

Link:
http://www.colorperfect.com/colorperfect.html?lang=en
67 USD is pretty expensive as I don't usually work with these kind of scans. In fact I doubt I might just shoot these scenes again in reversal film and forget about these stuff. This is a backup roll for some of the works that I have been asked to do.

通过我的 Nexus 6P 上的 Tapatalk发言
06-13-2017, 07:40 AM   #9
Veteran Member


Join Date: Jan 2010
Location: Michigan
Photos: Gallery
Posts: 2,207
The best way I found after a lot of trial with anti masking, was not to treat the orange color, just forget about it.
I use ImageMagick API scripting
It was a long learning curve ending up in a few lines of code, and I don't use it now, because I found
that the scanner does a better job of producing the basic inverted tiff, and a lot less work!

Here is a snippet from a script showing the inversion of a C41 neg, I have added examples along the way.


echo "******* correct lateral chromatic aberation ********"
PR_fulla=_fulla.tif
PR_incfulla=0
for file in *.tif; do
if [ "${file:0:1}" = "${PR_NegID[i]}" ]
then
PR_incfulla=$((PR_incfulla+1))
PR_ca $file $PR_incfulla${PR_NegID[i]}$PR_fulla &
echo $file
echo $PR_incfulla${PR_NegID[i]}$PR_fulla
echo _
sleep 1
fi
done
wait
echo "******* align stack files **********"
align_image_stack -m -a ${PR_NegID[i]}_Align_ *${PR_NegID[i]}$PR_fulla
wait
echo "******* enfuse contrast stack *************"
enfuse -o ${PR_NegID[i]}_ContrastStacked.tif --exposure-weight=0 --saturation-weight=0 --contrast-weight=1 --hard-mask ${PR_NegID[i]}_Align*.tif

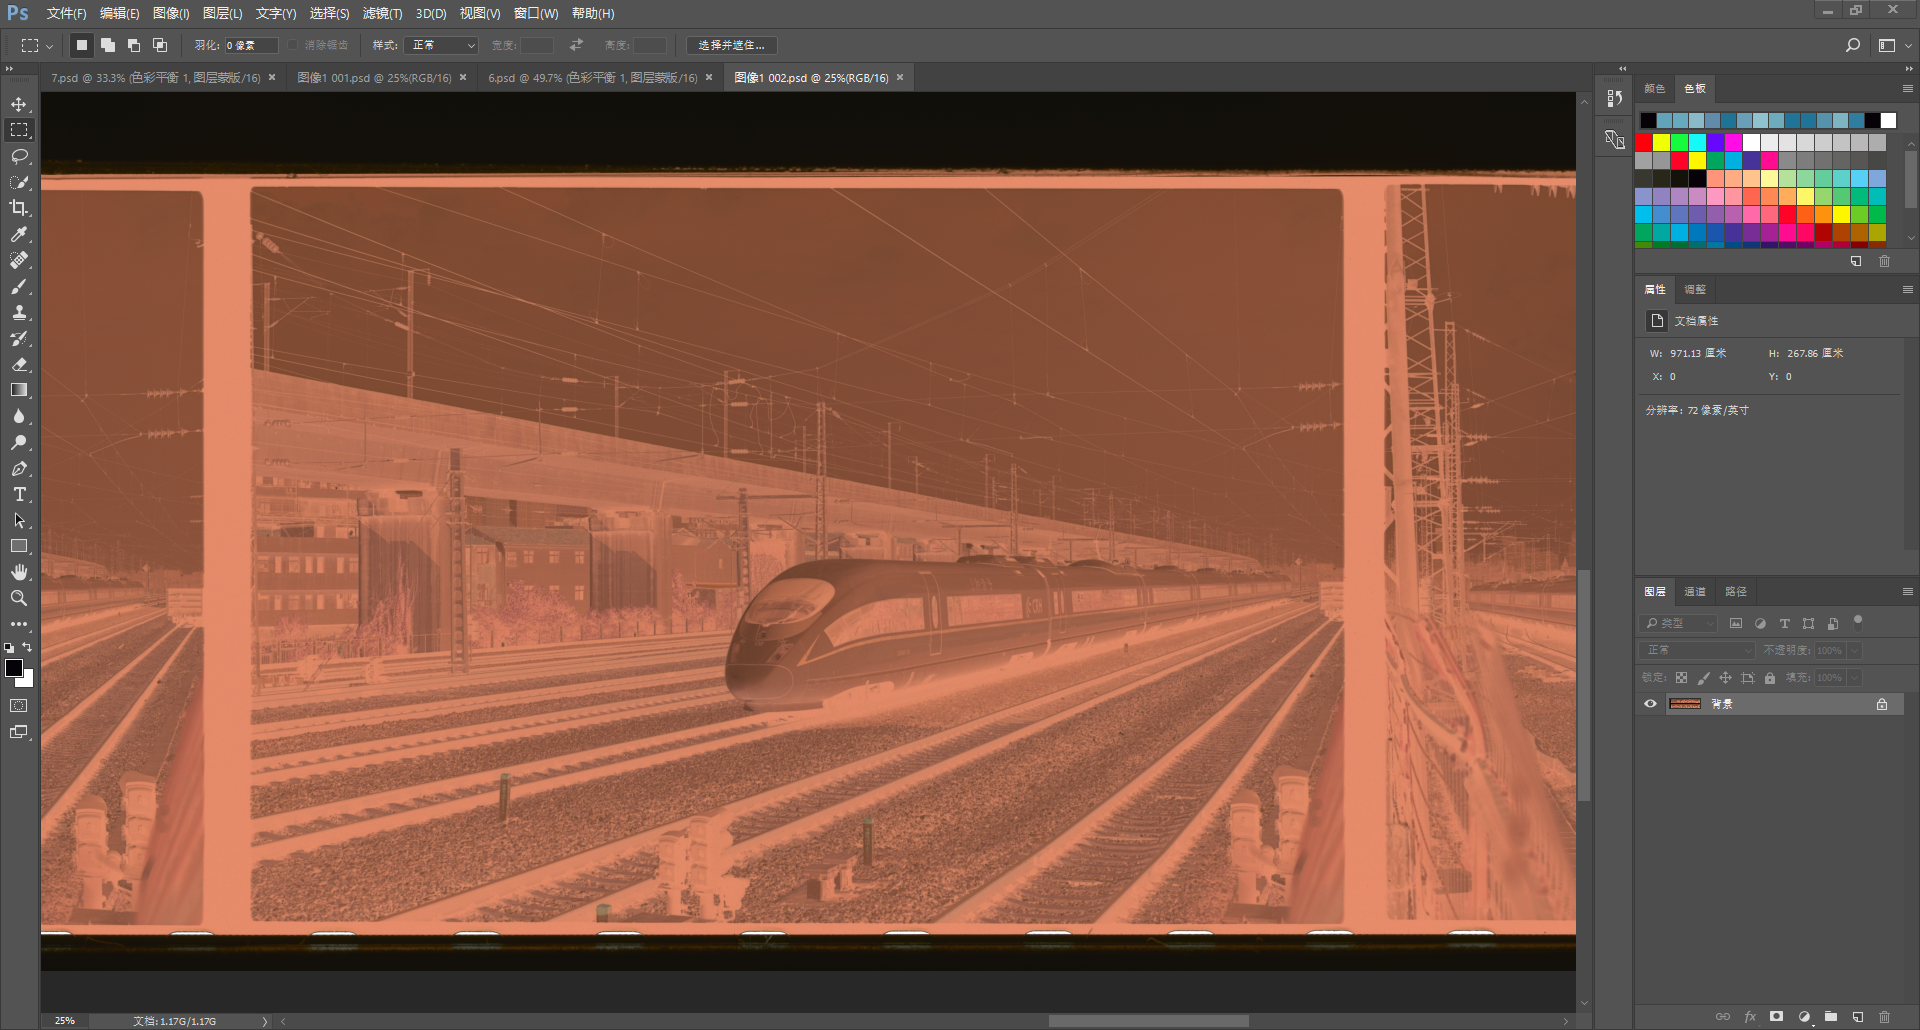
****EXAMPLE HERE OF THE NEG CONTRAST STACK
https://app.box.com/s/pxgxop0a9kvb8e39rjyzlabr6kgsitz4

echo "******* make positive tif ********"
convert ${PR_NegID[i]}_ContrastStacked.tif -negate ${PR_NegID[i]}_Positive.tif

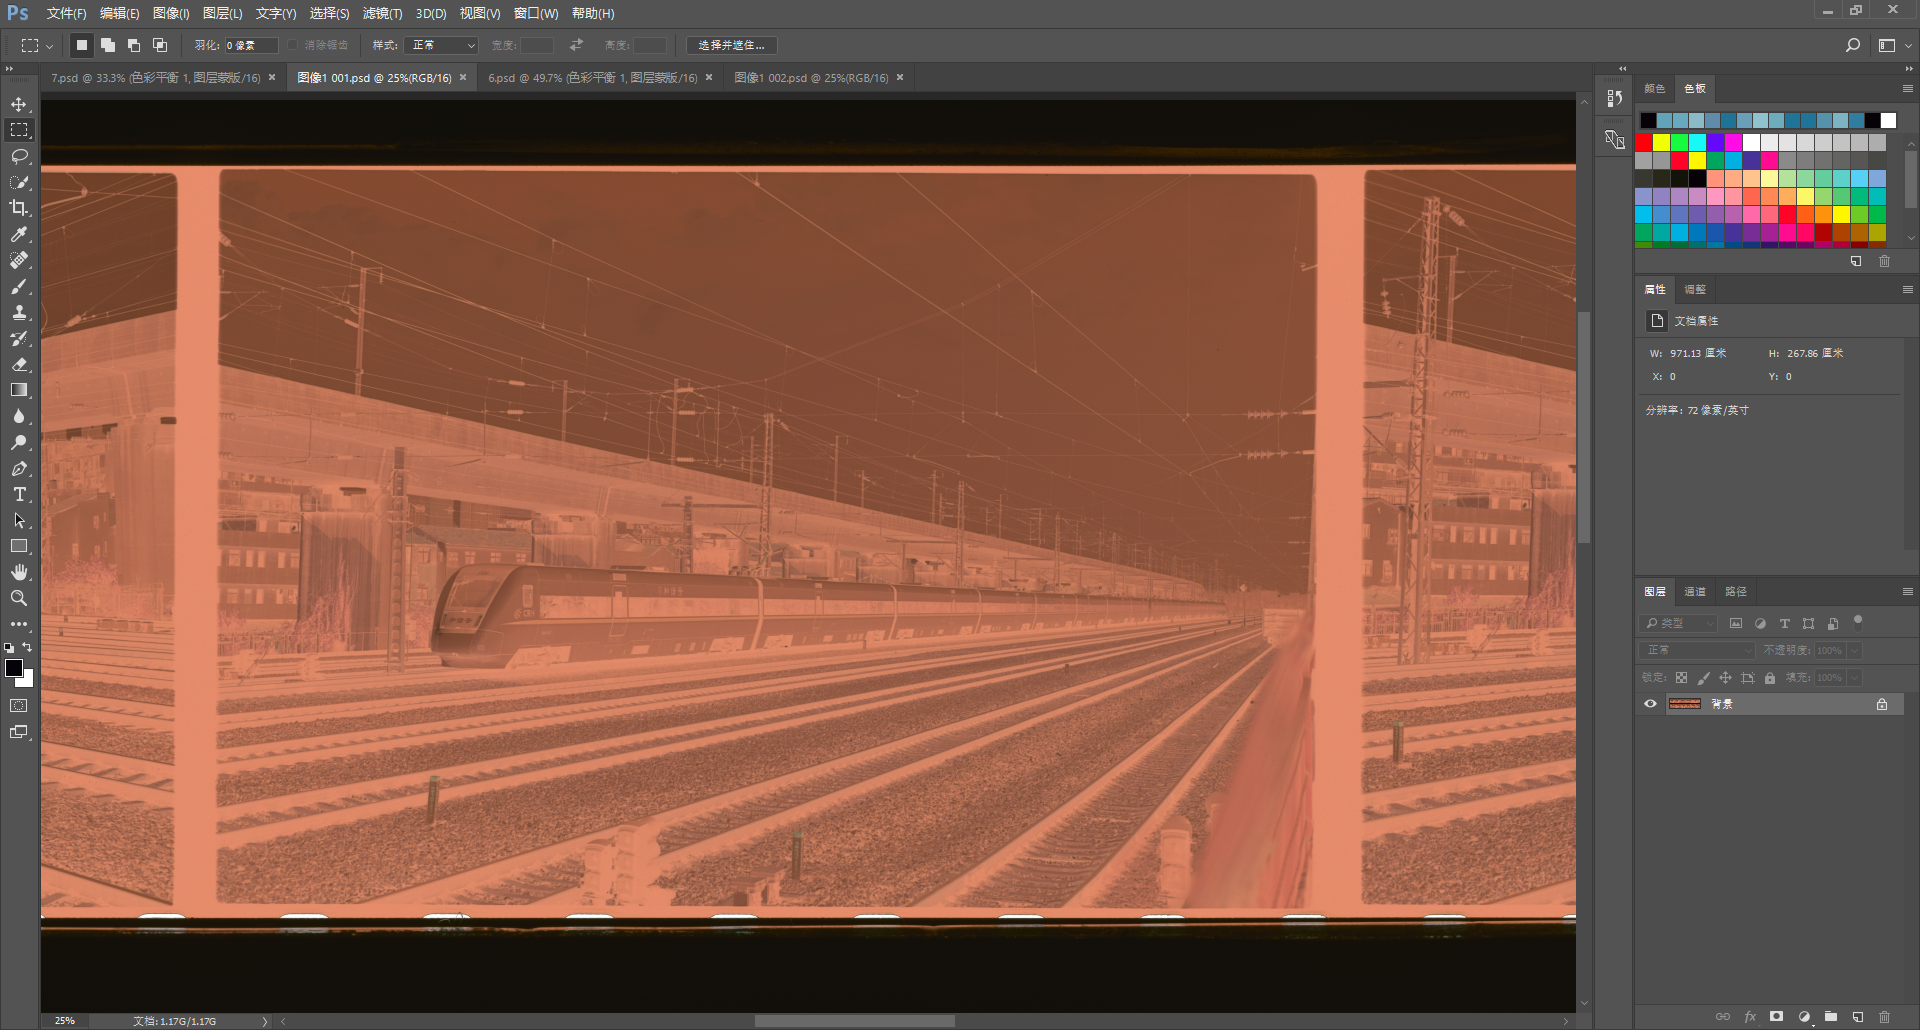
**** EXAMPLE HERE OF THE FIRST POSITIVE
https://app.box.com/s/6rmvwoj65n9a7smm5svkvyi2vg6o858t

echo "******* preliminary color balance *************"
convert ${PR_NegID[i]}_Positive.tif -channel r -level 0%,100%,0.6 -channel g -level 0%,100%,0.7 -channel b -level 0%,100%,0.7 ${PR_NegID[i]}_Degamma.tif

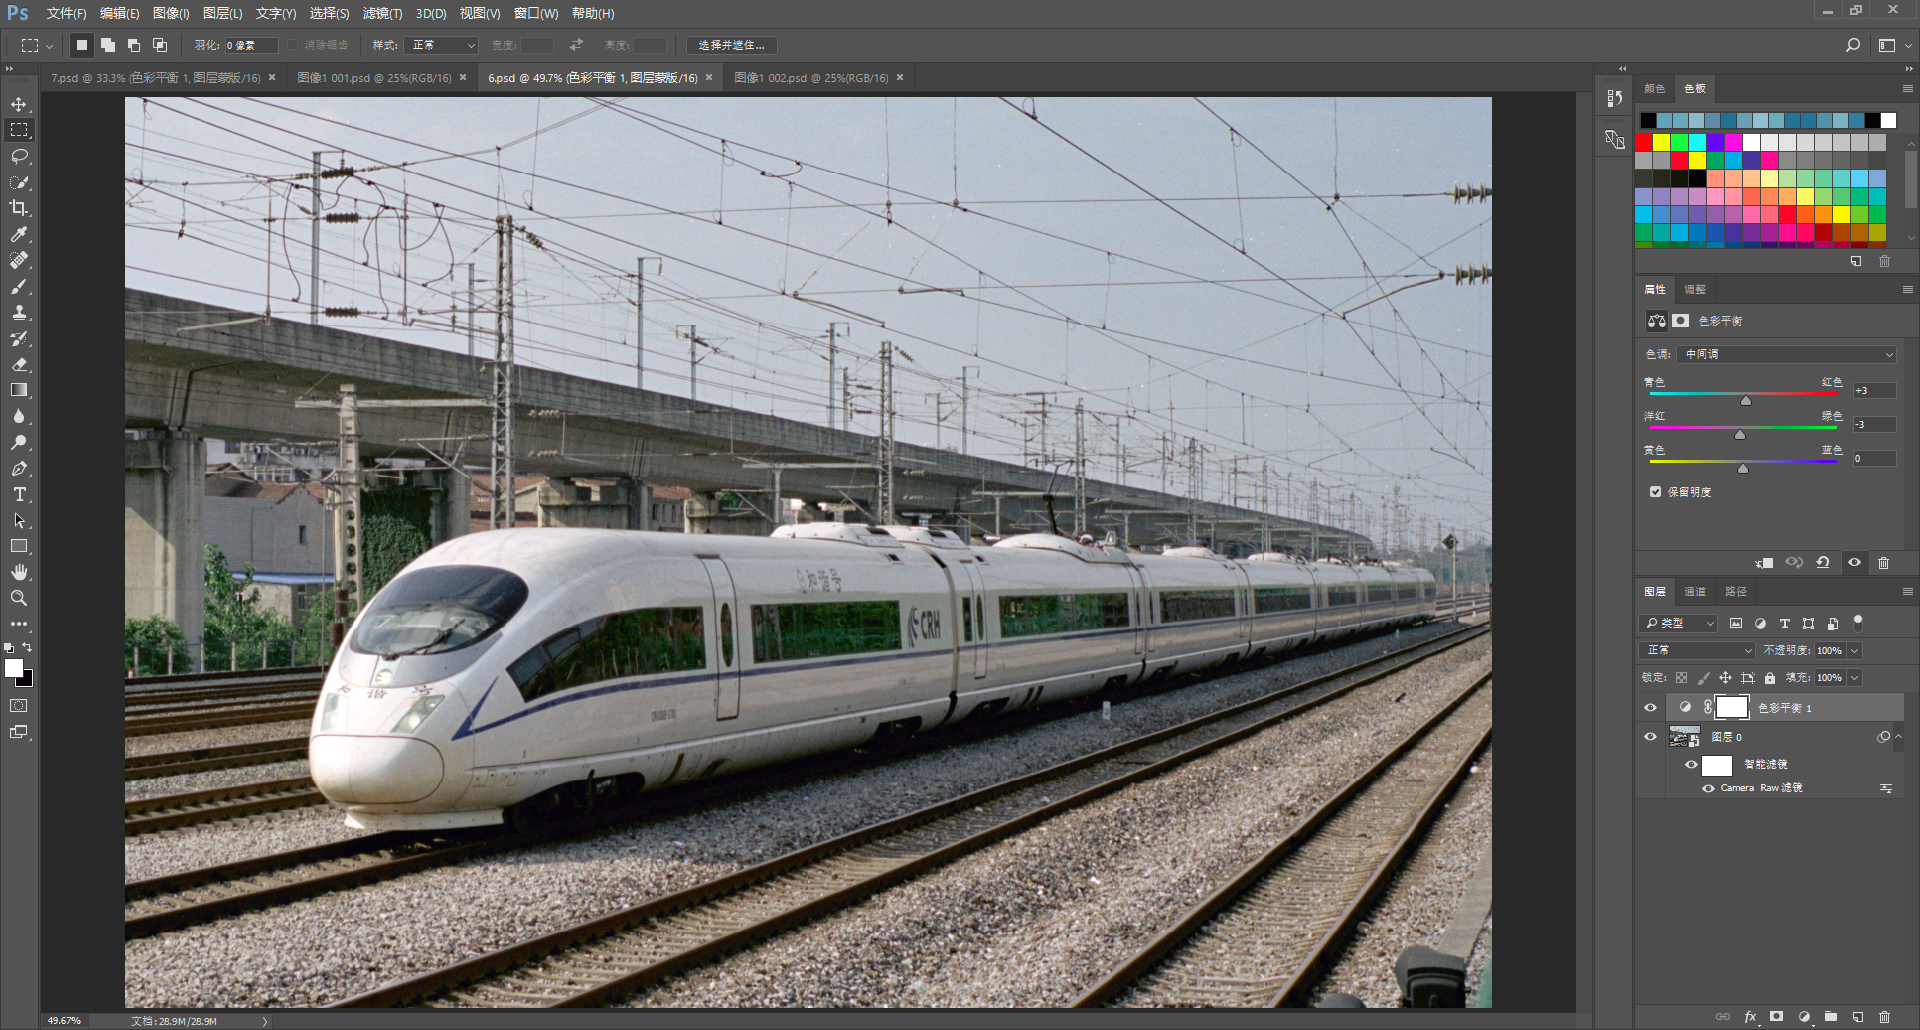
****** EXAMPLE HERE OF THE PRE COLOR BALANCE AND GAMMA
https://app.box.com/s/sj5gh03odvzmksw7rq9sb00hs60cyujv

echo "****** copy files to archive *****************"
cp * $PR_Dir
done
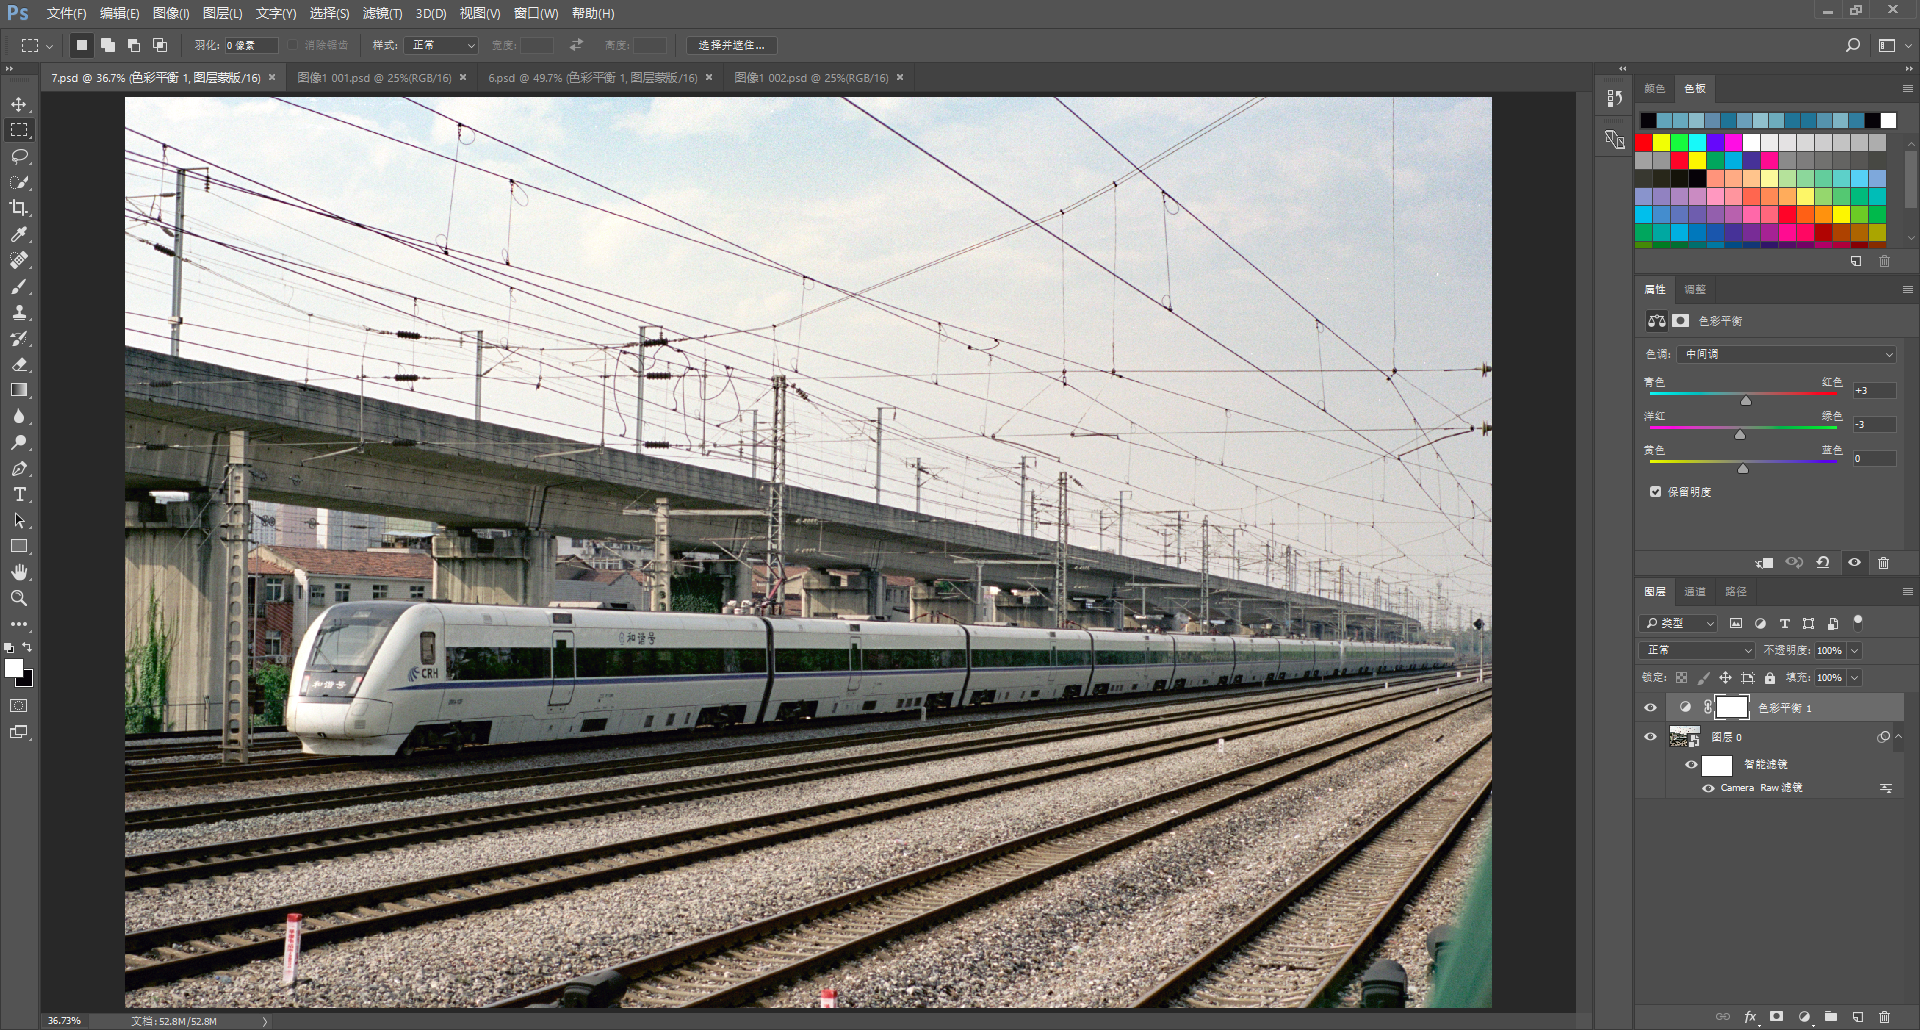
***** EXAMPLE HERE OF THE FINAL MANUAL COLOR BALANCE in CinePaint - My methods were confined to gray balance etc
https://app.box.com/s/75448kfmykqoi41xy7488cmeb77b6osy
06-13-2017, 07:52 AM   #10
Senior Member
hooverfocus's Avatar

Join Date: Aug 2010
Posts: 210
I don't know if I'm missing the point but the way I do it is pretty straightforward, and so far I've been happy with the method I use.

First invert & demask. Doing it with curves takes care of both in one go, you can invert in composite RGB but you just have to make sure to restore the proper colour for each channel afterwards.
Then colour balance. For this I use a separate layer. Set black point on frame, white & grey points as per image scene.
Then bring back some contrast. Mileage may vary, so adjust to taste.

Here applied on your images:
Imgur: The most awesome images on the Internet
06-13-2017, 08:09 AM   #11
Veteran Member


Join Date: Feb 2016
Posts: 706
QuoteOriginally posted by butangmucat Quote
Some follow-up questions:

So to neutralize the orange mask, I need to play with the curve on red and yellow channels?

The lab also suggested using levels to set black, grey, and white points. Are they the same as using curve correction?
There is a danger here of making a relatively simple process over complicated. Using Curves layer on top of an inverted image of your negative will get the job 95% done. You will be using the Red Green and Blue channels (not the yellow as this relates to CMY channels). Using the Curves will take care of the orange mask

Attached image shows the steps
1. Copy negative and invert (PS Ctrl+I)
2. Add a Curves layer and work on the individual RGB to bring the ends down to just before clipping shadow and highlights in each channel
3. Use the combined RGB channel to fine tune contrast as required
This will get you to where my image is and from there you will fine tune to taste with Hue&Sat etc. This is less than 2 minute job. Work on the sky seperately as needed

The black grey and white points are pretty much covered by the workflow above but you can if you wish click on them in turn in your image but you may find that you do not have a neutral or that they induce clipping.

I agree that you should be looking at individual scans of each negative rather than a scan of a whole strip and you may also ask the lab to reverse so you have a positive image. But normally a scan is just that a scan of an original in your case a negative which will be further corrected by you to your requirements - give 20 labs the same negative and ask for a colour print, result 20 different colour prints and all should be acceptable but none of them may be 'correct' to your eye or memory.

---------- Post added 06-13-17 at 08:59 AM ----------

Just an addition

You may want to try renaming one of your .fff files to tif and see what happens. Just copy and work on this dupe highlight the file extension .fff and change to .tif - it should/may open in Photoshop without any further ado although it may be if a neg film scanned originally and converted to pos that the Tif will still show a neg with the orange mask - this due to the tags in the Tif from the Hasselblad scanner.

Another option is to download the free Hasselblad software called Phocus - AFAIK you will need to register to download but should not be a problem
Phocus - Hasselblad

Last edited by TonyW; 11-06-2017 at 09:24 AM.
06-13-2017, 10:42 AM   #12
Veteran Member


Join Date: Mar 2007
Posts: 1,204
QuoteOriginally posted by butangmucat Quote
I think you misunderstood something.

- Hassie Flextight X5 is a (virtual) drum scanner AFAIK and I believe it only scans in stripes. Correct me if I am wrong.

- The fff files, AFAIK are linear raw files, and I am supposed to do the demask by myself and then fine-tune the color.

通过我的 Nexus 6P 上的 Tapatalk发言
butangmucat as I have never delt with files from a Hassie Flextight X5 something was being misunderstood.

On further inquire it appears you need to get the Imacon 3F Plugin for Photoshop to open the .fff files without having the Flexcolor software. I am not sure how you can do that. It may be possible to get the plugin for free without having to own the Flexcolor software. Maybe the place you had the scans done included the Imacon 3F Plugin for photoshop with the scans?

It may even be possible to obtain the Flexcolor software by simply creating an account at the Hasselblad website. From my short research the best results are obtained through the Flexcolor software than from the Imacon 3F Plugin in Photoshop.
06-14-2017, 12:28 PM   #13
Veteran Member


Join Date: Mar 2007
Posts: 1,204
butangmucat, I found this site Know How Transfer that offers scans such as the ones you had done for €7 each. At the bottom of that page they have a Free 3F package download that includes Flexcolor, the X3F plugin for PS and three .fff files to test the scans. It is a large download as it includes both Mac and Window installers. The three .fff images are >100mb each.

I was able to install the PS plugin which allowed me to open the supplied .fff files in Photoshop. I couldn't get the Flexcolor software to install with an error that the installer wasn't a recognized developer.

What type of scanner might you have yourself? Adjusting the color at point of scan is the best way to attain the color you want. I don't do much scanning but I have always used LaserSoft Silverfast on a now ancient Epson 4990. The latest versions of Silverfast allows you to actually scan negatives as DNG files.
06-14-2017, 12:36 PM   #14
Veteran Member


Join Date: Feb 2016
Posts: 706
Those files are quite old and I am not sure they will work with PS CC 2017.

However you do not need the plugin at all to use the images - as explained earlier .fff are Tif with a different file suffix to denote the file contains Hasselblad information.

Just change the file extension xxxxx.fff to xxxxx.tif
06-14-2017, 01:08 PM   #15
Veteran Member


Join Date: Mar 2007
Posts: 1,204
TonyW the X3F plugin supplied in that download worked for me with CS4. From what I read if you change the .fff file to .tif you loose the none destructive nature of the .fff file.

Are you able to download the Phocus software from the Hasselblad website for free? It says that it is a free download. I wasn't able to create an account to give it a try. That would give the best results. The Phocus software is Flexcolor essentially.

Last edited by Rico; 06-14-2017 at 01:21 PM.
Reply

Bookmarks
  • Submit Thread to Facebook Facebook
  • Submit Thread to Twitter Twitter
  • Submit Thread to Digg Digg
Tags - Make this thread easier to find by adding keywords to it!
auto, channels, colors, colour, curves, download, file, files, film, film orange mask, hasselblad, image, lab, mask, nexus, phocus, photography, photoshop, portra, post, print film, scan, settings, software, tif, type

Similar Threads
Thread Thread Starter Forum Replies Last Post
sharpening in Photoshop / unsharp mask / K5ii s KPsplash Digital Processing, Software, and Printing 11 11-25-2016 11:10 AM
Removing mould from a very old sepia print RobG Film Processing, Scanning, and Darkroom 8 04-25-2016 02:46 AM
Nature An affinity to Orange....... eaglem Post Your Photos! 8 11-24-2014 04:39 PM
Hide All Mask in Photoshop - need help jpzk Digital Processing, Software, and Printing 4 02-15-2010 03:50 PM


All times are GMT -7. The time now is 09:01 AM. | See also: NikonForums.com, CanonForums.com part of our network of photo forums!
  • Red (Default)
  • Green
  • Gray
  • Dark
  • Dark Yellow
  • Dark Blue
  • Old Red
  • Old Green
  • Old Gray
  • Dial-Up Style
Hello! It's great to see you back on the forum! Have you considered joining the community?
register
Creating a FREE ACCOUNT takes under a minute, removes ads, and lets you post! [Dismiss]
Top