So the last few days I've been trying to get my workflow together and wasn't quite satisfied with the speed nor quality of my old sharpening techniques. I Decided to combine a couple different sharpening approaches into one, keep all the control, and speed it up while I was at it. What follows is what I came up with, a link to download the actions(sharing is caring

), and a mini tutorial for those new to Photoshop.
EDIT: Preface This is not a magic sharpening method that gives sharper results than ordinary High Pass or Unsharp Mask sharpening techniques, but it does equal them(because it's the same). This action sharpens the areas you want sharpened without the stuff you don't. Because this is a form of edge sharpening it works best with images that are in focus and reasonably sharp to begin with. If you are trying to recover an overly soft image, this is probably not the method for you.
Download Me!!! What I wanted:
1. Something fast(30-60 sec)
2. Something that didn't sharpen noise or that sweet, sweet, bokeh.
3. Something that could be used with any image including comps with hundreds of layers and groups.
Here's an exaggerated example of what type of stuff gets sharpened. Notice the blurred areas and noise are not sharpened(the behavior I want) as they are in the full High Pass image:

Example of the problem with applying sharpening to the entire image(exaggerated for drama):
 Tutorial:
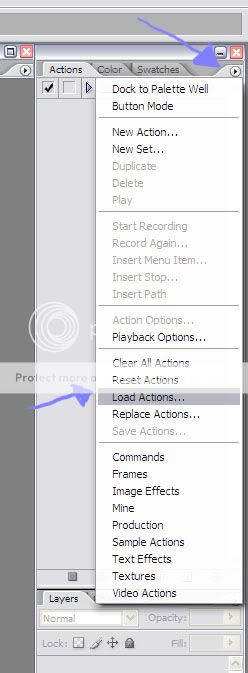
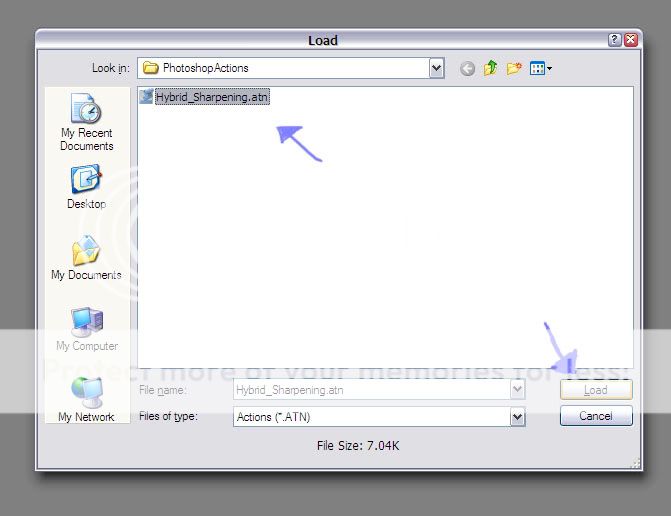
Load the action set into photoshop:
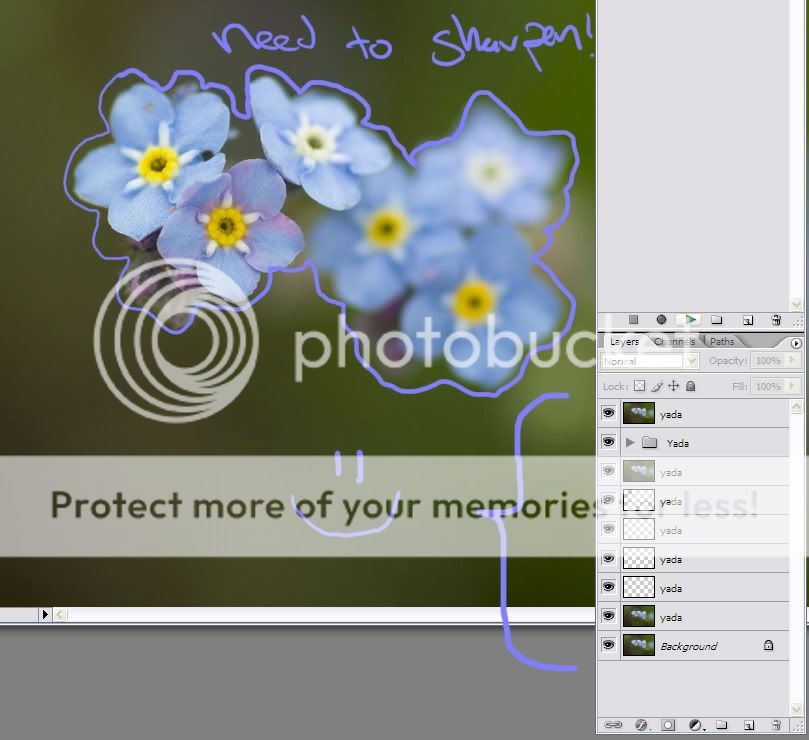
We want to sharpen just the flowers and keep all of our layers/groups as is:
Select the sharpening method you want to use(High Pass or Unsharp Mask), then hit play. This action assumes you have a layer called "Background". If you don't, a couple dialogs will pop up, hit continue and you're on your way:

Your image is now a black and white mask and a levels dialog pops up. Adjust the white and black slider to get the contrast you desire. Because this is our sharpening Mask, pure white = 100% of the sharpening effect is visible. Pure black = no sharpening. If you want more of the image sharpened make more whit visible.
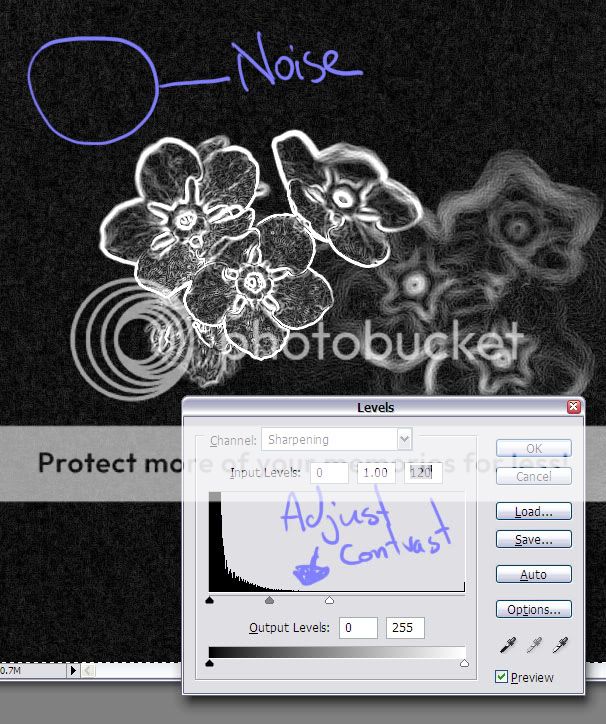
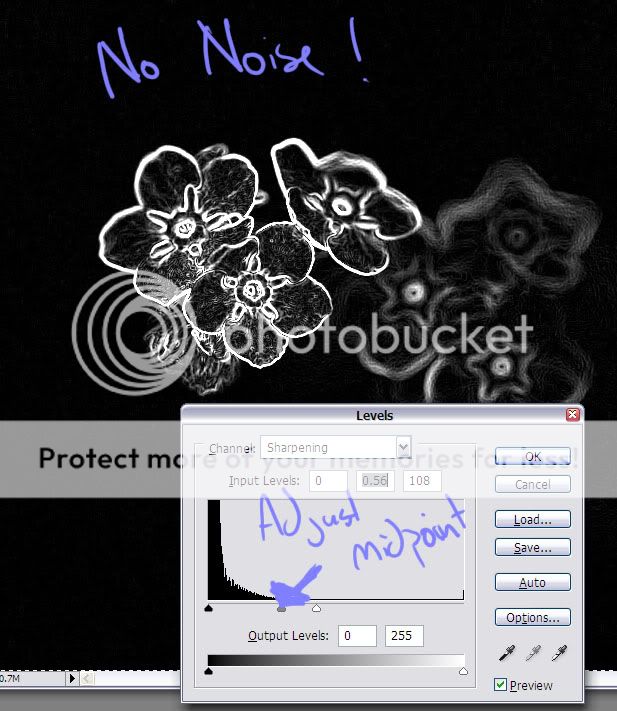
When we adjust the contrast the noise becomes more visible... We can easily fix this by adjusting the midpoint(Grey triangle), then hit ok:
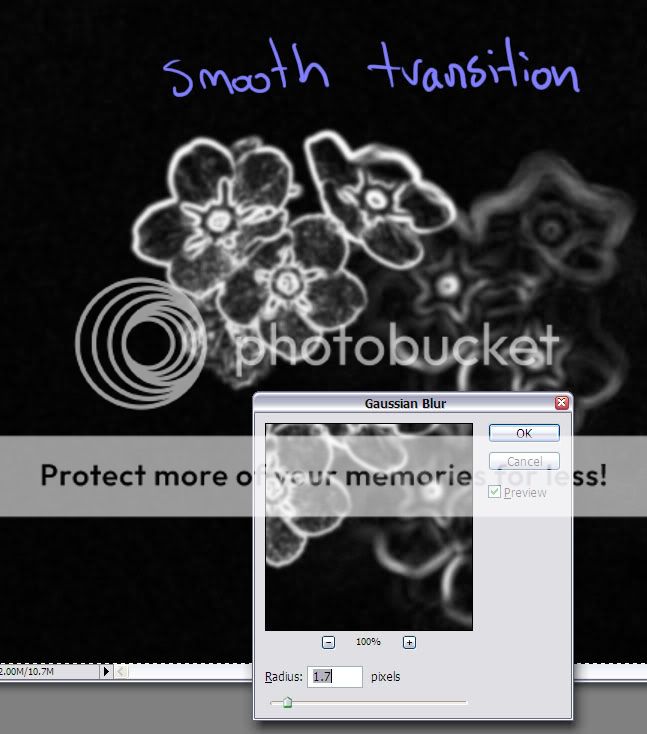
A Gaussian blur dialog pops up. This blur allows us to control the falloff of our sharpening effect, as well as exclude any of the remaining noise from the sharpening mask...
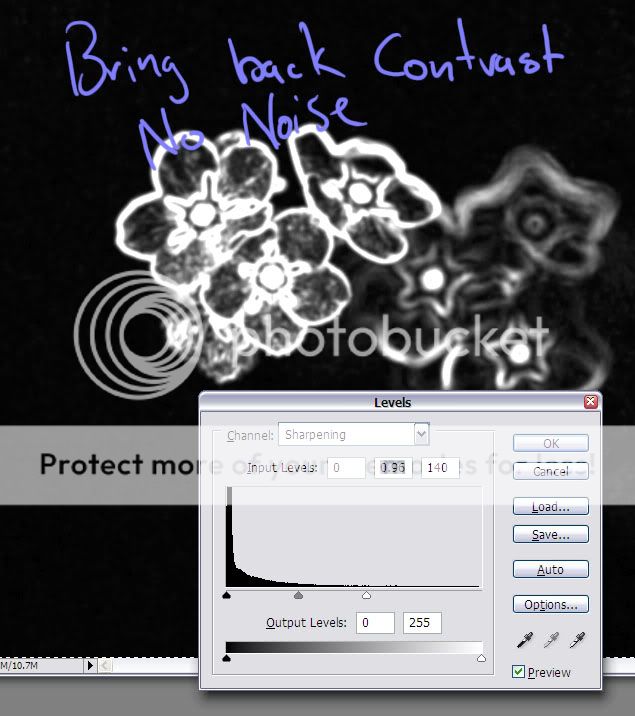
Problem is we've lost some contrast. Hit ok and another levels dialog pops up to readjust this(same method as before). Remember Pure white = 100% of the sharpening is visible. Hit OK.
Now that our mask is made, we need to sharpen the image(High Pass or Unsharp Mask depending on your earlier selection)(exaggerated for drama):

That's it! All of your original layers/groups are organized, locked, and placed into a new group called "Original". A "Sharpen" layer is placed above this group, with the layer mask we created earlier controlling what is sharpened and what is not. The correct blending mode for the "Sharpen" layer to make work is preselected("overlay" for High Pass, "normal" for Unsharp Mask).

Tips:
There is no magic setting. Every image and intended output is different, so you'll have to play around until you get what works for you. I typically use a value of .5-2 for High Pass and 80-300, .5-1.5, 0 for Unsharp Mask. That being said you should be able to find general settings that work for each intended output(print, web, etc.)
At the end of the process you can adjust the opacity and fill sliders of the "Sharpen" layer to fine tune your results. If you need even more control you can paint white or black onto the mask as needed.
PS
Let me know If there are any broken links or problems. It works for me and I figured some of you might find it useful as well.
Last edited by Vertex Ninja; 06-04-2007 at 12:11 PM.


 Similar Threads


