Don't be afraid to do light retouching on the final stitched image as well. Yea, it'll probably be a jpg or a TIF (TIF's are better for this, obviously), but in the case of that lightening evenly as you go right, then a quick gradient tweak would probably level things off nicely.
Also, don't be afraid to shoot really wide, or really wide open. You won't get the sharpness wide open as you would stopped down, but unless you're planning to keep the stitched pano at 100% you're going to be reducing the image anyway, meaning you're going to be losing detail anyhow. If anything having a slight blur is going to help keep artifacting away from edges in the reduced image. (Don't take this as sharpness being bad, it never, ever is, especially in landscapes, but pano's add another dimension to the mix).
As an example, I like shooting 360's (handheld, using the camera's electronic level as a guide) with my Sigma 10-20 to get pano's. The reason is I use them for shots like this:
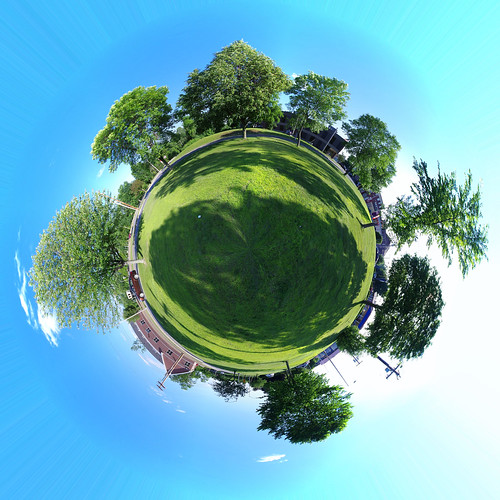
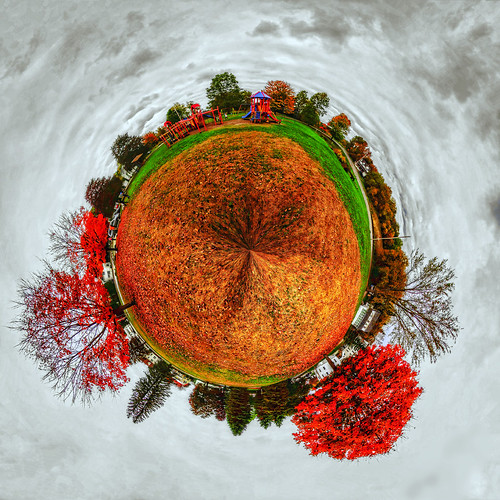
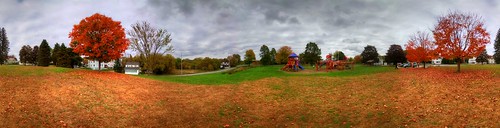
The pano that was used to make the latter being this:
One nice thing about photography is (by and large) the rules are made to be broken when the need fits.
FWIW, I tend to use Microsoft ICE for my panos, simply because it stitches very, very well and actually factors in (to a certain degree) distortion and the like and corrects for it.
---------- Post added 01-21-15 at 10:11 PM ----------
Double posting, but gonna explain my usual process, just because I know it differs from the norm.
I use the internal level on my camera. That's it. No tripods unless its late or I'm standing in such a way that turning on my feet would be dangerous.
Shooting this way, I *know* I'll be cropping the ground (usually) out of necessity, but thats OK with me. I also shoot somewhat wide (anywhere from 10mm up to about 35mm or so) because of the whole "going to crop the ground" factor.
Camera settings go on manual - no autofocus, no auto white balance. I meter the scene with the sun just off-frame then lock those settings in. No touchy! I also shoot these shots as in-camera RAW+JPG's, since I use ICE and it doesn't recognize RAW files. I'll go for using the JPGs first, then to the RAWs if the JPGs have issues I need to then fix.
I then make a series of vertical 'portrait' oriented shots (DON'T do landscape! We're going for as much sky and ground as possible here to allow some cropping later). I also shoot the scene twice or even three times, varying the exposure slightly just in case I muffed things.
When I get home, I throw the JPGs into Microsoft ICE, and usually will get what I need with only a minor amount of post work needing to be done. Its fast, somewhat efficient and (for me at least) it works. I've been using this method since before I had a DSLR and was shooting with a cheap Kodak and later budget Powershot. Back then I *did* use a tripod, since I could cock the P&S up into a vertical position. I got nervous with the K-x/K-30 doing that because the camera is so heavy. That in-camera level they have on the K-30 was a lifesaver as I could then ditch the tripod.
At any rate, I've never had many issues. Usually the biggest problem would be if I was shooting with a tripod and not realizing I wasn't perfectly level and the pano would slowly slide up or downhill, resulting in a lot of unwanted cropping where I didn't want it to be.
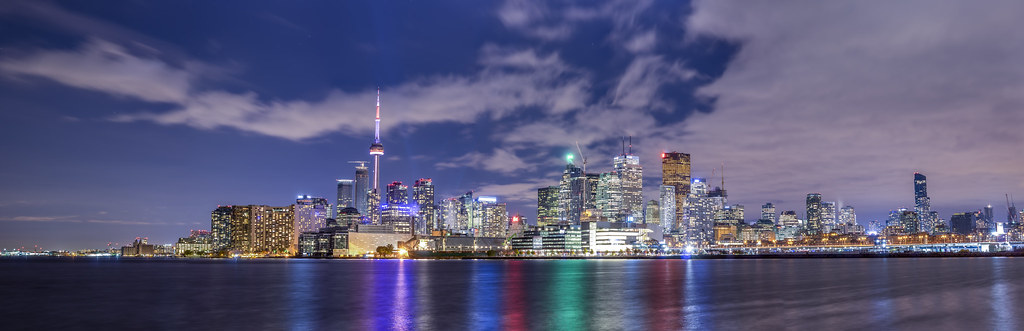
As an example, I used that method for this monster:

(click through, you'll see its 17537x2240 - shot on an $80 Canon A470). If I could go back in time I'd have done a second series of shots to add some sky, but whatever. Done is done.

The bottom line is you don't need an expensive pano head, or even a tripod to get a decent panorama. Just find a method
that works for you, and make sure your camera's settings are locked down so that the focus, exposures, and white balance don't shift. The rest is gravy. I hear people going on about nodal points and $500 pano heads and my eyes tend to glaze over in short order.
Of course this hasn't kept me from lusting after a gigapan head. Like I've said, rules (even personal ones) are always meant to be broken.


 I had to go back into LR to straighten the worst images just to get this result, as the skewing just wouldn't let the outer images (12 in total) stitch, even when manual control points were added. But this introduced other issues, I think--gross mismatches in the sky and a couple off oddities on the horizon--what the hell is that small volcanic eruption on the far right?
 I had to remove one image just to get it to work at all


 Similar Threads


