| Pentax/Camera Marketplace |
| Pentax Items for Sale |
| Wanted Pentax Items |
| Pentax Deals |
| Deal Finder & Price Alerts |
| Price Watch Forum |
| My Marketplace Activity |
| List a New Item |
| Get seller access! |
| Pentax Stores |
| Pentax Retailer Map |
| Pentax Photos |
| Sample Photo Search |
| Recent Photo Mosaic |
| Today's Photos |
| Free Photo Storage |
| Member Photo Albums |
| User Photo Gallery |
| Exclusive Gallery |
| Photo Community |
| Photo Sharing Forum |
| Critique Forum |
| Official Photo Contests |
| World Pentax Day Gallery |
| World Pentax Day Photo Map |
| Pentax Resources |
| Articles and Tutorials |
| Member-Submitted Articles |
| Recommended Gear |
| Firmware Update Guide |
| Firmware Updates |
| Pentax News |
| Pentax Lens Databases |
| Pentax Lens Reviews |
| Pentax Lens Search |
| Third-Party Lens Reviews |
| Lens Compatibility |
| Pentax Serial Number Database |
| In-Depth Reviews |
| SLR Lens Forum |
| Sample Photo Archive |
| Forum Discussions |
| New Posts |
| Today's Threads |
| Photo Threads |
| Recent Photo Mosaic |
| Recent Updates |
| Today's Photos |
| Quick Searches |
| Unanswered Threads |
| Recently Liked Posts |
| Forum RSS Feed |
| Go to Page... |
 |
| 3 Likes | Search this Thread |
| 02-14-2019, 01:01 PM | #1 |
| Flash Calculator?
So yesterday I did something different in my studio work with two different lenses shooting two different subjects. Let's start with the first one; FA77 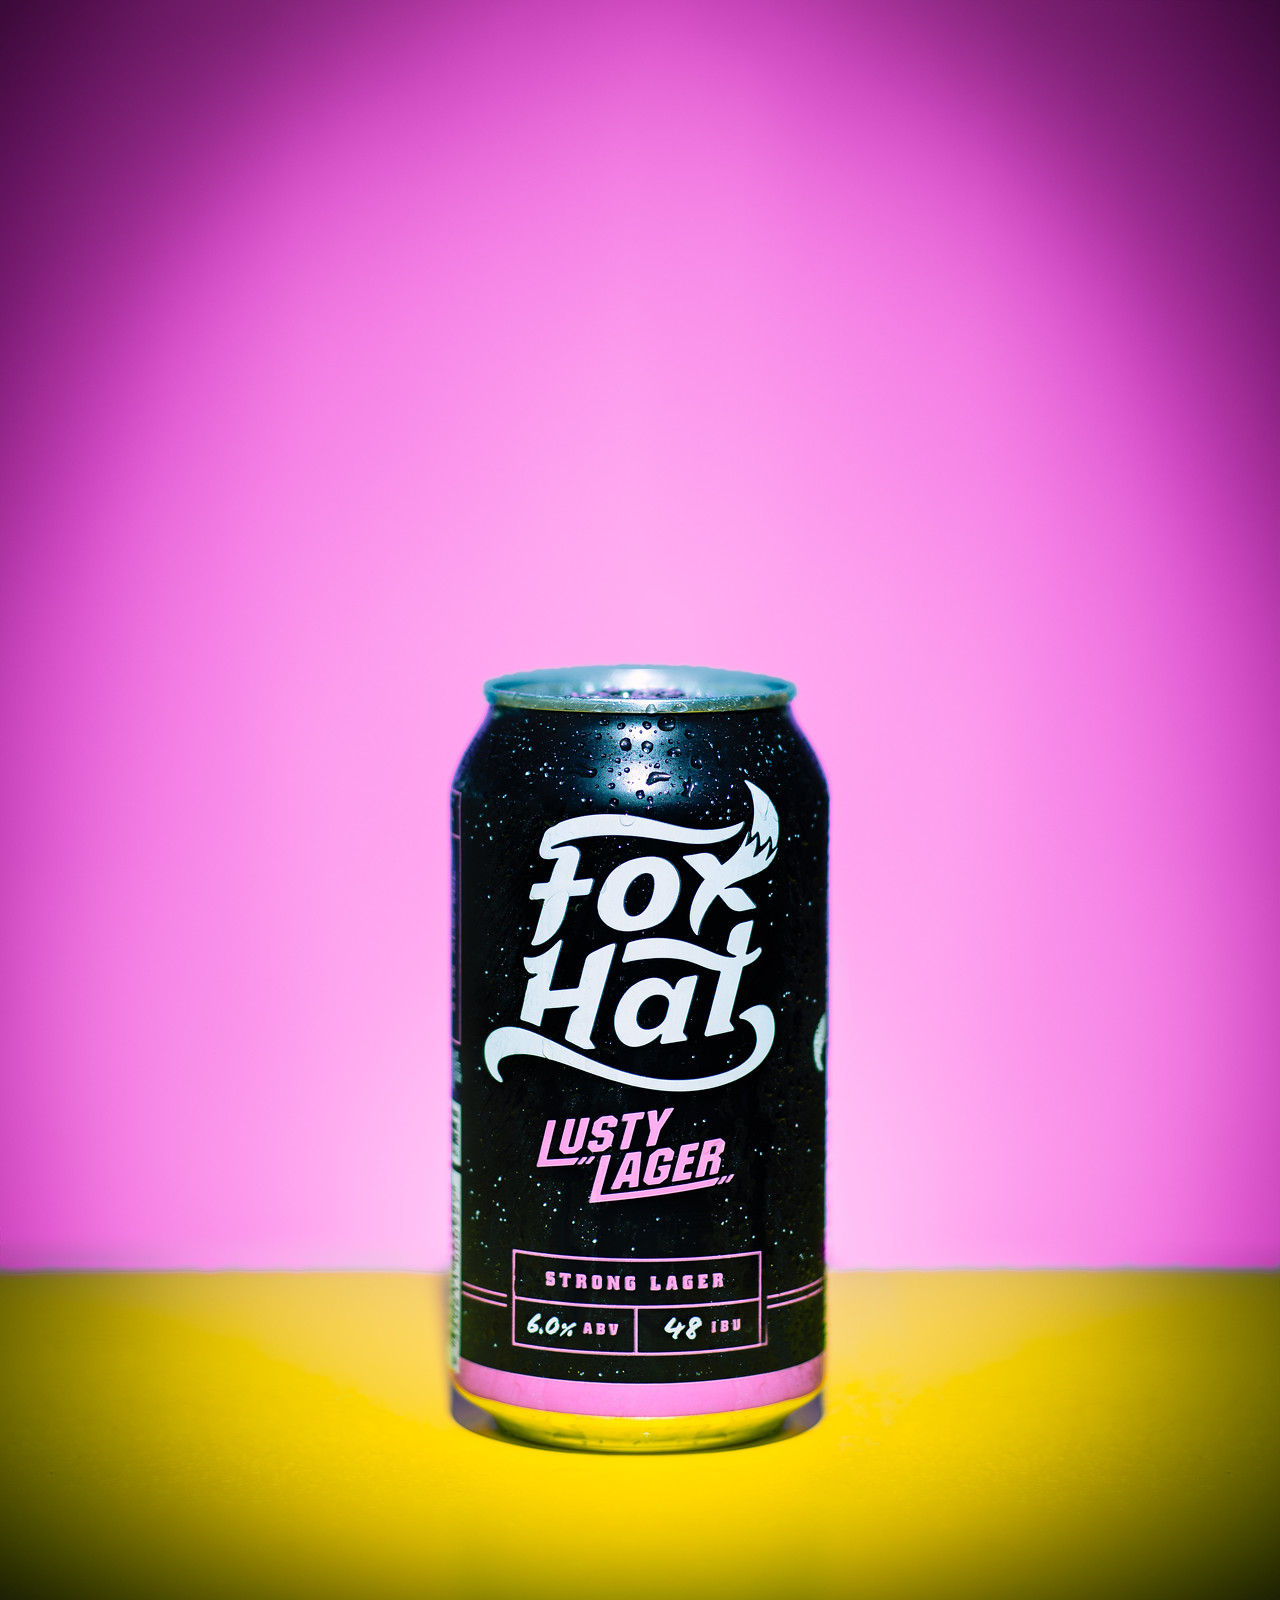 This shot here is composite, one frame at 1/200, f1.8, ISO 100 (the majority of what you see) and the other frame 1/200 f3.5 ISO 100 (for the can, just so the writing and text is a little sharper top to bottom). Both taken in X Mode. Both shots required ocf. One flash is up and behind the camera aimed at the can directly with a diffuser and snoot, the other flash is behind the set up in a softbox with gel to give the pink/purple background. Both flashes in manual mode. Now here's the thing... I cannot recall off the top of my head what the flash power was but let's pretend on the f1.8 shot I had it at say 64+3 for the snoot and 32 for the backdrop. When I went for the f3.5 shot I knew I would have to adjust the power to compensate but I didn't really know by how much, so I just adjusted, fired, chimped and kept adjusting till I felt I got an exposure that was similar to it. Using this tool; https://www.scantips.com/lights/exposurecalc.html I can see that I was -2ev difference between the f1.8 and 3.5 shot. How does -2ev difference look/calculate on manual flash? Can anyone give examples? Here's the other shot; Lensbaby Velvet56  This was a harder shot, this image is comprised of 3 frames, one at f2.8, f5.6 and f11 I think (or could be f8, f4, f2... exif won't show it). It was taken using the Lensbaby Velvet 56 in Manual mode. ISO 100 throughout the images, I think what I did with these shots was actually keep the flash power the same but adjust the shutter speed and aperture only. Lensbaby lenses (when not using flash) are supposed to be taken in Av mode, but when you put a flash on the shutter speed gets locked at 1/200, making aperture adjustments problematic and also missing out on scenarios where HSS is needed. Really I think I just need some kind of calculator so I can go into these shots a little more prepared. If I know I'm going to do some composite shots and know the apertures I wish to work with (f2, f4 and f8 for example), then if being stuck at 1/200 and ISO 100, then what must I need to adjust the flash power by to keep all three shots at the same exposure etc. PS When using the lensbaby without flash and doing composites it's easy, just stay in Av mode and adjust the aperture ring, but currently I am trying to figure out if I can gain some ease when using these lenses with flash. TIA! Bruce | |


| 02-14-2019, 04:49 PM - 1 Like | #2 |
 Really I think I just need some kind of calculator so I can go into these shots a little more prepared. then what must I need to adjust the flash power by to keep all three shots at the same exposure etc. Steve * This is the basic rule, but be aware that actual equivalence of light (quality as well as quantity) may not be the same depending on the nature of the flash and whether special techniques such as focus stacking are being used. Last edited by stevebrot; 02-14-2019 at 05:01 PM. Reason: Completeness | |
| These users Like stevebrot's post: |

| 02-14-2019, 04:59 PM - 2 Likes | #3 |
| * This is the basic rule Steve | |
| These users Like stevebrot's post: |
| 02-14-2019, 11:44 PM | #4 |
|
Just trying to understand. Why did you make a composite of the first shot? As far as I understand you could have shot the whole thing at f3.5 exposing for the can, then increase the flash power for the background and compensate for the 1.8 to 3.5 ratio. | |

| 02-15-2019, 02:37 AM | #5 |
| Good idea...Do you own a smart phone? There are multiple apps available for both iOS and Android. Another option is to use a flash meter. Halving the power is the same as one stop narrower aperture, exposure-wise. If full power at f/8, use 1/4 power at f/4 to provide the same flash exposure.* Steve * This is the basic rule, but be aware that actual equivalence of light (quality as well as quantity) may not be the same depending on the nature of the flash and whether special techniques such as focus stacking are being used. Be aware too that addition of gels, bounce, and increased flash-to-subject distance due to the bounce thoroughly complicate matters such that calculation is nearly impossible. Steve Do you by chance know of any app or even webpage (as it's studio stuff I'm talking about I have access to a computer easily) that might help with my calculations? That webpage I linked was really a kinda first page/first 2-3 hit of whatever google search I did, and I didn't look more into it than what I showed. It didn't seem to delve into flash power as part of the computations...? (which is specific to my needs). I'm aware that we can adjust the incremental values of the flash power (so it's not in +3 and +7's etc), but really all I get is that 1 is max and 256 the weakest hahaha. When I am setting up my shots I chimp a lot to get a vibe and look that I think will work with a future edit, I have just come to understand that many product photography shots are comprised of composites (no more is this true than with heavy reflective items such as glass and bottles). I'm too dumb to figure out if a web page or app tells me my basic exposure triangle is varying by -2ev what that might correspond to in terms of adjusting my singular or multiple flash set up (I completely failed school lol, academia intelligence is not strong with this one  ). ).I do understand however that any adjusting of lighting position will skew everything, as well as room dynamics. Just trying to understand. Why did you make a composite of the first shot? As far as I understand you could have shot the whole thing at f3.5 exposing for the can, then increase the flash power for the background and compensate for the 1.8 to 3.5 ratio. The shot itself is 80% f1.8, only the CAN is f3.5 (if I left the can at f1.8 the text is just that tad too blurry, in fact I should have stopped down more!). However, if I shot the whole shot at f3.5 then the bokeh of the flooring and the backdrop diffuser sheet is more defined (can see crinkles and uneven lighting etc). As it was, even at f1.8 I had to perform a 'symmetry' edit and copy one side of the backdrop over to the other to create a more even lighting distribution. If I did as you say, shoot for f3.5, the bokeh in the table top/meets backdrop is too crisp for my liking. when you shoot flash straight on at a subject, and then also lighting behind, it's hard to get that balance right (in my experience). Too much flash from the front drowns out the lighting from the rear etc. I also experimented with varying degrees of flash power for the backdrop softbox lighting, too much and it loses it's colour, too little and you can really see a difference in light power coming through. Move the soft box back and the range of intensity of the colour increases, you need to have it fairly close to the bottle/can to provide a more uniformed colour/flash lighting distribution. I am really trying to figure out a way to light a soft box evenly (when shooting directly at it). I have a strip one as well as a large 120cm octagon one. I have tried special attachments inside the softbox to try and spread the light emitting into the box more evenly (such as magmodsphere/bounce) but none seems to really help. Too low a power and you start to see the shadows in the lines/creases of the diffuser panel or the actual lightstand within the box. It's really hard to find a sweet spot where the colours feel fairly 'even' for a small location, thus this means the softbox moves too close to comfort to the thing being snapped. Does that make sense? | |
| 02-15-2019, 07:04 AM | #6 |
| I'm aware that we can adjust the incremental values of the flash power (so it's not in +3 and +7's etc), but really all I get is that 1 is max and 256 the weakest hahaha. For example, if you are happy with the camera at f/2 and your key light at 4 (or 1/4 power) and you background light at 8 (or 1/8 power), then the following would give equal exposures: f/1.4 key 8 background 16 f/2 key 4 background 8 f/2.8 key 2 background 4 It's exactly the same as manual mode with ambient light. If you open the aperture one f-stop (doubling the amount of light you let in) but wanted to keep the exposure the same, you need to halve the shutter speed to compensate (halving the amount of light you let in). For the "+3" and "+7", these will be adding finer units of 1/3 EV control of the flash power. If it isn't already, I advise you to set your camera to 1/3 EV steps as well (the other option is 1/2 EV). This way, one click on the flash power will match one click on the cameras aperture wheel. Using the above example as a starting point, the following would give the same exposure: f/2 key 4 background 8 f/2.2 key 4+3 background 8+3 f/2.5 key 4+7 background 8+7 f/2.8 key 2 background 4 It's just a matter of counting 'clicks'. NOTE: I've written flash powers like "4+3" to match how you expressed it in your first post. I'm not sure how yours actually displays it, but this notation is pretty confusing. My Nikon flashes would write 1/4 + 0.3 with an extra box to separate the "+0.3" to reinforce the mixed notations. The most confusing thing with my Nikons is how the 0.3 and 0.7 units work as either add ons or subrtract ons (that's a new term I think). 1/4 + 0.3 would be the same power as 1/2 - 0.7, which version gets displayed depends on how you get there (ie start at 1/4 power and increase it one press or start at 1/2 and decrease it two presses). ---------- Post added 02-15-19 at 09:19 AM ---------- Move the soft box back and the range of intensity of the colour increases, you need to have it fairly close to the bottle/can to provide a more uniformed colour/flash lighting distribution. Or use double diffusion- use big fat diffusion panel as your backdrop and put your flash/softbox behind it. Not as flexible, but you can also just use actual coloured backgrounds. For small products, a collection of different colours won't be too pricey or hard to manage space wise. Last edited by BrianR; 02-15-2019 at 07:20 AM. | |
| 02-15-2019, 07:26 AM | #7 |
|
For a 2 stop difference, I would have just adjusted the ISO. I have a flash meter. You'll get 1/3 stop variations in reading if you don't hold it the same way and direction. So just do what you did. Trial and error via looking at the histogram. It doesn't take long. My strobes have power settings in the back and I have ND filters for them. I will still chimp to verify. Last edited by tuco; 02-15-2019 at 07:39 AM. | |
| 02-16-2019, 09:49 AM | #8 |
|
+1 on what BrianR said about "it's just a matter of counting the 'clicks'." Just make sure the camera's aperture, shutter speed and ISO settings are all set to 1/3 stop increments. The same goes for the speedlight. Then, if you stop the lens aperture down 6 clicks (2 full stops), you simply increase the flash power by 6 clicks if using the flash's adjustment wheel in 1/3 stop increments. Alternative, one could increase the ISO by 6 clicks from say ISO 100 to ISO 400. If you do it this way, you won't need to mess with charts or apps that will only slow down the process. | |
| 02-16-2019, 12:00 PM | #9 |
|
I also think that a simple dial click system is a good idea .... Certainly it is used by plenty of professionals for efficient and accurate real world working. I think it's clear that the problem here is understanding of the mathematical relationships, and the numerical displays on the equipment. The best way forward would be to set both camera and trigger to the same step increments and use the click method to keep things equal on both camera and flashes. I have previously advised Bruce to switch to half steps, to simply things, and I think 1/3rd steps is overly fiddly now with processing being used for all photos anyway. So one click would be 1/2 a stop, two clicks is one stop ..... | |
| 02-16-2019, 12:20 PM | #10 |
| What flashes do you have? I'm assuming that the first number in your power readings are 1, 2, 4, 8, 16, 32, 64, 128, 256? These are reciprocals, 1 is full power, 2 is 1/2 power, 4 is 1/4 power etc. From here it's exactly as Steve said, each step in flash power will double or halve the light and will compensate for opening or closing the aperture one full f- stop. For example, if you are happy with the camera at f/2 and your key light at 4 (or 1/4 power) and you background light at 8 (or 1/8 power), then the following would give equal exposures: f/1.4 key 8 background 16 f/2 key 4 background 8 f/2.8 key 2 background 4 It's exactly the same as manual mode with ambient light. If you open the aperture one f-stop (doubling the amount of light you let in) but wanted to keep the exposure the same, you need to halve the shutter speed to compensate (halving the amount of light you let in). For the "+3" and "+7", these will be adding finer units of 1/3 EV control of the flash power. If it isn't already, I advise you to set your camera to 1/3 EV steps as well (the other option is 1/2 EV). This way, one click on the flash power will match one click on the cameras aperture wheel. Using the above example as a starting point, the following would give the same exposure: f/2 key 4 background 8 f/2.2 key 4+3 background 8+3 f/2.5 key 4+7 background 8+7 f/2.8 key 2 background 4 It's just a matter of counting 'clicks'. NOTE: I've written flash powers like "4+3" to match how you expressed it in your first post. I'm not sure how yours actually displays it, but this notation is pretty confusing. My Nikon flashes would write 1/4 + 0.3 with an extra box to separate the "+0.3" to reinforce the mixed notations. The most confusing thing with my Nikons is how the 0.3 and 0.7 units work as either add ons or subrtract ons (that's a new term I think). 1/4 + 0.3 would be the same power as 1/2 - 0.7, which version gets displayed depends on how you get there (ie start at 1/4 power and increase it one press or start at 1/2 and decrease it two presses). ---------- Post added 02-15-19 at 09:19 AM ---------- I'm not sure I understand this, but I think you're saying the softbox isn't lit uniformly and further back you see closer to the edge of the surface which is darker? You might have an easier time with uniformity using a white or neutral grey backdrop and aim your gelled flash directly at it (I 've only skimmed this article, but it shows many examples Creating Perfect Gelled Backgrounds for Portraits). Or use double diffusion- use big fat diffusion panel as your backdrop and put your flash/softbox behind it. Not as flexible, but you can also just use actual coloured backgrounds. For small products, a collection of different colours won't be too pricey or hard to manage space wise. And you're right about the backdrop gel/flash being un-uniformly lit, it was patchy. So for example, a 120cm octagon softbox, to get the flash firing at a pleasing power setting (so that the purple is not washed out, but quite a good strong shade) I needed the power fairly low. It took time to adjust it to a place where I felt shadows and light areas of the flash firing within the softbox were best, the stem of the lightstand less visible etc, and I used the bottom right hand corner of the Octagon softbox where I avoided the stem of the lightstand and felt the lighting was most even (but even then in post I actually used symmetry copying of the background to make in truly uniformed...). I have done gels against white backdrops before, here's some shots; Enchanted Forest Flicks | Flickr but it's very much amateur hour here and I am not fully in control of my gear/knowledge. I thank you for that link and will give it a good going over soon. I think my main issue is the front flash lighting the subject can 'battle' the rear gel light, weakening it etc, lighting position, grids and what not can be useful here. Silly me had not actually thought to fire my flash direct onto a backdrop for my product photos, instead thinking inside a softbox was better  Silly Bruce... Silly Bruce... +1 on what BrianR said about "it's just a matter of counting the 'clicks'." Just make sure the camera's aperture, shutter speed and ISO settings are all set to 1/3 stop increments. The same goes for the speedlight. Then, if you stop the lens aperture down 6 clicks (2 full stops), you simply increase the flash power by 6 clicks if using the flash's adjustment wheel in 1/3 stop increments. Alternative, one could increase the ISO by 6 clicks from say ISO 100 to ISO 400. If you do it this way, you won't need to mess with charts or apps that will only slow down the process. For a 2 stop difference, I would have just adjusted the ISO. I have a flash meter. You'll get 1/3 stop variations in reading if you don't hold it the same way and direction. So just do what you did. Trial and error via looking at the histogram. It doesn't take long. My strobes have power settings in the back and I have ND filters for them. I will still chimp to verify. I also think that a simple dial click system is a good idea .... Certainly it is used by plenty of professionals for efficient and accurate real world working. I think it's clear that the problem here is understanding of the mathematical relationships, and the numerical displays on the equipment. The best way forward would be to set both camera and trigger to the same step increments and use the click method to keep things equal on both camera and flashes. I have previously advised Bruce to switch to half steps, to simply things, and I think 1/3rd steps is overly fiddly now with processing being used for all photos anyway. So one click would be 1/2 a stop, two clicks is one stop ..... Thanks everyone for helping this dummy  | |
| 02-16-2019, 01:09 PM | #11 |
|
But it's easier to understand the relationships between exposure time, aperture, ISO and flash power stops with half steps, and to learn the figures. That's why I suggested half steps for you a while ago.
| |
| 02-16-2019, 01:52 PM | #12 |
|
I suggested your camera be set to 1/3 steps so that it matches your flash. If you can set both to 1/2 steps, that's fine too. The most important thing for this thread is that they match. I think my main issue is the front flash lighting the subject can 'battle' the rear gel light, weakening it etc, lighting position, grids and what not can be useful here. You're happy diving in to photoshop, so another possibility you might consider is combing the lighting in post. In your can photo, take a shot with only the front light on, then take another with the backlight how you like it but the front light off. Combine in post. I have an example of this sort of thing in the first post here, where I move a single light around and then blend the results: Lighting for wide angle close-ups - PentaxForums.com. My use was to be lazy and only pack one light, but this has legitimate studio use. That said, it's almost always more satisfying to get the physical setup 'right' and do it in one shot and generally necessary if your subject is alive and possibly moving .
| |
| 04-10-2019, 04:43 AM | #13 |
|
So I just had another stab at this tonight, I wanted to share my results and whether I am understanding things correctly from a flash power adjustment perspective. Please observe the following shot;  This is a composite shot taken with the Lensbaby Velvet 56 (which is a macro lens as well as a weird glowy soft thing, quite sharp when stopped down). Two speedlights were used. Settings went like this; X Mode; Shot 1 1/200 f5.6 ISO 100 Flash 1 = 8 Flash 2 = 32+3 Shot 2 1/200 f2 ISO 100 Flash 1 = 32 Flash 2 = 128+3 The shot was then merged in PS, using the f5.6 mainly for the ring and a little bit around it and then blending to the predominant f2 glow shot that occupies most of the shot. I used this webpage here to see the EV difference between going from f5.6 up to f2; Exposure Calculator to Compare Any Two Camera Exposures It told me it was +3EV difference. I took the f5.6 shot first (as stopping down is easier to see focus with the lensbaby range of lenses) and then because I was opening up the lens to f2 I needed less power to equal the same exposure and thus changed the flashes accordingly, going from 8>32. (I counted 8 as '1', 16 as '2' and therefore '32' as '3'. I did the same with 32+3 (to get to 128+3, but I didn't need to do that adjustment as on the V6ii trigger when you adjust power and both speedlights (A and B for example) are selected the power adjustments are global, handy for moments like this. But this was done in the comforts of my own home, google next to me via my computer. Next time I need to be able to do these adjustments a little more confidently, at a clients house for example. So I asked a friend for advice, if there was a phone app or something to help me with finding the EV value differences between shots etc. He simply pointed me to this web page; f-number - Wikipedia He suggested I print and laminate this and bring with, just in case. If I understand it correctly then this is how it might work; The lensbaby has a range of apertures with stop markers/points at these apertures; 1.6, 2, 2.8, 4, 5.6, 8, 11 and 16. My speedlights are adjusting at third of a stop (+3 + 7 etc). So... for argument sake, if I was using a composite with the following apertures 1.6 and 8 (shutter speed and ISO the same), then the power of the light would have to adjust by 4.7EV. So if on the f8 shot I was using a speedlight at 2+7 I would need to back it down to 32+3 for the f1.6 shot? Now... I didn't use any maths to help me get to that result, so it could well be wrong. I tried to use the charts and almost like counting on fingers lol. What is a better way to do it. Like... there must be a kinda multiple math calculation thing to help me work that out? Like do this math first to arrive at x, then do this next math to arrive at y, then do this amount of 'clicks' on the V6ii to arrive at the right exposure? That would be the ultimate solution for me, a 'click guide'! But no seriously, I know many of you are highly clever and skilled academic practitioners, I failed school horribly and find this stuff quite hard and over taxing on the brain. It just doesn't 'click' in my head. There is enough for me to concern myself with the photography process, the set up, focus, composition, choosing apertures and balancing light etc, I would just really like some simply way of saying to myself; "ok... I'm taking this first shot at f8, the next one is going to be at f4 so I need to do this amount of clicks on the V6ii for my flashes to get the same exposure" Is this possible? Can I just do some maths that involve the apertures first, then that gives me a EV difference, then I can translate that EV number to be a corresponding number of clicks (clicking in the right direction obviously hehe)? Cheers everyone, I really appreciate your time and patience with me  Last edited by BruceBanner; 04-10-2019 at 04:48 AM. | |
| 04-10-2019, 12:08 PM | #14 |
| I took the f5.6 shot first (as stopping down is easier to see focus with the lensbaby range of lenses) and then because I was opening up the lens to f2 I needed less power to equal the same exposure and thus changed the flashes accordingly, going from 8>32. (I counted 8 as '1', 16 as '2' and therefore '32' as '3'. I did the same with 32+3 (to get to 128+3, but I didn't need to do that adjustment as on the V6ii trigger when you adjust power and both speedlights (A and B for example) are selected the power adjustments are global, handy for moments like this. Since your flash is set for adjustments in 1/3 stop increments, you merely would have had to count 9 clicks to lower the flash's output to compensate for opening the aperture by 3 stops. So... for argument sake, if I was using a composite with the following apertures 1.6 and 8 (shutter speed and ISO the same), then the power of the light would have to adjust by 4.7EV. So if on the f8 shot I was using a speedlight at 2+7 I would need to back it down to 32+3 for the f1.6 shot? Starting with the lens at f8 and the flash at 1/2 + 7 and then reducing flash output by 4.7 stops we get: 1/4 + 7/10 (1 stop down) 1/8 + 7/10 (2 stops down) 1/16 + 7/10 (3 stops down) 1/32 + 7/10 (4 stops down) 1/32 (4 and 7/10 stops down) The easiest way to do this is simply to count the clicks. Three clicks for each full stop (3 x 4 = 12), plus 2 more clicks for the 7/10 stop for a total of 14 clicks on the speedlight dial/button. Hope this helps. ---------- Post added 04-10-19 at 03:21 PM ---------- "ok... I'm taking this first shot at f8, the next one is going to be at f4 so I need to do this amount of clicks on the V6ii for my flashes to get the same exposure" Is this possible? Can I just do some maths that involve the apertures first, then that gives me a EV difference, then I can translate that EV number to be a corresponding number of clicks (clicking in the right direction obviously hehe)? | |
| 04-10-2019, 01:57 PM | #15 |
| Bruce, first off, your counting is wrong with regard to adjusting the main flash. You only lowered the flash's power output by two stops, not three. Also, you're using whole numbers for the flash output, when these numbers are actually fractions. When you say "8>32," you should be saying 1/8 power to 1/32 power. So when you adjusted the lens aperture 3 stops from f5.6 to f2, you should have reduced the flash power by three stops as well, and that is from 1/8 to 1/64 power (1/8 to 1/16 is one stop, 1/16 to 1/32 is another stop and 1/32 to 1/64 is the third stops). Since your flash is set for adjustments in 1/3 stop increments, you merely would have had to count 9 clicks to lower the flash's output to compensate for opening the aperture by 3 stops. Here again you're not adjusting the speedlight correctly. The correct value is 1/32 power. Starting with the lens at f8 and the flash at 1/2 + 7 and then reducing flash output by 4.7 stops we get: 1/4 + 7/10 (1 stop down) 1/8 + 7/10 (2 stops down) 1/16 + 7/10 (3 stops down) 1/32 + 7/10 (4 stops down) 1/32 (4 and 7/10 stops down) The easiest way to do this is simply to count the clicks. Three clicks for each full stop (3 x 4 = 12), plus 2 more clicks for the 7/10 stop for a total of 14 clicks on the speedlight dial/button. Hope this helps. ---------- Post added 04-10-19 at 03:21 PM ---------- Yes, as I mentioned above, simply count off the corresponding number of clicks on the flash's dial. F8 to f4 is two stops, so lower the flash power by two stops, or six clicks since your flash's output is set to adjust in 1/3 stop increments. I'll retest today. I love the '3 clicks per stop' and I can run with that. What about the EV difference flash calculator stuff, I might not always have charts with me for reference etc. Is there any simple maths I can do in my head to find the EV difference? Like.. I know it would get complicated to add in a 2nd and 3rd variable (shutter speed variance and ISO change) but let's for arguments sake pretend that I will only be shifting aperture in this regard, how can I easily figure out of f5.6 >f2.8 is xEV difference, f8>f2.8 etc etc? | |
|
| Bookmarks |


| Tags - Make this thread easier to find by adding keywords to it! |
| aperture, background, backgrounds, box, camera, clicks, count, ev, f/2, f1.8, f8, flash, iso, lens, lensbaby, lenses, light, mode, photography, post, power, shot, shots, speedlight, technique |
| Top Liked Posts |
2  Post #3 by stevebrot Post #3 by stevebrot |
| 1 Post #2 by stevebrot |
 Similar Threads
 | ||||
| Thread | Thread Starter | Forum | Replies | Last Post |
| Lens potential comparison calculator | beholder3 | Photography Articles | 10 | 05-18-2012 06:44 AM |
| optimum hood depth calculator? | rparmar | Pentax SLR Lens Discussion | 77 | 03-06-2011 02:13 PM |
| Macro Extension Tube Calculator | Ouroboros | Photographic Technique | 10 | 12-04-2010 12:53 PM |
| Blackberry Depth of Field Calculator! | elcahall | Pentax DSLR Discussion | 9 | 12-11-2009 11:05 AM |
| DOF and FOV calculator | MoiVous | Pentax SLR Lens Discussion | 2 | 05-31-2009 10:52 PM |


