Forgot Password
Pentax Camera Forums Home
 

Reply
Show Printable Version Search this Thread
09-14-2012, 11:16 PM   #16
Veteran Member


Join Date: Jun 2011
Location: London, Canada
Photos: Gallery
Posts: 343
Hello
It seems to me that's it's more of a salvage operation than a retouch. Don't mean to be harsh but with such an image as this you will never get a "good" end result. The subject out in the field with the setting sun is fine. As mentioned the hot spots on the forehead and nose are harsh. Having repositioned the subject by slightly turning the head and/or you moving to the right would fix that. The colour cast is warm on the sun side and cool from the sky on the shadow side. The contrast is too high to get a full range of tones in one shot, HDR isn't really an option here. A warm fill reflector on the shadow side would balance things up. Trying to recover a good balance from an underexposed image is difficult. You can lighten things up and push and pull but you still won't end up with what a good image would give with little effort. I've done a quick edit to remove the hot spots and made it a b&w which hides some of the flaws. A reshoot is the best option. We learn from our mistakes and get better with practice. Again don't want to offend just offering my thoughts on it.
Regards
Greg

Attached Images
 
09-15-2012, 06:34 AM   #17
Veteran Member
Buschmaster's Avatar

Join Date: Dec 2006
Location: Minnesota
Posts: 806
Original Poster
Thanks Gregory, that makes a lot of sense!
09-16-2012, 05:11 AM   #18
Site Supporter
Site Supporter


Join Date: Oct 2010
Location: Melbourne
Photos: Gallery
Posts: 3,386
Hi

I really do not exactly know what the OP wanted to achieve. It is always extremely difficult to do this. So all one can only ever do is try to think what is desired and then put your own spin on it.

There are now a number of variations and I would like to add to the possibilities and hope it will strike a cord.

Generally I am not overly fond (I try to choose my words carefully) of the colour, to me they look a bit "thin" and lifeless, but then again maybe this is what was desired, I don't know. But if the OP wanted to emulate the old film prints as the came back from the chemist in your street then perhaps it is only something the OP got used to seeing. I am saying this because I grew up in the old film days and know, therefore, that prints most of the time looked like this when the operator did not change the chemicals often enough as was required to maximise returns. And when you were unlucky to have them printed at the very end of the chemicals life, when they were spent, well they would look thin and flat. On the other hand with luck your pics were done with fresh chemicals and you would see a huge difference.

I have taken your image and put it through the mill with the help of NICK Viveza by applying control points here and there. (Without going into details) I particularly did not like the the "cold shoulder" and warmed this up a wee bit. I also toned down the bright areas of the nose a bit, maybe hardly noticeable because it is such a small image.

I would dearly like to know what you think (all of you) because this is a forum to exchange ideas, is it not ?

Greetings

Last edited by Schraubstock; 02-16-2013 at 01:50 AM.
09-16-2012, 03:12 PM   #19
Veteran Member


Join Date: Jun 2008
Location: Flyover America
Posts: 4,469
QuoteOriginally posted by Schraubstock Quote
I would dearly like to know what you think (all of you) because this is a forum to exchange ideas, is it not ?
For me it's too warm, saturated and dark.
Not to say it's awful or anything just not to my taste.

My best shot at it given the limitations of the file:


Last edited by wildman; 11-08-2012 at 12:28 AM.
09-16-2012, 05:25 PM   #20
Veteran Member
Buschmaster's Avatar

Join Date: Dec 2006
Location: Minnesota
Posts: 806
Original Poster
QuoteOriginally posted by Schraubstock Quote
Hi

I really do not exactly know what the OP wanted to achieve. It is always extremely difficult to do this. So all one can only ever do is try to think what is desired and then put your own spin on it.

There are now a number of variations and I would like to add to the possibilities and hope it will strike a cord.

Generally I am not overly fond (I try to choose my words carefully) of the colour, to me they look a bit "thin" and lifeless, but then again maybe this is what was desired, I don't know. But if the OP wanted to emulate the old film prints as the came back from the chemist in your street then perhaps it is only something the OP got used to seeing. I am saying this because I grew up in the old film days and know, therefore, that prints most of the time looked like this when the operator did not change the chemicals often enough as was required to maximise returns. And when you were unlucky to have them printed at the very end of the chemicals life, when they were spent, well they would look thin and flat. On the other hand with luck your pics were done with fresh chemicals and you would see a huge difference.

I have taken your image and put it through the mill with the help of NICK Viveza by applying control points here and there. (Without going into details) I particularly did not like the the "cold shoulder" and warmed this up a wee bit. I also toned down the bright areas of the nose a bit, maybe hardly noticeable because it is such a small image.

I would dearly like to know what you think (all of you) because this is a forum to exchange ideas, is it not ?

Greetings
I like the warmth of it. A lot actually!

QuoteOriginally posted by wildman Quote
For me it's too warm, saturated and dark.
Not to say it's awful or anything just not to my taste.

My best shot at it given the limitations of the file:
Thanks! Sorry about limiting you so much Perhaps I should ask the model what she thinks of the different pictures!


Edit:

Just asked her! Her favorite is the most recently post by Wildman. She likes the feel of it a lot. Hopefully she'll be my model again soon and give me another shot!
10-09-2012, 09:05 PM   #21
Senior Member
telly0050's Avatar

Join Date: May 2011
Posts: 233
I actually think the file isn't so bad.
if the harsh light on nose is a bit of problem, how about just blur it a bit?
i use healing brush to fill in the nose hard light, then blur it out in a new layer.
after the hard light is fixed, you can pretty much do anything with it.

but then again, the file is a bit small to work with.

10-09-2012, 09:14 PM   #22
Veteran Member
Buschmaster's Avatar

Join Date: Dec 2006
Location: Minnesota
Posts: 806
Original Poster
I'll pass this along to my model and see how she likes it. But I must say, I really like it! It's a lot of what I was going for!

I've uploaded the original jpeg here:
http://www.mintbusch.com/fullimage.JPG

Thanks!

10-10-2012, 09:05 PM   #23
Veteran Member
Jessesdad's Avatar

Join Date: Jan 2011
Location: Blackwood
Photos: Gallery | Albums
Posts: 359
Yet another try. Or three.
Telly's is great.
Attached Images
     

Last edited by Jessesdad; 10-11-2012 at 12:27 AM.
10-13-2012, 08:06 AM   #24
Veteran Member
Julie's Avatar

Join Date: Aug 2010
Location: Illinois
Photos: Gallery | Albums
Posts: 1,069
Hi Eric, seems like everyone is taking a go at it; so why not?

I don't do many portraits,but here is how I would treat it...


I have Elements 8 on my computer at home and here is what I did:

Adjust Lighting ---> Shadows/Highlights ---> lighten the shadows so we can see her pretty face more clearly, darken the highlights a little bit so we don't have super light/blown-out areas, and up the contrast a tiny bit
Apply a Soft Omni lighting effect to the right of her face ---> go back into Shadows/Highlights and darken the highlights so the little less extreme and make it look a bit more natural
Adjust Lighting ---> Levels, (sorry, I don't know the proper terms when using levels, but I moved left slider and made it about 10pts to the right, middle slider about 10pts to the right, and the last one, about 35pts to the left, to get the lighting to look like how I wanted)- I left just enough darkness and shadows to make her look a little mysterious.
Lastly, I made a new sepia layer on top, about 15% opacity, to give it just a little tint and then merged the two layers together into a final image

I also went and removed the fly-away hairs on the right.

Just my $.02.
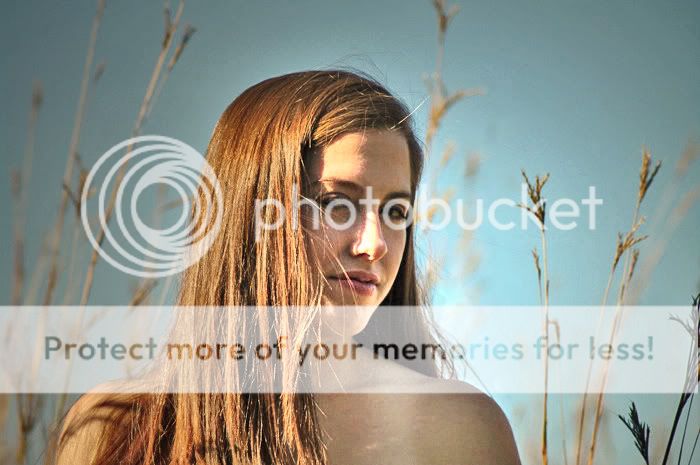
Nice photo of a pretty girl.
10-13-2012, 09:26 AM   #25
Veteran Member
Buschmaster's Avatar

Join Date: Dec 2006
Location: Minnesota
Posts: 806
Original Poster
All of these edits are so great! She is very happy that so many people are taking interest in her picture
10-13-2012, 10:26 PM   #26
Inactive Account


Join Date: Jan 2011
Location: Vientiane
Photos: Albums
Posts: 100
oh boy.
10-13-2012, 10:28 PM   #27
Veteran Member
Buschmaster's Avatar

Join Date: Dec 2006
Location: Minnesota
Posts: 806
Original Poster
QuoteOriginally posted by boone Quote
oh boy.
??
10-13-2012, 10:37 PM   #28
Inactive Account


Join Date: Jan 2011
Location: Vientiane
Photos: Albums
Posts: 100
Sorry for not completing my post. Don't want sound like a jerk. But some of the edits are too much.
10-13-2012, 10:47 PM   #29
Veteran Member
Buschmaster's Avatar

Join Date: Dec 2006
Location: Minnesota
Posts: 806
Original Poster
QuoteOriginally posted by boone Quote
Sorry for not completing my post. Don't want sound like a jerk. But some of the edits are too much.
Sometimes we need to push the limits of what is good to see what works. Just throw edits at the wall and see what sticks.

I just appreciate people spending time to help me out.
10-14-2012, 09:26 AM   #30
Veteran Member
Otis FanOtis FanOtis FanOtis FanOtis FanOtis Fan
Rupert's Avatar

Join Date: Sep 2006
Location: Texas
Photos: Gallery | Albums
Posts: 25,123
I like the one by Wildman....if you can provide him a larger file....maybe Raw...I bet he can work wonders! She is a lovely young lady, keep shooting her and you will get the results you desire sooner than later, she is gorgeous! This is a process of learning.....I'm still a newbie and I've been at it several years now.....but I don't give up easily.....when you get one that meets your expectations, it make it all worthwhile! You're on the right track, the composition is great......just keep at it!
Regards!
Reply

Bookmarks
  • Submit Thread to Facebook Facebook
  • Submit Thread to Twitter Twitter
  • Submit Thread to Digg Digg
Tags - Make this thread easier to find by adding keywords to it!
background, bit, critique, eyes, photography

Similar Threads
Thread Thread Starter Forum Replies Last Post
Is anyone editing videos with the K-30 yet ? madbrain Pentax K-30 & K-50 12 07-31-2012 03:04 AM
photo editing help please Rusky40 Pentax DSLR Discussion 11 07-30-2012 01:29 AM
Should I decompress before editing? oriweissman Video Recording and Processing 15 03-29-2012 11:56 PM
Photo editing help derelict Digital Processing, Software, and Printing 5 08-12-2011 05:50 AM
in camera editing Rusky40 Pentax DSLR Discussion 2 11-29-2010 07:02 AM


All times are GMT -7. The time now is 08:34 AM. | See also: NikonForums.com, CanonForums.com part of our network of photo forums!
  • Red (Default)
  • Green
  • Gray
  • Dark
  • Dark Yellow
  • Dark Blue
  • Old Red
  • Old Green
  • Old Gray
  • Dial-Up Style
Hello! It's great to see you back on the forum! Have you considered joining the community?
register
Creating a FREE ACCOUNT takes under a minute, removes ads, and lets you post! [Dismiss]
Top