Forgot Password
Pentax Camera Forums Home
 

Reply
Show Printable Version Search this Thread
07-27-2012, 05:00 PM   #16
Giveaway winner!
MysteryOnion's Avatar

Join Date: Dec 2007
Location: beantown
Photos: Albums
Posts: 944
Super cool! Going to download and build one, Thanks KKado!

07-28-2012, 10:36 PM - 2 Likes   #17
Site Supporter


Join Date: Apr 2009
Location: Hilo, HI
Posts: 70
Original Poster
Step 1: Prism roof and front body

Let's get started with some instructions! Plenty of pictures incoming, so I hope the mods don't get too mad at me

Here are some things you'll need:
~ 100-150GSM paper
~ 40-70GSM black paper
~ Sharp knife (#11 xacto blade suggested)
~ Metal ruler
~ Paper glue (Elmer's is OK, but something more permanent is recommended. I used Scotch Clear Glue from OfficeMax.
~ Glue stick or spray glue (3M 77, or Elmers Spray Adhesive)
~ 1/4" - 20 nut (If you plan to have a tripod attachment)
~ Some corrugated cardboad, or mat board
~ Patience, patience, patience!

Disclaimer: Not everything on these printouts is exact - you'll probably have to do some trimming here and there.

Top Gear Top Tip: Wash your hands often! Ink and glue will rub off onto your fingers and leave ugly gray marks on the paper.

1. Glue pages 1-3 to the black paper, using spray adhesive or a glues stick. On page 1, the Top Plate and the little trim pieces need not be glued to black paper. You can cut those out and put them aside.
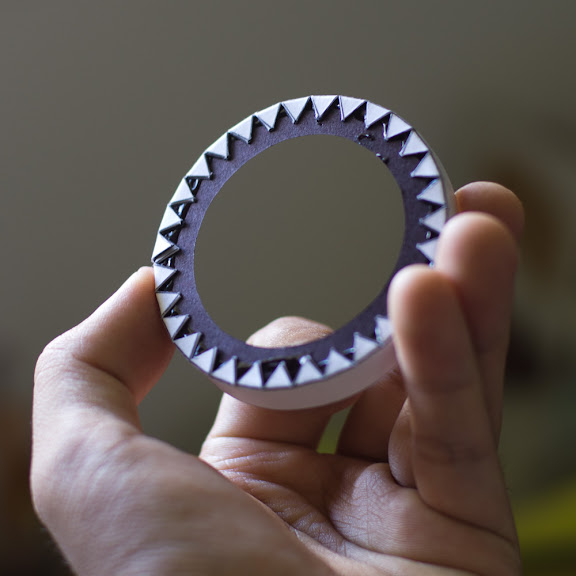
2. Cut out the Prism Roof from page 3. Crease all of the tabs and gently bend the gray lines. The metal ruler will help to make crisp creases.


3. Then glue it together as shown here. Use conservative amount of glue, and remember that it dries the fastest when it's applied in a thin, even coating.


4. Cut out the Body from page 1. Make sure to cut out all parts marked with a red "X." The tripod hole is optional, but if you plan to use a tripod nut, cut it out now. It's tedious, but you'll be rewarded in the end if you're patient


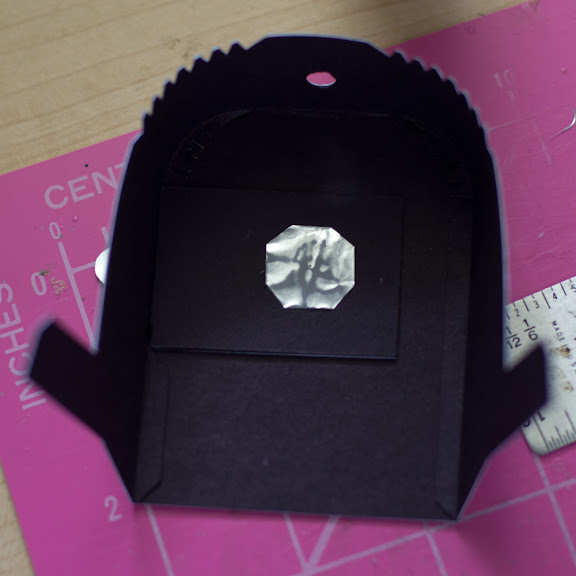
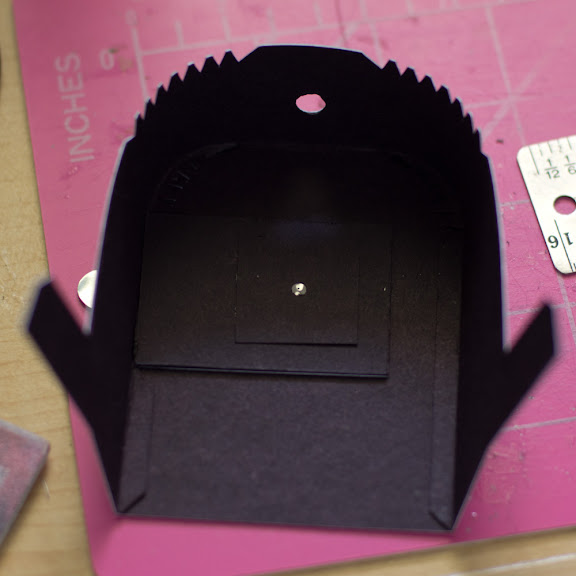
5. Fold it up! Go slowly, and glue only a few tabs at a time.


07-28-2012, 10:44 PM - 1 Like   #18
Site Supporter


Join Date: Apr 2009
Location: Hilo, HI
Posts: 70
Original Poster
Step 2: Shutter and Pinhole

6. Cut out Shutter from Page 3. You can use it as-is, or cut it out of some thin aluminum stock as I have. There's a lot less friction, and it won't get all bent-up in operation.


7. Cut out Shutter Cover from Page 3. Simply glue it over the shutter. Be sure not to glue it to the shutter itself! (That would be a disaster! ) Apply glue conservatively, and clamp it by resting something on top of it.
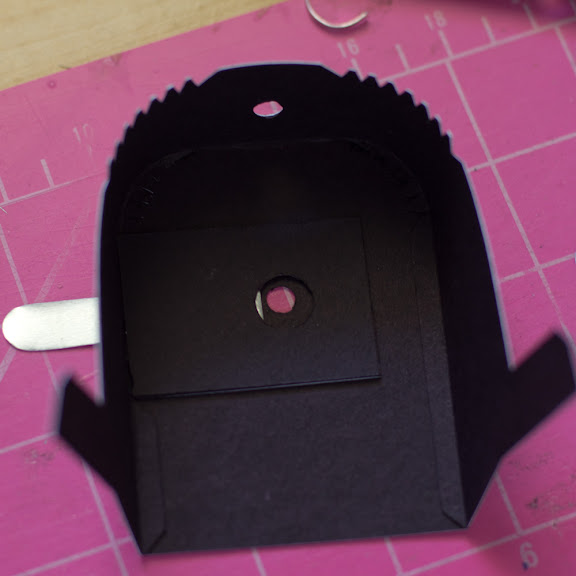


8. Make a pinhole in some aluminum foil or pie tin. I think 0.3mm is a good diameter. There are plenty of good tutorials out there for making a pinhole. Glue it to the shutter cover piece.


9. Make a small hole in a scrap piece of black paper, and glue that over the pinhole material. This will help reduce internal reflections.

07-28-2012, 10:53 PM - 1 Like   #19
Site Supporter


Join Date: Apr 2009
Location: Hilo, HI
Posts: 70
Original Poster
Step 3: Attaching the Prism to the Body, making the "Lens"

10. Glue the prism to the body. The easiest way is to first glue the forward tab to the body.


11. Then glue the rest of the tabs. There will undoubtedly be a few "pinhole" light leaks at the glue joints. Seal these up with little pieces of black paper.


12. Cut out the Lens Nameplate from Page 1, and the Lens Outer and Lens Inner from page 2.


13. Glue the Lens Inner to the Lens Nameplate.


14. Glue the Lens Outer into a tube (use the Lens Inner as a form, so that they fit snugly into one another). Then glue the assembly from Step 13 into the Lens outer. Let about 4-5mm protrude from Lens Outer, as shown.


15. Glue this assembly to the Body. Cut out the Aperture Ring and Focus Ring from Page 2. Then glue these to the Lens.


That's all for now! I'll finish up the instructions later tonight, or maybe tomorrow. Starting to look like a camera, right?


Last edited by kkado; 07-28-2012 at 11:02 PM. Reason: Missing bracket
07-28-2012, 11:10 PM   #20
Veteran Member
Silent Street's Avatar

Join Date: Nov 2011
Location: Castlemaine, Victoria, AUS
Photos: Albums
Posts: 1,151
Is this the most amazing example of creative and functional origami ever!? It is to me. It is marvellous. There seems to be quite a special mix of card/stock material involved, including what looks like card with a silver back? This should go in the MOMA!
07-30-2012, 01:15 PM   #21
Site Supporter


Join Date: Apr 2009
Location: Hilo, HI
Posts: 70
Original Poster
QuoteOriginally posted by Silent Street Quote
Is this the most amazing example of creative and functional origami ever!? It is to me. It is marvellous. There seems to be quite a special mix of card/stock material involved, including what looks like card with a silver back? This should go in the MOMA!
Technically it's not origami since it's not one square piece of paper, but I'll accept that compliment anyways

The materials really aren't all that special. The black paper is just regular thin black construction paper, and the white paper is thin card stock. And the shiny stuff is just some aluminum stock (1/64" IIRC) I picked up from a local hardware store. The rest of the instructions will be finished up later this week. Until then, happy folding!
08-02-2012, 08:36 PM   #22
Veteran Member
Silent Street's Avatar

Join Date: Nov 2011
Location: Castlemaine, Victoria, AUS
Photos: Albums
Posts: 1,151
Auction a finished paper pentax on eBay, no reserve. The proceeds of this working camera can then be raked into the Benevolent Pentax Forum Addicts Recovery Program. Neato!

08-12-2012, 09:53 PM   #23
Loyal Site Supporter
gordon_l34's Avatar

Join Date: Sep 2008
Location: Brisbane, Australia
Photos: Gallery | Albums
Posts: 779
Asahi Pentax AP & Honeywell Lens Catalogue

QuoteOriginally posted by séamuis Quote
i would certainly be interested. absolutely wonderful job! and brilliant photos.
Why haven't you sent my items which I have paid for?
Why don't you answer mine and other forum members PM's?
08-12-2012, 10:25 PM   #24
Veteran Member
hks_kansei's Avatar

Join Date: Jun 2012
Posts: 834
QuoteOriginally posted by gordon_l34 Quote
Why haven't you sent my items which I have paid for?
Why don't you answer mine and other forum members PM's?
The user profile says he is banned, which means he is probably unable to respond to, or receive, PM messages.

Probably best to contact the site admin, or contact the guy through whatever other communication methods you might have. (email address?)
08-13-2012, 12:25 AM   #25
Loyal Site Supporter
gordon_l34's Avatar

Join Date: Sep 2008
Location: Brisbane, Australia
Photos: Gallery | Albums
Posts: 779
Asahi Pentax AP & Honeywell Lens Catalogue

QuoteOriginally posted by hks_kansei Quote
The user profile says he is banned, which means he is probably unable to respond to, or receive, PM messages.

Probably best to contact the site admin, or contact the guy through whatever other communication methods you might have. (email address?)
Hi,

That is why he would have been banned.

Regards.
08-19-2012, 03:37 PM   #26
Senior Member
insulinguy's Avatar

Join Date: Aug 2009
Location: Fort Worth, TX
Photos: Gallery | Albums
Posts: 134
so...why was he banned?
08-19-2012, 05:04 PM   #27
Veteran Member
Na Horuk's Avatar

Join Date: Feb 2012
Location: Slovenia, probably
Photos: Gallery | Albums
Posts: 11,186
I was on vacation when this thread was new and only saw it now (because of the off topic bump)
but very interesting stuff! The shots are actually surprisingly good, they have a certain special something about them. Hope you sort out the light leaks.
08-30-2012, 11:45 AM   #28
Veteran Member
aurele's Avatar

Join Date: Jan 2011
Location: Paris, France
Photos: Albums
Posts: 3,217
Just discover this thread, this is soooo exciting

i'm going to try it, i can't wait to be tomorrow to buy all i need
09-01-2012, 05:55 AM   #29
Forum Member


Join Date: Dec 2011
Location: Brisbane
Posts: 67
I'm going to try this as well, was going to make a 35mm pinhole but this is so much better
09-01-2012, 08:57 AM   #30
Veteran Member
aurele's Avatar

Join Date: Jan 2011
Location: Paris, France
Photos: Albums
Posts: 3,217
i was wondering : Do i need to find a light meter to adjust the time i expose the picture ?
Reply

Bookmarks
  • Submit Thread to Facebook Facebook
  • Submit Thread to Twitter Twitter
  • Submit Thread to Digg Digg
Tags - Make this thread easier to find by adding keywords to it!
camera, medium format, pdf, pentax
Thread Tools Search this Thread
Search this Thread:

Advanced Search


Similar Threads
Thread Thread Starter Forum Replies Last Post
For Sale - Sold: Pentax SF1 with bag, film, cleaning fluid, printer paper, other extras bdery Sold Items 3 12-06-2011 06:08 AM
Streets Paper in the Snow kbrede Photo Critique 3 12-17-2010 08:27 PM
Macro Paper Wasps.......... eaglem Post Your Photos! 2 11-09-2010 10:58 PM
What do you use for paper? eccs19 Digital Processing, Software, and Printing 14 08-23-2010 10:01 AM
Paper Pentax MX J.Scott Film SLRs and Compact Film Cameras 10 04-05-2010 07:12 PM


All times are GMT -7. The time now is 02:49 AM. | See also: NikonForums.com, CanonForums.com part of our network of photo forums!
  • Red (Default)
  • Green
  • Gray
  • Dark
  • Dark Yellow
  • Dark Blue
  • Old Red
  • Old Green
  • Old Gray
  • Dial-Up Style
Hello! It's great to see you back on the forum! Have you considered joining the community?
register
Creating a FREE ACCOUNT takes under a minute, removes ads, and lets you post! [Dismiss]
Top