For those of you who are interesed I have put together a guide to disassembling the K 28mm F3.5 lens
WARNING: This is a guide based on my NON - EXPERT approach. There might be errors in my method but it worked for me.
1. Pictured below is my work space.
1.1. Blower for removing loose dust particles (~$30 AUD from any camera shop)
1.2. Cotton tips for cleaning nooks and crannies (~$1.50 AUD from any supermarket or pharmacy)
1.3. Isopropyl Alcohol I recommend high grade 90% + (~$15 AUD from hardware store)
1.4. Standard Lens cloth
1.5. Powder free latex gloves (pictured cotton gloves leave fibres) (~$5 AUD from Supermarket)
1.6. Small tool kit (I use a mobile phone repair kit) (~$15-30 AUD from electronic store)
1.7. Soft tea towel to stop parts dropping and bouncing away (~$free from kitchens near you)
1.8. NOT PICTURED: White Synthetic grease, fine soft paint brush, tray for holding loose parts.

 2.
2. Ok Lets start by setting the lens to a default position. I go with Aperture f22 to remove tension from spring as shown latter. Focus set to infinity.
 3.
3. Now to removing the name plate. A rubber stopper from hardware store will help. My lens came with holes pre-drilled. Remove by turning anti-clock-wise.
 4.
4. Undo exposed screws to remove filter thread barrel and lift out.
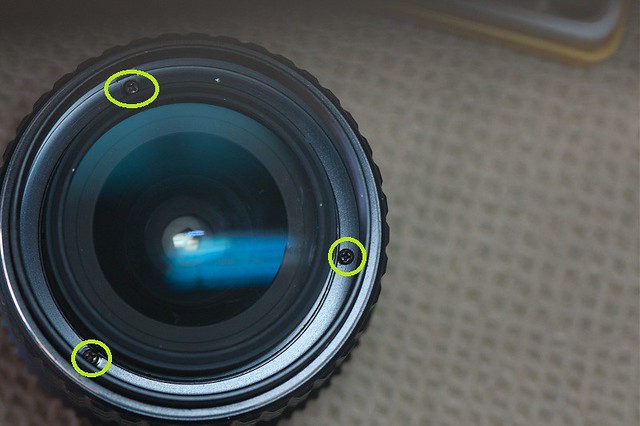 5.
5. Undo exposed screws to remove focus ring. I suggest you mark the original alignment before removing these screws just so you know the original orientation making reassembly quicker.
 6.
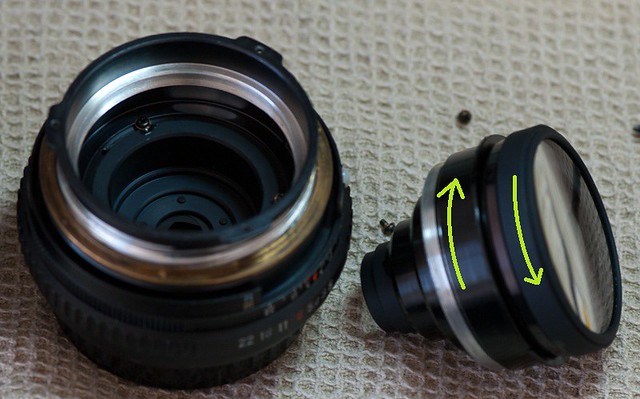
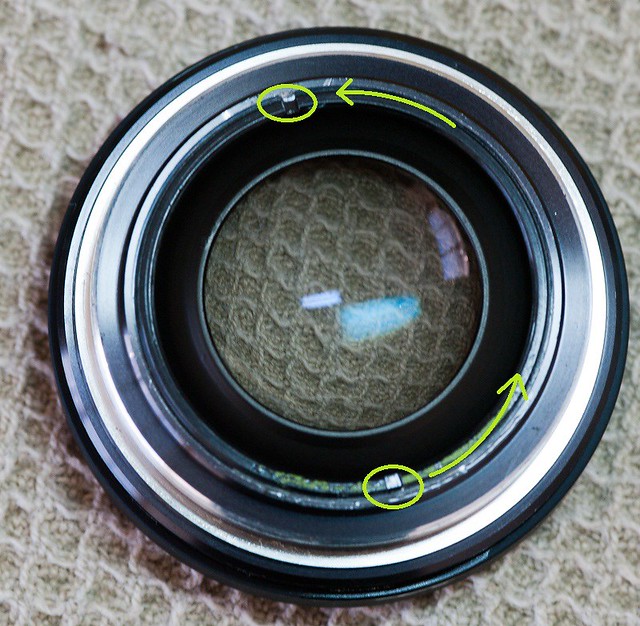
6. Now to remove the front lens groups. Twist top section in anti-clock-wise motion, there are a couple of small notches near the arrows if your unable to get a grip.
Pentax K 28 f3.5 disassembly-11962 | Flickr - Photo Sharing! 7. Exposing the front element is shown in the following photos and is done by twisting in directions shown in photos.
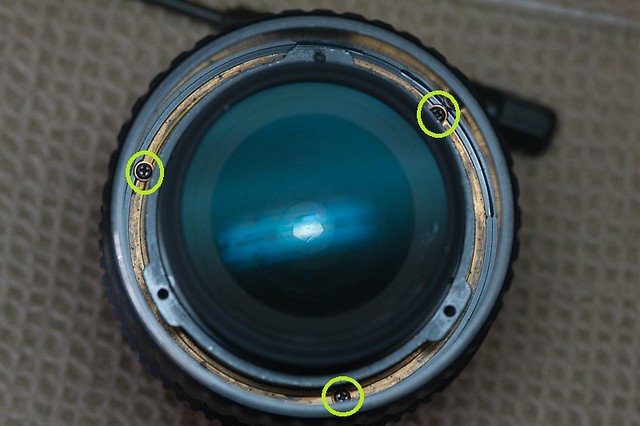
 8.
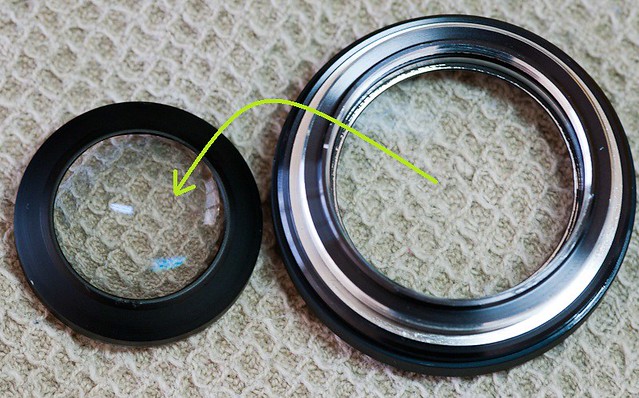
8. To get to the back of the front element undo the retaining ring as shown. the second element with come free with a gentle tap, sometimes is a bit of a pain to get out though.
 9.
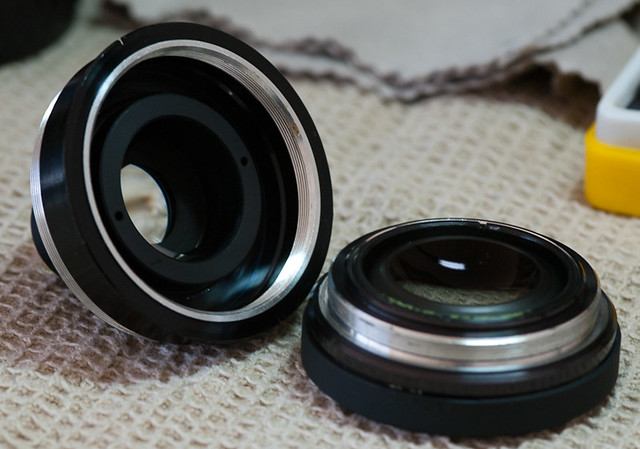
9. Now you have access to all elements surfaces for the purpose of cleaning.
9.1. I personally clean the lenses by using the blower and following with the isopropyl alcohol and cotton tips. being careful not to touch any of the black paint. This should remove any oils and dust particles and sterilise any mould if there were any. I then gently polish the lens surface with a clean lens cloth.
10. Now reassemble the front group in reverse order to prevent dust getting in while you clean the rest of the lens.
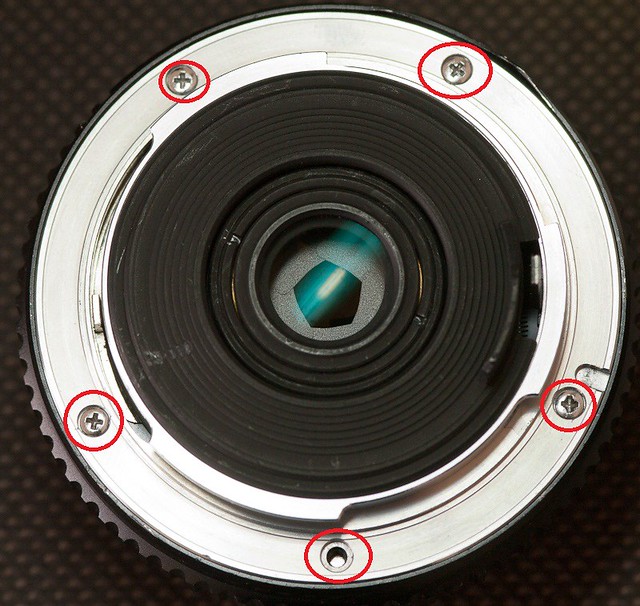
11. To get access to the aperture mechanism remove the five screws indicated (yes the lens I received was missing one)
 12.
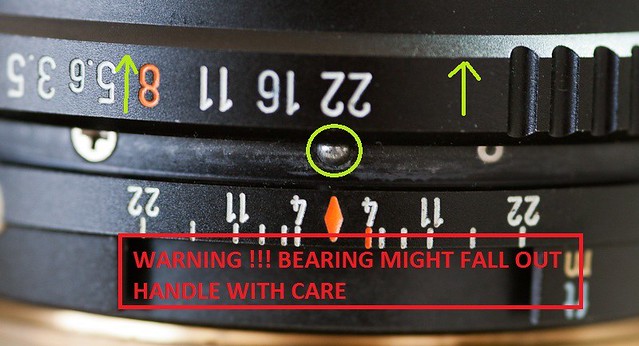
12. WARNING TAKE CARE WITH THIS STEP: You can now remove the aperture ring by sliding it to the rear of the lens, but be careful as the bearing as shown has a tendency to fall out and IT WILL VANISH! I stupidly lost mine and took over 30min of searching to find it.
12.1. If you do lose it I suggest getting a strong magnet and sweeping the area. I used a magnet that tradesmen use to recover tools from wall cavities. They are very strong!!!
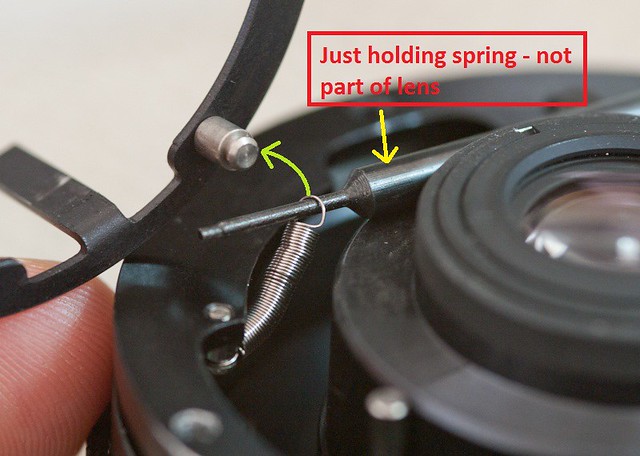
 13.
13. You can now take the aperture assembly off by undoing the 3 exposed screws. (unfortunately I didn't photograph this step) and for ease of handling you can remove the aperture lever arm (ring) by unhooking the spring as shown.
 14.
14. I now cleaned everything down with Isopropyl alcohol to remove dust and old oil as well as cleaning the old grease from the aperture ring. A small paint brush does this quickly.
15. Put a very small dab of white Synthetic grease to re-lubricate the aperture ring and bearing.
16. You can now re-assemble in the reverse order for a nice clean old lens. Which if taken care of correctly will stay that way for many years to come!
Note: It appears the lens had some "loctite" or similar thread locking adhesive on the screws. This is optional when reassembling your lens. I didn't bother but if you choose to I suggest doing so sparingly.
Anyway I hope this helps you get that old lens back to tip top shape! Good luck


")


 Post #1 by Chaos_Realm
 Similar Threads


