 Originally posted by alamo5000
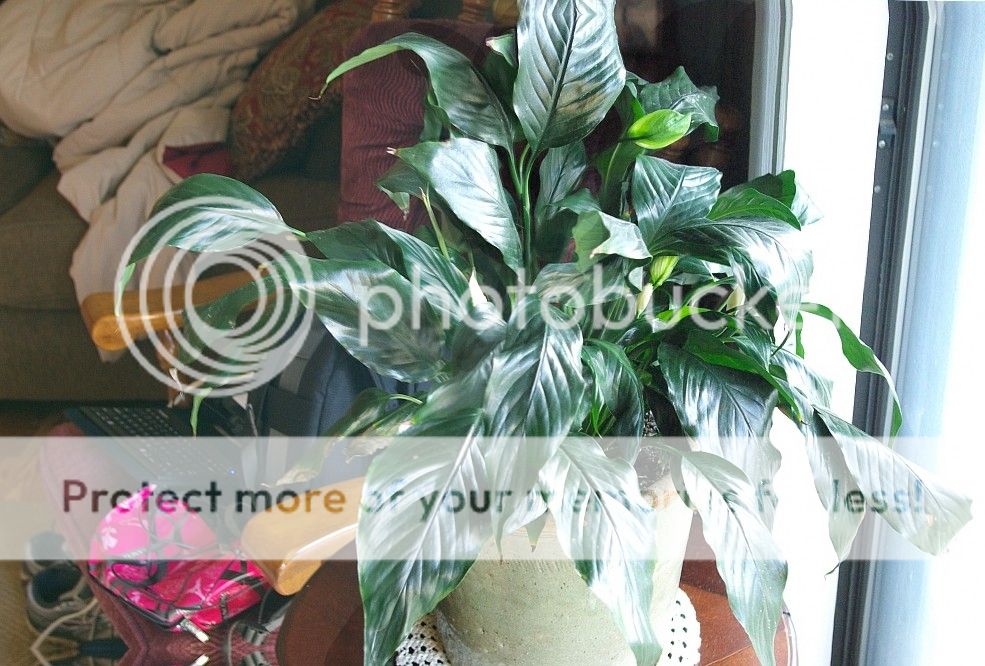
Here's another good one.
In Camera Artistry: Using Any Light Source - YouTube
A couple of things:
Expose for the highlights.
Second thing, unless you expressly want that kind of huge contrast, you need to select or create better lighting conditions.
Also I have found that you have to be more careful with shiny things

I'm at work now, but will check out that video this evening. I've learn some things from other B&H videos.
Exposing for the highlight makes the left side of the picture very dark/underexposed. Can that be recovered with post-processing?
Originally posted by mikeSF a common challenge in photography. a few ways to solve it
1) bracket and manual blending
2) bracket and HDR
3) physical graduated ND filter applied to right side
4) digital ND filter(if highlights are not blown)
5) add light to the left side (reflector, flash, continuous lighting, etc) and use a faster shutter
6) reduct light coming through the window (screen, shutters, translucent reflector, different time of day, wait for a solar eclipse, etc)
that is a perfect setup in which to practice several techniques and decide what works best for you. good luck and have fun!
It is a great setup for testing out things. That's why I thought it would be a good shot to ask about, since I seem to run into that issue a lot when I'm trying to get pictures of family without "posing" them. Pretend the plant is a family member or two who is visiting and I want to get a candid shot of them. For that situation, #6 is not practical. I need to learn about numbers 1,2, and 4. #3 sounds like it would be fairly quick to do, I just need to pick up a graduated ND filter. The first thing for me to try is probably #5, but would it take a separate flash, or is the pop-up one good enough to do it? I plan on doing a lot more experimenting with that shot.
Originally posted by clackers You can expose for the foliage with spot metering and let the window blow out ... presumably there's not much interest out there anyway.

You're right, there is nothing of interest there. Letting it blow out doesn't bother me too much, but it takes part of the plant with it.
Originally posted by dms Besides ways to change the scene--to modify/reduce the DR (e.g., combining multiple exposures of the same scene)--you also can decide what part of the DR/scene (the slice so to speak) you want to capture, and accept the fact that one end or both ends of the DR will be lost. The first picture you show (to my taste/coming from decades of slide/color work) is a reasonably realistic picture, and works quite well (of course the scene is not terribly interesting--but it illustrates the problem--and I think is a satisfactory solution). I have the similar scene in mind--except the glare is sunlight glancing off ice/snow on the North Face of Matterhorn Mountain--and that is just how to show it. In either case the sunlight is overpowering.
Clackers just said it w/ more economy of words!
I agree the scene is not too interesting.
It was mainly just to experiment with getting a decent photo when the light situation is that bad. These are the best that I could come up with, with my extremely limited knowledge. what you are saying about needing to pick a "slice" and accept that it won't all be "perfect" makes sense. HDR/blending seems to be a common theme, too. I've got to look into that more.
Originally posted by clicksworth You could join the left side of one with the right side of the other with Gimp. It would go better with a tripod. This would be mikeSF's #1 method.
That's great, clicksworth! I wish my Gimp skills were better.
Originally posted by geru2000 Learn to control/modify the light.
In this instance try pulling the table a few feet away from the window or maybe modify the light by stretching a white sheet over the lower half of the window to get more even light.
In this instance modifying or changing the light falling on the plant are your only options to achieve even lighting.
That's a good idea in some situations. I'm learning that sometimes a couple of steps one way or the other can make a big difference.
Thanks for all the replies, everyone. Lots of great advice and ideas. I seem to learn best by trying things, but at times like this I didn't even know what to try. You've all given me some ideas.
I have more experimenting to do...


 Similar Threads


