I don't use RT much because I'm a SilkyPix Pro 6 user. But the free RT has some interesting features. Here is a quick guide to part of the interface. I'll use "Sharpening" as its effect is more obvious than NR.
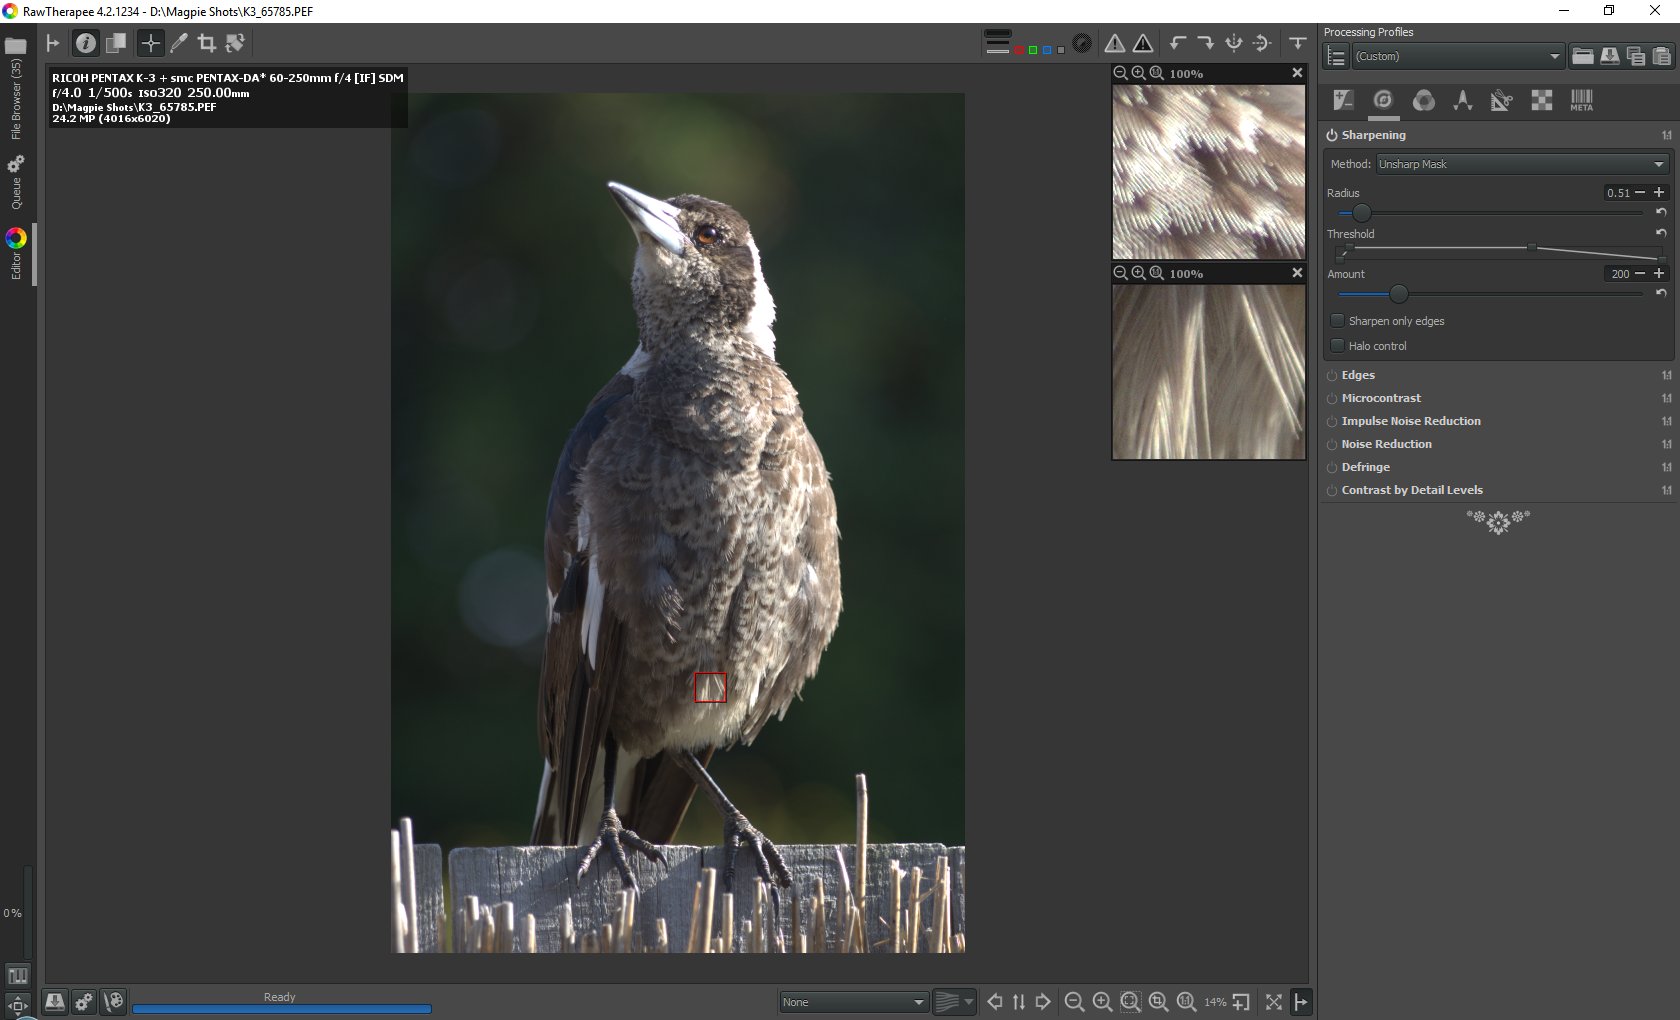
Each module can be minimised/reopened by clicking on its title e.g "Sharpening". Here I've miminised all the other modules on the Detail section.
A module is activated/deactivated by clicking on the power button icon to the left of its title. This allows you to compare the effect of the enhancement. In this Detail section, only Sharpening is showing as active, but I've also activated Vibrance in the Colour section.
I've fitted the image to the screen by clicking on the 3rd magnifying glass at the bottom (hotkey "F").
The "14%" means than that, at the current zoom level, 100 image pixels in length or height are mapped down to 14 screen pixels.
To the right of the 14% is the "Open new detail window" icon. The detail window defaults to 100% but you can zoom in/out in this window. You can also use the wheel on your mouse to zoom, but its action will depend on whether you've clicked on the detail window first to give it focus - otherwise you'll zoom the main image instead.
You can relocate the red marker showing the extent of the detail window by either dragging it directly, or by dragging within the detail window itself.
You can also open more than one detail window, but only the last one is highlighted on the main image. You click on the "x" to close each detail window.
The Sharpening amount defaults to 200% but you could drag it fully to the right to make the sharpening more obvious in the 100% (or more) zoomed detail window. (You can click on the curved arrow to the right of the bar to reset it back to 200%. Note: this is not an Undo. For example, if you first set 500%, and then 1000%, clicking on this arrow will not go back to 500%.)
Also, you could click on the "1:1" magnifying glass down the bottom (hotkey "Z") to zoom the main image instead to 100%. As long the zoom level is 100% or higher you'll see the effect of the sharpening.
You can drag the zoomed-in main image around to pan about.
In the portrait-orientated image in my screen-grab, I could can also drag the fitted main image to the LHS to allow more space on the RHS for detail windows. I'm not sure how many detail windows you could have open. (The "I" hotkey will toggle the display of the info.)
"L" and "Alt-L" hotkeys toggle the display of L (not currently visible) & R panels. "Shift-L" toggles a thumbnail panel at the top.
"Shift-B" toggles the screen into side-by-side view and shows you the Before/After effect of a module. Zooming & panning affect both sizes equally. If you have say Sharpening at 1000% and switch to the Vibrance module and fully ramp it up too, in Shift-B view, activating/deactivating the Vibrance module will only show the change of the Vibrance effect, not the Sharpening effect which is still being applied to both panels.
"R", "G", "B" hotkeys show B&W versions derived from each of these colour channels, as well as "V" (Luminosity) combining them to show a standard (0.299*R + 0.587*G + 0.114*B) B&W version.
Dan.


 It says bundled files, but it doesnt show any of the pentax profiles. I tried dragging the files into the bundled folder but they wont stick.


 Similar Threads


