Regarding the comments about DFS and building master darks, I have been doing this project with my K10D over some time.
Here are a few pointers that I've come to understand.
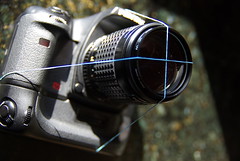
Before you burn your time in the field and get frustrated with poor results, understand your lenses and how they will reach focus at infinity. I only shoot with primes, helping to reduce the problems they cause. The best way I've found to get the perfect focus with using camera lenses is to find a bright star or planet (Venus or Jupiter are great). Then I put two rubber bands across the open end of the lens in an "X" pattern. Then when I take the test pictures, I will get diffraction spikes. These spikes should form crisp lines when critical focus has been reached. You may be surprised that "infinity" is actually not at the infinity mark on your lens.
When you start getting into the 5-10-15-20 minute exposure range, either by stacking and summing or individual exposures, you'll run into skyfog issues. This is when the background glow of the atmosphere starts to show up. This can happen even in dark sky areas, albeit slower than in light polluted areas. For the dark sky site I go to, I've found that individual exposures of 15 minutes at ISO 800 are as much as I can get on a very dry, clear night.
A major boost will be the addition of a light pollution filter. You can get a well-balanced 2 inch filter (I use the one from Baader Planetarium) with an adapter ring to put it on your 49 mm lenses. This will allow you to get some much longer exposures.
In addition to the sky fog, you'll start to notice gradients across the frame. This is because the background color of the sky does change. A sunset's colors are an example of these gradients. You'll do well to center your subject in the frame so that you can control the gradient in post processing.
When I started doing the photography with my K10D, I left the in camera noise reduction on because I thought that it saved a step for me later. What I found was that there were several times over the course of sessions where long exposures would be lost because the batteries would lose too much voltage in mid-NR. What I found was annoying was that the camera wouldn't "automagically" switch the power supply to the grip or body battery in mid-exposure. It seems to only do this switching between exposures.
When you do get into this, you may want to use the intervalometer functions or purchase one of these devices or run your camera tethered to a notebook. I've done both and am satisfied with running the notebook as it allows me to do autoguiding.
When doing this task, you will get much better improved performance from the camera and the batteries by letting it rest for about 2 minutes between shots. With two fully charged (albeit 2 year old) batteries, I have done 5+ hours of continuous exposures of lights and darks in 50F temperatures. This is more than enough time for me to wait for darkness, do drift polar alignment, wait for my subject to get at least 40 degrees up in the sky, and then shoot until my batteries in the laptop die and I run out of snacks. :-)
A note on autoguiding. When you are doing images at 200mm, an autoguider REALLY helps. This is getting ahead of where you are at the moment, as you would need a mount that would allow this tool. It will be much more forgiving if you start with a wide-field lens like a 50 mm.
I would highly suggest reviewing this book by Robert Reeves: "Wide Field Astrophotography: Exposing the Universe Starting with a Common Camera" It details the construction and operation of barn door mounts as well as what you can expect to get from basic cameras and setups. You can get the book from William-Bell
Wide-Field Astrophotography, Exposing the Universe Starting with a Common Camera by Robert Reeves
Lastly, for an example of what I did with using in-camera noise reduction with long exposures and a D FA 100mm F2.8 Macro lens:
http://www.flickr.com/photos/smigol/3840664082/ 


 Post #10 by smigol
 Similar Threads


