Forgot Password
Pentax Camera Forums Home
 

Reply
Show Printable Version 8 Likes Search this Thread
5 Likes  #1
DIY lens case out of PVC tubes
Posted By: cadmus, 03-25-2011, 11:22 PM

The following is my DIY PVC lens case project. I built one of similar design some time ago (1997) and it lasted many years.


big: http://farm6.static.flickr.com/5226/5559996033_de6be512b8_b.jpg

You will need:
-Nylon pack cloth. (scraps… < 1/3 yd.)
-A widowed or holy hiking sock (that will be unusable after this project)
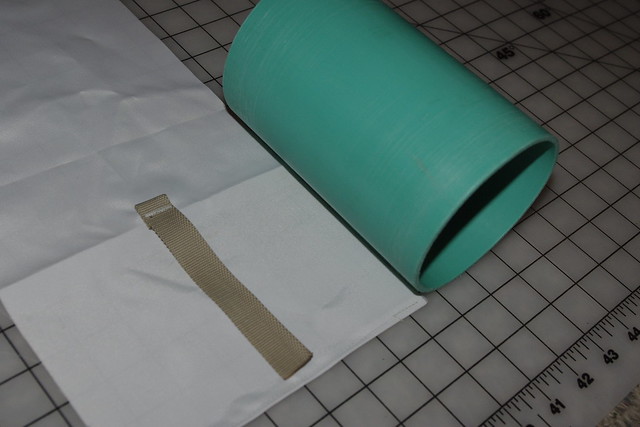
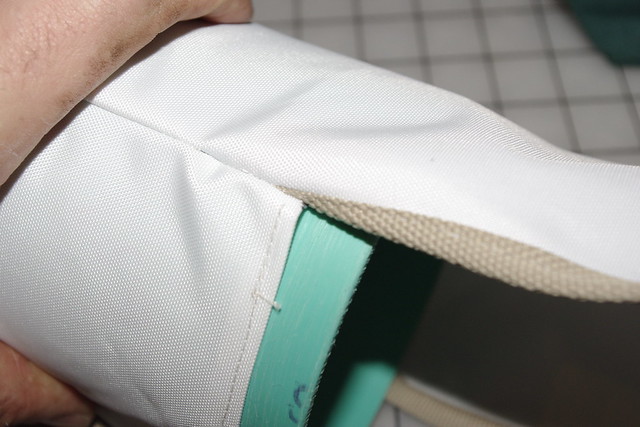
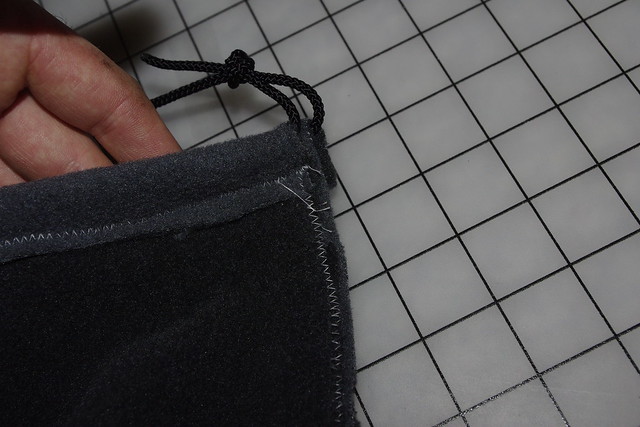
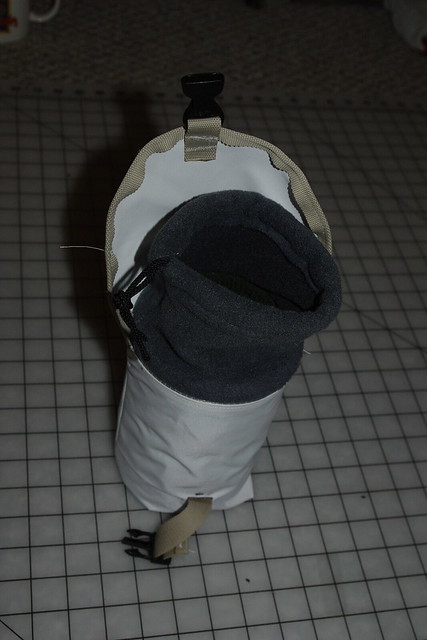
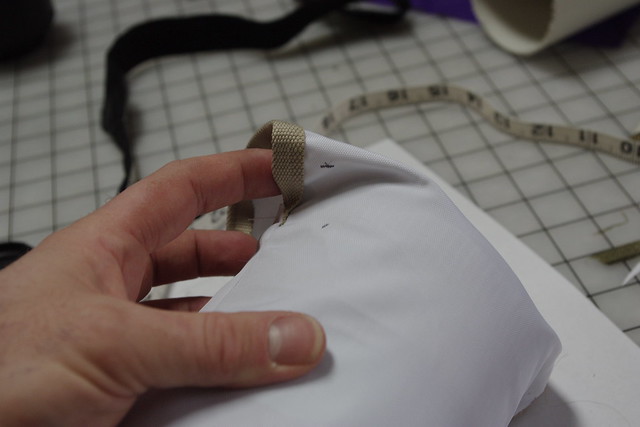
-A buckle and webbing OR hook and loop Velcro
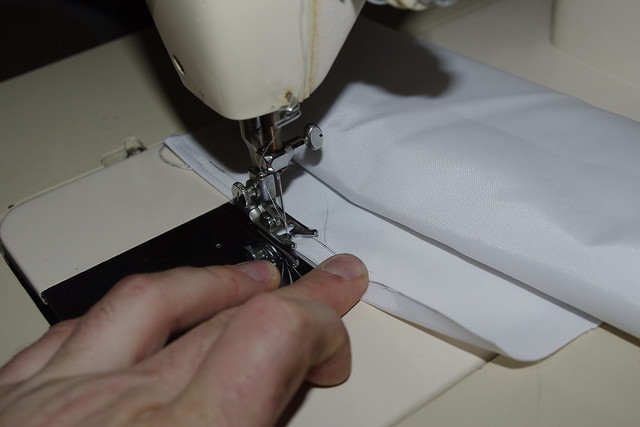
-A sewing machine or a strong hand with thread
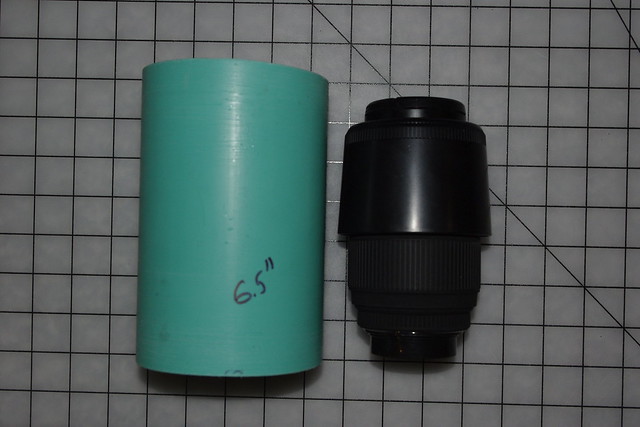
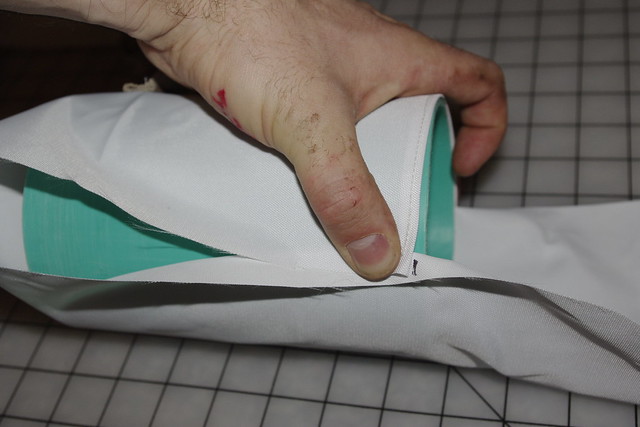
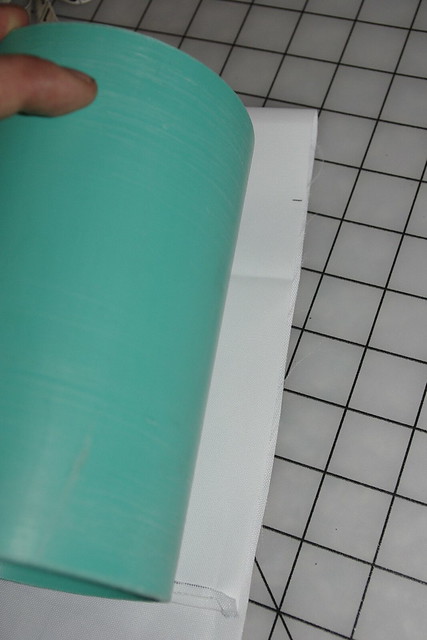
-PVC tube that fits your lens when it is wrapped in the old hiking sock
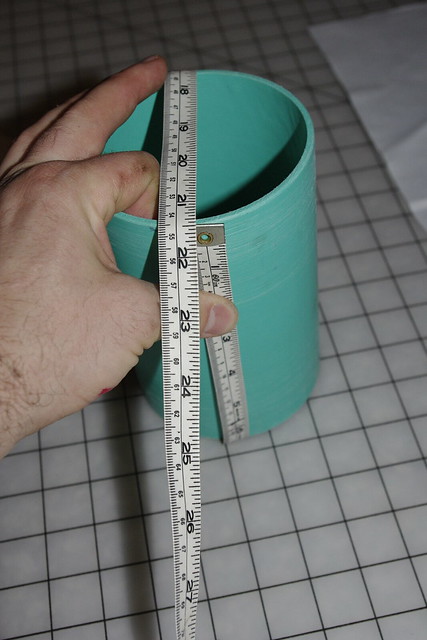
-Tape measure or sting… I like unit less measurements
-Fibertape or duct tape (high end brand name for this project)
-Perhaps some foam from sleaping pads, sam splints or window seal stripping.
-Scissors
-Sharpie or something erasable if you care what it looks like (I don’t)
-Saw or large pipecutters
-pins, maybe
-iron, not really
-your lens

I got these 4 done in a day, but plan on the first one taking longer.

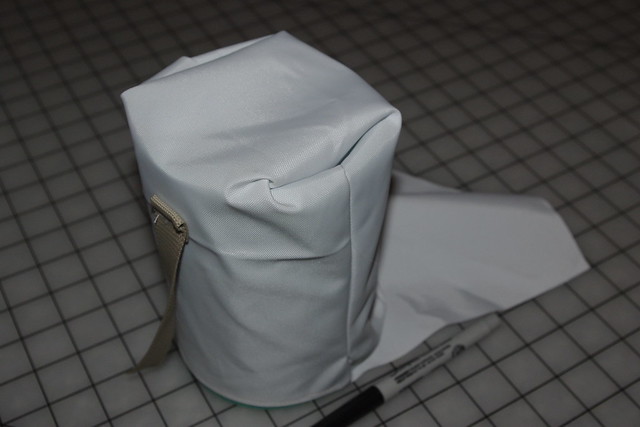
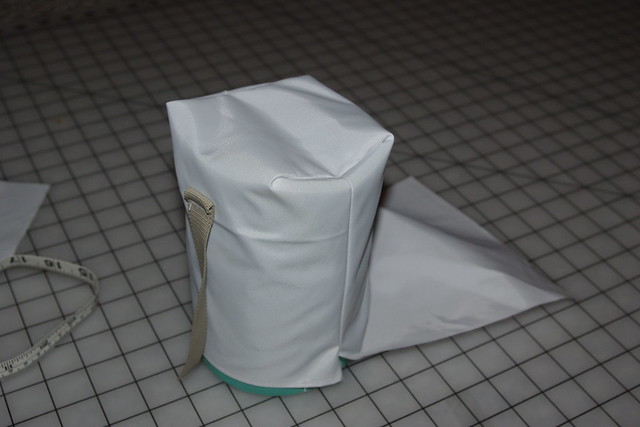
People on this website frequently talk about how certain gear instills trust in the client, like big grips and big lenses and what not. I advise if you are one of those studio people who is trying to look professional do not bother making these lens cases because they are not much to look at. If you do, use black fabric and thread because it looks more professional. I personally swore off black anything because it is easy to loose in the dark and hard to find in my backpack. In fact I lost a really nice black tripod in Glacier Bay National Park 4 years ago, finders keepers. All my gear is now mix matched bright colors. I made these white so you can better see the process.

Last edited by cadmus; 03-26-2011 at 12:47 AM.
Views: 18,987
03-25-2011, 11:26 PM   #2
Senior Member
cadmus's Avatar

Join Date: Feb 2011
Location: Colorado
Posts: 133
Original Poster
BUYING and SIZING THE PVC
1- get a sock from your sock drawer that no longer has a mate or has a hole in the toe (maybe a hole in the heel if the sock is long enough or you are making a case for a short lens). This will serve as padding on the inside of the pvc tube. Thick is good. Bring several potential socks to the hardware store to increase the possible padding options when picking out PVC tubes.


2- go to a locally owned small 'ma & pa' hardware store who sells a wide range of PVC and ABS tubes. Remember when you spend a dollar at a local store that money stays local. You might get this PVC pipe for 3% less at the big corporate box store but that money is going far far away. Find a diameter that fits your lens when wrapped in the sock. If it is slightly loose you can use strips of weather seal strips aka foam take to snug it up a little. Look for a scrap pipe bucket or short pile, sometimes those are discounted.

Some tubes especially sewage/leach field piping and electrical (gray) PVC have one end of each stick (tube) slightly wider diameter than the tube it’s self. This opens up more sizes on the same stick. You will only need the length of the lens plus a few cm maybe more if you want to add foam to the top and bottom of the lens because this design has no HARD cap or bottom.you could buy pvc caps but that is expensive.


This photos looks a little loose even with a thick sock but i am making this case to allow for the lens WITH a lens hood.

This is how i shored up the skinny part.


You know best what thickness of pipe wall you need and what weight you can carry. Remember ABS is often lighter than PVC. If you are new to the wonders of PVC pipe the term ‘schedule’ is how long you can use a pipe before it will need to be replaced so Schedule 80 is thicker than 40 which is thicker than 20 or 18.


3- cut the pipe to a length you like and sand the ends.
The hardware store might cut these to the length you need if you ask nice.

Last edited by cadmus; 03-26-2011 at 12:54 AM.
03-25-2011, 11:27 PM   #3
Senior Member
cadmus's Avatar

Join Date: Feb 2011
Location: Colorado
Posts: 133
Original Poster
CUTTING and TAPING the SOCK

4-Cut your favorite sock in a place that allows nice padding in the tube as shown. Remember you want the nice side in the inside as that is where the lens will be.


Now tape it in place as shown here. If you are adding foam or weather stripping do that before you tape the sock on.


Don't tape too close to the end of the pipe as the tape might be visible when you are all done.

Last edited by cadmus; 03-25-2011 at 11:47 PM.
03-25-2011, 11:28 PM   #4
Senior Member
cadmus's Avatar

Join Date: Feb 2011
Location: Colorado
Posts: 133
Original Poster
MEASUREMENTS for FABRIC CASE


5- measure the circumference of the pipe as shown.


Decide on an allowance. (if you don't know the term try this: http://en.wikipedia.org/wiki/Seam_allowance) I used an allowance of 1 cm most the time.
(note:I made the allowance smaller on the lid flap)

( [Circumference] x 0.5 )+(2 x [allowance] ) will be the width of your fabric. These photos are shown without the sock taped on. You might want to add the sock and some tape to the tube when you take the circumference measurement. I like my fabric case on extra tight so I did not add that extra girth when measuring.

6- Measure the length of fabric as shown.


For the length of the fabric you will need to measure completely abound the tube as shown or add up the following:
(2 x [tube length]) + ( 2 x [external diameter of tube] ) + ( 2 x {allowance] ) + [flap length]

Where flap length is the amount the lid flap will hang over the front of the case when complete. This is up to you. In this demo I did both vlecro and a buckle, you can do what ever.

7- cut the fabric in a rectangle using the formulas for width and length above or use your tape measure.


Last edited by cadmus; 03-26-2011 at 12:58 AM.
03-25-2011, 11:29 PM - 1 Like   #5
Senior Member
cadmus's Avatar

Join Date: Feb 2011
Location: Colorado
Posts: 133
Original Poster
SEWING the FABRIC CASE pt1

8- fold a single allowance of fabric towards the wrong side at the small end of the rectangle and sew it down. Good sewers would iron all of these folds but my iron has so much ski wax on it that I didn’t want to ruin the fabric. this was done just to make the opening look good and keep the fabric from unraveling.

9- now is a good time to add the webbing for a buckle or the Velcro closure. I can’t tell you how to do it. Here I put the webbing down enough to have room for the 1” buckle and the 1” flap, plus 1”. Velcro would be near the top. Mind what side of the fabric you want on the outside.


10- place the fabric on the tube and use pins or pens to mark where you will sew the 2 sides. Keep in mind what side you want out will be in. You will turn it inside out after it is sewn.


11- sew the 2 sides at the proper allowance. Check to make sure you did not make it too tight. I started at what will be the bottom of the case and sewed to what will be the opening and flap. Once I got to the flap I stopped a little early. Then, after I shaped the flap I went back and finished this seam but added a nice webbing trim to the flap as shown.


I did this to make my mom and sister proud of me. On all the other cases I just folded it over .5cm. And if I knew no one would ever see it I would do nothing but heat the edge of the flap with a lighter after I shaped it, it is nylon, you can do that, forget how it look, 'function over fashion'.

Last edited by cadmus; 03-26-2011 at 01:01 AM.
03-25-2011, 11:30 PM   #6
Senior Member
cadmus's Avatar

Join Date: Feb 2011
Location: Colorado
Posts: 133
Original Poster
SEWING the FABRIC CASE pt2

12- once the tube is in there you can fold the little points at the bottom in so it makes a flat bottom. Pin these or mark them with a pen.


Now turn the case inside out and sew the little tabs. turn it outside out and you should now have a flat bottom.


This was not easy. I had to rip out a few seams. Seam rippers are handy.


13- trim the flap to your liking. Some of mine were round some oblong. Then fold the edge in wards and sew it so it looks nice. Or use some thin webbing folded over it as shown above.

14- add webbing or Velcro for your desired closure system.

Last edited by cadmus; 03-26-2011 at 12:15 AM.
03-25-2011, 11:47 PM   #7
Senior Member
cadmus's Avatar

Join Date: Feb 2011
Location: Colorado
Posts: 133
Original Poster
I added a fleece collar to allow for more top protection when a big lens is in it and a snug fit when I put a little lens in it.


Here it looks like a flying nun


You can mitigate this by giving the top a more tailored fit. pin unneeded segments and sew it up.


Lastly, did you know that rather then trimming all those pesky threads you can just light um on fire with a lighter. They should (if polyester) burn nicely but stop at the fabric.


Last edited by cadmus; 03-26-2011 at 12:38 AM.
03-26-2011, 12:05 AM - 2 Likes   #8
Senior Member
cadmus's Avatar

Join Date: Feb 2011
Location: Colorado
Posts: 133
Original Poster
Variations:
Buckles work ok. So does Velcro. As does a drawstring closure but that provides little protection. you could do a zipper but that is a lot of work.
The purple one in the top image has a strip of Velcro running vertically. This was a easy and effective design relative to the others.

I added a fleece collar to the large (4"x6.5") one shown in this post. This allows for more top protection when a big lens is in it and a snug fit when I put a smaller lens in it.

I typicality carry 3 lenses. Being able to put my smallest and medium in the same small case. And putting any of the 3 in the BIG case lets me carry only 2 cases when traveling. No matter what lens is on the camera in the hard holster (https://www.pentaxforums.com/forums/pentax-camera-field-accessories/134573-an...hing-hard.html) the other 2 lenses have a home and I am not carrying around an empty case. If this is appealing spend some time monkeying with sizes at the hardware store.

For both my cases and holster i have ensured that there is a little extra length to the case for a drybag. I often Use a light weight (not thick vinyl) drybag or a thick ziplock over the lens before I put it in the case if i am on a boat or in the rain.

You can add a circle of 1/2" military surplus sleeping pad foam ($5 for a full pad) to the bottom for extra padding at the ends. But make sure you give yourself some extra length.

You could also just buy the PVC caps, glue foam in the inside and forget all this sewing stuff. 
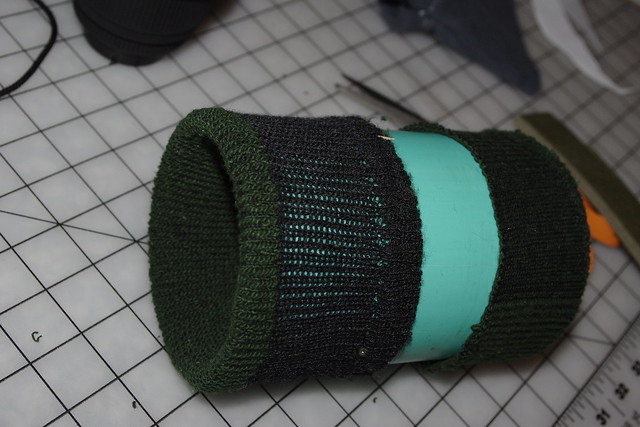
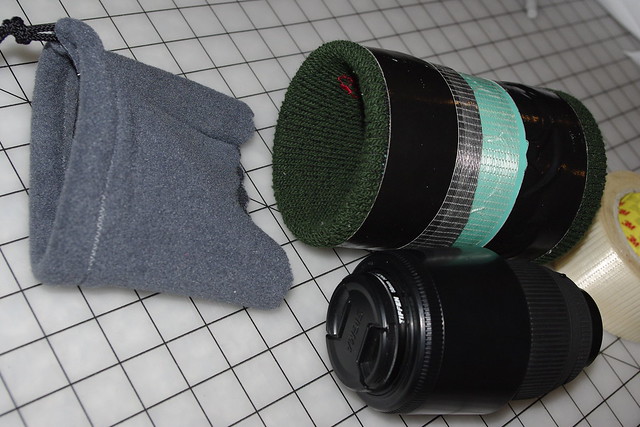
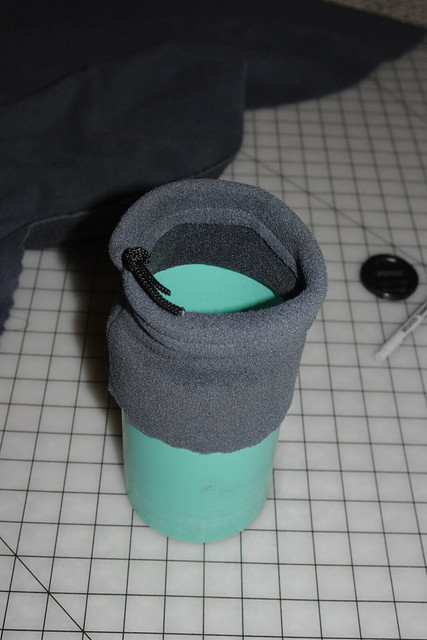
but as you know fleece and wool socks will absorb dust and sand and keep it from the lens. (using old socks reduces lint so if using new socks wash it frequently)

I am broke these days as my wife and I are in grad school. I feel bad not being able to contribute financially to the site so i will try to make up for that in other ways until i graduate.
I hope that this method helps preserve the lenses of someone who can not afford store bought lens cases,

Pete

Last edited by cadmus; 03-27-2011 at 10:07 AM.
03-26-2011, 01:48 AM   #9
Veteran Member
Vylen's Avatar

Join Date: Dec 2008
Location: Sydney, Australia
Photos: Gallery
Posts: 1,262
You could make some money by making them for other people
03-26-2011, 07:01 AM   #10
Pentaxian


Join Date: Oct 2006
Location: Dayton, OH
Photos: Gallery
Posts: 4,724
You should contact Adam and have him add this thread to the DIY article forum.

Tim
03-26-2011, 10:16 AM   #11
Veteran Member
GerryL's Avatar

Join Date: Jan 2009
Location: CA
Posts: 2,731
Now...if only I had a sewing machine..
03-26-2011, 10:32 AM   #12
Veteran Member
Jools's Avatar

Join Date: Aug 2009
Location: SW Wisconsin by way of Venezuela
Photos: Gallery | Albums
Posts: 1,398
Great stuff here.
Thanks for the generous description and awesome pictures.
A real manual on how to make these.
Well done.
03-26-2011, 05:37 PM   #13
Veteran Member


Join Date: Dec 2006
Location: Pennsylvania, USA
Photos: Gallery | Albums
Posts: 797
A great DIY tutorial. Kudos.
04-06-2011, 10:20 AM   #14
Veteran Member


Join Date: Jan 2010
Location: Vancouver, BC
Posts: 1,421
That's a great DIY project. I had thought about doing the same thing but have not taken it beyond just thinking about it. Now with a step by step how-to, I have no excuse to give this a go.

Thanks,
08-22-2012, 02:32 AM   #15
New Member


Join Date: Aug 2012
Posts: 4
Very nice post! Thanks for pictures!
Reply

Bookmarks
  • Submit Thread to Facebook Facebook
  • Submit Thread to Twitter Twitter
  • Submit Thread to Digg Digg
Tags - Make this thread easier to find by adding keywords to it!
diy, diy lens, do it yourself, gear, lens, people, project, pvc, sock, thread, yourself

Similar Threads
Thread Thread Starter Forum Replies Last Post
DIY Lens Hoods - no math required pacerr Do-It-Yourself 33 03-04-2021 03:47 PM
Is this lens DIY repairable? ryan s Pentax SLR Lens Discussion 12 03-17-2011 10:12 AM
DIY Lens Hood jersey_m Pentax Camera and Field Accessories 5 02-16-2011 09:27 AM
DIY Lens Cap Holder-Link davidreilly3207 Pentax SLR Lens Discussion 3 01-18-2010 05:26 PM
For Sale - Sold: Vivitar Manual Extension Tubes for Pentax K-Mount with Case - Excellent Condit sarahfisch Sold Items 3 08-26-2009 04:03 PM


All times are GMT -7. The time now is 06:54 AM. | See also: NikonForums.com, CanonForums.com part of our network of photo forums!
  • Red (Default)
  • Green
  • Gray
  • Dark
  • Dark Yellow
  • Dark Blue
  • Old Red
  • Old Green
  • Old Gray
  • Dial-Up Style
Hello! It's great to see you back on the forum! Have you considered joining the community?
register
Creating a FREE ACCOUNT takes under a minute, removes ads, and lets you post! [Dismiss]
Top