Forgot Password
Pentax Camera Forums Home
 

Reply
Show Printable Version 3 Likes Search this Thread
09-23-2010, 07:44 AM   #16
Veteran Member
goddo31's Avatar

Join Date: Feb 2009
Location: Perth, Western Australia
Photos: Gallery | Albums
Posts: 2,576
Original Poster
Ok finally managed to find some time to update this.
Tom and stormcloud - thanks for commenting on this thread. The MX is a great camera. It's a little bit before my time also, but I love using the older gear.


Unfortunately at this stage I am missing a couple of photos. Repainting the film door was difficult for me, as I'm really not a good painter! But this is what I did:
1. Bought some black gloss spray paint, specifically one I could use on the metal surface of the film door without a primer. If you would like any further details on exactly what I used, let me know and I will find the can. The paint type is enamel.
2. Wet and dry sandpaper. With this I carefully sanded down the worn areas in preparation for painting
3. Repainting. I actually didn't spray the paint on - instead I used a small soft brush. Possibly not the best method, but I am happy enough with the result. Painting the whole film door was not necessary, as the new covering would cover most of it.

After two coats the paint job was as good as I was going to get it - by no way perfect but a lot neater looking than how it was originally!
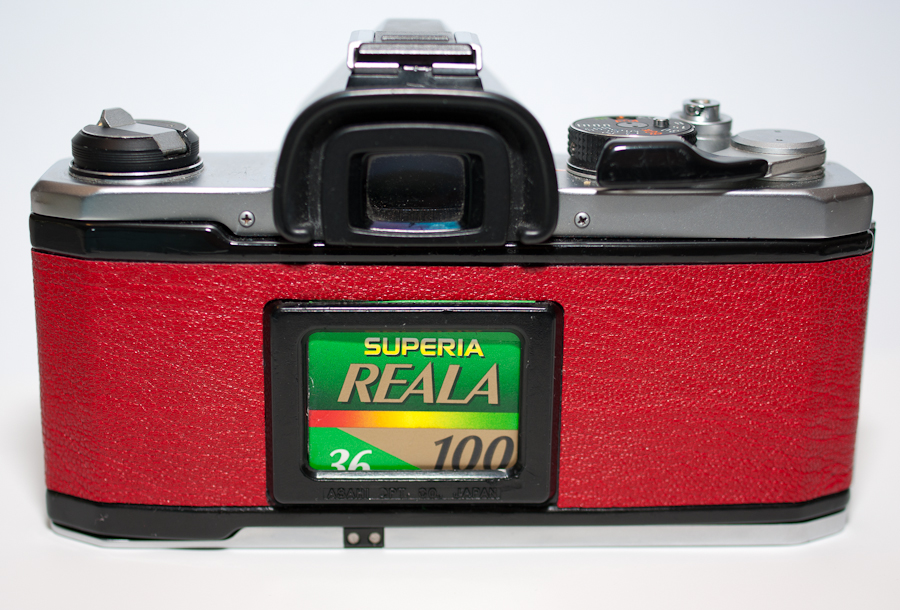
Before I get too ahead of myself, I must mention the film reminder that you can see on the back of the camera. From factory this film reminder has it's four little feet melted (OK, minor assumption here) into four appropriate holes in the back of the film door. When I removed the rear leatherette and prepared the film door for repainting I had to remove the black plastic film reminder. It came off easily enough but the holes where the feet go actually goes through the light-proof film door!
This seemed like a potential issue at first, but then I realised two things.
The first is that the film pressure plate that holds the film flat looked like it would block the holes when film was loaded. My second thought was that I could just carefully 'Supa Glue' the black plastic holder back in it's original position. Thankfully, this worked like a charm! No light leaks, film reminder securely in place.

Back to the camera covering - the fun part!
I installed the rear covering much the same as the front, wetting some parts of it slightly to slow the setting of the adhesive. If you have read through Jon Goodman's (the friendly 'interslice' seal kit guy) camera seal kit instructions before, you may have noticed that he mentions licking the adhesive for mirror bumper foam before application. While there are some suggestions on the camera covering seller's website, my method was the one recommended by Jon. As is commonly said here on PF, Your Mileage May Vary - but that's what I did.

Recovering the rear film door went fairly smoothly, and now the camera was just about complete. Here are two photos of the edges of the film door that I repainted:
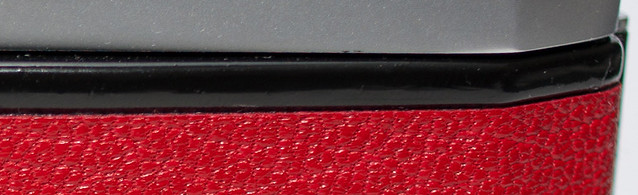
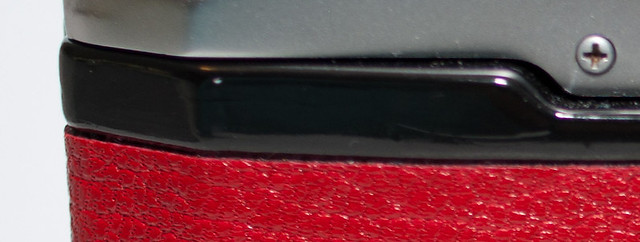


...
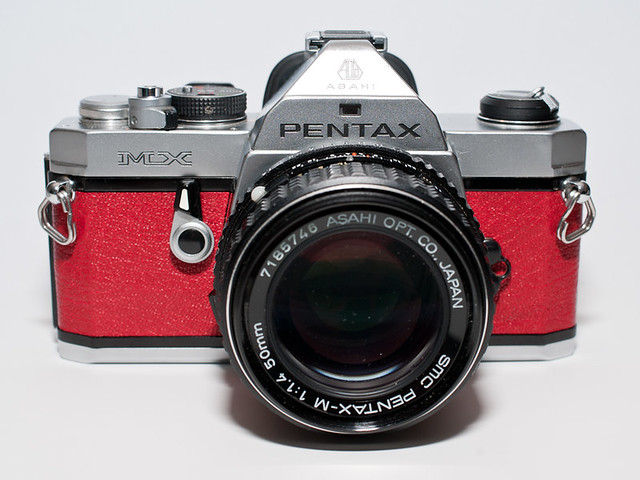
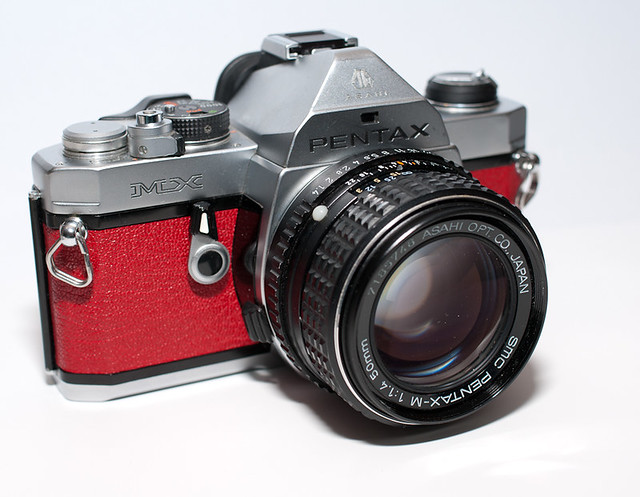
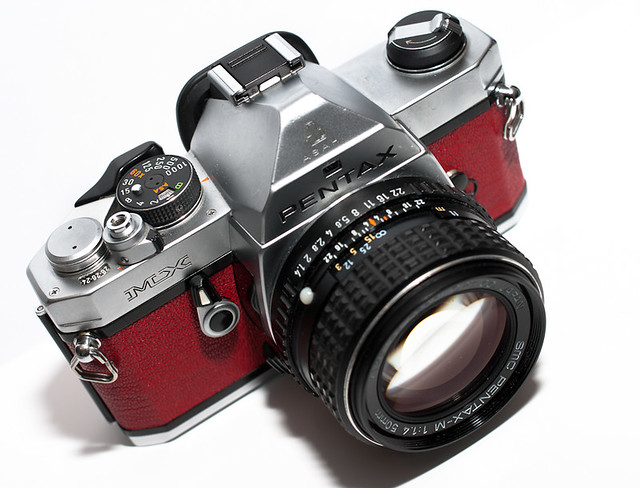
Now finally I can show the finished product!


09-23-2010, 07:47 AM - 1 Like   #17
Veteran Member
goddo31's Avatar

Join Date: Feb 2009
Location: Perth, Western Australia
Photos: Gallery | Albums
Posts: 2,576
Original Poster
And now onto some camera 'porn' shots (I really should've given that M50 a dusting!):


09-23-2010, 08:40 AM   #18
Pentaxian
builttospill's Avatar

Join Date: Jun 2009
Location: Utah, Idaho
Photos: Gallery
Posts: 2,398
Thanks for the update. That's a good looking camera and you did well restoring it.
09-23-2010, 08:51 AM   #19
Veteran Member
Pablom's Avatar

Join Date: Feb 2010
Location: Usa
Posts: 1,940
good job goddo, that looks great

09-23-2010, 02:03 PM   #20
Veteran Member
Ratmagiclady's Avatar

Join Date: Nov 2008
Location: GA
Photos: Gallery | Albums
Posts: 13,563
Cordial welcomes back to the land of the living, for your rakishly-attired MX.

As for detail work on the blacks and all, don't overlook a nice quality model-maker's enamel and brushes to go with. (There's even a site out of Germany with better paints for the task, still: I'll fish through some bookmarks)

Ha, here: English link now: Check these guys out: (I really haven't) http://www.micro-tools.com/store/~/C-PAI/Paint.aspx

Anyway, given nice paint and brushes, I really might suggest doing your blackwork on that camera by hand, rather than trying to make a spray work. Proper enamels are going to generally be happy to lay down on the black trim on a camera like that. Just trust it do do so and don't go over it again and again when it might want to get gummy)
(The chrome plates are a different matter)


I've also, again, seemed to not get the last page of a thread until actually posting and scrolling back. Looks nice, that.

Last edited by Ratmagiclady; 09-23-2010 at 02:12 PM.
09-23-2010, 07:39 PM   #21
Veteran Member
goddo31's Avatar

Join Date: Feb 2009
Location: Perth, Western Australia
Photos: Gallery | Albums
Posts: 2,576
Original Poster
Pablo, builttospill, thank you.

RML - Thanks for your interest and for the link. I did end up doing it by hand with a nice soft brush, even though it was a spray can of enamel. Sounds silly, but I actually sprayed the can into the plastic lid then brushed the paint on.

cheers,
Jason

Last edited by goddo31; 09-23-2010 at 08:03 PM.
09-23-2010, 08:06 PM   #22
Veteran Member


Join Date: Sep 2009
Location: Oregon
Photos: Gallery | Albums
Posts: 5,079
Nice job Jason, that is one sweet looking MX now.

09-23-2010, 08:07 PM   #23
Veteran Member
Stratman's Avatar

Join Date: Mar 2007
Location: St Louis, Missouri U S A
Photos: Gallery | Albums
Posts: 2,464
Looks great !!!!
09-24-2010, 02:42 AM   #24
Veteran Member
goddo31's Avatar

Join Date: Feb 2009
Location: Perth, Western Australia
Photos: Gallery | Albums
Posts: 2,576
Original Poster
Thanks Steve and Colton.
I will be shooting with the MX on the weekend sometime
09-25-2010, 06:11 PM   #25
Site Supporter
Site Supporter
demondata's Avatar

Join Date: Oct 2006
Location: Aurora, Ontario, Canada
Photos: Gallery
Posts: 632
What a looker! I was thinking of passing mine on to someone for parts, but this has given me some ideas - also for my MV, MG, ME Super, K1000, P30n, Mz5n . . .

Thanks for sharing your enthusiasm for this classic!
09-28-2010, 02:28 PM   #26
wjt
Veteran Member


Join Date: Dec 2009
Location: Perth
Photos: Albums
Posts: 371
You failed to mention all this work when we were shooting on monday. Nicely done... i must admit i was looking at it thinking it was a very nice looking camera and that maybe i might look at adding an MX to my collection....
09-28-2010, 03:36 PM   #27
Veteran Member


Join Date: Dec 2007
Location: Prague
Photos: Gallery
Posts: 1,199
I've had similar idea last year:


It is not done is such perfectionist style, but I like it. The paint job is not a bad idea either. Do you have a recommendation of a specific paint to use?
09-28-2010, 09:26 PM   #28
Veteran Member
goddo31's Avatar

Join Date: Feb 2009
Location: Perth, Western Australia
Photos: Gallery | Albums
Posts: 2,576
Original Poster
QuoteOriginally posted by demondata Quote
What a looker! I was thinking of passing mine on to someone for parts, but this has given me some ideas - also for my MV, MG, ME Super, K1000, P30n, Mz5n . . .

Thanks for sharing your enthusiasm for this classic!
You're welcome. Making a camera look nice and different is a great way to get motivated to shoot some rolls through it

QuoteOriginally posted by mibane Quote
You failed to mention all this work when we were shooting on monday. Nicely done... i must admit i was looking at it thinking it was a very nice looking camera and that maybe i might look at adding an MX to my collection....
Well, an MX and Super Program go nicely together after all
cheers!

QuoteOriginally posted by elho_cid Quote
I've had similar idea last year:


It is not done is such perfectionist style, but I like it. The paint job is not a bad idea either. Do you have a recommendation of a specific paint to use?
Looks cool, wish I had the FA43 to go with mine too.
For the paint, I am no expert but I went with a gloss enamel that didn't need priming when used on metal surfaces. I aimed to keep it simple and didn't want the paint to come off. Using gloss paint was maybe not the best idea, as it rather more shiny than the original black trim. I just bought the paint from a hardware store from memory.
09-28-2010, 11:20 PM   #29
Pentaxian
hcarvalhoalves's Avatar

Join Date: Aug 2010
Location: São Paulo, Brazil
Photos: Gallery
Posts: 1,019
Sexiest MX around here. Well done.

I intend doing similar repair work on a K1000 I'm getting soon, hopefully!
09-29-2010, 12:25 AM   #30
Inactive Account


Join Date: Apr 2010
Location: Macedon Ranges, Victoria
Photos: Gallery | Albums
Posts: 300
Sorry goddo31, been tied up with the single in september challenge in the forum, so I've missed your later craftwork! Brilliant job and well done. Nice porn shots too, even with the lense still on!! Cheers Paddy
Reply

Bookmarks
  • Submit Thread to Facebook Facebook
  • Submit Thread to Twitter Twitter
  • Submit Thread to Digg Digg
Tags - Make this thread easier to find by adding keywords to it!
mx, pentax mx, project

Similar Threads
Thread Thread Starter Forum Replies Last Post
The K20D in Yosemite...in Black and White. Ansel Adams reborn? Not! ebooks4pentax Pentax DSLR Discussion 8 07-17-2008 06:39 AM
Hello from Chicago USA - Spotmatic (film) reborn? OldChE Welcomes and Introductions 5 05-15-2008 02:11 AM
Reborn Shooter Venturi Welcomes and Introductions 6 03-09-2008 01:15 PM


All times are GMT -7. The time now is 10:18 AM. | See also: NikonForums.com, CanonForums.com part of our network of photo forums!
  • Red (Default)
  • Green
  • Gray
  • Dark
  • Dark Yellow
  • Dark Blue
  • Old Red
  • Old Green
  • Old Gray
  • Dial-Up Style
Hello! It's great to see you back on the forum! Have you considered joining the community?
register
Creating a FREE ACCOUNT takes under a minute, removes ads, and lets you post! [Dismiss]
Top