Forgot Password
Pentax Camera Forums Home
 

Reply
Show Printable Version 3 Likes Search this Thread
09-15-2010, 09:31 PM - 1 Like   #1
Veteran Member
goddo31's Avatar

Join Date: Feb 2009
Location: Perth, Western Australia
Photos: Gallery | Albums
Posts: 2,576
A Pentax MX is reborn

Hello,

A few months ago I purchased an MX with an idea for a little project. The project was really quite simple: find a cheap MX in good mechanical condition in the aim to clean it up and give it a new brightly coloured skin.
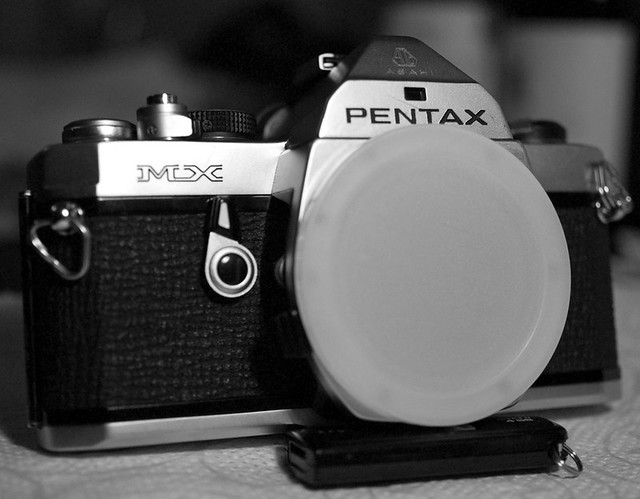
The MX I eventually found was a bargain and works well, but cosmetically it needed a bit of help. I must apologise for the average "work in progress" pictures but it should give you the idea...

Not too bad from this side:


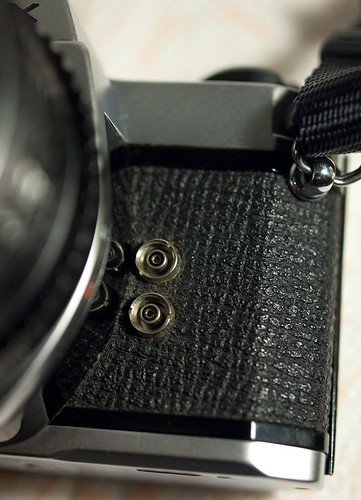
This is the stock covering that I want to replace, OK for it's age but not that pretty


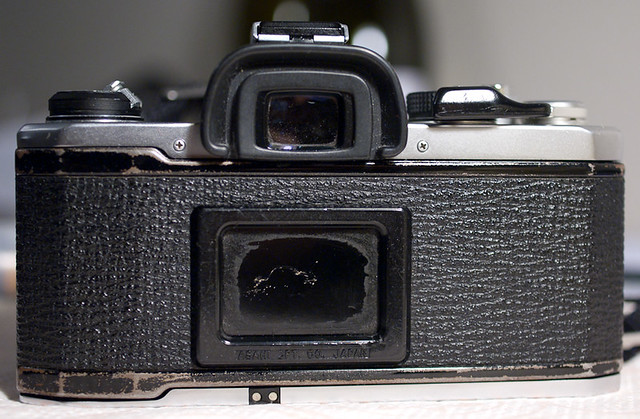
This side will require some work!


I'll leave it at that for now, next post will be when I start taking it apart!

09-15-2010, 10:09 PM   #2
Inactive Account


Join Date: Apr 2010
Location: Macedon Ranges, Victoria
Photos: Gallery | Albums
Posts: 300
Gudday goddo 31

Goodanyamate...I'll follow this with interest! I've an old K1000 I've had since I had haironmehead and have kept in good nic, but I recently purchased a M50mm F1.7 lense with an old ME attached which I was going to spruce up! Will follow with interest..how's things in the west anyway? Been a bit wet here in Vic lately. Cheers Paddy
09-16-2010, 01:49 AM   #3
Veteran Member
goddo31's Avatar

Join Date: Feb 2009
Location: Perth, Western Australia
Photos: Gallery | Albums
Posts: 2,576
Original Poster
G'day Paddy,
Thanks, I will do another post on this soon.
Perth has had awesome weather actually over the last few days. Starting to warm up nicely in the day but not yet stinkin' hot. Been really fine and sunny too, which will hopefully stay over the weekend I am happy to say Spring is here! Hopefully it will be for you too soon.

cheers
09-16-2010, 02:43 AM   #4
Veteran Member
goddo31's Avatar

Join Date: Feb 2009
Location: Perth, Western Australia
Photos: Gallery | Albums
Posts: 2,576
Original Poster
Finding a new 'skin' and removing the old

One thing that took me quite a long time in this process was chosing the new camera covering for the MX. After literally a few weeks of indecisiveness I ordered the cardinal red kid skin kit from cameraleather, seen here.
I was pretty happy when it arrived as in my opinion it's a really nice shade of bright red! I was a little uncertain how it would appear in 'real life' - feel free to share your opinions.

Before I get too ahead of myself, I replaced most of the light seals and checked the mirror bumper foam before starting any of this. I consider checking the overall condition and operation of the camera as essential. I also ran through a test roll or two and was pleased to find the metering is as close to perfect as I can tell - it seems to match my Super Program - nice and predictable.

Early shot with Pentax MX, Kodak BW400CN


The first stage before starting on the new covering was to clean up the camera. This was quite easy. I used isopropyl alcohol and a decent quality cloth to first remove any dust and dirt. Next step was removing the original leatherette covering from the camera. I quite simply picked up an edge with a pocket knife and peeled the covering off with my fingers. The original adhesive still remained on the camera body in places but some more isopropyl alcohol soon removed that.
I ended up with the following:


Note that in the above image you can see a bar extending down from the shutter button. This bar is normally covered by a thin aluminium piece that fits into the groove you can see, all of which is held in place by the covering when it is stuck in place.

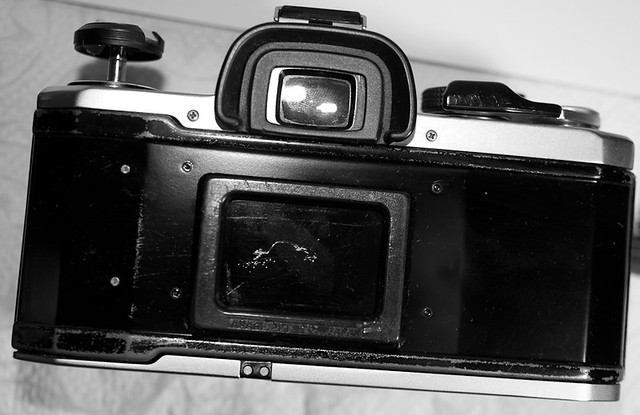
Naturally the next step was to do the same to the rear of the camera film door:


Note the scratches and the generally poor cosmetic condition of the film door. This is something that will be fixed up too.

09-16-2010, 05:03 AM   #5
Inactive Account


Join Date: Apr 2010
Location: Macedon Ranges, Victoria
Photos: Gallery | Albums
Posts: 300
QuoteOriginally posted by goddo31 Quote
G'day Paddy,
Thanks, I will do another post on this soon.
Perth has had awesome weather actually over the last few days. Starting to warm up nicely in the day but not yet stinkin' hot. Been really fine and sunny too, which will hopefully stay over the weekend I am happy to say Spring is here! Hopefully it will be for you too soon.

cheers
Good to hear that you blokes out west are sending warmer weather across soon..don't hog it all for yourselves! Can you still buy covers for the older cameras (looking at a later post)? Cheers Paddy
09-16-2010, 06:53 AM   #6
Veteran Member
goddo31's Avatar

Join Date: Feb 2009
Location: Perth, Western Australia
Photos: Gallery | Albums
Posts: 2,576
Original Poster
What do you mean by covers? The back film door or the black leatherette coverings I have just pulled off in the last post?

I'm not sure if you can still get the film doors. The leatherette you can definately get, however I'm not sure about the genuine Pentax stuff...
09-16-2010, 07:31 AM   #7
Pentaxian
builttospill's Avatar

Join Date: Jun 2009
Location: Utah, Idaho
Photos: Gallery
Posts: 2,398
I'm impatiently anticipating more photos of your camera. It looks like quite a project, but as a fellow MX fan, I'm sure it will be worth it.

09-16-2010, 08:38 AM   #8
Veteran Member
goddo31's Avatar

Join Date: Feb 2009
Location: Perth, Western Australia
Photos: Gallery | Albums
Posts: 2,576
Original Poster
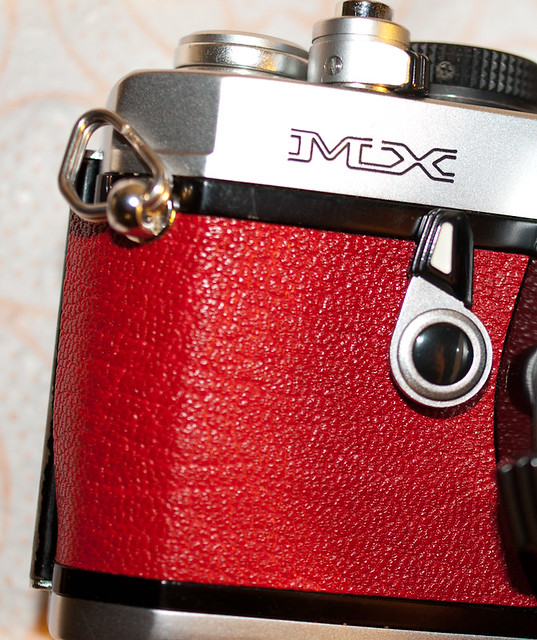
Thanks, I will try to do a major update tomorrow night. Meanwhile, here is a photo from when I first started fitting the replacement covering on the front of the MX.
Note that at this stage I hadn't fully stuck the left edge down. Installing the covering over the self timer was quite easy. As the cameraleather instructions mentioned - move the self timer to roughly '9 o'clock' and gently slide the cover over the self timer through the pre cut hole.

09-16-2010, 09:47 AM   #9
Veteran Member


Join Date: Sep 2009
Location: Oregon
Photos: Gallery | Albums
Posts: 5,079
Looking good Jason.
That's going to be one very striking MX when you are done.
09-16-2010, 10:13 AM   #10
Pentaxian
builttospill's Avatar

Join Date: Jun 2009
Location: Utah, Idaho
Photos: Gallery
Posts: 2,398
Yes, it is. Thanks for sharing.
09-16-2010, 10:39 AM   #11
Veteran Member
johnmflores's Avatar

Join Date: Apr 2009
Location: Somerville, NJ
Photos: Gallery | Albums
Posts: 5,361
looking good! makes me want to do the same!
09-16-2010, 04:34 PM   #12
Veteran Member
goddo31's Avatar

Join Date: Feb 2009
Location: Perth, Western Australia
Photos: Gallery | Albums
Posts: 2,576
Original Poster
Thanks guys
Apart from repainting the edges of the film door, this is realy very easy to do.
09-17-2010, 06:52 AM   #13
Veteran Member
goddo31's Avatar

Join Date: Feb 2009
Location: Perth, Western Australia
Photos: Gallery | Albums
Posts: 2,576
Original Poster
Installing the new front camera covering

After the camera covering was removed from the front as shown in a previous post, installing the new covering was fairly easy.
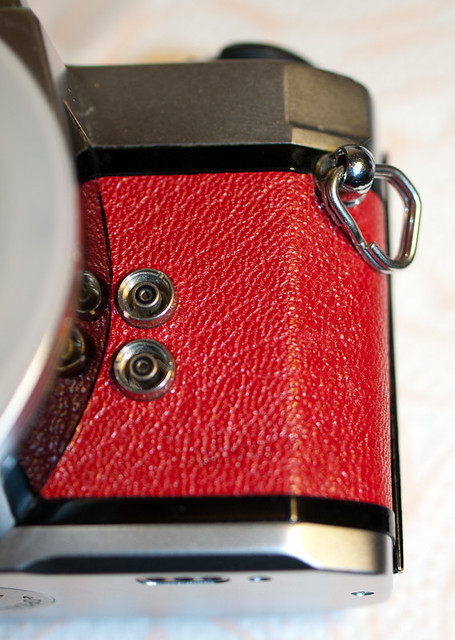


Perhaps the most important aspect was lining up the covering so it looked neat and fit properly. In the photo shown above, I carefully wet some areas of the adhesive and only stuck down the edge closest to the K mount first. After I was satisfied, I carefully laid down the rest of the piece, ensuring that it lined up properly.
At this stage I must apologise for not taking more photos of the work during this phase - at the time I simply wanted to get it done!
By about now I really got to see how well this particular kit fitted to the camera body. In the image shown above there appears to be a small gap - I managed to smooth this out somewhat and when looking at the camera in person the fitment looks just fine

The hardest bit for me at this stage was sticking down the right most edge. But after a while of repeated 'massaging' the piece was securely in place!
With both front pieces now in place I had done enough for the evening and ended up with something like this...


At this stage my little MX was already starting to look much fresher, but the hardest job loomed - fixing up the rear film door. Before getting to that stage I did perform a trial fit. Basically just placing the rear covering on top of the film door, keeping the plastic backing in place so it didn't stick just yet.


Next update I will get onto repainting the film door. This made me a bit nervous, as I'm really not that good at painting things nicely!

cheers,
Jason
09-17-2010, 07:32 AM   #14
Veteran Member
8540tomg's Avatar

Join Date: Feb 2008
Location: Waterloo, Ontario
Photos: Gallery
Posts: 4,461
Looks good Jason,

The MX was my first 35mm film cameras back in 1981. Stilll works perfectly.

Tom G
09-17-2010, 03:55 PM   #15
Senior Member
stormcloud's Avatar

Join Date: Oct 2009
Posts: 232
that looks awesome - even though was before my time so no nostalgia for me - makes me wanna go get one
Reply

Bookmarks
  • Submit Thread to Facebook Facebook
  • Submit Thread to Twitter Twitter
  • Submit Thread to Digg Digg
Tags - Make this thread easier to find by adding keywords to it!
mx, pentax mx, project

Similar Threads
Thread Thread Starter Forum Replies Last Post
The K20D in Yosemite...in Black and White. Ansel Adams reborn? Not! ebooks4pentax Pentax DSLR Discussion 8 07-17-2008 06:39 AM
Hello from Chicago USA - Spotmatic (film) reborn? OldChE Welcomes and Introductions 5 05-15-2008 02:11 AM
Reborn Shooter Venturi Welcomes and Introductions 6 03-09-2008 01:15 PM


All times are GMT -7. The time now is 06:52 PM. | See also: NikonForums.com, CanonForums.com part of our network of photo forums!
  • Red (Default)
  • Green
  • Gray
  • Dark
  • Dark Yellow
  • Dark Blue
  • Old Red
  • Old Green
  • Old Gray
  • Dial-Up Style
Hello! It's great to see you back on the forum! Have you considered joining the community?
register
Creating a FREE ACCOUNT takes under a minute, removes ads, and lets you post! [Dismiss]
Top