I wanted to present an example of how to use this powerful tool Photoshop has to offer its users, showing the transformation that can occur after just one pass of the function in post processing.
Let me point out that the "Selective Color" tool in Photoshop, which may have several equivalents on other software packages, is not used to isolate a subject within an image using colour, as in the confusingly similar 'selective colouring'. It is rather used as a colour enhancer, and this short article will show the results from its application.
Whilst there are more complex facets to selectively colouring an image, such as described in
this article, the simple application of Selective Color in Photoshop alone can make a huge difference to an image if you want a more global treatment.
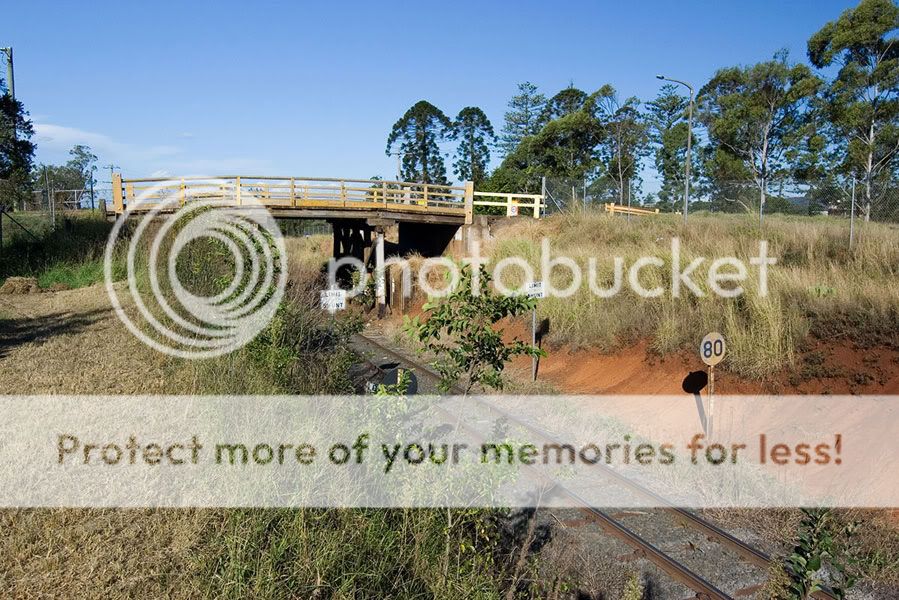
Here is the starting image - a little dry and washed out from the high contrast and harsh sunlight hitting the landscape:
So we initiate the tool:
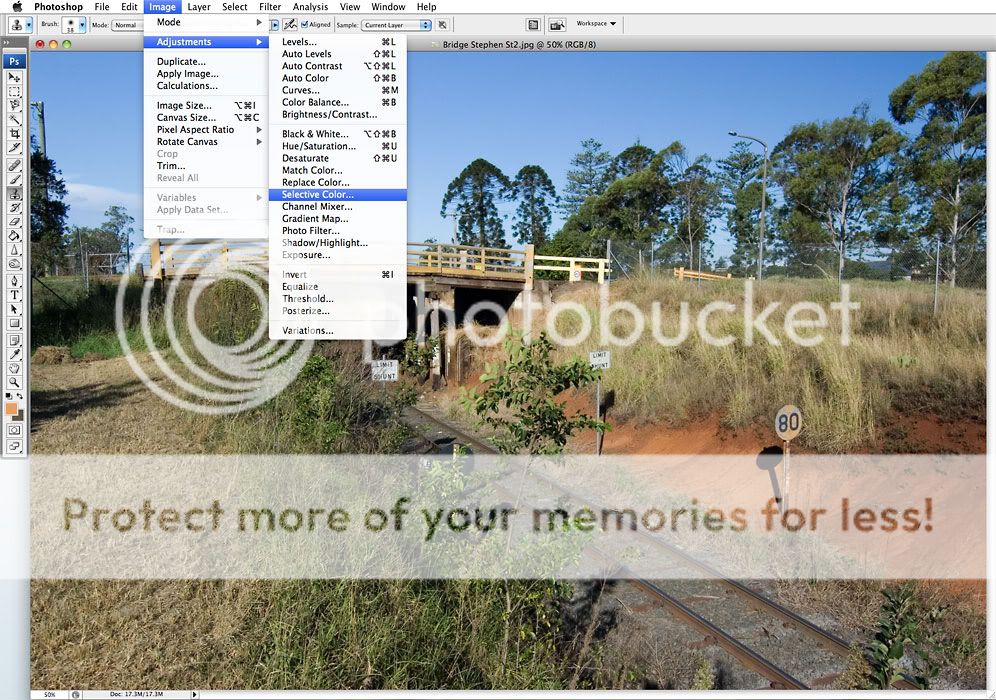
This brings up the prompt to adjust the colours by separate colour channels based on the CMYK and RGB systems (cyan, magenta, yellow and black as well as reds, greens and blues).
There are a number of sliders you can utilise to manipulate the colours in each channel, and getting used to the nuances of each will help to know how much you should use without being too heavy-handed or causing unwanted pixellation.
So here is the first channel, Reds:
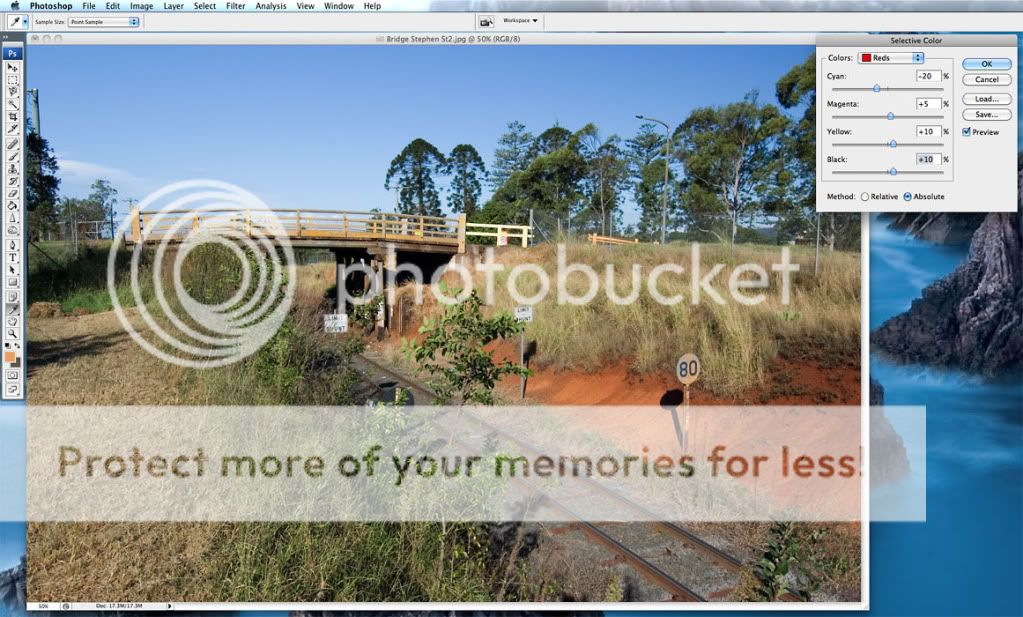
Sliding the individual CMYK adjustment sliders alters the way the reds in the image appear, based on the amount of adjustment and what colours are used. Shifting the cyan slider to the left (negative) gives more of a boost to the reds, while sliding to the right (positive) tones the reds down in favour of a deeper cyanotic hue. Similarly, altering the yellows either makes the reds more rich with yellow (positive) or reduces the yellow intensity and thereby changing the reds in the image to appear more purple (negative). The black slider is useful in deepening (positive) or backing off (negative) the black tones within the selected colour.
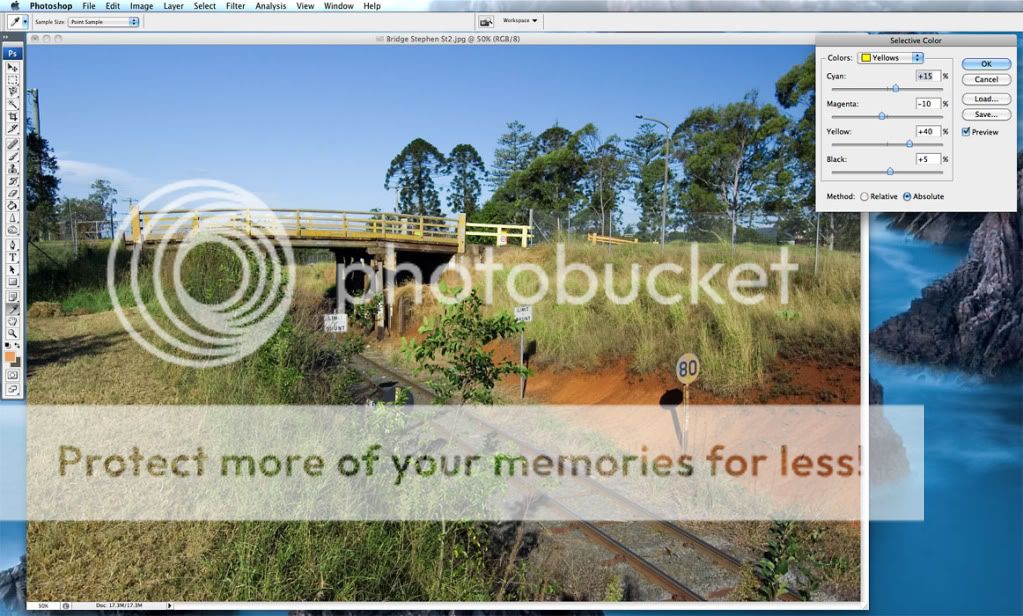
By selecting yellows, you can now alter the yellows in the image selectively. The yellow slider doesn't have great impact in this channel, since it mainly serves to either saturate (positive) or desaturate (negative) the colour in the image. However, the cyan and magenta sliders are useful in manipulating the yellows into a more appreciable tone as desired.
With greens, it's beneficial to use the magenta slider. The magenta slider can be utilised to boost the greens, making them more brilliant by reducing the magenta (negative), as shown below.
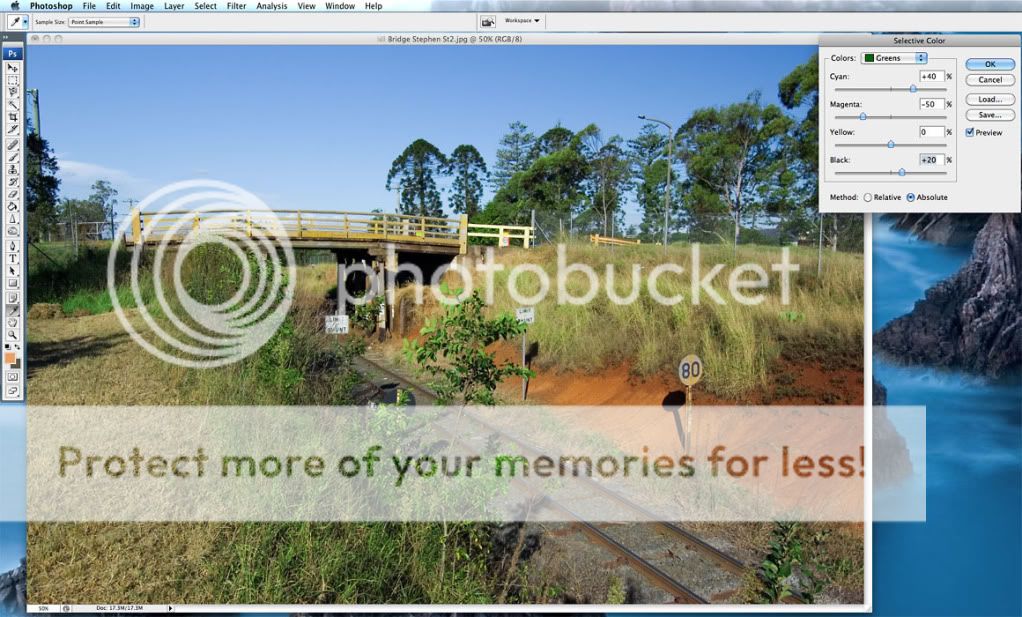
If the opposite effect is required, the magentas can be enriched by sliding it the opposite way (positive).
Moving onto the cyans, I find that most of the time Pentax's auto WB favours the yellows in place of the blues and so manipulating the cyans towards a more rich blue with less yellows is helpful. So with the sliders for cyan and magenta, experiment with going positive, whilst taking the yellows negative and see how it turns out:
Blues can be dealt with much the same, although with landscapes, the blue sky is quite sensitive to this channel. Be weary not to overdo it.
Neutrals are helpful in shifting the mid-contrast point (using the black slider), but also to add or take away hues that can enhance the overall look of the image with a colour tint (using the colour sliders).

Whites are good for manipulating how the whites in the image appear, but slight changes to the sliders can create drastic changes that blunt the impact of the whites in the scene. Most helpful to me for landscapes is to shift the yellows negative between -10 and -20, sometimes even more, to extract the yellow hue sometimes evident in clouds when I'd like a clean white look to them. At times it's useful though to add some magenta or yellow to the whites to add more drama to the sky, but this comes at a cost of changing the other parts of the image that have strong highlights.

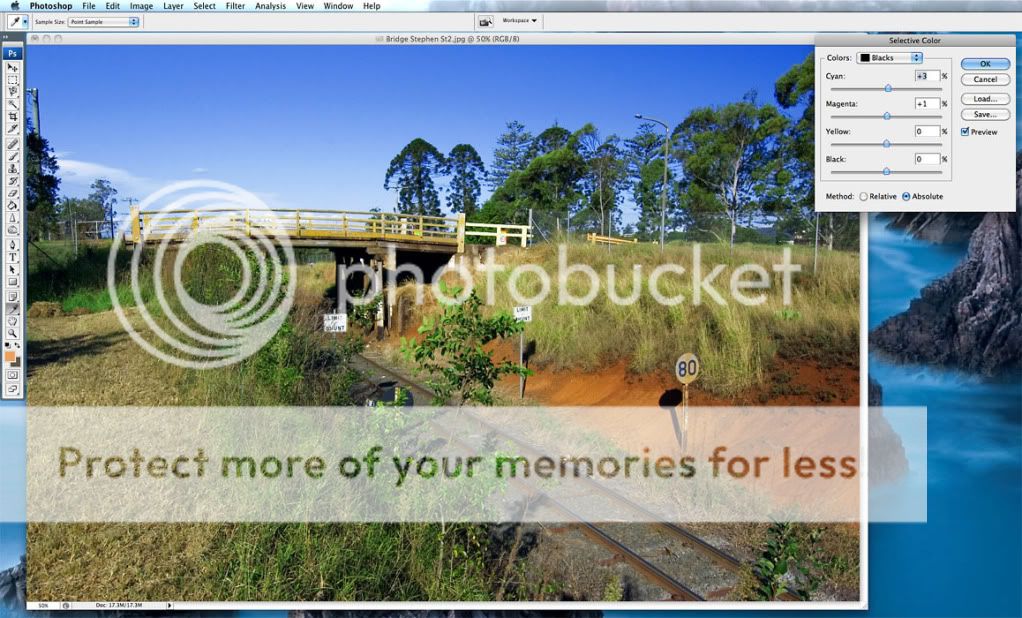
Blacks are useful to boost and enhance the contrast in the image, but is also easily overdone. So be conservative with the sliders here - the most important one being the black slider, but the colour sliders can be used if you want to add a cyan or yellow tinge to the deep shadows in the image.
And the final result:
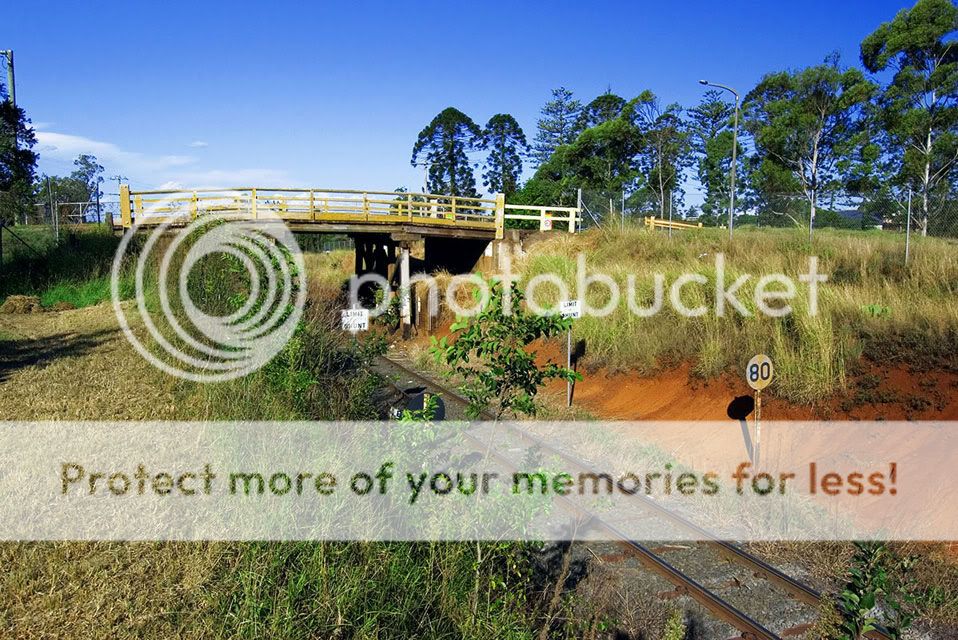
A marked improvement from the original I'll say - and taking all of about one minute to achieve.


 Similar Threads


