In high contrast situations, it's not easy to capture the entire dynamic range of a given scene. Some of these settings are amenable to HDR photography, some less so. And for those times when only one capture is made, but the contrast is overwhelming, this tool in Photoshop called
Shadow/Highlight is a robust means of effectively enhancing the details in both the shadows and highlights of an image.
There are numerous means which high contrast scenes can be adjusted for pre- and post-capture (D-range mode with highlight and shadow correction, RAW highlight recovery and fill light, masks and filters) but the
Shadow/Highlight tool seems to do a fantastic job with such minimal fuss.
Examine this example:
Original image 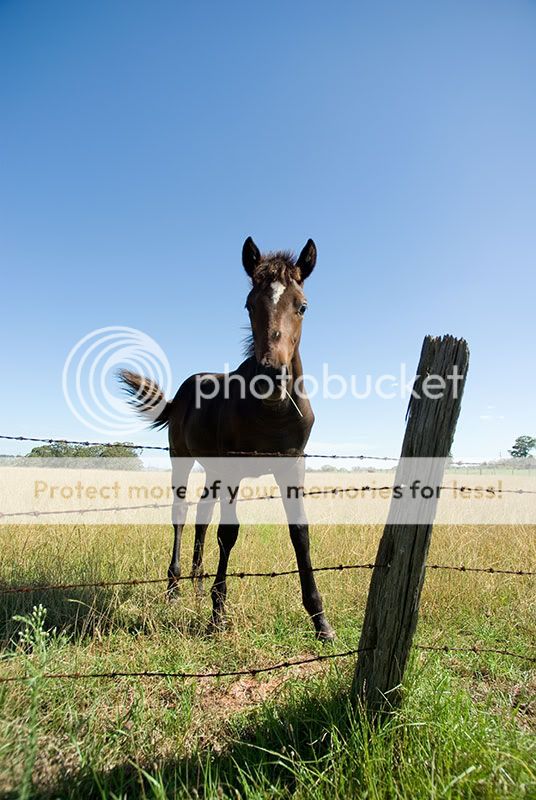
...a high contrast image that has a significant amount of shadow detail hidden in the body of the horse and highlight detail buried in the horizon and background areas. Whilst not being 'clipped', the image is too high in contrast to appreciate these details.
By opening up the tool:
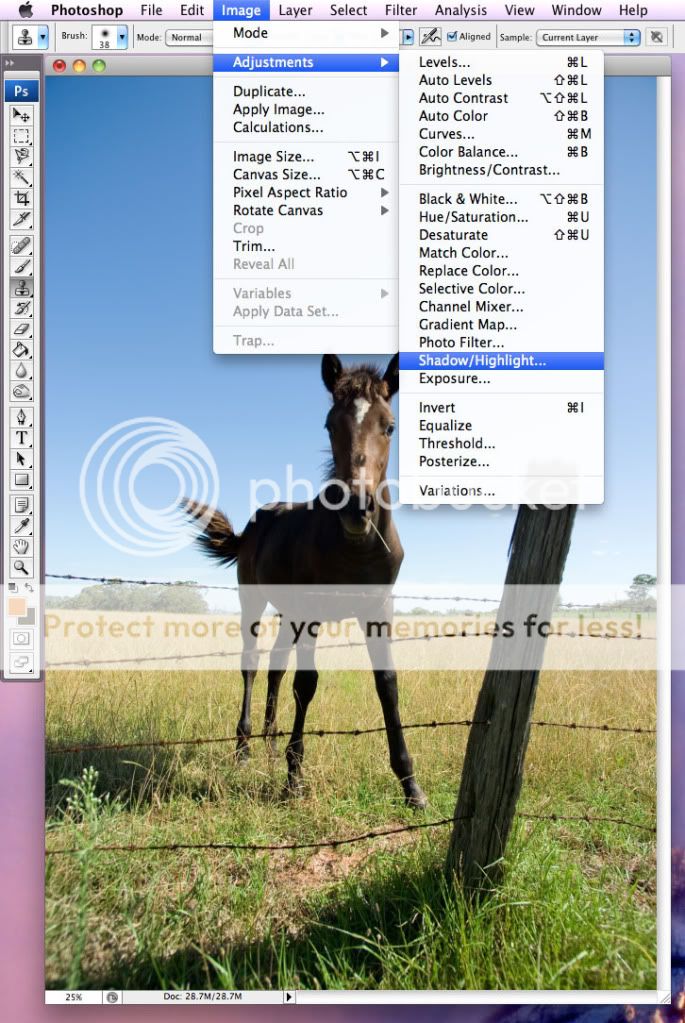
... there are 3 sliders to handle each the shadows and highlights details separately:

In the above example, highlights were focused on for recovery of detail by improving contrast of highlight detail whilst not clipping highlights any further than the tolerance level indicated below in the prompt. This has the effect of limiting highlight signal at the expense of some haloing around the high contrast areas, dependent on the radius chosen - the higher the radius, the less abrupt the haloing (smoothed out over the given radius) but the less highlight contrast effect there is.
In the next example, the shadows are the desired area of interest, being boosted by an increased amount and tonal range, each affecting the shadow areas differently (tonal range increasing the signal boost of shadow details within the bounds of the amount percentage specified). This can have the effect of dampening contrast but enhancing much of the deep shadow detail.
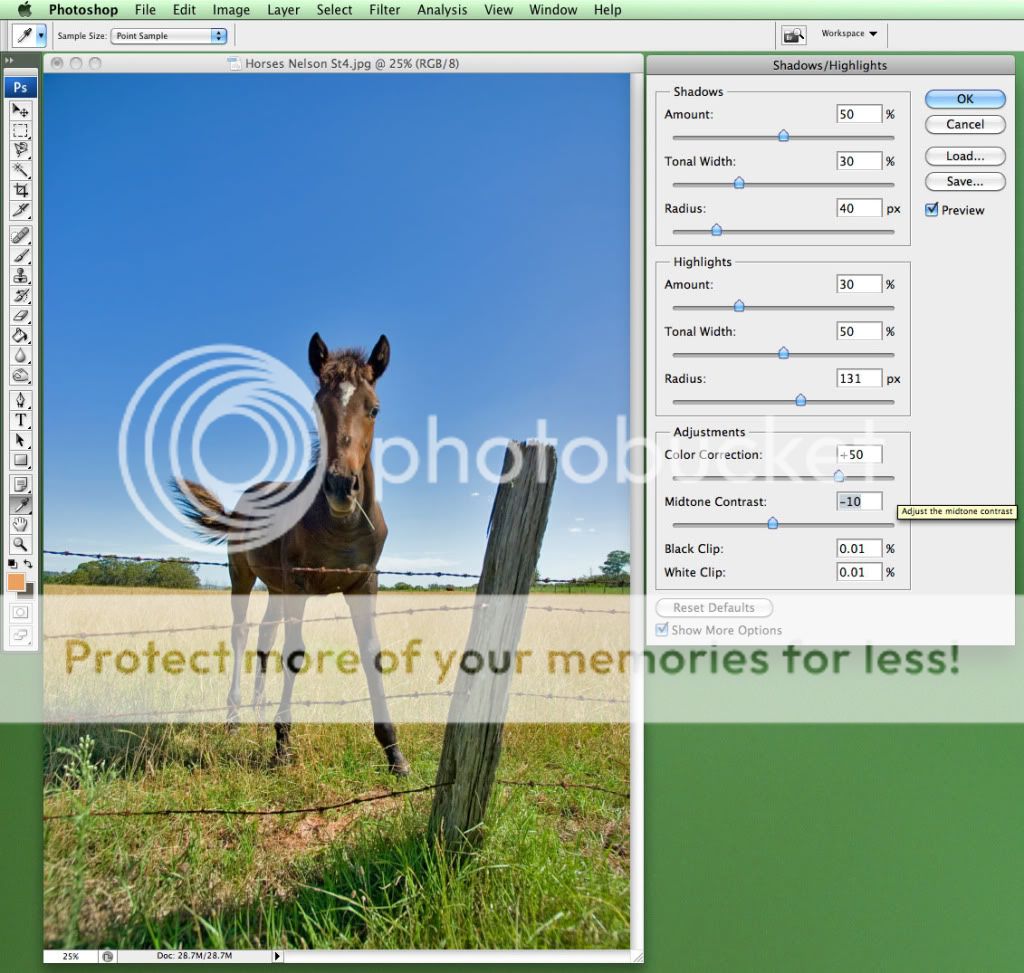
As can be seen, there is also the color correction and mid-contrast point tools within the prompt, which are quite useful in shifting the midpoint of contrast whilst altering the shadow/highlight areas, as well as providing the option to adjust the vibrancy of the overall image.
It is useful to run a pass of such a shadow treatment and then a pass of curves to re-enhance the contrast of the image, and the result can be more favourable than the original:
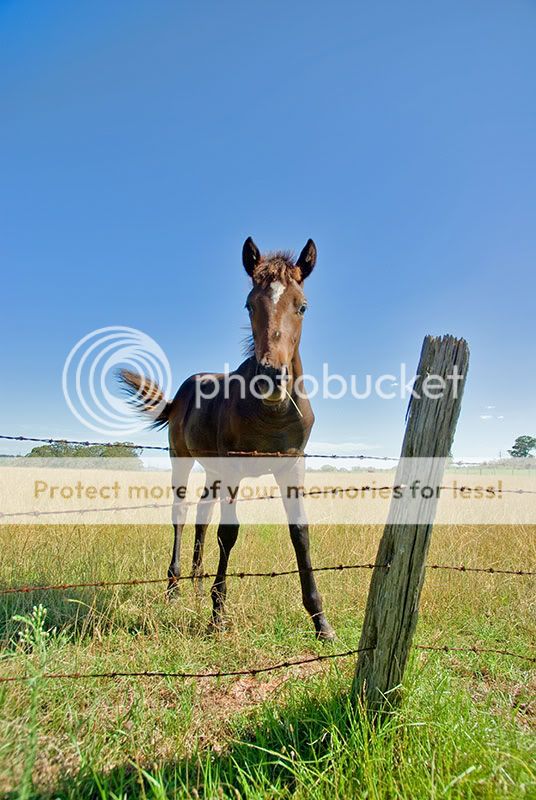
Again, with most PP tools, this one requires some diligence to avoid overdoing the effect - judicious use of Shadow/Highlight avoids the lower contrast, unnatural colour alteration and the unsightly halo effect.


 Similar Threads


