|
Forum: Maintenance and Repair Articles
01-24-2010, 07:52 PM
|
| |
The Pentax-A 50mm f1.7 is a very good lens except for one problem. A tiny part can break and jam the aperture ring at some place other than the A position. It often won't return to the A position, making the lens far less useful and valuable. The fix is not that hard and doesn't require special tools. It is probably better to read through this once before starting, then follow the instructions.
A clean workspace with good light is helpful. You may want a clear plastic bag to control a spring-loaded bearing. More on that later. A good quality Phillips #0 or #00 screwdriver is required to take off the mount. Tweezers, a small dab of lithium grease and a small flat-bladed screwdriver are optional.
I have heard that the mount screws have slots for a slightly different screwdriver head, but Phillips will work OK with proper technique - make sure you have good contact with the slot and apply even pressure. With the lens face-down on the work surface, remove all five screws. Grab onto the bayonet lugs and lift off the mount. You'll see this:
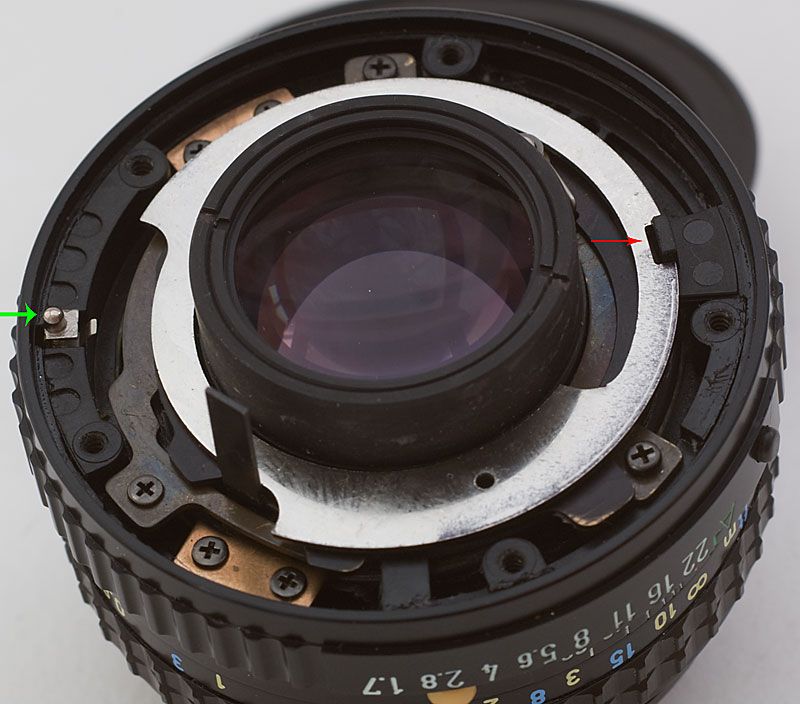
At this point, a lot of things are loose - the mount was holding everything together. The first thing you can do is lift off the stamped steel ring around the rear element. It links the aperture to the aperture ring. This photo will help you put it back in the right place.
Next, there's a thing on the left side of the photo marked with a green arrow. Pentax calls it the "A-M Selecting Plate", part number 38305.X50801. It has two more associated parts, a tiny spring and a metal plate. This part is critical in telling your camera you've mounted a KA lens. You can slide it out now with the tweezers, or leave it for later. The main thing is, these three parts are important for maintaining the A position functions. A closer photo:
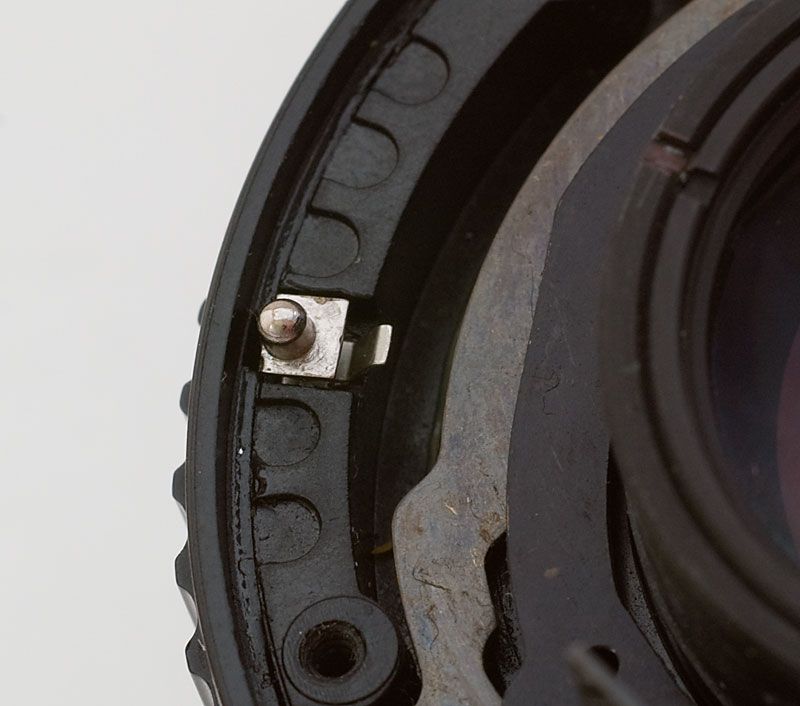
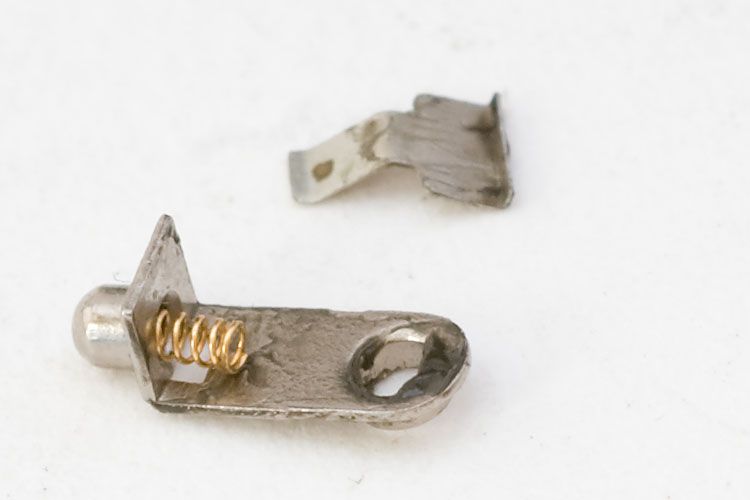
I think it's easiest to take all these off and reinstall them in the final stages, instead of worrying about them staying in place. Here is the part, its spring and contact:
OK, now we'll talk about the second part that you don't want to lose. There's a 1.5mm ball bearing that makes the clicks between aperture settings. A spring is pushing it outward against the aperture ring, so when you remove the aperture ring, this bearing will launch into space. The bearing is just to the right of the off-white bump. In this photo, it is perched on its little spring:

If you have the lens in a plastic bag, when you slide the aperture ring off, the bearing will end up in the bag. I can usually just orient the lens so the bump is in my left palm, slide the ring off with my right, and the bearing is in my hand. This probably only works because I have spare bearings, so losing one is no big deal for me. The spring can also get lost when you're not looking at it, but it usually stays hidden in its hole. The aperture ring has the small black button in it too; keep track of that.
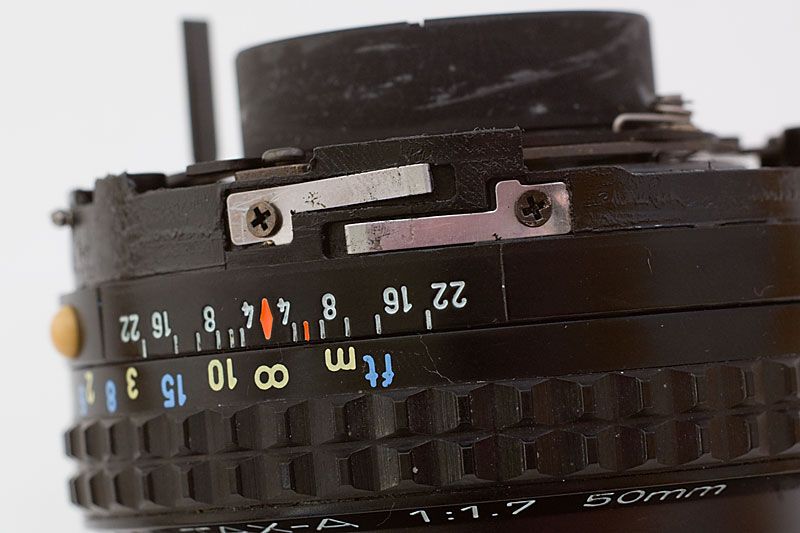
With the aperture ring off, you now have access to the problem. You probably see something like this:
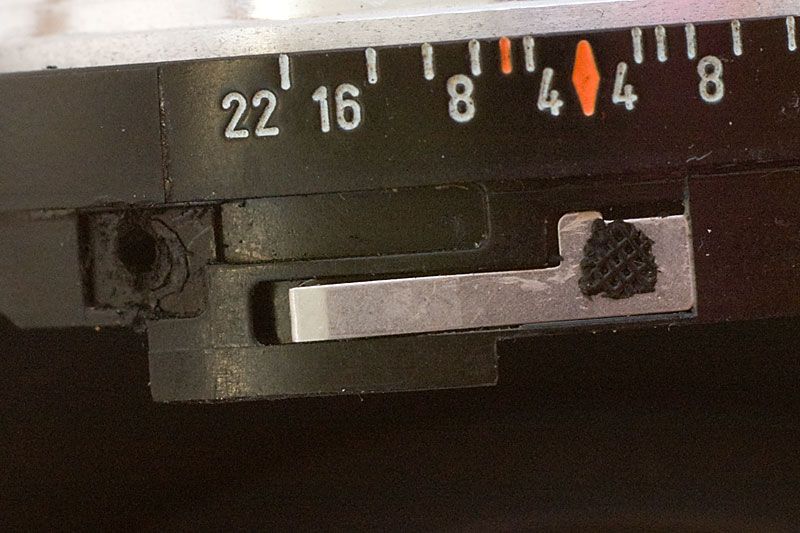
And you have another tiny part falling out, one of those flat steel springs. Pentax put these springs on with a plastic weld, which doesn't last forever. (In their defense, they may not have expected people to be using these lenses 25 years later.) You can fix the spring in several ways. Epoxy glue is one solution. Pentax uses screws on almost all other lenses, if you have some very small screws. Screw heads or epoxy should not stick out at all, because the aperture ring has to slide by them. Here is a successful screw repair:
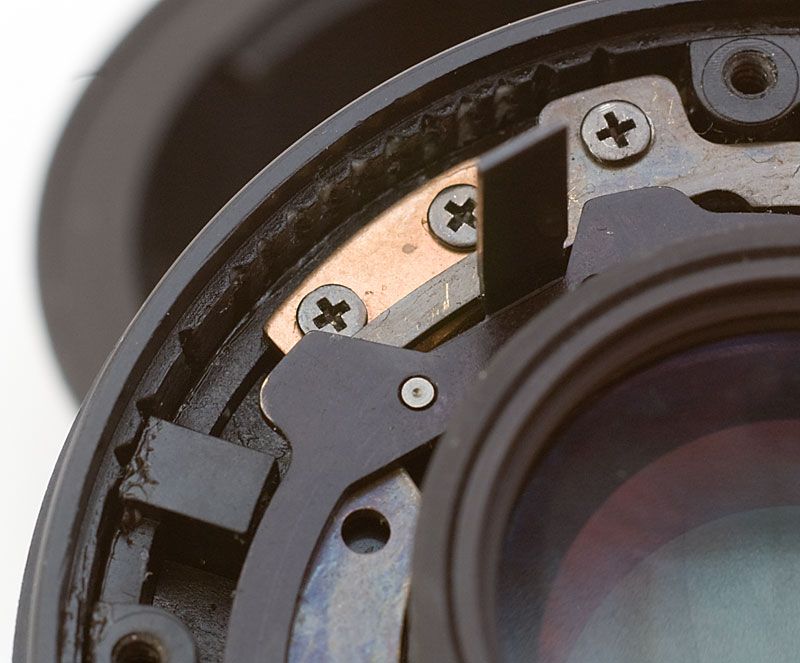
It's a good time to clean the aperture ring of any dirt, and remove other grit or dirt you see. One more photo to show you the little v-grooves that mark each click-stop for the aperture:
Now all you have to do is reassembly. This can be challenging because of all the tiny unsecured parts moving around. I use a small amount of lithium grease to relube the aperture ring. I also use a bit to stick the A button in place, and stick the ball bearing to its spring on the lens. I hold the lens sideways and orient the ball bearing so it's at the top and not falling off. I hold the aperture ring so the numbers are going the right way and the v-grooves are lined up with the ball bearing.
Then I slide the opposite side of the aperture ring onto the lens first. I keep sliding it on until it runs into the first (lower) flat spring, then use a small flat-blade screwdriver to tuck that flat spring under the ring. Then I slide the ring on a bit more until it's up against the bearing. I use the flat-blade screwdriver to shove the bearing down and slide the ring over it. Then the upper flat spring gets tucked under the ring and the hard part is done. You should be able to move the aperture ring and feel click-stops, and the button to select the A position should work correctly. Set the ring to the A position for the next step.
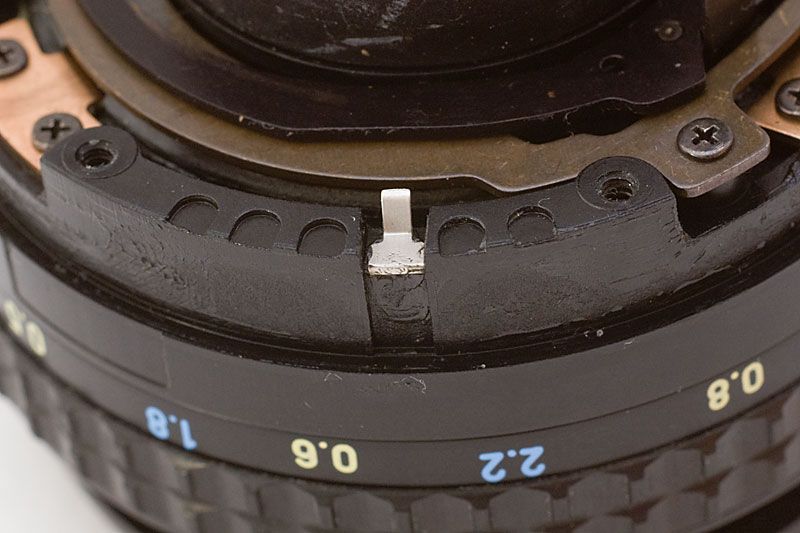
Next, reinstall the parts for the A contact. The contact plate goes in first. It has a hook that goes over the outer rim. I use a bit of grease to stick this in place too. It should be in this position, except of course your aperture ring is installed now:
Then just slide the "A-M Selecting Plate" into its slot. The stamped steel plate goes on next, flat side up. Use the first photo to install it; the tab in the aperture ring fits into the slot (red arrow). Line the mount up so the aperture lever will fit through its slot and the A contact will fit into its hole, then put that into place. Reinstall the five screws.
Check your work by mounting the lens on your DSLR. Set the aperture ring to A and see if the camera will recognize the aperture setting. Use the DOF preview to see if the lens stops down to the selected aperture, then change the aperture with the wheel and stop down again. (Exact controls to do this will vary with different camera models.) Then go use your repaired lens.
|


