|
Forum: Post Your Photos!
06-29-2023, 08:53 AM
|
| |
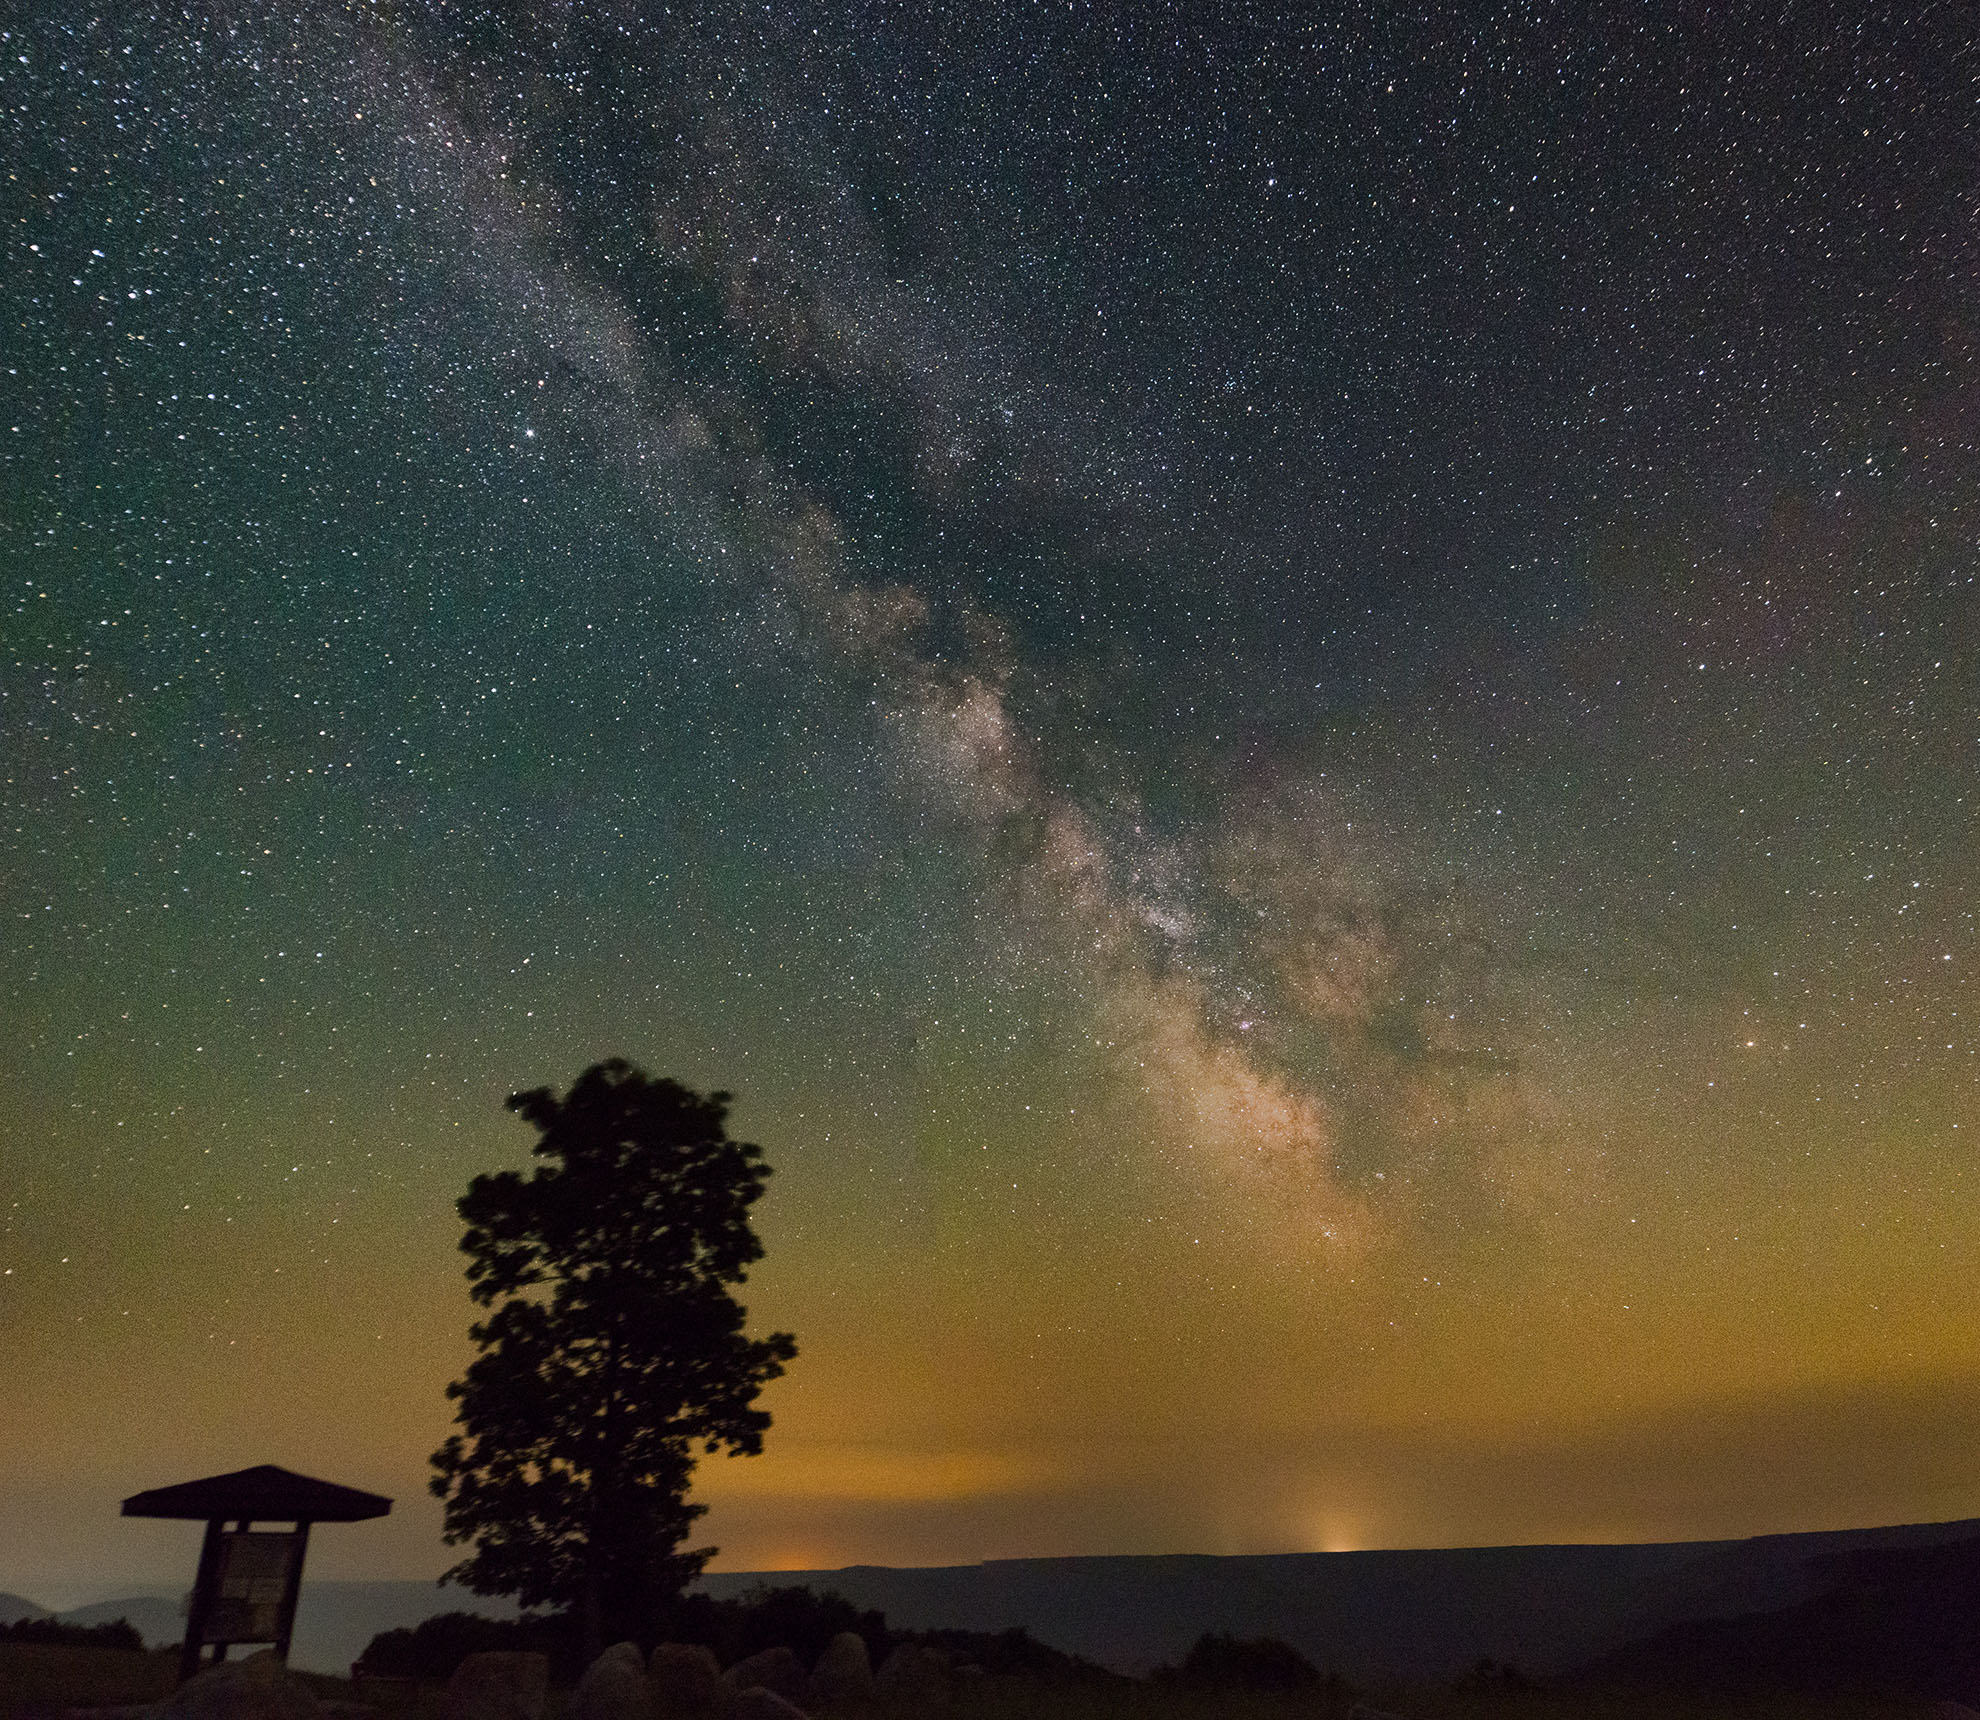
Took this shot about 1:30 an back on 18 June 2023. As far as I can tell, the horizon is dark and orange due to lingering smoke particulates in the atmosphere. This image is a composite of 3 vertical orientation photos to get more of the sky than my APS-C sensor and lens would otherwise cover.
|
|
Forum: Post Your Photos!
02-12-2023, 01:43 PM
|
| |
| |
|
Forum: Monthly Photo Contests
11-01-2022, 01:28 PM
|
| |

2 friends of mine playing a game which involves narrating a story while a match slowly burns down in their fingers. You can check it out at ascoundrelinthedeep.com |
|
Forum: Post Your Photos!
10-31-2022, 02:24 PM
|
| |
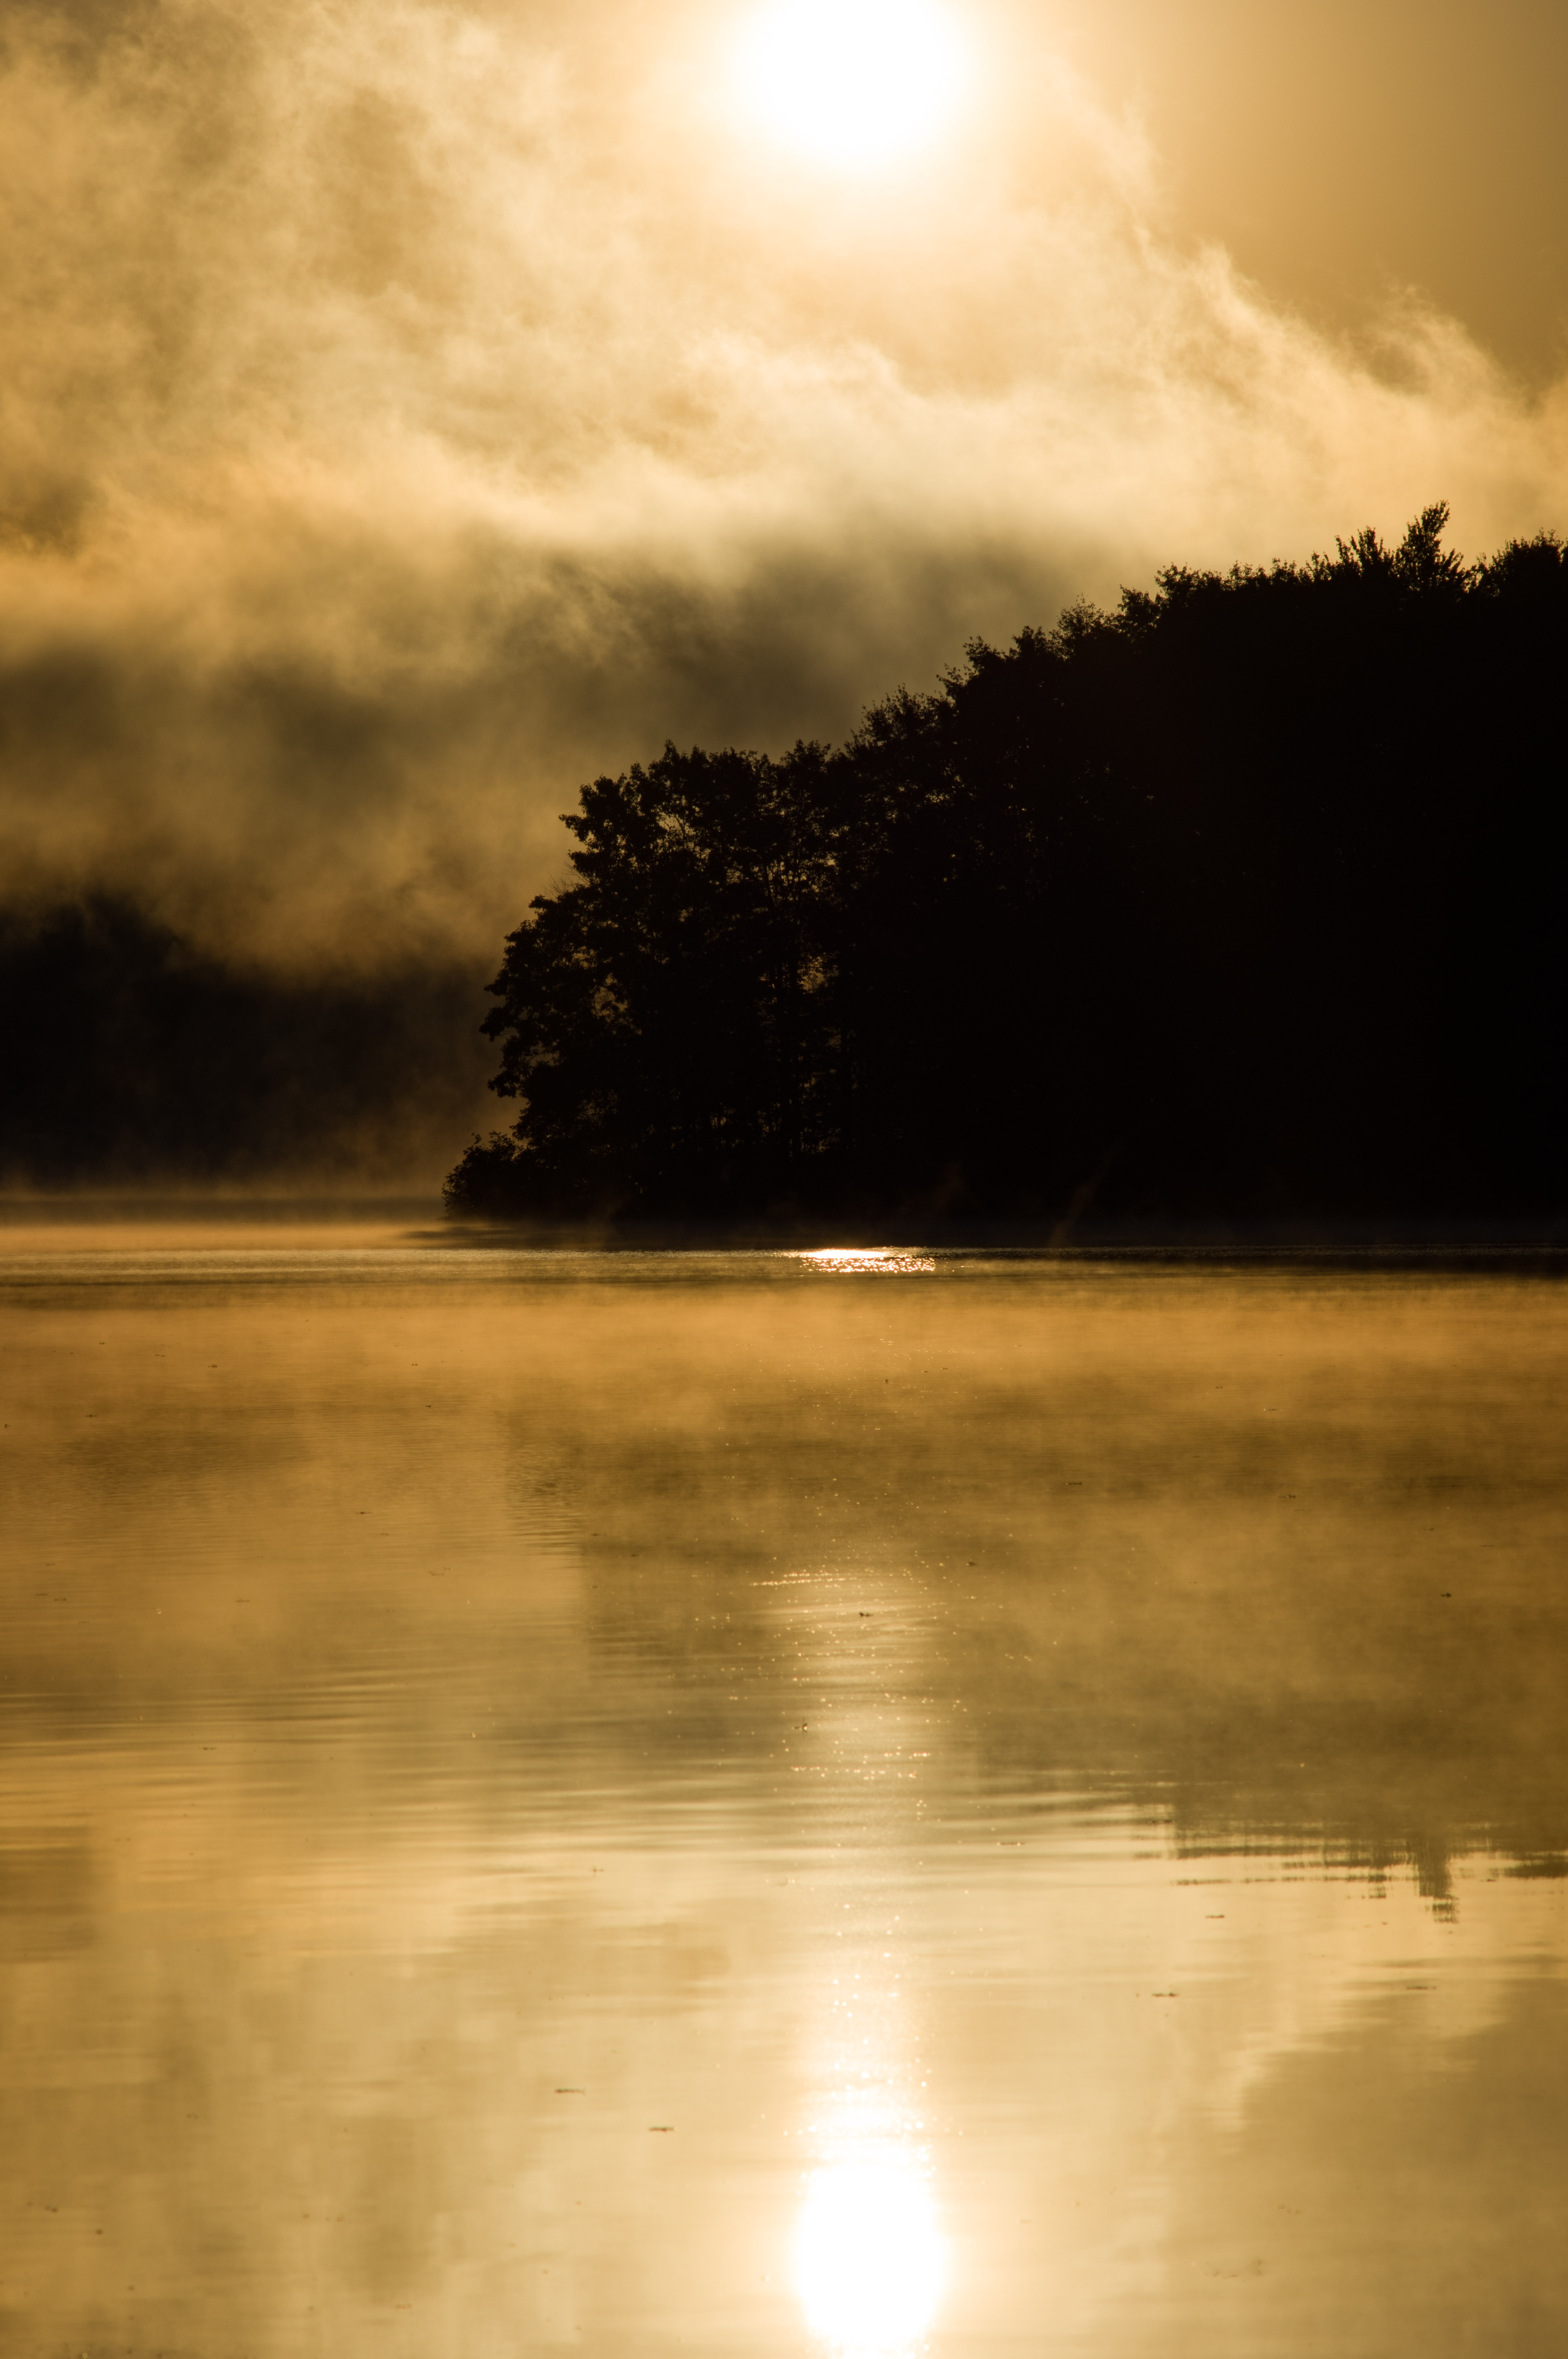
Stepped out of my comfort zone on this one - shooting a landscape in portrait orientation and with a telephoto lens. I like this one because of the extremely dramatic appearance.
|
|
Forum: Post Your Photos!
10-24-2022, 10:36 AM
|
| |
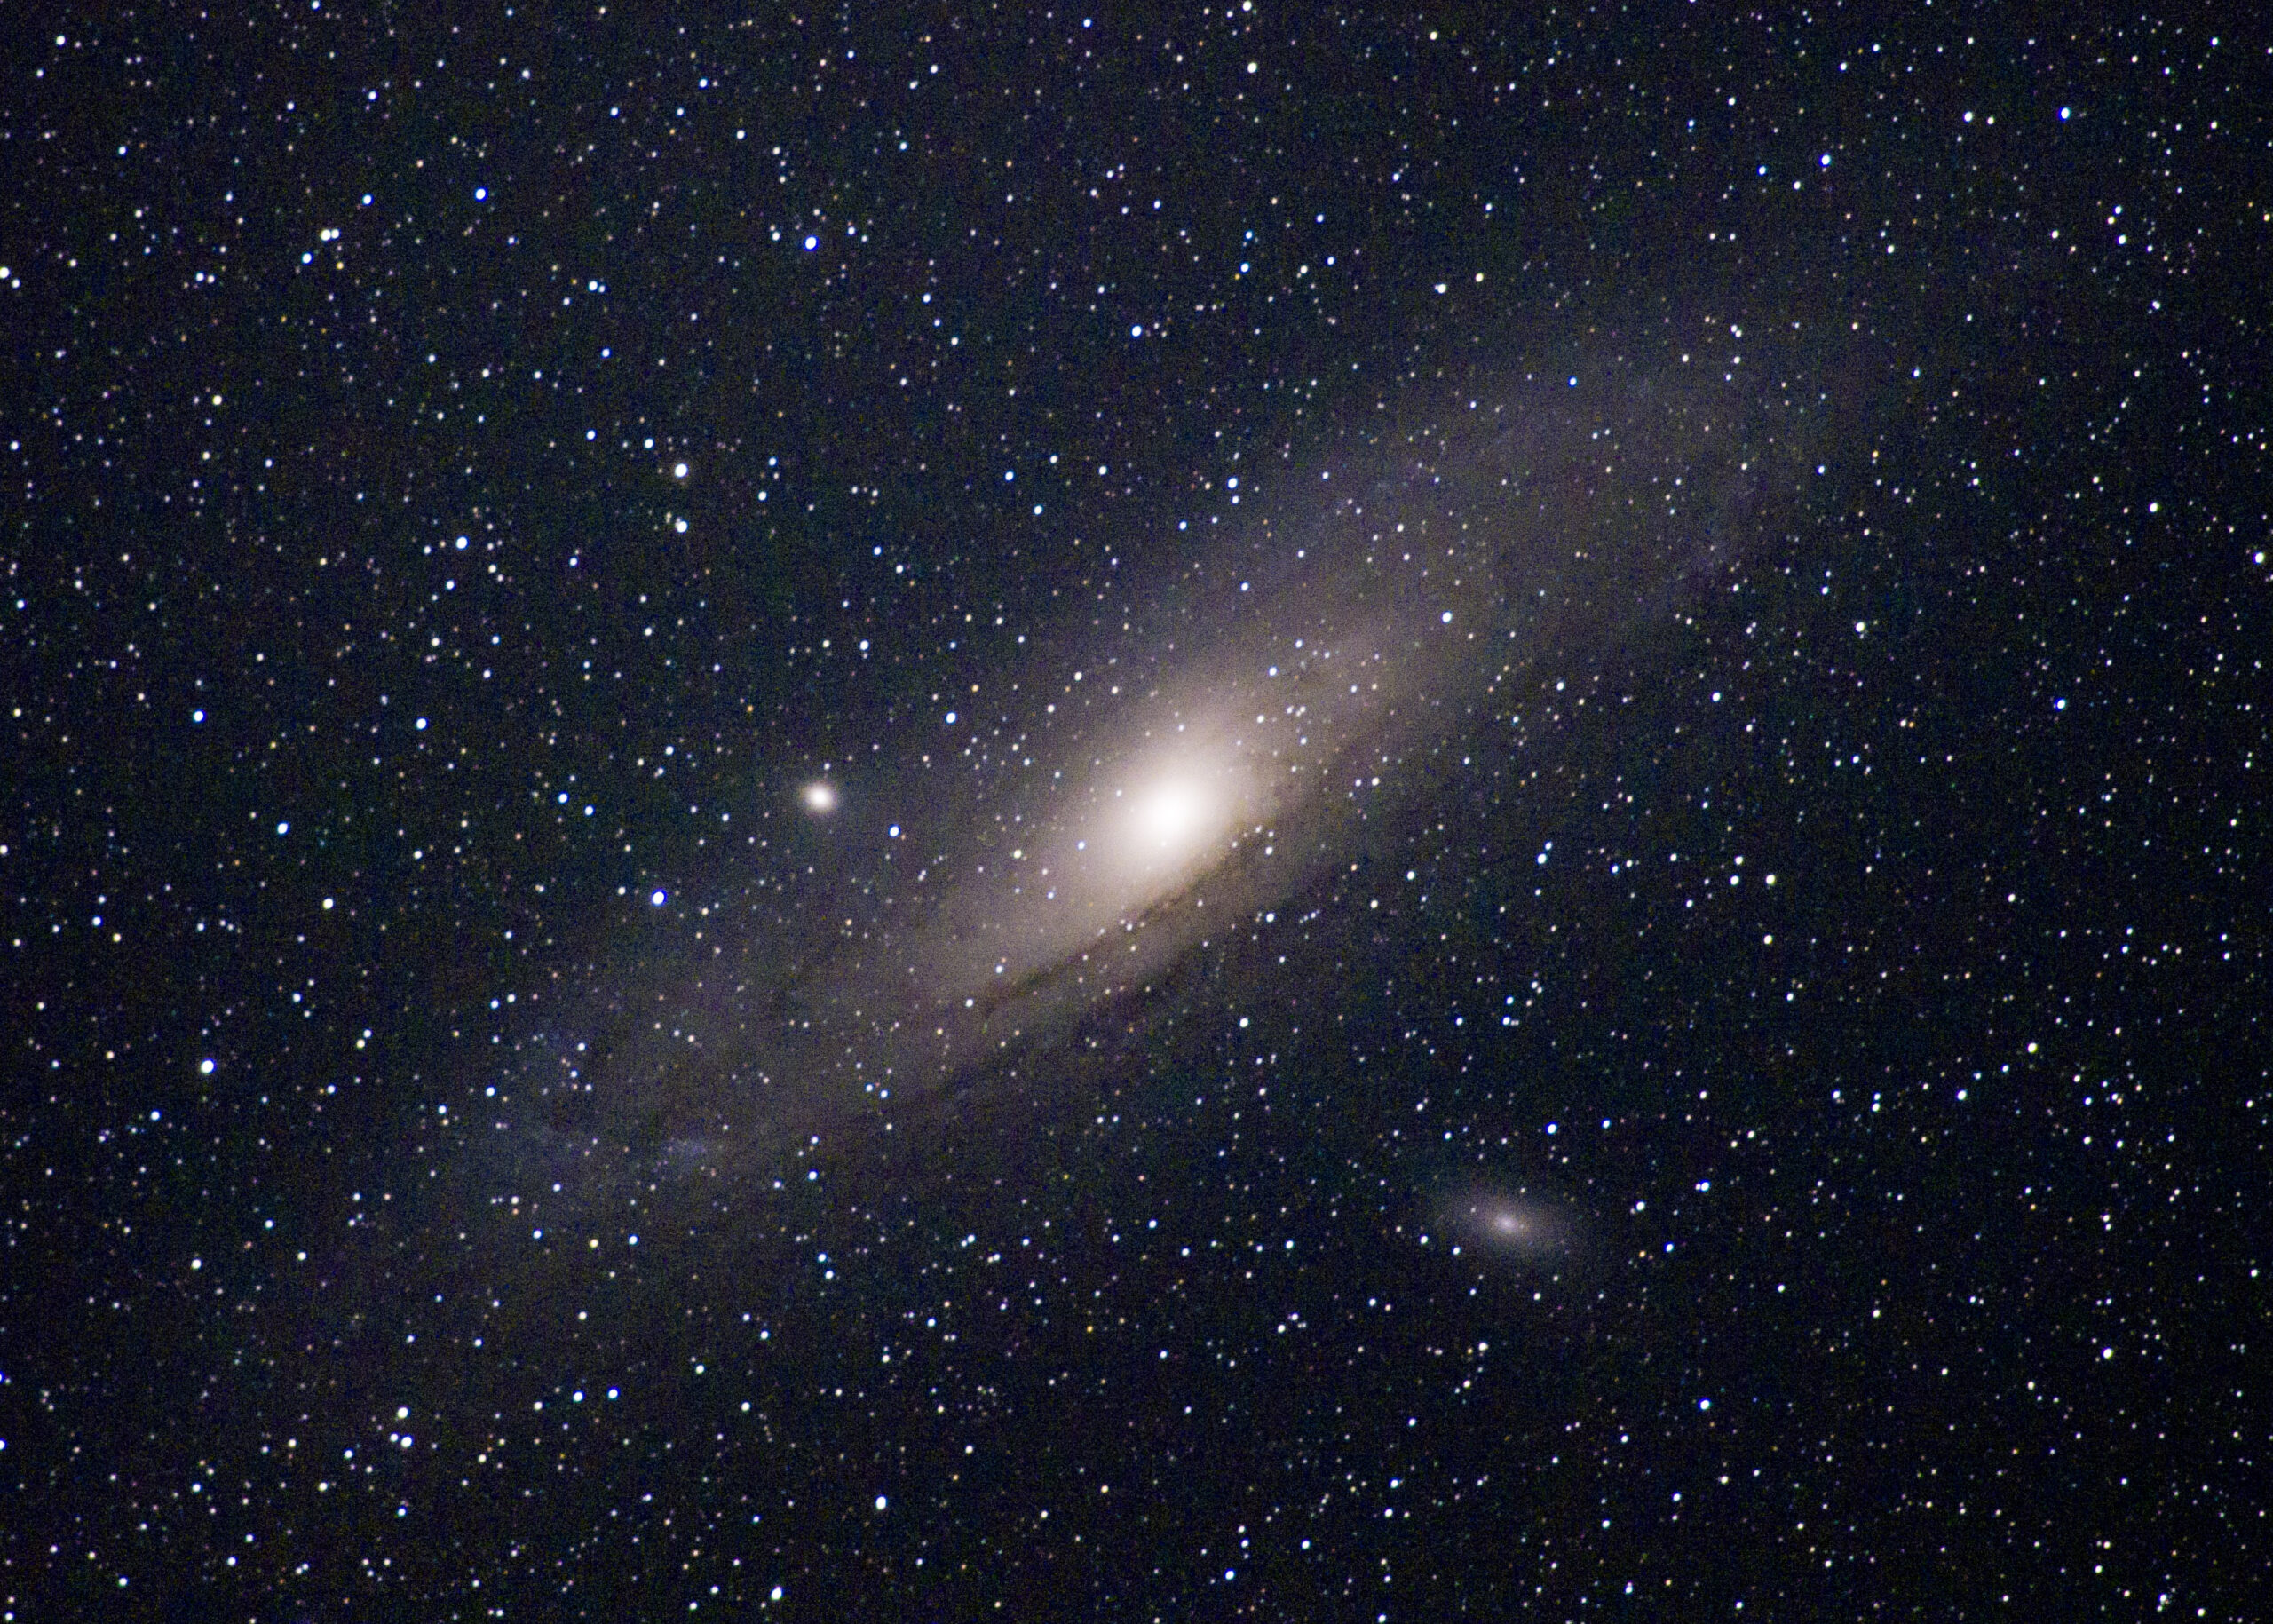
This image of the Andromeda Galaxy is a stack of 17 separate 10-second exposures stabilized by Astrotracer, composited in Sequator, then enhanced in Lightroom. I was fortunate enough to have a clear, cool, and still night on Friday with no moon and no clouds. Getting over an hour from the nearest city meant little enough light pollution that I could actually pull some detail!
|
|
Forum: Post Your Photos!
08-31-2022, 08:47 AM
|
| |
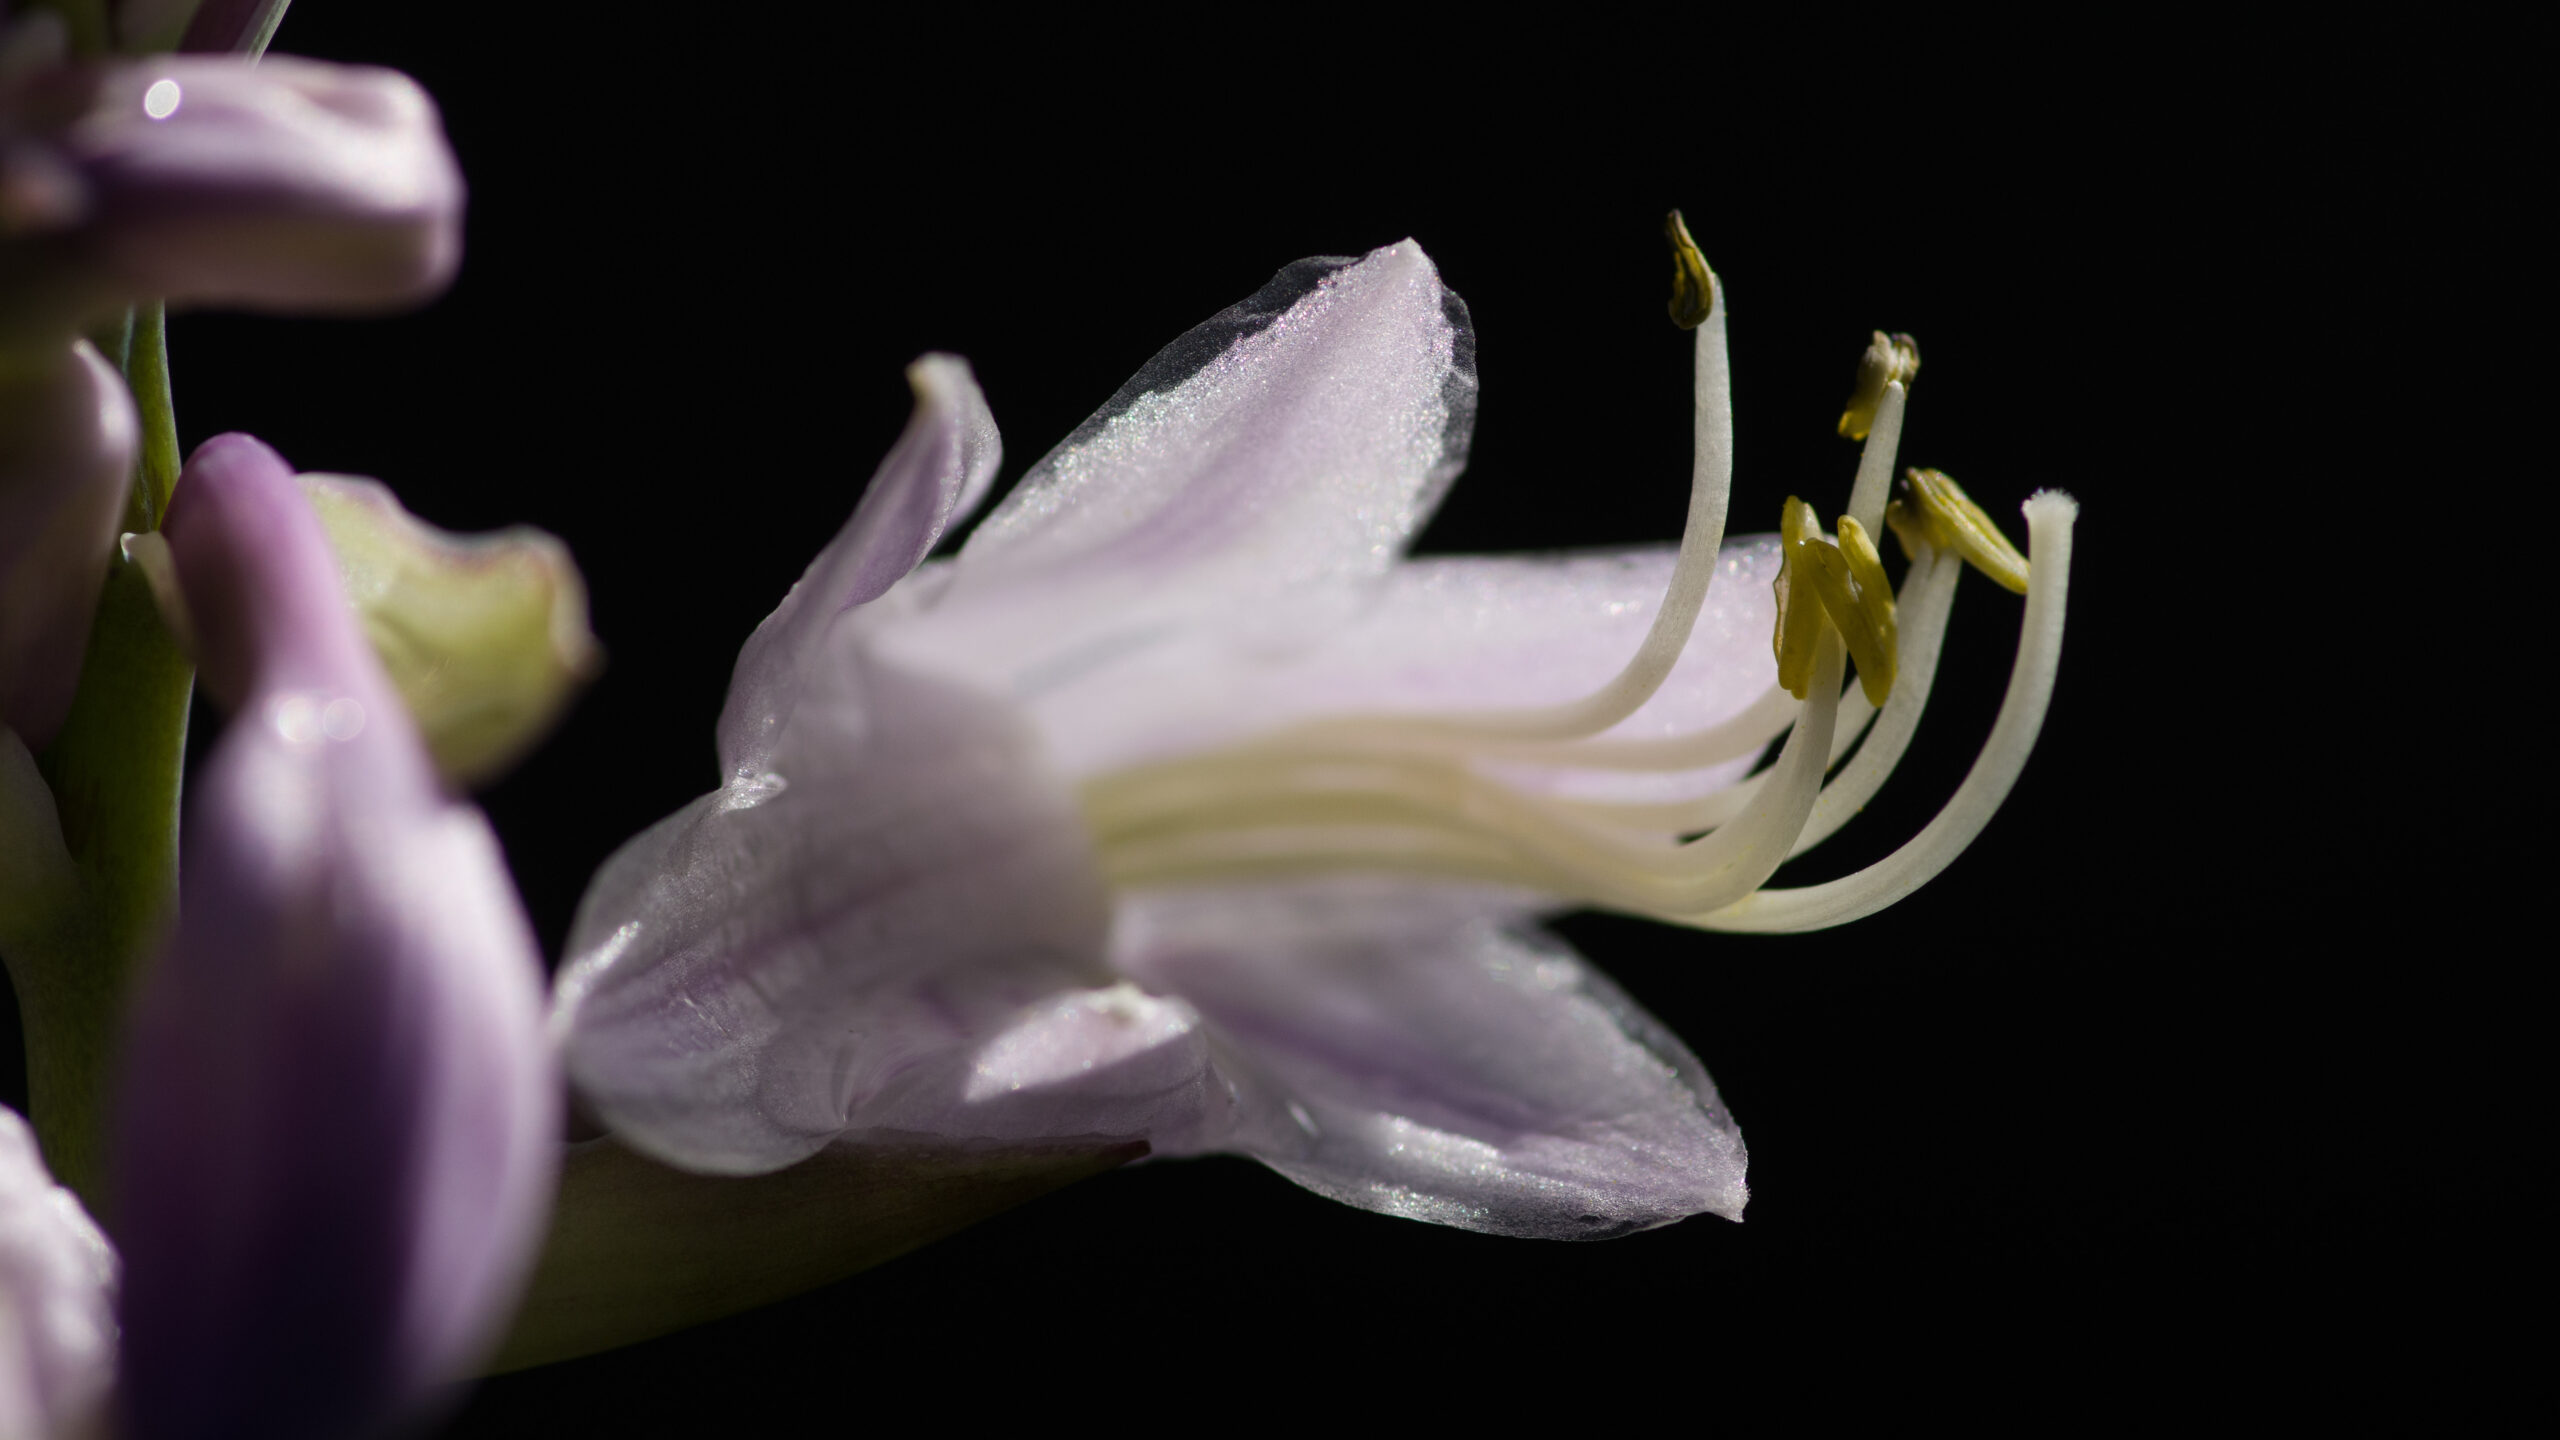
I caught the hostas on the side of my house in bloom, in some fortuitious light. Mid to late afternoon, with the sun having just emerged after a light rain shower. The side wall of my house behind the blossoms was in full shadow, providing a good blank, dark backdrop.
|
|
Forum: Post Your Photos!
12-08-2021, 10:31 AM
|
| |
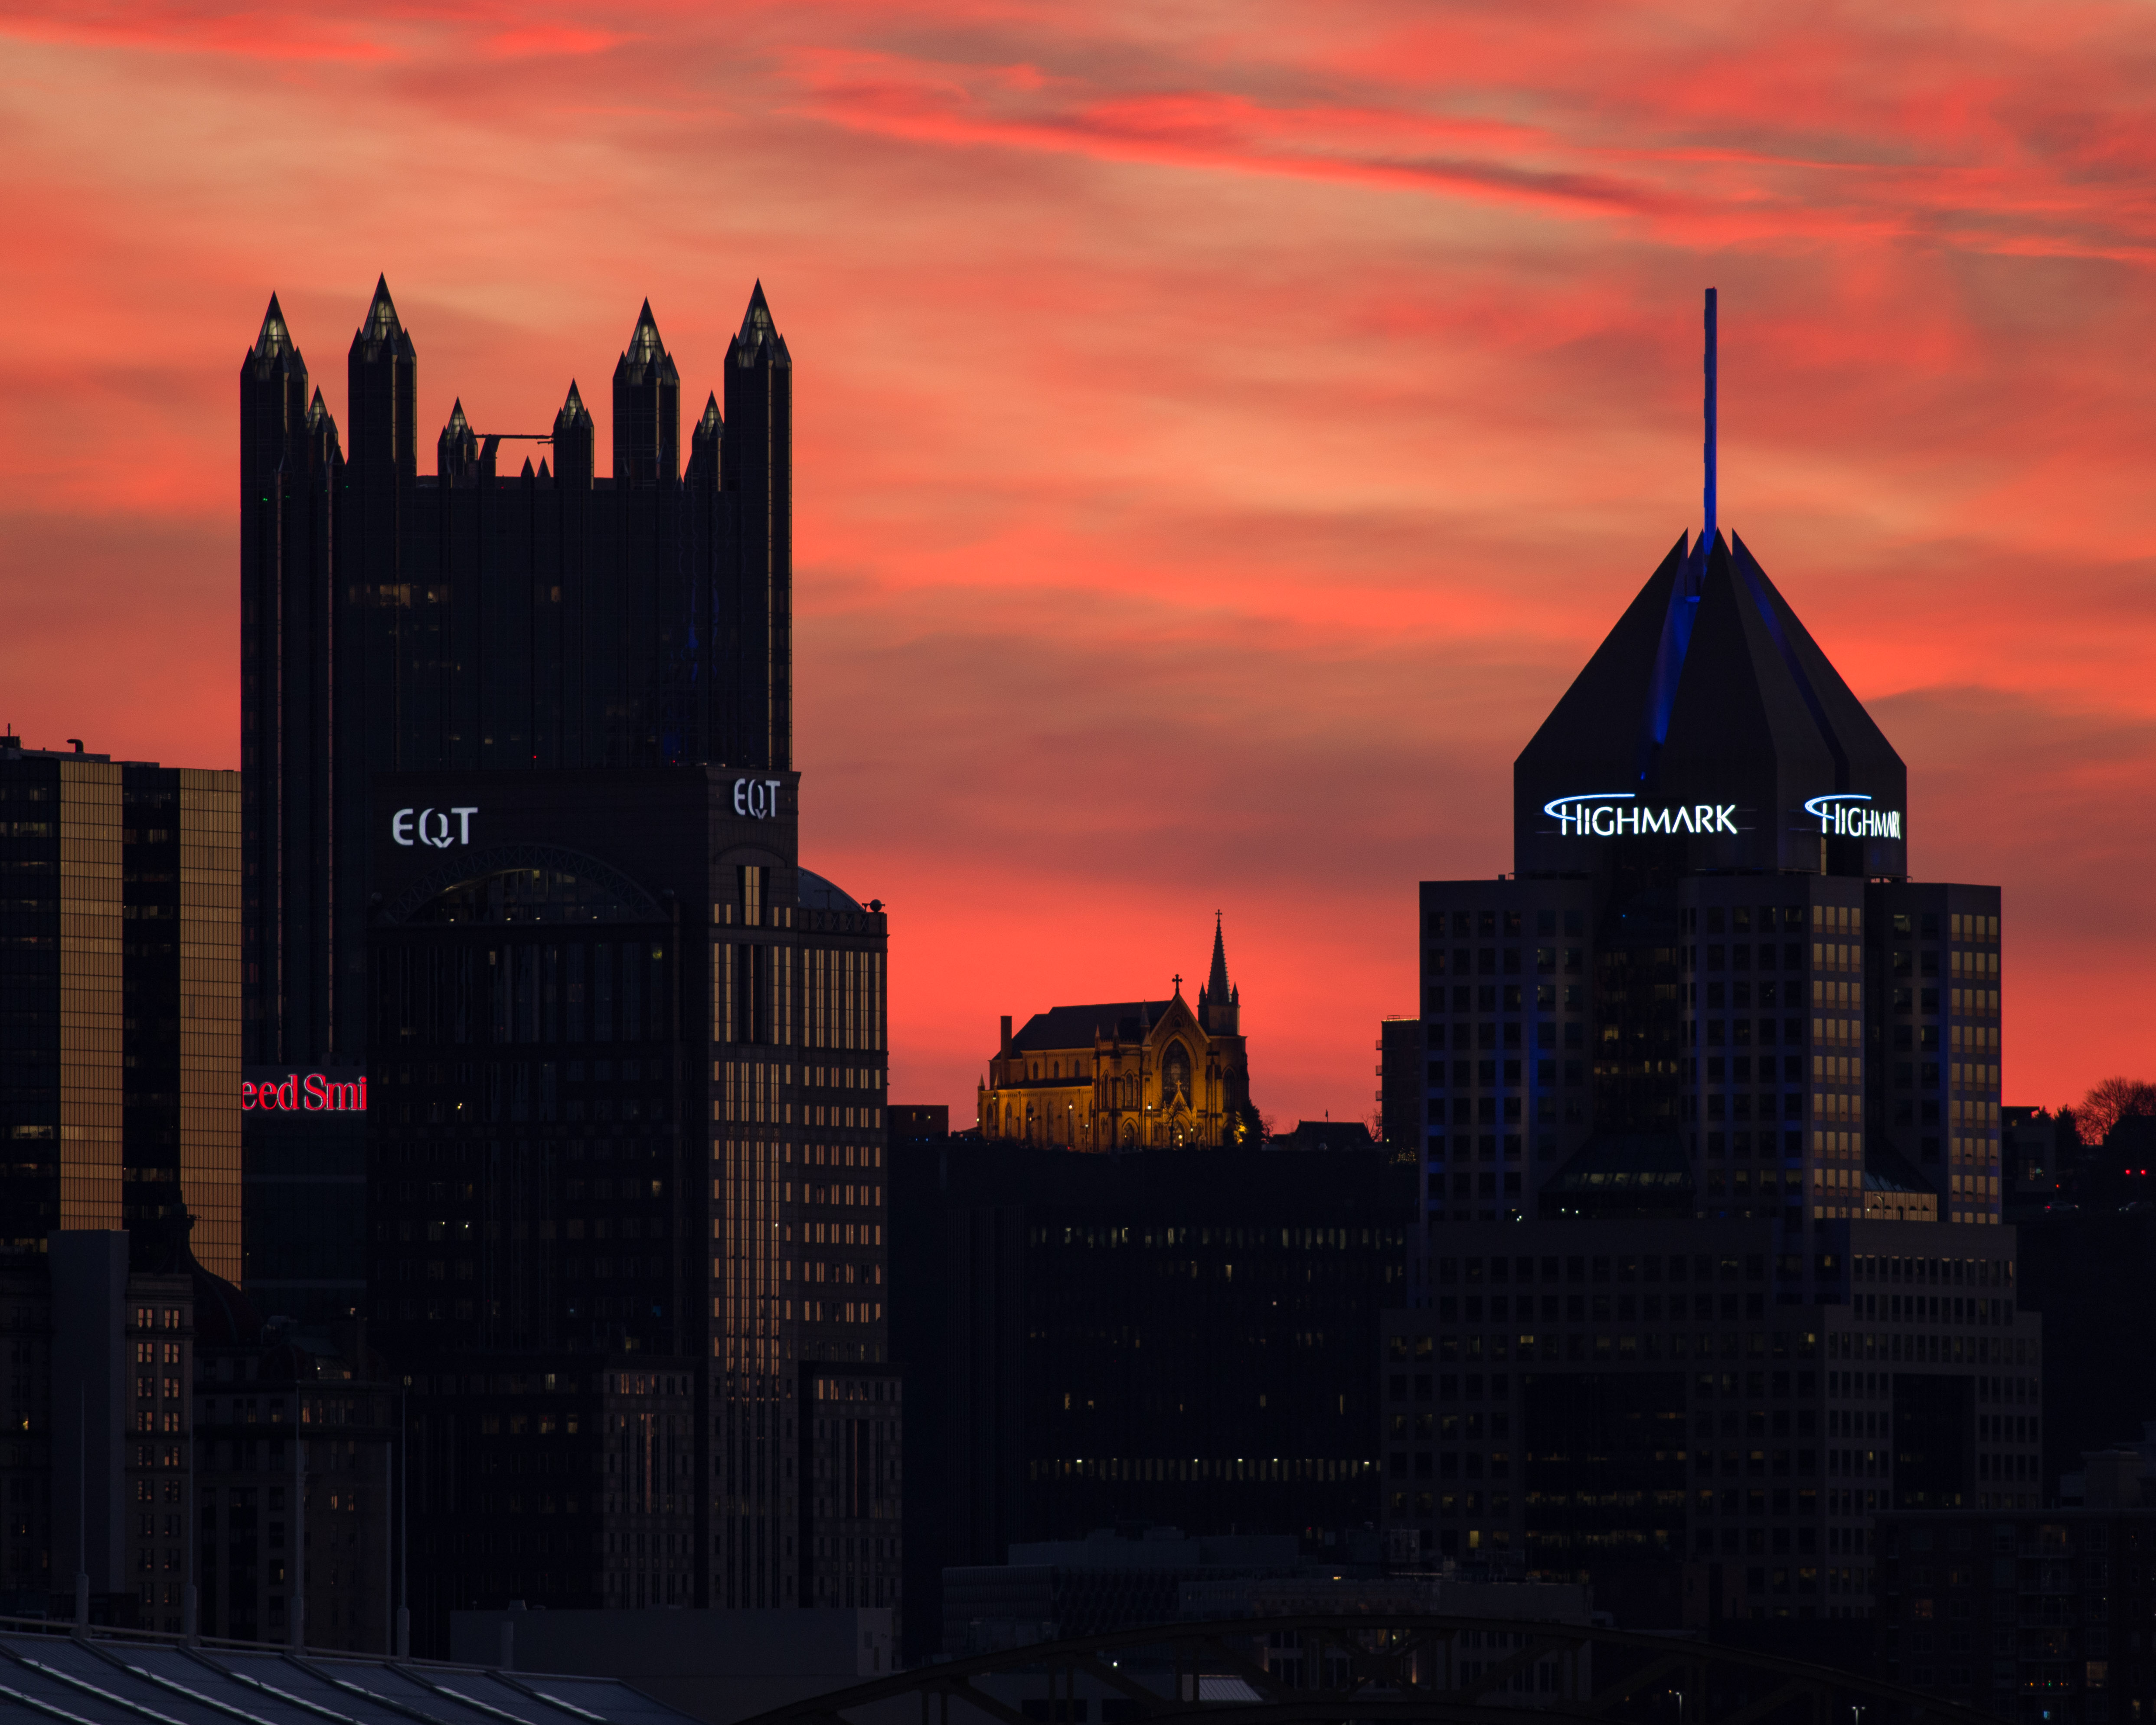
Pittsburgh just after sunset. This city has some great angles and vantages if you get creative with where you point your camera.
|
|
Forum: Post Your Photos!
11-08-2021, 08:00 PM
|
| |
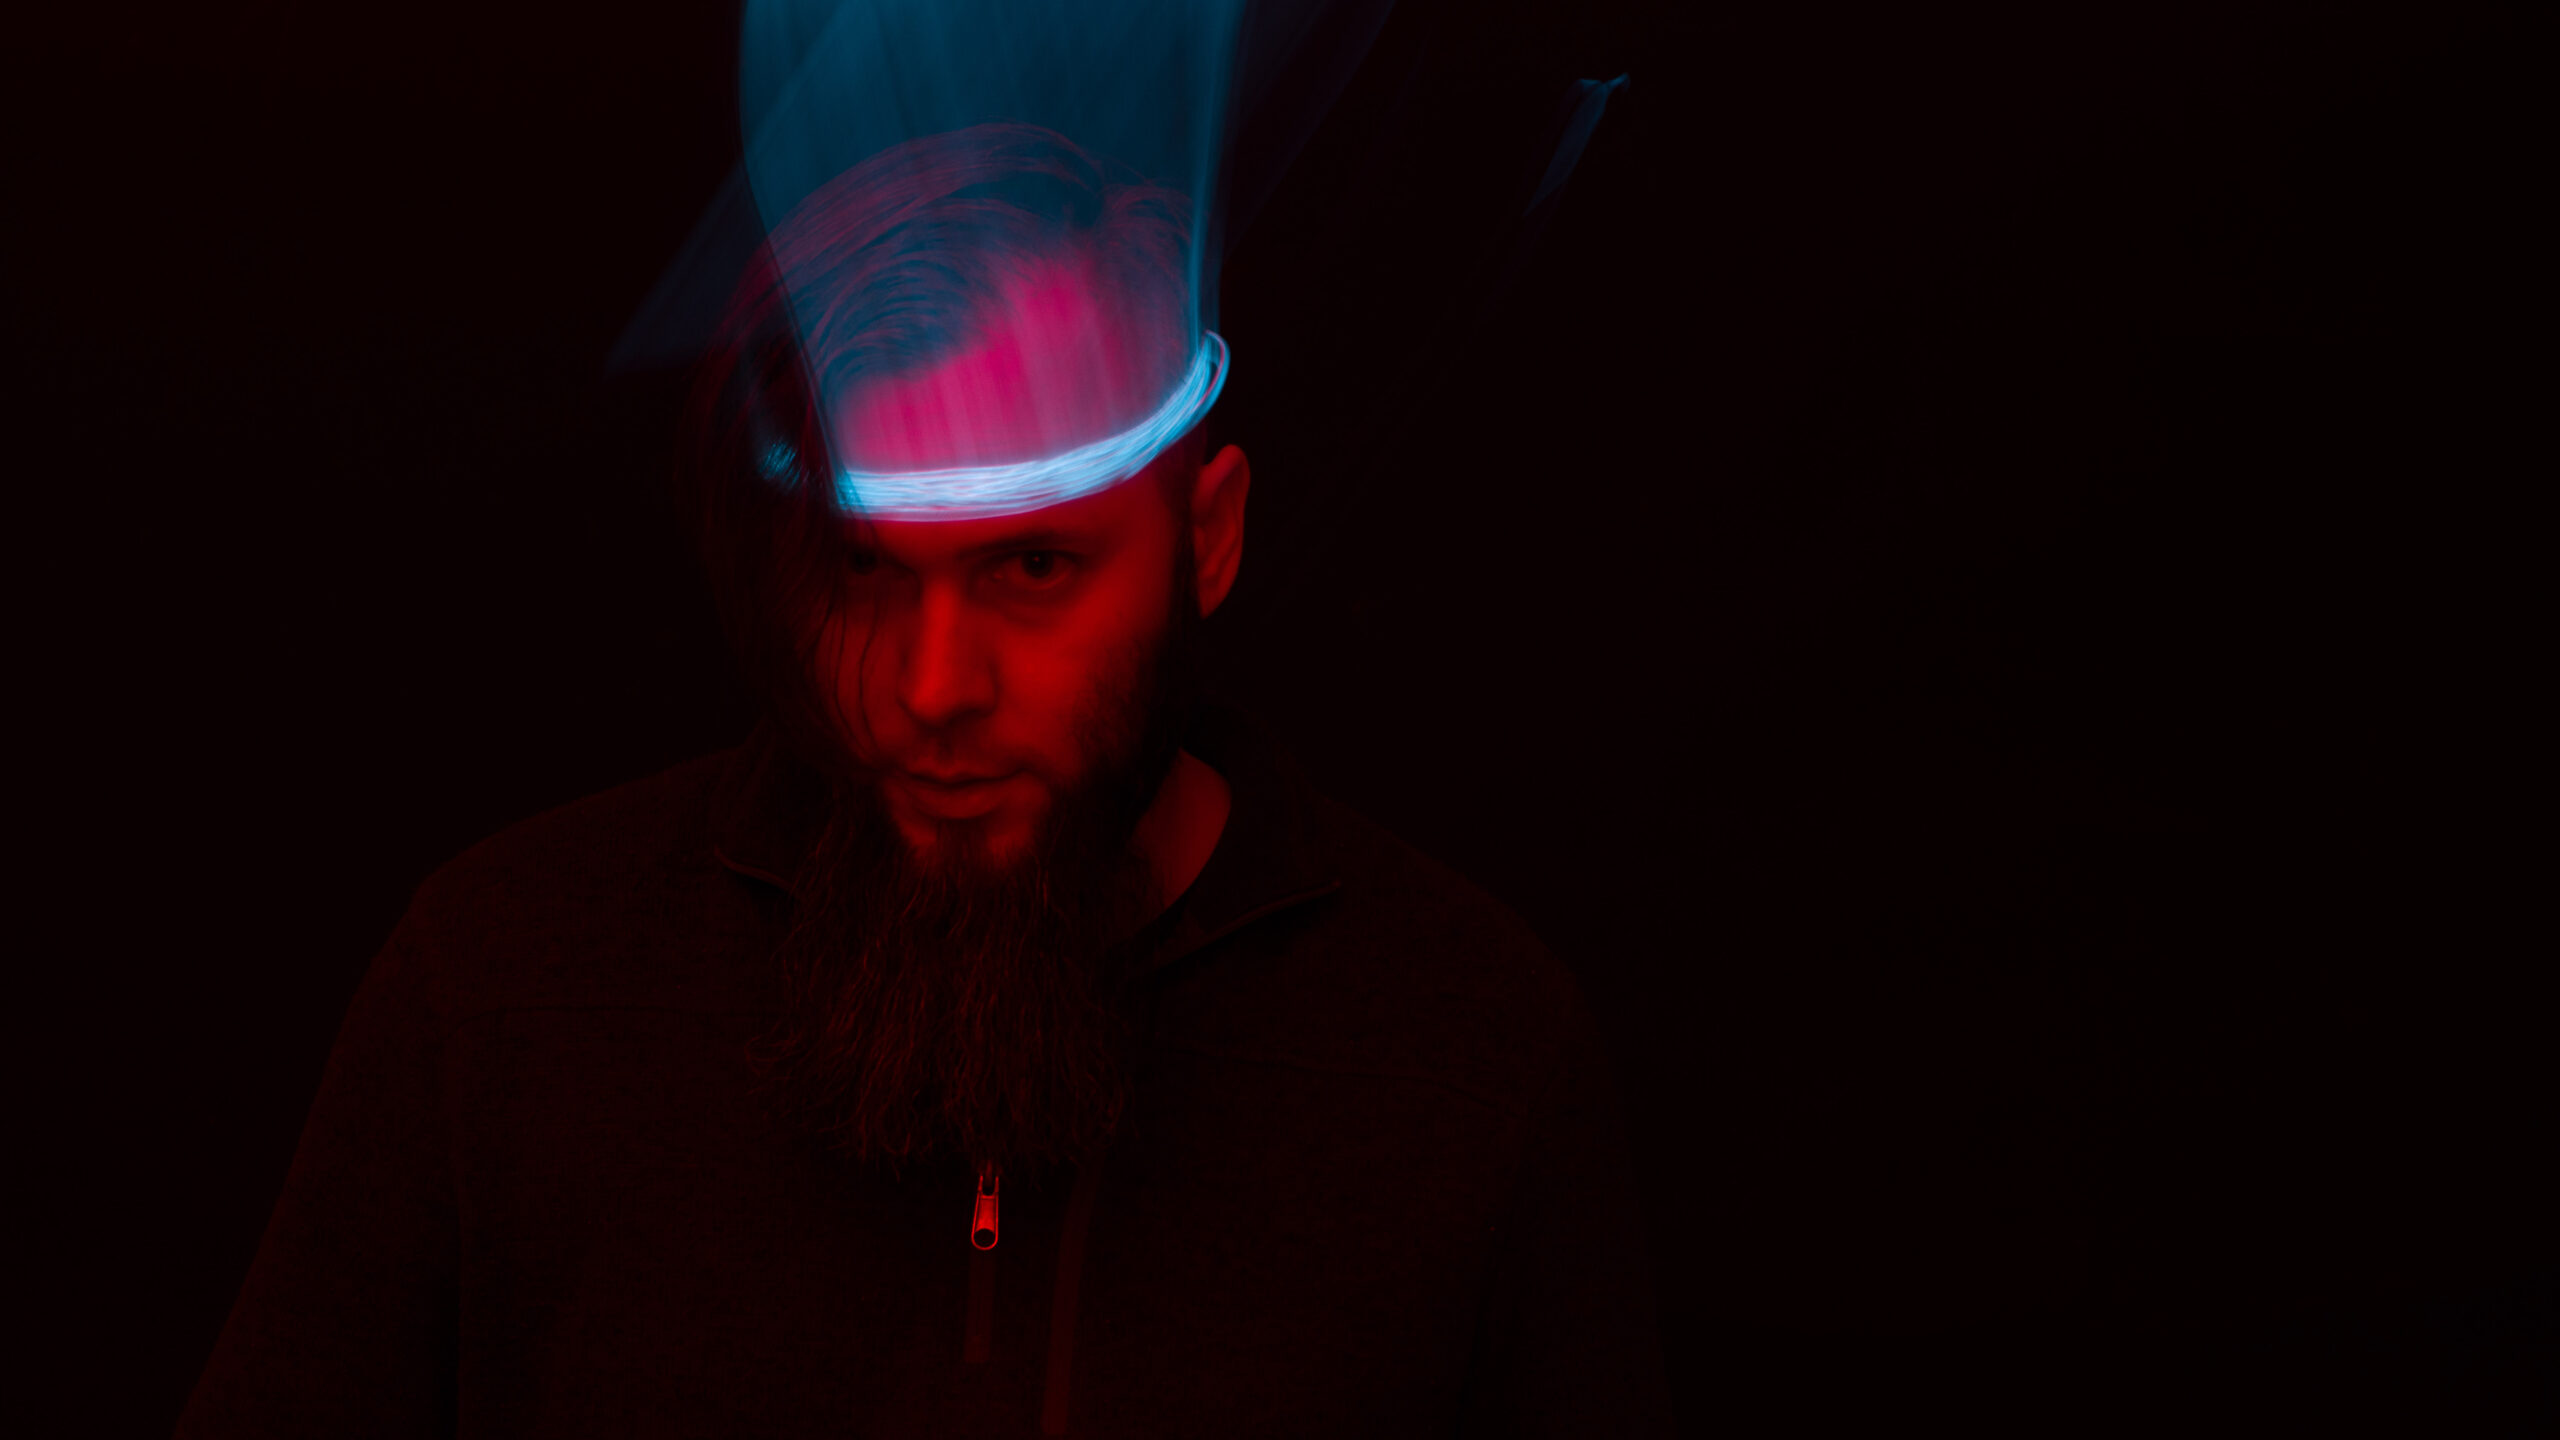
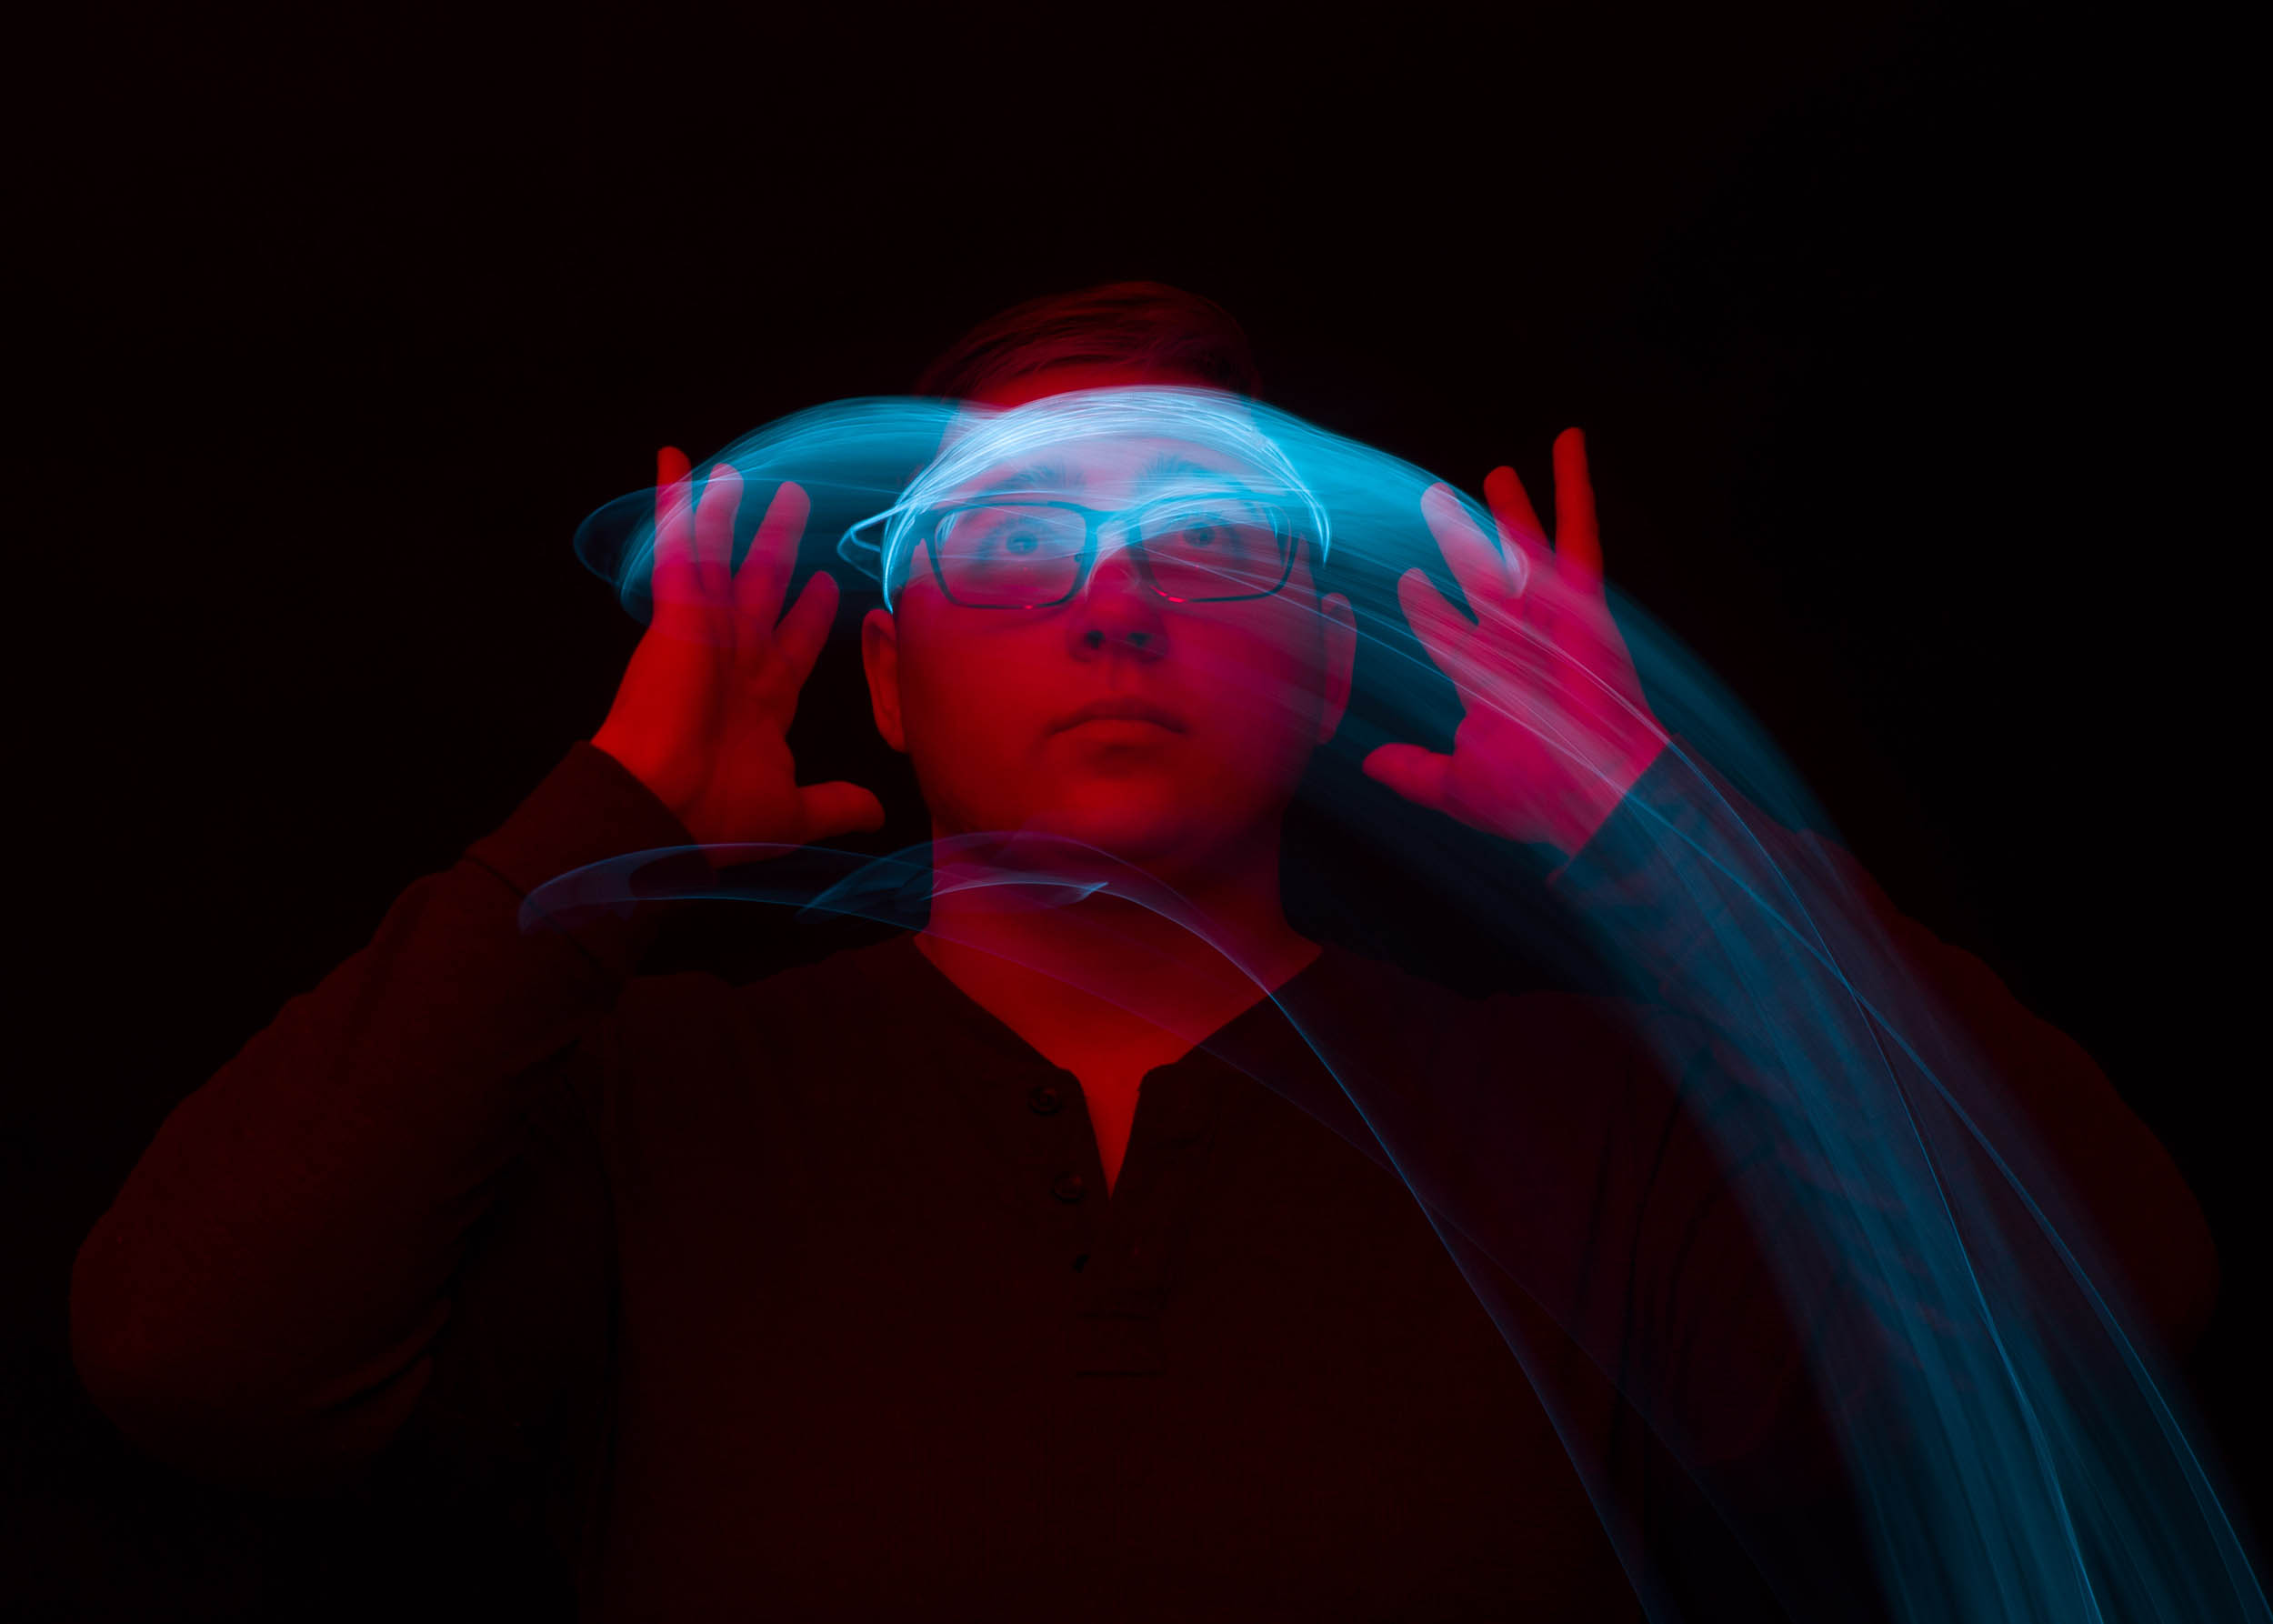
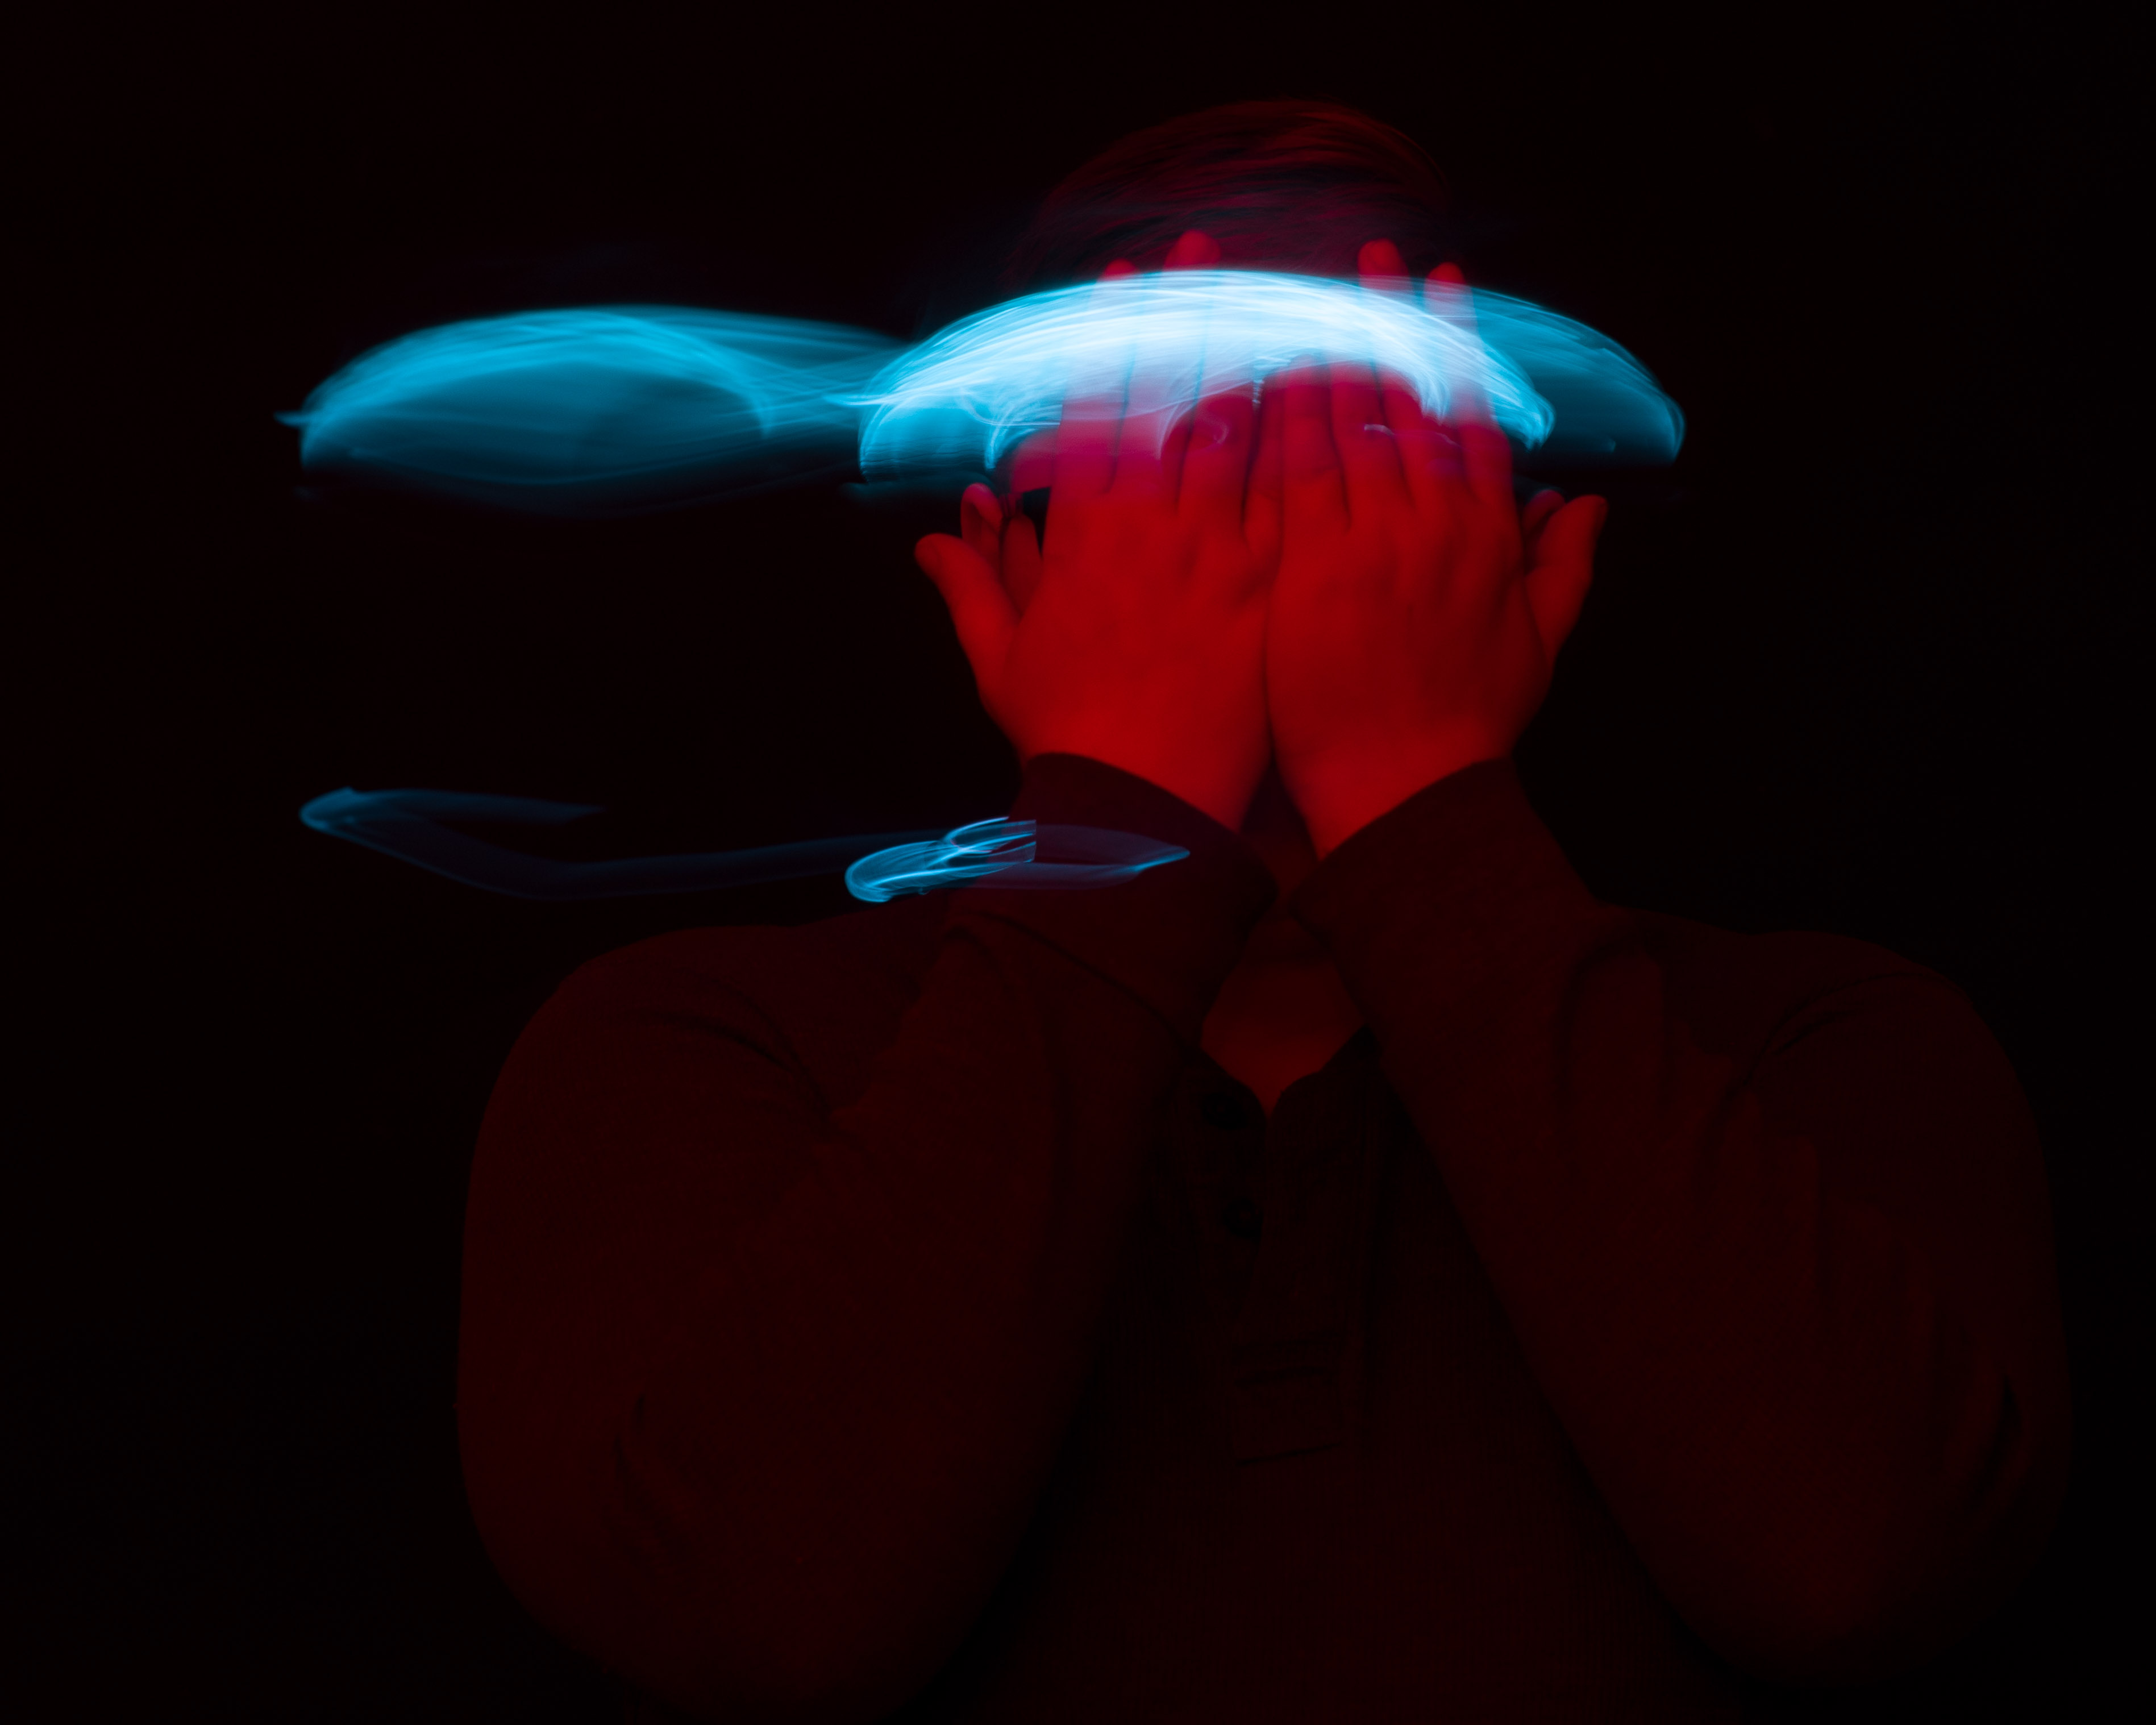
Shot some experimental portraits last week. Used an old AF280T flash unit with a red gel over it to freeze the subject in a dark studio, and experimented with moving to let the electroluminescent wire streak out over the frame. Actual shutter speeds varied from 3 to 6 seconds for the shoot, and aperture varied from f3.2 to f4.5.


 |
|
Forum: Pentax K-3 & K-3 II
11-05-2021, 09:41 AM
|
| |
Some creative portraits, K-3 and Pentax A50/1.4

 |
|
Forum: Post Your Photos!
04-19-2021, 04:03 PM
|
| |
I like the rendering of the early version Takumar 35/2, even though it isn't the sharpest lens wide open. The bokeh can be busy, but I love the character of it regardless, and the pleasingly "glowy" rendering of the in-focus highlights.
|
|
Forum: Photo Critique
11-20-2019, 08:11 AM
|
| |
I'll add another vote for the landscape orientation, but you may also want to consider a square crop for a shot like this (as iheiramo already mentioned). It might be able to help you achieve a "best of both worlds" look by focusing the image on the most interesting bits. I've found this is a good compromise for some of my shots, after I started shooting an old medium format TLR.
|
|
Forum: Mini-Challenges, Games, and Photo Stories
11-20-2019, 11:30 AM
|
| |
Over the last few years, I've built up a small collection of vintage screw mount takumar lenses that I like to shoot with, from 300mm down to 35mm. To help improve my own understanding of the balance between focal length and aperture for creating depth of field, I did a small exercise where I set up a shot (for which my partner generously modeled) and tried to capture the same composition with each lens at a few particular aperture ratios. It also gave me some interesting ways to compare the relative sharpness of my lens collection.
The lenses I used were the Takumar 300mm f4 (model 1), Macro-Takumar 50mm f4, Super-Takumar 50mm f1.4 (8-element), and Super-Takumar 35mm f2 (model 1 early). Each lens shot at each available aperture of f8, f5.6, f4, f2, and f1.4. So, the first two lenses got only 3 shots each, while the faster lenses got progressively more shots to compare. I did very little post-processing on these images, to ensure that they'd best represent what was coming out of the camera.
You can see the collection at a higher resolution in my Google Photos album. I'm planning to build a comparison tool on my website at some point, but wanted to share the photos here first.
Has anyone else taken comparison shots like this?
|
|
Forum: Lens Clubs
09-26-2016, 12:31 PM
|
| |
Nice waterfowl on the pond in Pittsburgh's North Park. Shot with a Takumar 300mm f4 (version 1), stopped down to around f7, on a tripod with a K-3. He did me the favor of hanging out in that spot for a good half hour while the sun went down.
|
|
Forum: Troubleshooting and Beginner Help
09-18-2016, 01:22 PM
|
| |
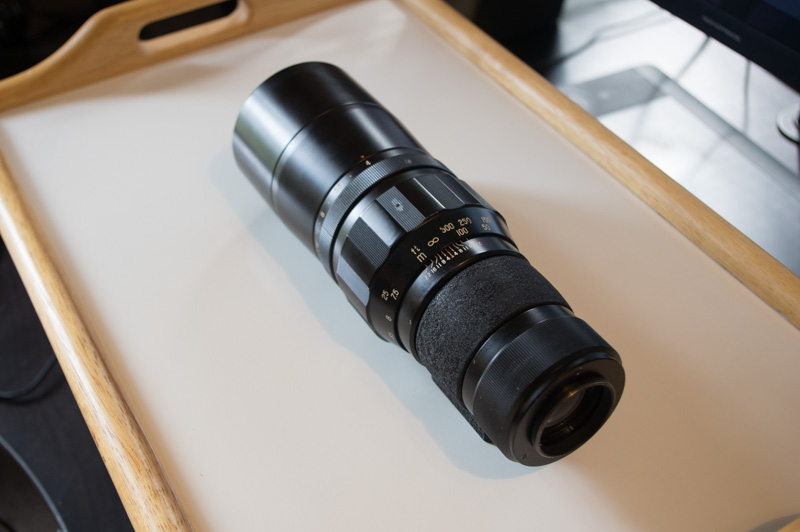
I few months back I picked up an old Asahi Takumar 300mm f4 lens on the cheap, after checking that the glass was in pretty good shape. I've been adapting it to my modern Pentax K-mount bodies, but the lens has had some issues. So, I decided to take it apart for servicing at home!
The Problems
1. The lens doesn't quite focus to infinity (but it seems to get very close indeed).
2. The focusing ring is extremely stiff.
Time to take the lens apart and diagnose!
Removing the Rear Mount
I unscrew the 3 flush screws that hold the screw mount onto the back and remove it from the lens assembly. The first thing I notice is that there are some spacers between the mount and the lens assembly: these help ensure that the lens focuses correctly to infinity. There is an extremely thin and fragile brass one, a 1mm aluminum spacer, and someone's extra homemade spacer made from a file envelope and cut into shape with a razor. (paper spacer not pictured)
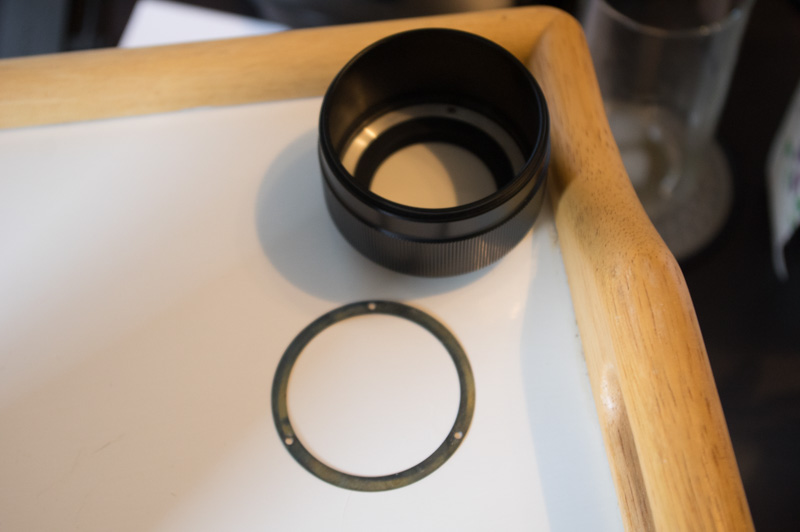
I set aside the homemade spacer, hoping that closing the gap it creates will allow focus to infinity.
Removing the Tripod Collar
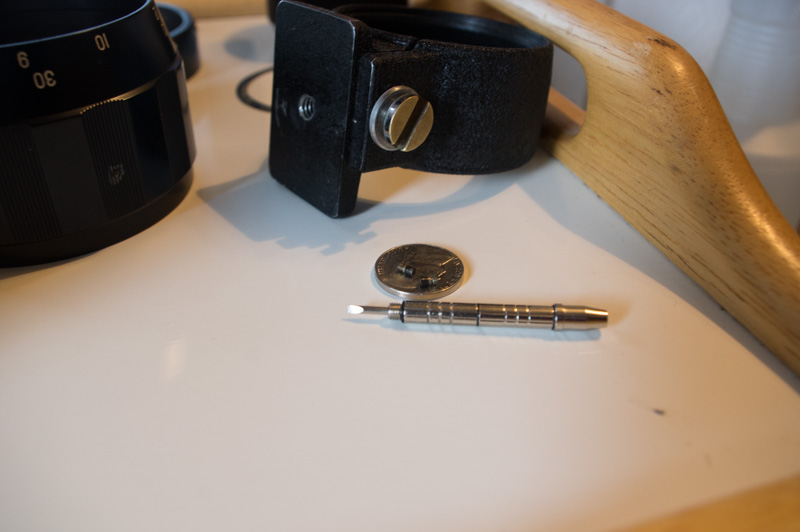
With the rear mount removed, I next remove the tripod collar. This one is simple: use a nickel to loosen the collar until it opens enough to slip off the top of the inner barrel.

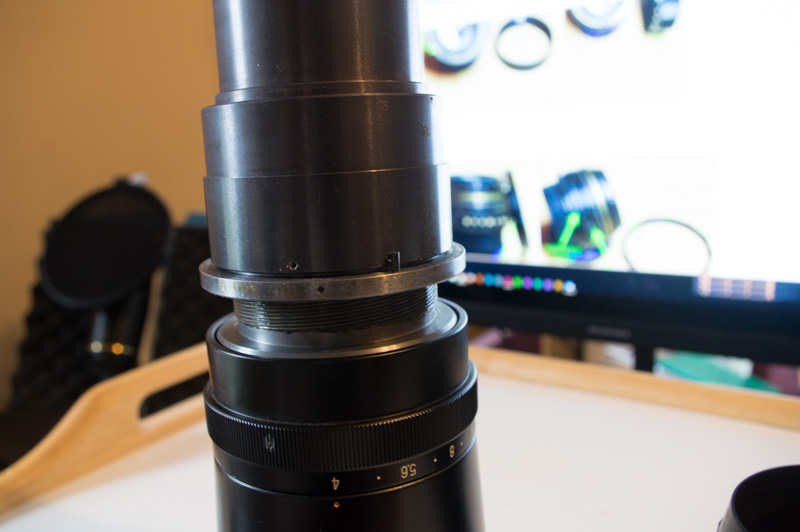
Removing the Focusing Scale and Ring
The next two parts must be removed to access the focusing helix. Each is held in place by its own trio of set screws, which can be carefully removed or unscrewed. The screws in the scale are particularly tiny and prone to disappearance (I actually lost one of them while reassembling the lens, despite my many precautions) - so be careful when handling them. Remove the scale first and slide it off the barrel, after which the focusing ring can be removed similarly.

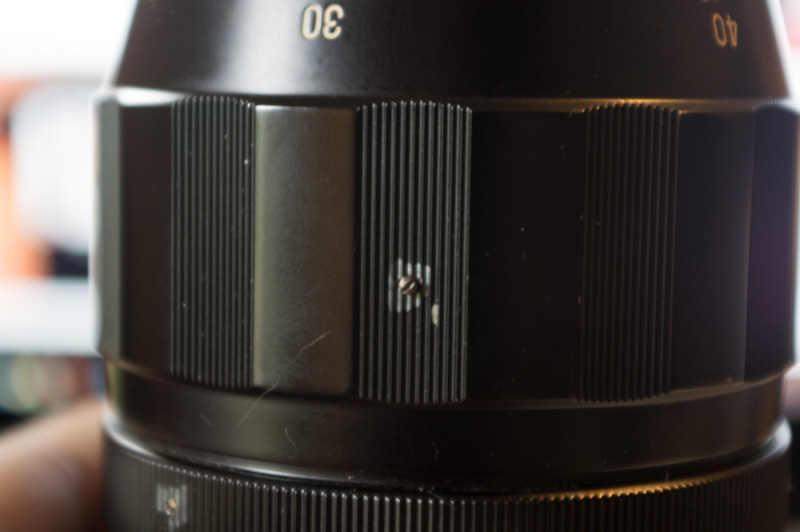
This exposes the silver ring in the images, which is the middle component of the focusing helical. The two post screws protruding from the main body of the lens are the focusing limiters: you can see the incredible 340 degree throw of the focus ring based on how close together they are. The vertical post attached to the silver ring simply bump into those posts to stop the advance of the lens.
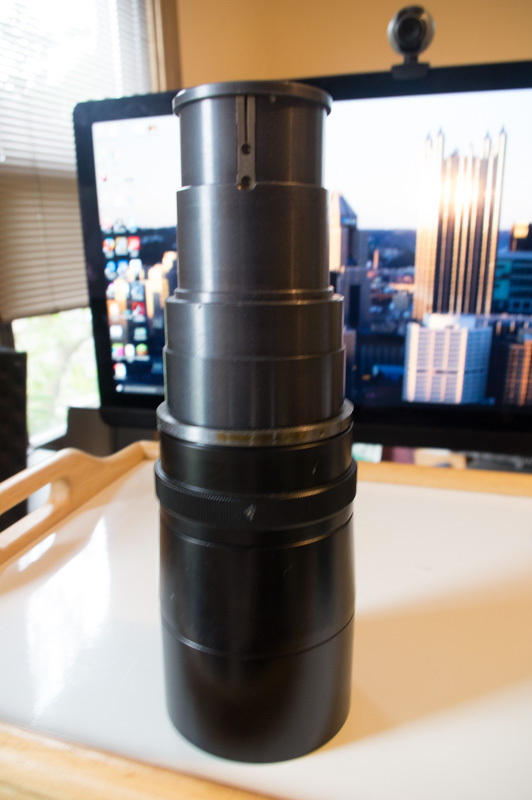

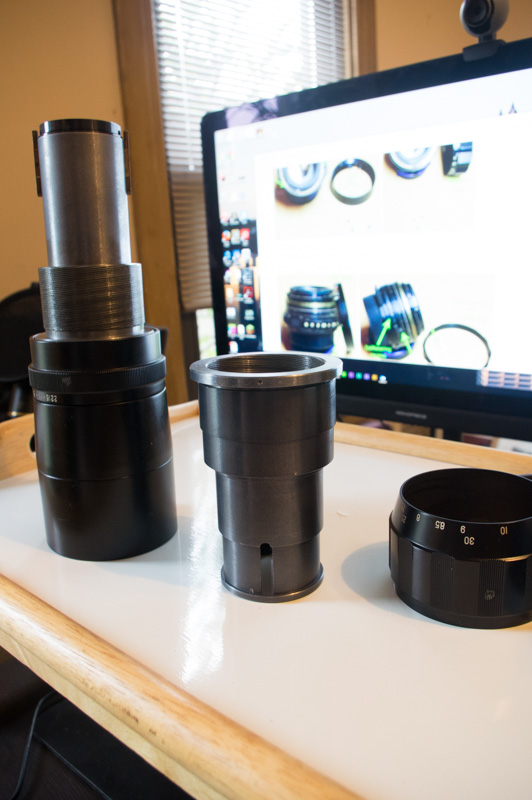
Disassembling the Helical
This is easy! Just remove the focus limiting post screws, then rotate the silver ring anti-clockwise (when looked at from the rear of the lens) until it disengages from the forward elements. Then, turn over the removed part, and unscrew the silver ring (which is really a flange) from the upper housing. This will reveal the inside and outside helix threads so that they can be cleaned and re-lubricated.
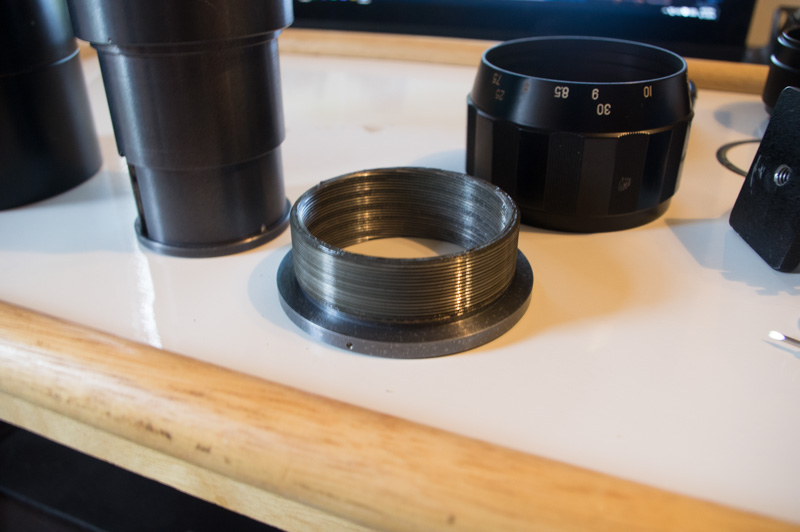
As I suspected, both sets of threads, while relatively clean, were coated in what I assume was the original, petroleum-based grease from 1958-1962 when the lens was originally assembled. It had thickened considerably, and a small amount of dust had become mixed up in it.
Generous application of mineral spirits removed the grease completely without harm to the metal parts and allowed a closer examination of the threads. After I was confident that the threads were all intact and in good condition, I applied new lubricant (a commercially-available PTFE/Lithium helical lubricant specifically designed for optical applications). After application, I worked all the parts together and apart a few times until I was sure that the lubricant had spread evenly across all necessary surfaces (and adding a little once or twice down the length of the threads to help fill gaps and achieve the right level of focus damping).
After that, it was the (not so) simple matter of re-assembling everything!
Reassembling the Helical
I should have taken better notes or marked the exact position of the helical elements where the came apart, because there are many, many thread start positions on these old parts. It took over a dozen attempts to align the threads so that the focusing ring would be in the correct position when fully tightened (and each one required me to disassemble the helical at least half way, then make small adjustments to the rotation of the other part before re-assembling). If you choose to do this, carefully feel for where the parts separate during disassembly and mark the alignment with a grease pencil or similar so you don't have to spend as long experimenting as I did.
Reassembling Everything Else
With the helical put back together, everything else really does simply slide back on and attach in a simple reversal of the disassembly steps. Just be cautious when reattaching the focusing scale, as it was during this step that I lost the one set screw.
Testing!
With everything back together (minus the previous owner's homemade paper spacing ring), I put the lens through some basic paces to check its focusing abilities.
The good news: the focusing ring turns with about 1/4 the force it took before. Everything turns smoothly and easily, and holds position exactly where you let it go. I'm very happy with that.
The bad news: while I haven't actually made it to a location where I can satisfactorily test the infinity focusing, it still looks pretty soft at infinity. I'll know more once I can do some more thorough testing.
|
|
Forum: Post Your Photos!
08-04-2016, 08:41 PM
|
| |
These photos were shot with a Takumar 135 f2.5, M50 f1.4, and Super-Tak 50 f1.4.
|


