|
Forum: Do-It-Yourself
07-31-2011, 09:41 AM
|
| |
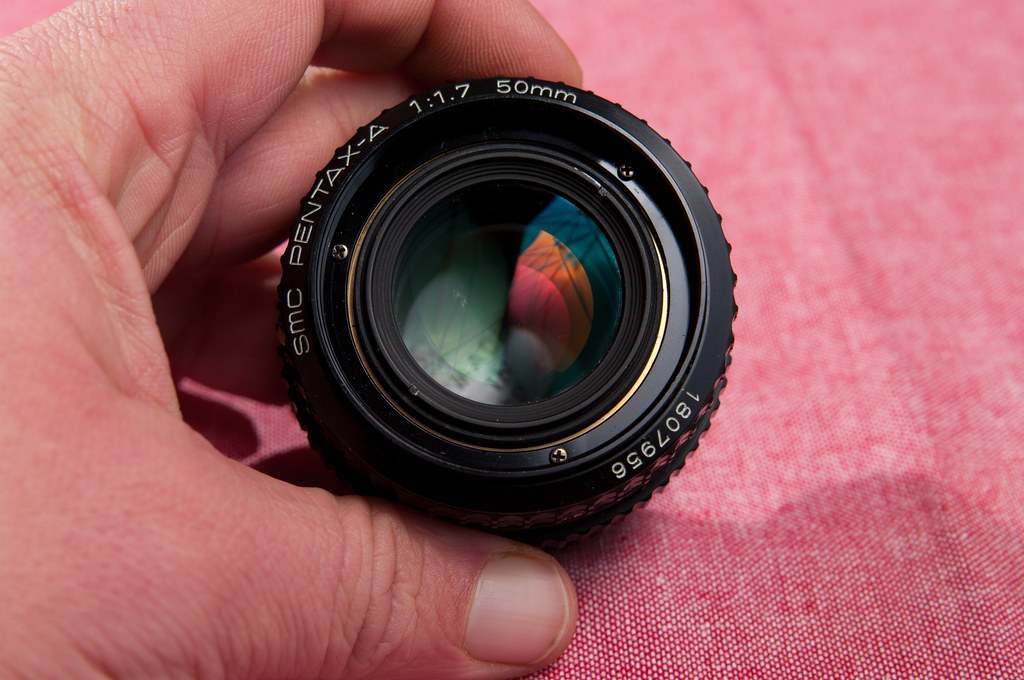
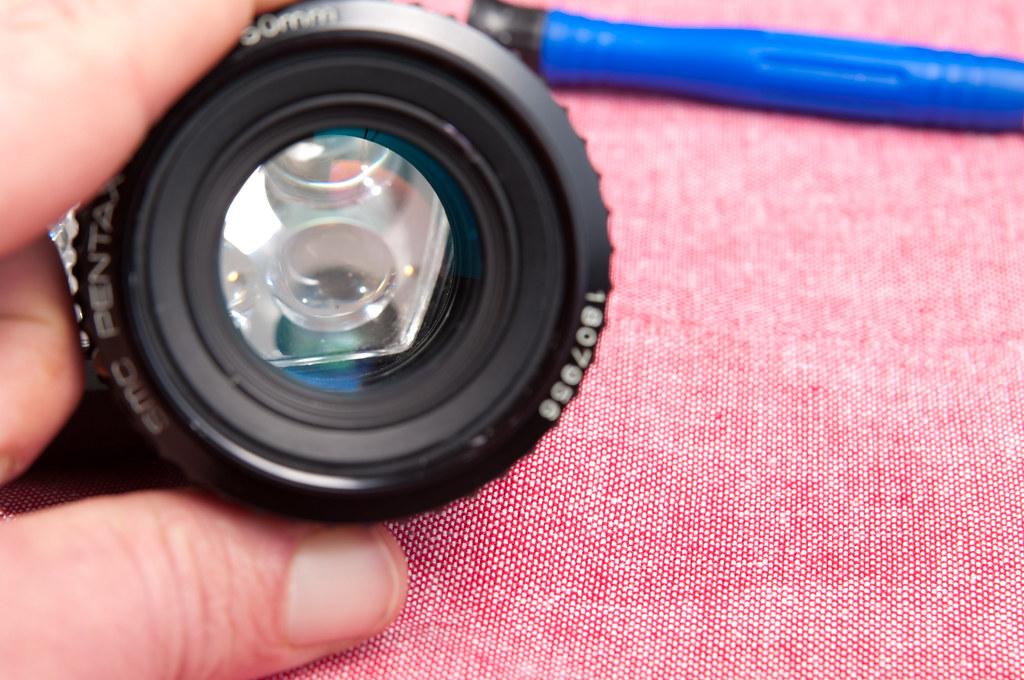
I have been lucky avoiding Fungi in most of my lenses bar one - my SMC A50/1.7 . It had an annoying flourish just off-center that I'm sure did nothing to effect IQ, but sure drove me bananas and would send my OCD into overdrive. It was located on the rear of the Front Group, so it could potentially spread to the rear group as well.
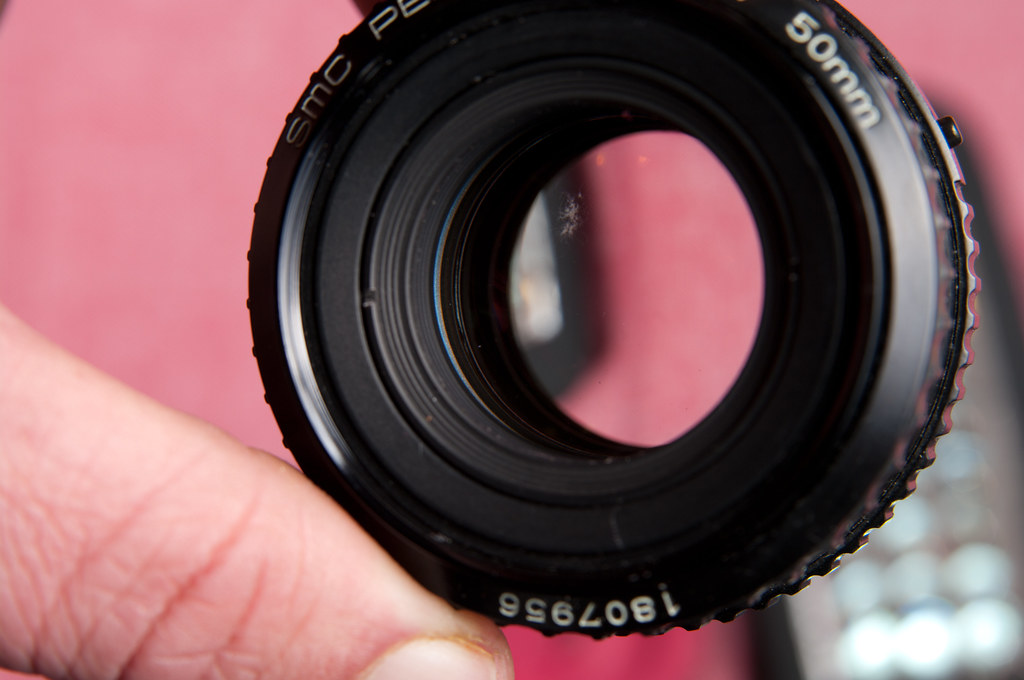
_IMG4552 by OzAdr1an, on Flickr
I've read up on the net, and did find some other pics and guides to the M50/1.7 - but this is unfortunately slightly different in assembly of the front group which meant that it was helpful - but not the answer. I umm'ed and arrr'ed about it, posted a thread here asking for suggestions, fashioned myself a crude Spanner Wrench suitable for the front group.. and eventually decided to give it a go :)
So armed with having read up on a number of other peoples experiences, and having studied http://www.pentax-manuals.com/manuals/service/smca5017.pdf I set about cleaning it.
DISCLAIMER: I have no idea what I'm doing. No really - First lens I've ever pulled apart and cleaned. I read lots of other lens type cleaning guides, and studied the exploded Pentax Service Diagram carefully. Please do not consider this an intelligent or well thought out 'how-to' guide - its simply what *I* did to clean my lens that I offer up as I could not find anything specific relating to Front Groups on A50/1.7 - only rear aperture repair. Repeat my stupidity entirely at your OWN risk!
Here is the tools I presumed I would need all laid out:
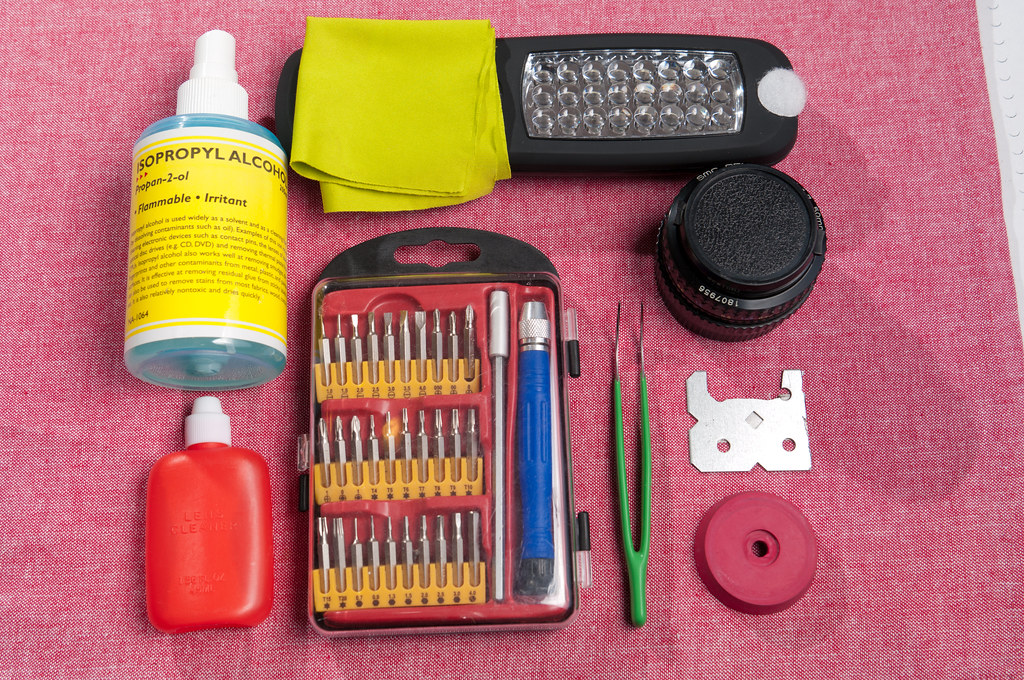
_IMG4549 by OzAdr1an, on Flickr
Isopropyl Alcohol, for cleaning the Fungus Off and misc cleaning;
Optical Cleaner, for final Lens Clean
Lint Free Lens Cloth
Torch for Inspection
Set of precision screwdrivers, including JIS bits
Tweezers
38mm Rubber Plug with Center Removed
Home Made Spanner Wrench suitable for front group
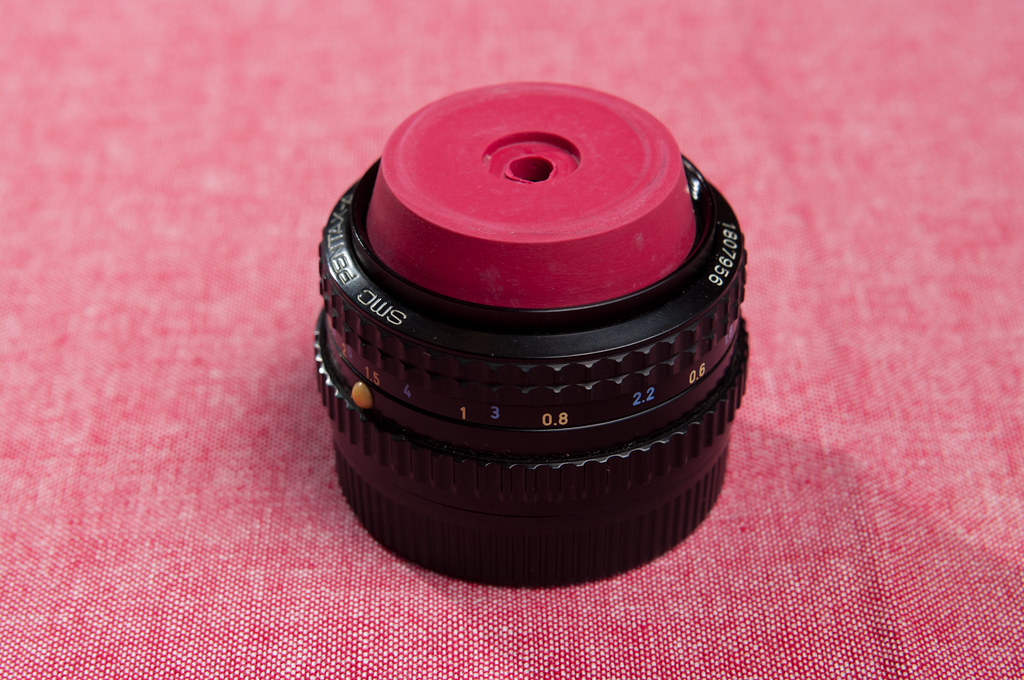
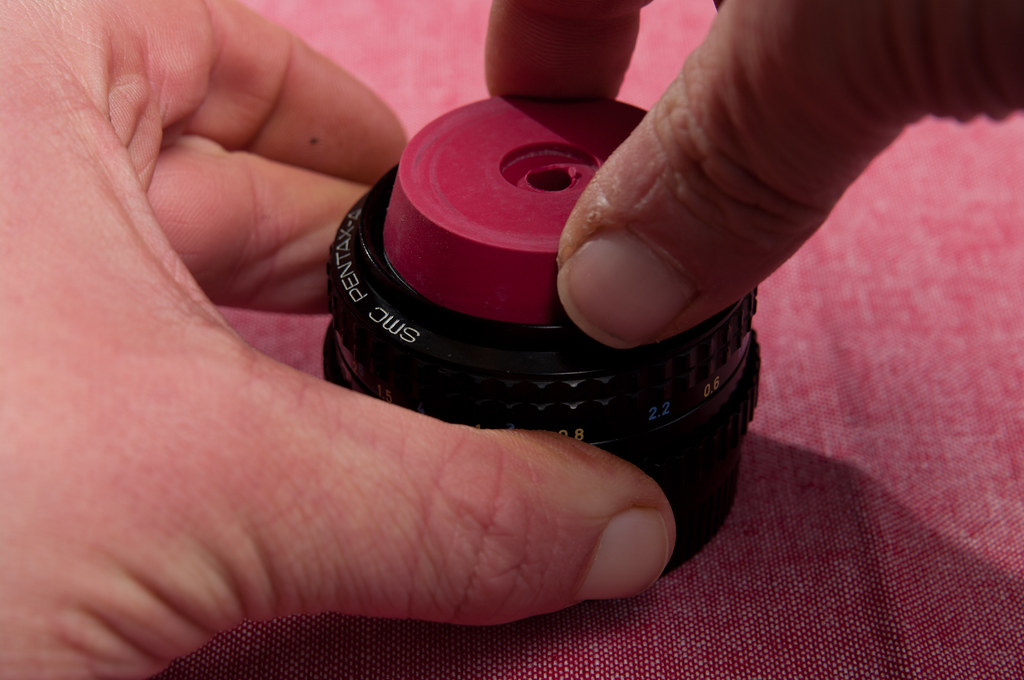
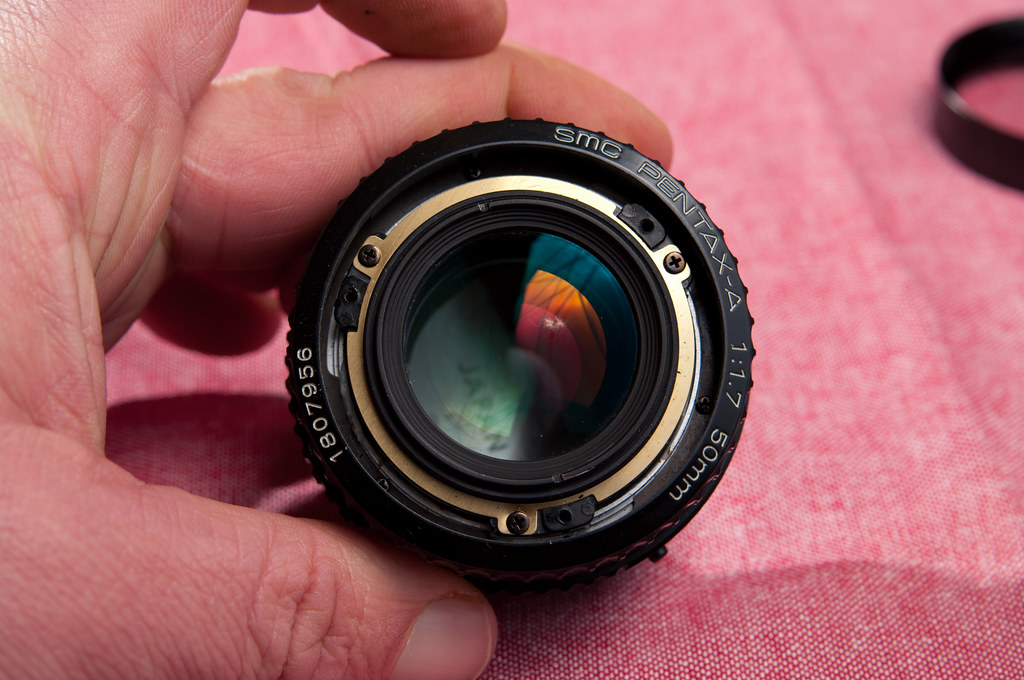
Set the lens to infinity to make it as short as possible. I then used the "rubber plug" trick to remove the front bezel from the A50/1.7. This is simply a 38mm Basin Plug with the center ring removed. Grip the base, and apply a firm downward pressure on the outside of the plug while twisting counter clockwise - it should spin right out with little trouble.
_IMG4555 by OzAdr1an, on Flickr
_IMG4556 by OzAdr1an, on Flickr
After removing the bezel, you should now see 3 #0 JIS screws. Remove these and you can lift up and remove the metal filter ring.
_IMG4558 by OzAdr1an, on Flickr

_IMG4559 by OzAdr1an, on Flickr
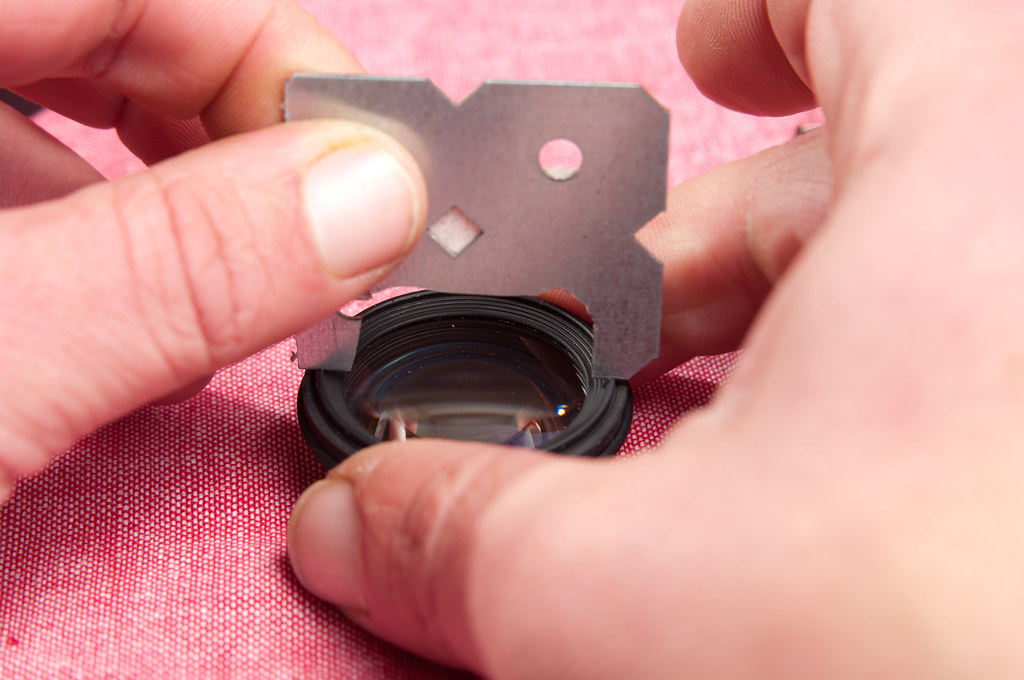
You can now see the retaining ring used to hold the front group in place. Once again it is fastened using 3 #0 JIS screws. Carefully remove the screws and set them aside.
_IMG4560 by OzAdr1an, on Flickr
If you gently tip up the lens into your palm the front group should now just fall out. Set the rest of the lens body aside and perhaps replace the lens cap to at least stop too many dust mites collecting in there whilst all apart :) Yes we will of course clean it before reassembly - but why make more work ? :)
Here is the front group with its retaining ring on top set down next to the lens body.
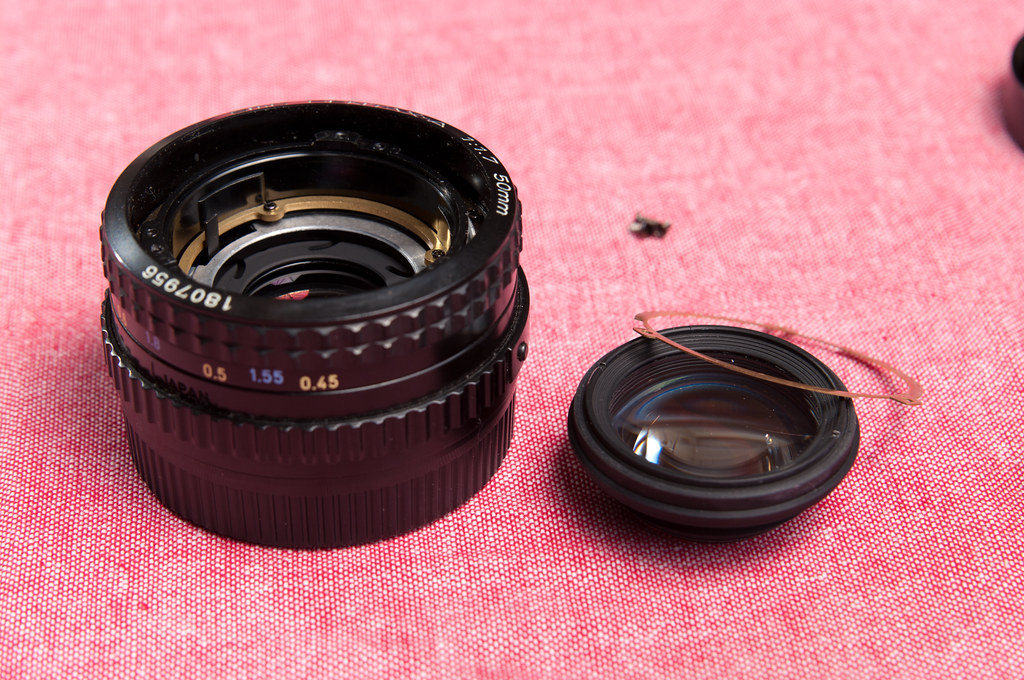
_IMG4563 by OzAdr1an, on Flickr
Now - anyone who has proper tools for the job (I'd highly recommend them :p ) - LOOK AWAY NOW!!! :) For any other heavy handy gits like myself - behold my home made Spanner Wrench suitably sized for the front retaining ring of the group:
_IMG4564 by OzAdr1an, on Flickr
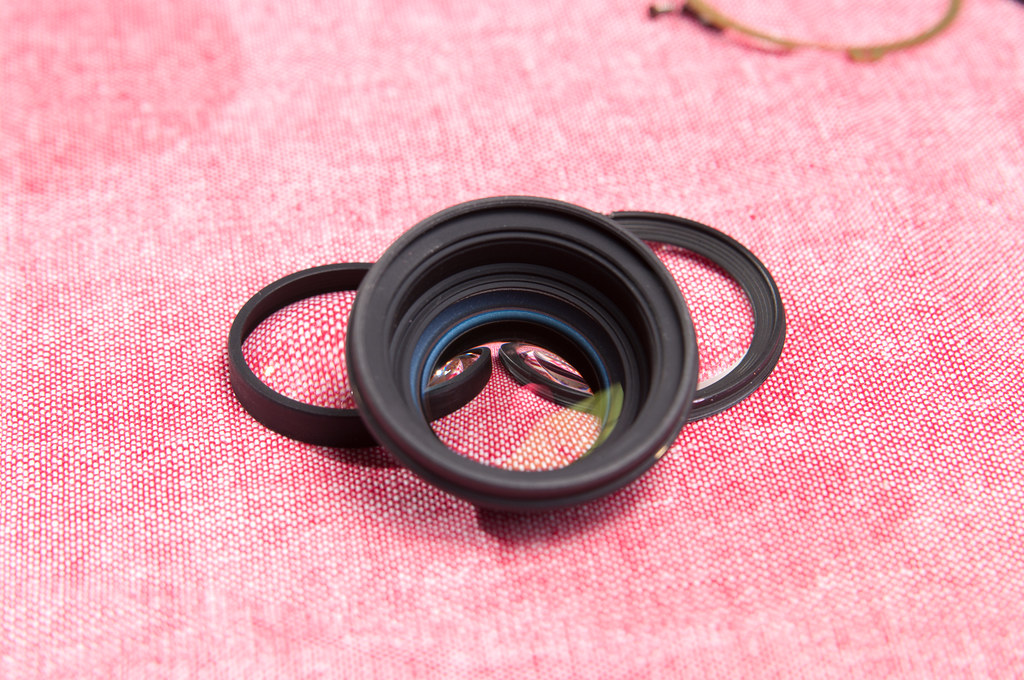
Grip the base of the group, and with the wrench engaged in the notches whilst pushing down firmly simply rotate counter-clockwise and it should come loose. After I got it untorqued, I just spun it off with my finger tips.
_IMG4565 by OzAdr1an, on Flickr
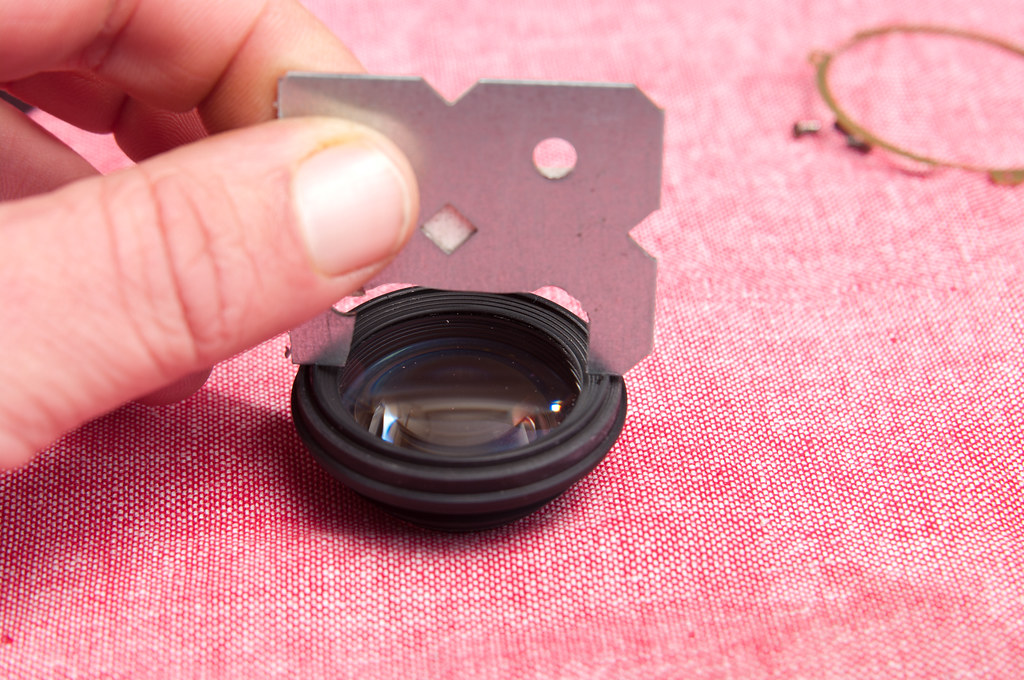
This will free the first lens element, which you can tip over carefully into your hand and set aside. Remember which way it goes - but thankfully on this lens its pretty easy because all the front elements are concave and go with the dome outwards. The middle element will also come free, or you may need to gently lift out the spacer located immediately underneath the first lens element.
_IMG4566 by OzAdr1an, on Flickr
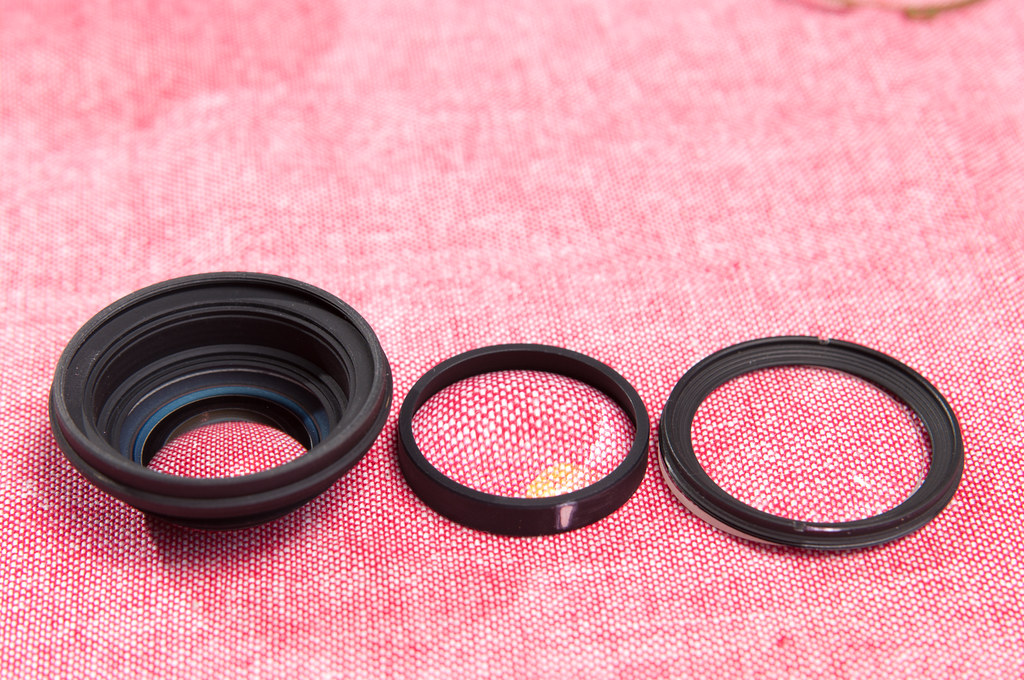
You should now be left with the the elements from the front group ready for cleaning and also now have easy access to the front side of the 4th element (not shown, but inside the Base behind the aperture blades. Set it to 1.7 manually to access them ).
_IMG4567 by OzAdr1an, on Flickr
Simply clean them and carefully polish them. There is some varied suggestions to removing the fungus - some suggest using Cold Creme and then letting it harden for an hour before removing with Zippo Fluid or Isopropyl Alcohol. I didn't have any Cold Creme available and it seemed to be removed very easily with just good strong Isopropyl Alcohol.
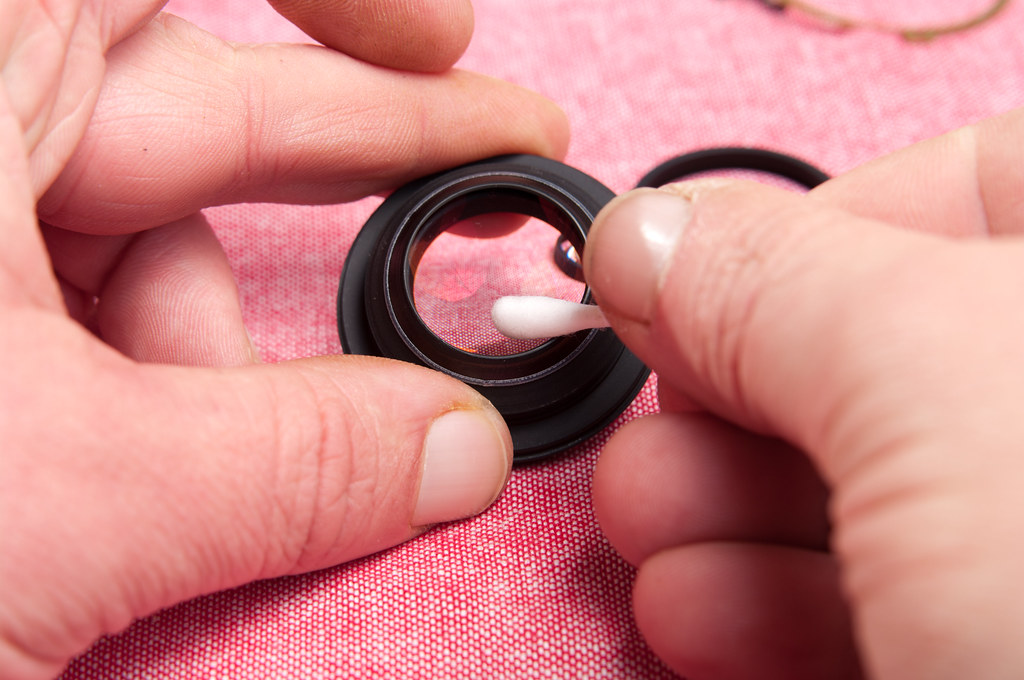
_IMG4568 by OzAdr1an, on Flickr
With all the elements cleaned with alcohol, I then used Optical Fluid to clean them all once again and polished them. Using a rocket blower I also blew the lens body out and reassembled the group polishing them each time. Then its simply a matter of reversing the above process to get it all back together ship shape.
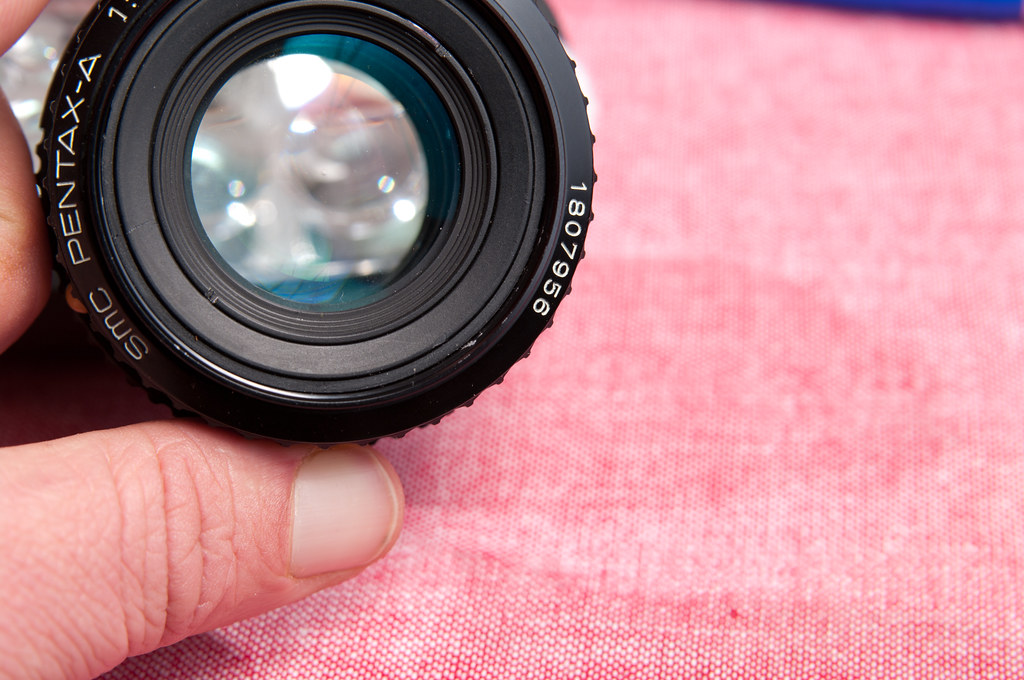
Here is the cleaned lens - I think you can tell its clean and Fungi Free I hope..
_IMG4571 by OzAdr1an, on Flickr
_IMG4570 by OzAdr1an, on Flickr
And here is a shot taken through the 50mm that also serves as a quick Strobist Setup shot (Basic cross light, One softbox, One bare for Rim light) :) Focus was off a bit sorry - but its mostly sharp :lol:
_IMG4572 by OzAdr1an, on Flickr
|
|
Forum: Do-It-Yourself
07-31-2011, 11:06 AM
|
| |
Oh - a follow up - if you happen to have fungus on the rear elements, then its pretty trivial to remove the rear group, just refer to the Pentax Exploded diagram above.
The password is "Pentax" for the PDF - I didn't set it I've simply passed the link on :)
|
|
Forum: Flashes, Lighting, and Studio
02-17-2011, 03:09 PM
|
| |
Apologies - I've been very busy with work - here is quick couple of pics inside. The Capacitor is simply a 10uF one, rated to 16V.
I'll get some better ones when I have more than 10 minutes to spare...
The very last pic is taken with the Nikon Trigger reassembled and back on the camera - its a 2 flash shot taken using X-Sync @ 1/180.. and from my very untrained eye - doesn't appear to have any shutter shadow at all.
The full size images are up on my website at http://adr1an.net/Flash-Trigger-Mods if someone wants some high-res ones.
|
|
Forum: Pentax K-5 & K-5 II
06-15-2011, 08:11 PM
|
| |
Lol - I was just asking the same question myself via the Search Feature....
What I found is: The answer is in the Astrophotography threads and in short - No.
I obviously am not answering from personal experience - but there appears to be numerous people w/ K10's (better it seems), K20's, 5's, 7's and x's that have all taken between 5 minutes up to one image I saw that was 2.5hrs...
The biggest issue is the Dark Frame Subtraction (or NR as its called in-camera) that kicks in and will double the time of the exposure as the camera takes its automatic follow-on built in DF after every frame - so 30sec will become 1min between cycles etc.... I believe you can turn it off in the K5 - but K20 and 7 users need to resort to the Debug Menu.
If you do turn it off - I'm guessing it would be worth while taking at least one DFS shot tho. It would seem that the Hot Pixel Noise is fairly Linear and Constant - so one shot should cover a range of long-exposure shots.
But ultimately - it would seem there is no risk of damage - just of decreasing Signal to Noise Ratio. Any Hot Pixels that start to present themselves due to heat should disappear as the sensor cools again. Some people in the Astro threads feel that multiple short exposures (of say 30 secs each) that are then stacked using a program like Startrails application is better in terms of getting good S:N ratio.
|
|
Forum: Photographic Technique
10-14-2011, 02:58 PM
|
| |
Throwable Panoramic Ball Camera // Jonas Pfeil

Via HackaDay:
 Quote: Quote: This odd-looking ball can automatically take a panoramic image whenever you throw it up into the air. Seriously, that’s then entire set of operating instructions for the device. Inside, a 3D printed frame hosts an array of 36 cellphone cameras, each capable of taking a two megapixel image. Also included is an accelerometer. When it senses the change in momentum associated with the apex of its vertical trajectory it snaps an image with all of the cameras at the same time. The result is a spherical image with no obstructions-like a tripod or other support mechanism. The images are automatically stitched together and displayed on a computer which allows the user to pan and zoom.
The whole story is told in the video after the break. The example images shown are quite good, although there are a few artifacts where the segments meet. Most notably, color variances between the images captured by different CCD modules. We’d image that this can be fixed automatically in software if a talented programmer were willing to put in the time. The thing about spherical photos is that methods using post processing to unwrap an image always have some distortion to them. With that in mind, we think the ball camera is as good a solution as we’ve seen.
Youtu.be
|
src="https://www.youtube.com/embed/Th5zlUe6gOE?controls=1" allowfullscreen>
|
|
|
Forum: Pentax K-5 & K-5 II
09-25-2011, 10:17 PM
|
| |
Not at all - just providing some contrast to your claims that "no other camera has had the multitude of issues the K-5 has" (paraphrased).
Even extrapolated as you did - the D7000 would appear to have more problems, over more users, than the K-5.
Thats all I'm saying. Continue to dislike the K-5 by all means - I'm not trying to convince you otherwise... But lets all not throw hyperbole around ... because your statement would appear fallacious based on empirical evidence... and I haven't even touched the Canon MkIII :lol:
My example used just one model from one other manufacturer.... Been following the Sony A77 issues ? 60% of Korean stock has supposedly got an issue.... ;)
All this does is show *everyone* is having *lots* of problems due to the rampant race to stick features and megapixels into ever shrinking bodies.... This is what happens when you want "bleeding edge" technology at a consumer level... stuff breaks. Perhaps I am far more agnostic about this aspect having worked in an arena that deals with this daily for the last 20 years... I kind of expect anything at the forefront technologically to be riddled with issues.. the key for me is.. how they are worked through and resolved....
|
|
Forum: Pentax DSLR Discussion
09-23-2011, 11:17 PM
|
| |
| |
|
Forum: Lens Clubs
09-14-2011, 05:52 AM
|
| |
Crossposted from PYP's, but it is one of my 'best' FE shots yet, so feel justified in re-sharing it here (by best I mean I feel most complimentary use of FE i've done so far....) :)
Zenitar MC16/2.8 @ I think F5.6? mebbe it was 4...
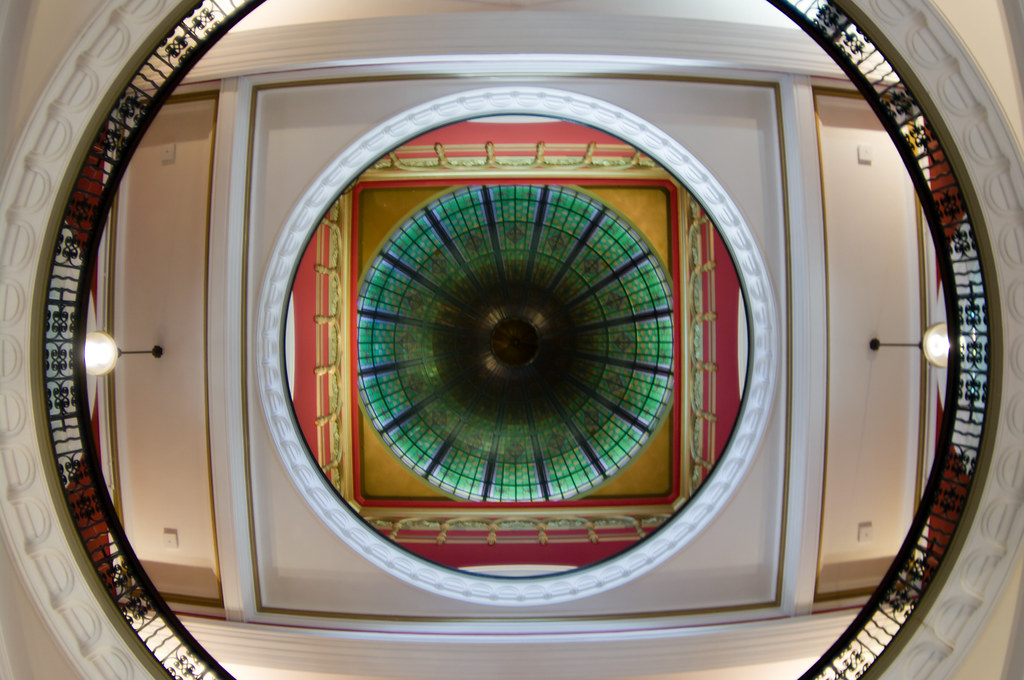
QVB Central Dome by OzAdr1an, on Flickr
|
|
Forum: Post Your Photos!
08-31-2011, 11:20 AM
|
| |
Argh! My Living room is being invaded by Light Domes!!!
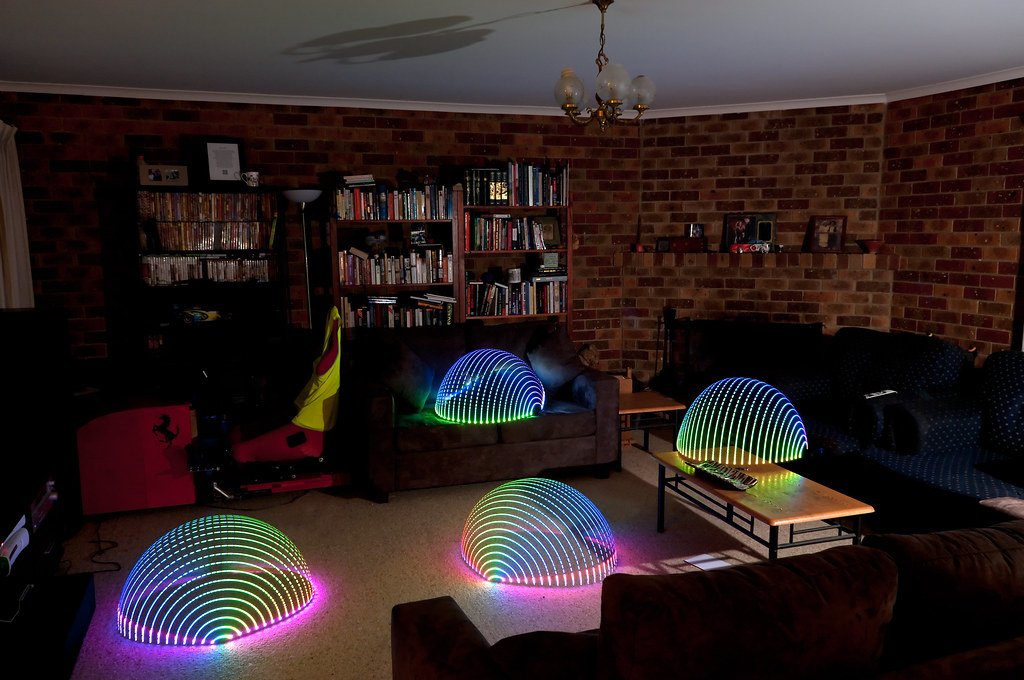
Domeage to Great Light Painters Before Who Inspire Me... by OzAdr1an, on Flickr
:lol:
No its not photoshop - it was done with LongExposure and LEDs.. I've been very inspired last few weeks by Lightpainting, specifically the "Light Junkies" group in Flickr.
I of course gave the cliched Orb a go last week - and based on that success I decided to hack together a very crude "Dome" tool (which was, until recently, the current 'mystery' in Light Painting...)
The above was my second go at LightPainting all up, and first go with the Dome Tool... I had a minor ghost in a tiny spot, so all in all, not too bad. 30" Exposure, lots of running around wearing dark clothing, then popping a flash, then hoping it all worked and I wasn't a whopping big ghost in the image :lol:
(Edit: Incidentally, heres my first attempt.. the aforementioned cliched Orb...)

They Have Arrived - The First Orb by OzAdr1an, on Flickr
|
|
Forum: Photo Critique
08-05-2011, 09:39 AM
|
| |
To balance that sunlight, you'd need more than one speedlite ..
To go over 1/180 sync speed, your flash needs to be one that does p-TTL and supports HSS (High Speed Sync). You also start to loose heaps of power then - so Distance-to-Subject is an issue and HSS I dont think would handle this distance regardless..
To sync with a flash that doesnt use HSS - then you are limited to 1/180 max shutter speed.
And yes - to use p-TTL you are more or less constrained to either Off-Camera with Pentax p-TTL Cable, or using the Wireless Flash Mode (which relies on sending light pulses using the Onboard Flash - and thus is strictly "Line of Sight"). Not sure of any 'affordable' Wireless (radio) Triggers that support p-TTL - they are as you remarked all 'dumb' triggers pretty much.. which is actually - what I want when I am trying to use multiple speedlites - I want to control it - not 20 different exposures based on the cameras random guesses :lol:
Given you shot it at 1/320, F3.2 - I think that equates to say a 1/180, F5.6, ISO400 shot - or a 1/180, F4, ISO200 shot... That means you need a flash thats powerful enough to balance or otherwise 'overpower' the sun at F4-F5.6 at.. about 15meters ? (45 feet?)...
In short - thats a pretty powerful flash if you wanted to leave the above image composed as it was with some balanced light complimenting the rider.
I'll hawk my usual suggestion - Check out Strobist: Lighting 101 if you want to get into Off Camera Flash. Just replace the words "Pocket Wizard" with "CTR-301P" or "RF-602" or "Cactus V5" :lol: Your wallet will thank you...
|
|
Forum: Photographic Technique
08-03-2011, 01:37 AM
|
| |
Make sure to convert your images to sRGB when saving as JPEG as most online image processing is geared towards the sRGB Colour Profile and NOT ProPhoto - which is most likely what your PDCU and LR/ACR are setup to use.
Because ProPhoto is a much wider gamut, when images are converted unceremoniously to sRGB they can often loose a lot of tonality...
Whereas if YOU convert them to sRGB inside LR/ACR/PDCU, then they will end up looking much the same when posted without so much washing out of the colours...
Have a search around for 'converting to sRGB'...
Heres the first one I found.. not saying its actually going to help you :lol: http://om4.com.au/client/preparing-images-color-profiles-srgb-adobe-rgb/ |
|
Forum: Pentax K-5 & K-5 II
07-21-2011, 09:45 AM
|
| |
It updates every Second - what that does is configure for how long its updating 'for'. You'll note that it speaks of overriding the Light Meter settings and extending them automatically based on the chosen setting..
So it would seem that the unit 'wakes up' based on the meter (i.e, half shutter if camera asleep or been idle) and then will continue to plot its position @ 1Hz (based on details on next page of specifications stating 1second update rate) for the duration specified.
This makes sense so that A: it doesn't constantly drain like you suggest, and B: is able to geo-tag any picture once awake without having to wait 2-3 seconds for a 3D lock again... as the light meter also triggers automatically when the camera is first turned on..
This means you can switch on, compose for a bit, then 'snap', and still have it tagged to the 10m RMS the unit supplies...
I'm almost convinced now that it uses the pTTL feedback packets maybe to pull the NMEA data (same ones that will light the flash symbol on ok exposure) - stamping the GPS lat-lon that the O-GPS1 transmits based on the normal flash trigger linked to the shutter.. and it'll work up to 1/4000 etc because it'll also fake out that it does HSS etc..
This is no doubt why Pentax state you cannot use dongles etc to use other pTTL flashes when using the O-GPS1...
|
|
Forum: Pentax DSLR Discussion
07-18-2011, 09:20 AM
|
| |
Yes - but a delay in manufacturing due to a problem that surfaces shortly after release with the in built inter-axial settings processor causes wide spread panic amongst forum posters, so there is continued demand for the older model... Prices take some time to drop as a result...

Over 15 years later, the cartoon is still accurate ;)
|
|
Forum: Photography Articles
07-16-2011, 09:24 AM
|
| |
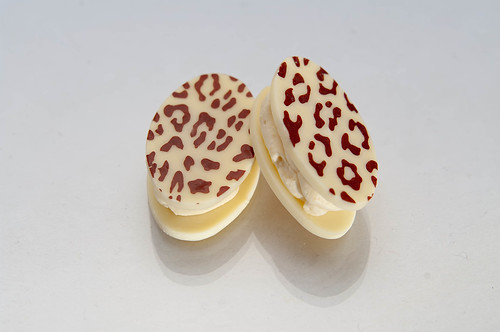
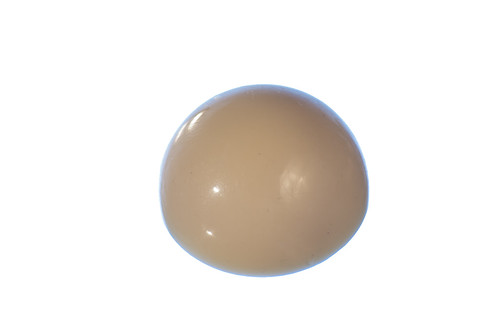
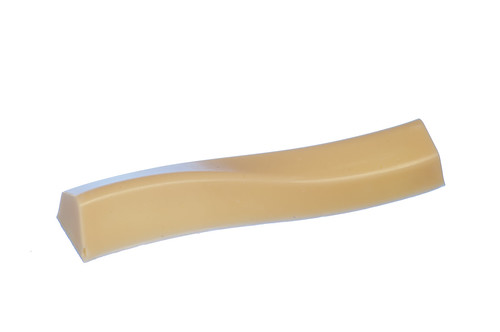
Ok, Hopefully this is a useful contribution for some people. It sure drove me nuts for a few days figuring it out ! :) White subjects on pure white backgrounds isn't as straight forward as one would hope....
I recently had a friend ask if I could shoot some chocolates she hand makes. She is in the process of making a brochure, being done by another friend who is a 'graphic designer' (don't know them - but use quotes because I'm not a 'photographer' either :lol: ). They have a requirement that she supply white background images, with preferably no shadow in them.. yawn.... Did I mention she makes lots of white chocolates ;)
So after some discussion and earlier sample shots showing how boring it made her efforts look and what we could maybe do, she wants me to do some non-white background images for her upcoming website and personal/marketing use (yay! I get to play with a reason .. :lol: ) . But I did have to knock over this first request... so heres how I went about it.
I could have used a light tent, but there would still be shadows unless I nuked the whole scene and lost just as much fine detail...
.....or I could use some sort of shroud with a light diffuser in it. In fact, thats what I tried first. I butchered a cardboard box, cutting the sides at an angle and putting tracing paper over a center panel I removed. I then placed the chocolates on some rice paper under some clear acrylic. With some reflectors diligently placed around, and a flash shooting through the tracing paper at full power - heres the end result - not what I wanted!:
:(:( :(
So some further research and questions and answers on some newsgroups, and here is the new approach - guaranteed to get you capturing white-on-white without loosing toooooo much definition in the white item.
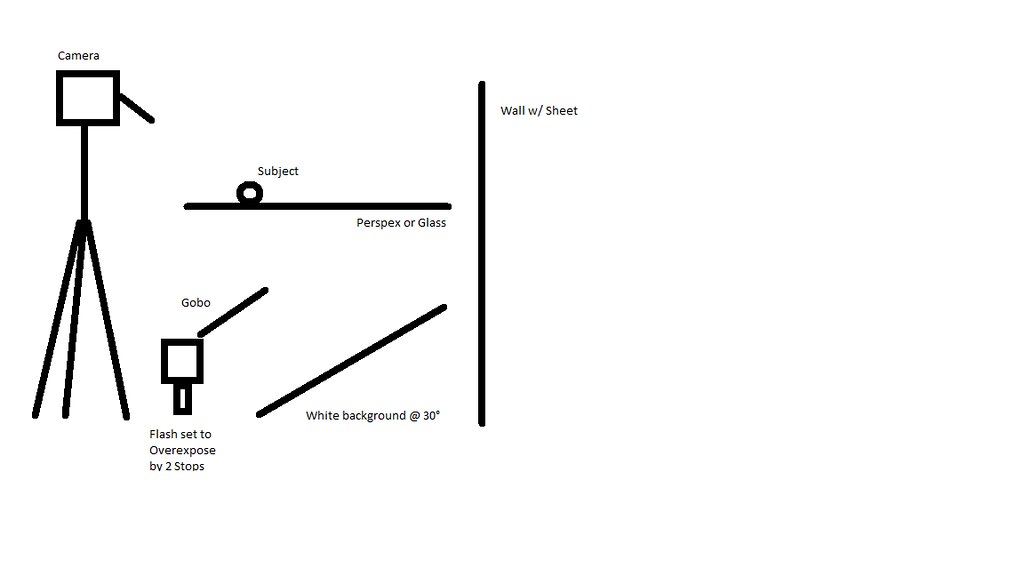
The trick is to separate the background from the foreground, overexposing the background by 2 stops or more.
How do you do that if you dont have heaps of room, or a white wall handy ?
You cheat of course!:)
Using some glass preferably, or failing that some clear acrylic (although beware, it behaves differently to glass slightly and requires a bit more 'futzing around' so to speak to get setup right as it transmits more light at shallower angle than glass which will bounce most of it at these angles). Get it supported high enough off of the ground, about a meter, meter and a half (3 - 4 feet for those imperial amongst us! ). I used two chairs turned back-to-back.
On the ground, place a white reflective card that is *flat* - preferably some corflute, or stiff card that is supported so it doesn't bow (I, when testing, used some card laid on another light stand as a 'backbone'). It needs to be flat to prevent spurious reflections, shadows appearing on it, causing flare and just general other hassles. Get it elevated to about a 30° angle towards the camera. Now this is the background you want to overexpose. Place a flash on the ground, and then with the camera in position on the tripod just behind it, place a Gobo extending to just underneath the subject.
Now take some shots and chimp it. Adjust the flash as necessary so that about two stops higher than you need the background is blowing out entirely, but the subject is still just a silhouette. Move it back and forth or up and down.. small adjustments can make a big difference especially when working macro. I was aiming for a working shot at F11, which meant I was looking for a sea of red at F13 (My logic being if they've blown at 13, by 16 it'll be about right...). Don't forget, if shooting Macro @ 250mm or something, you should zoom the flash so that you don't waste lots of that power throwing it way outside the frame.
In tonight's case, because of the angle I was shooting, I actually used a carefully ironed sheet as the reflector I overexposed due to the angle and the Sigma 70-300 Macro I was using.. the same angle using my Tammy though shoots clean through to the card/reflector diagrammed below... The "sheet on a wall" still works, but leads to throwing a lot of 'bounce' light onto the subject making it impossible to silhouette entirely - this results in the mild halo and nasty catchlights on the chocolates and lots of free 'fill light' that you may not want in the final product... but like I said.. I'm more interested in my ideas that aren't based on floating chocolates ;) ;)
Here is a crude diagram from a 'sideways' glance...
and a Lighting Diagram Diagram (if that makes sense) of the complete setup I used tonight - but only the flash under the flowers is relevant to over-exposing it for the pure-white:
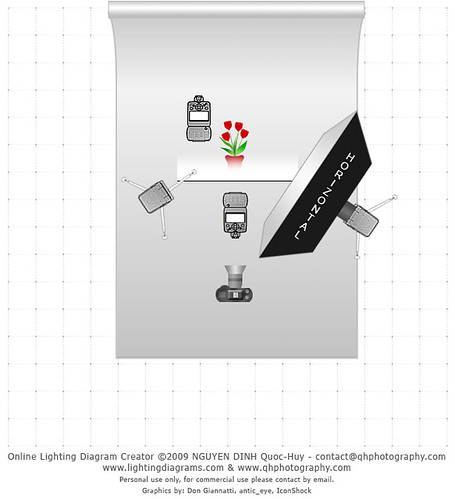
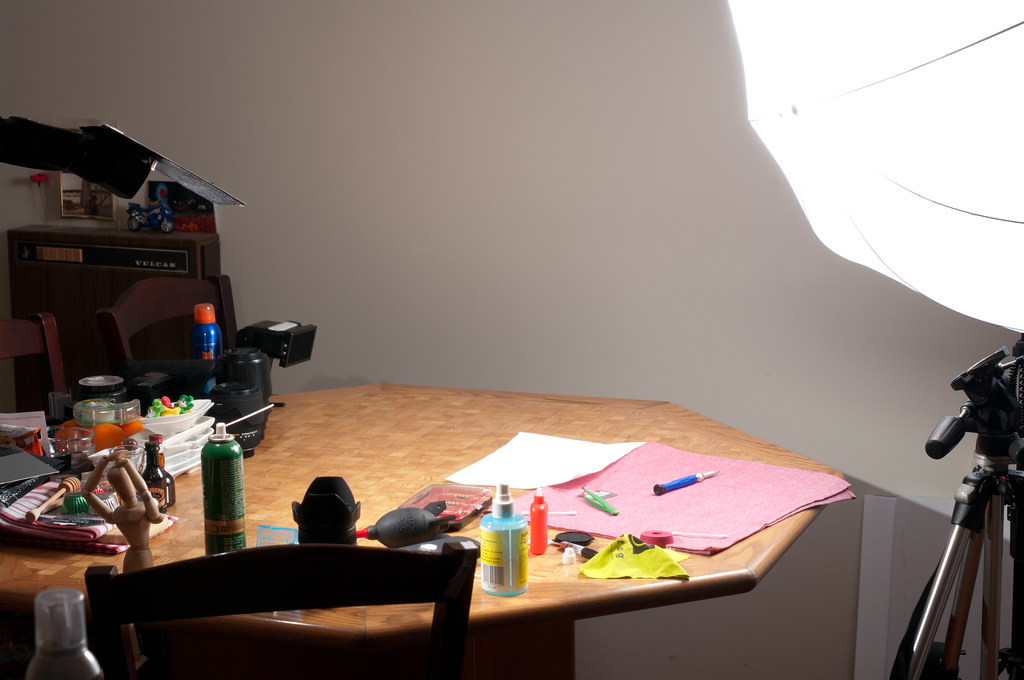
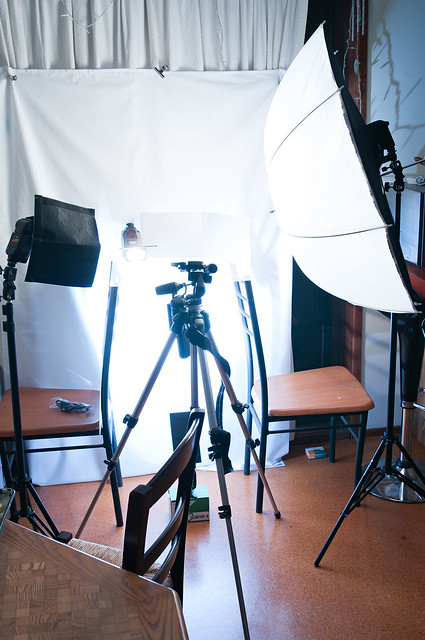
With your subject now just a silhouette in a sea of blinking red (if you have highlights turned on in Playback :) ) - its just a matter of lighting it however you want! I ended up using a *lot* of lights in these captures - more because I deliberately kind of want to make these ugly :lol: As you can see from the setup shots, all the dishes and ingredients are for tomorrow when I shoot some more varied compositions making them hopefully look more tasty ;)
Here is my setup tonight - every light over a meter off the ground is personal choice based on the subject:
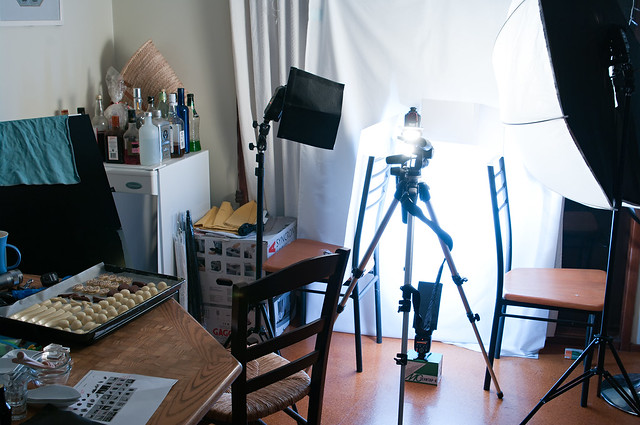
A wider view, chocolates at the ready (I hadn't picked out the 'heros' yet ;) ):
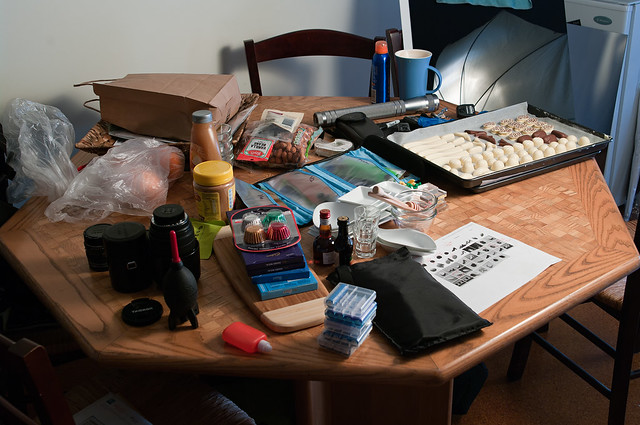
And all the supplies ready to go on the kitchen table for the next round. I plan to do the chocs with their filling ingredients on dishes in better compositions - hence the nuts, peanut butter, chocolate to grate up for effect, etc...
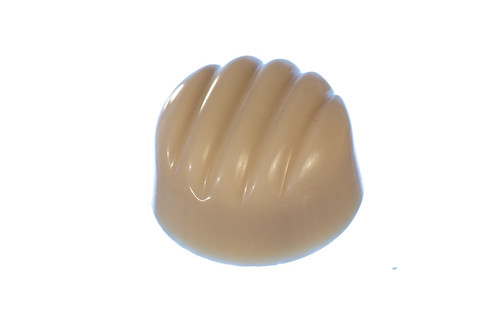
And with all that, I produced some images like these - not the greatest compositionally or by any means great lighting - but they ARE what I wanted.
The only PP is a v.light denoise and some sharpening ( you can tell I know! :lol: ) - But it is white-on-white with no shadows! :)
And to show it works just as good on non-white-on-white:
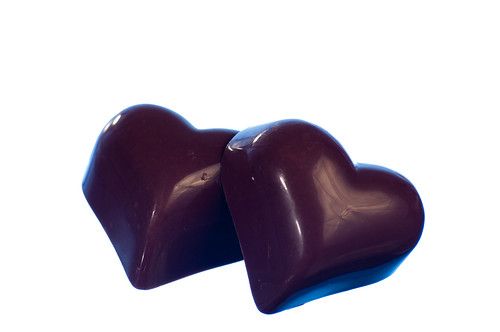 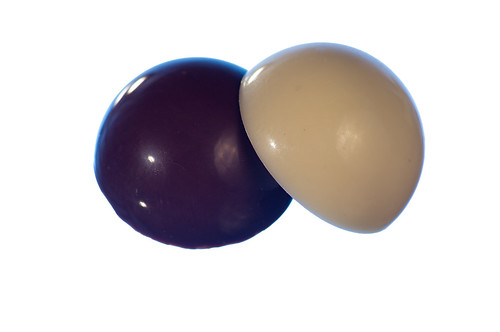
(theres some more on my flickr page Chocolates II - a set on Flickr)
I hope this helps anyone else that needs to shoot white-on-white at any stage!
But... Do remember to shoot a grey-card or otherwise white balance stuff properly and switch to custom - all that white can drive the AWB a little screwy and its a PITA to fix - go on - ask me how I know :lol: .. ;)
|
|
Forum: General Talk
07-16-2011, 02:58 AM
|
| |
I heard this presentation a few weeks ago and have been meaning to post it up here as I found so many of the topics Kerry covers in his talk are really the crux of what seems to come up so often...
Kerry is a very highly regarded Journalist in this country, a firm 'part of the furniture' when it comes to political commentary... and I found some of his comments very relevant to the media today.
You can access the Audio MP3 or Video of the presentation at
Kerry O’Brien: The Race to the Bottom in Politics and Journalism - Politics - Browse - Big Ideas - ABC TV
The highlights are at http://www.abc.net.au/tv/bigideas/browse/video_popup.htm?vidURL=/tv/bigideas...ngth=Highlight ... But I highly recommend taking the hour to watch/listen to it in its entirety..
(p.s... this is why I really appreciate the Australian Broadcasting Corporation... no Commercial Station would ever carry this! :) )
Quote: Kerry O’Brien: The Race to the Bottom in Politics and Journalism
In his first public lecture since semi-retirement, O’Brien argues politics and journalism have always been “inextricably linked in a kind of necessary love-hate dance”. Trouble is, he tells his university audience, the dance has become an ever downward spiral.
07 Jun 2011, 11:00
Kerry O’Brien is one of the most well-regarded names in Australian journalism. With a career spanning 45 years, he has been awarded six Walkley Awards and the coveted Gold Walkley, the highest honour in Australian journalism. The host of the ABC’s Lateline for six years, Kerry later moved to The 7.30 Report in December 1995, and only concluded his time on the program in December 2010.
O’Brien was delivering the annual Wallace Wurth Memorial Lecture at the University of New South Wales.
Kerry O’Brien is an Australian journalist based in Sydney. He is the former editor and host of The 7.30 Report on the ABC and the present host of the current affairs show Four Corners. O'Brien started as a news cadet in 1966 working his up through newspapers, wire services and television news and current affairs. He has had roles as a general reporter, feature writer, political and foreign correspondent, interviewer and compere, and also served as press secretary to then Labor Prime Minister Gough Whitlam. He has interviewed many world leaders including President Barack Obama, Nelson Mandela, Tony Blair, Mikhail Gorbachev and Margaret Thatcher. Anyway - Yes some parts are Australian Centric.. but if you run with the *loose* Translation that Labor is "The Democrats" and Liberal are the "Republicans" (don't ask, just work with it) - then I'm sure one or two of you might find it just as interesting given the number of problems he highlights that are of a truly global issue...
|
|
Forum: General Talk
07-14-2011, 05:51 PM
|
| |
You would only have to wait 3 mths - Or actually just post this week really... by the time you posted interest, thrashed through the debates on why you just need to make it in Full-Sleeve, then the discussion about how crap they'll be given the ridiculously small buttons and they will only appeal to the American Market, Someone will have to determine if its got a decent amount of Depth of Shirt and another wag will point out that whilst the shirt comes with K-Mounts, neither match because one is in fact closer to the Q size and the other closer to a 645D, A few people that didn't order last time will also point out they aren't ordering this time, because they heard there was a massive run of shirt-stains, and the shirt won't iron flat properly when done in low-Tungsten light - Oh, and whens it coming in all the different colours like the k-r .... it'll be Christmas !
And we haven't even started on the location of the Ricoh logo....
:lol::lol::lol:
|
|
Forum: General Talk
07-12-2011, 08:04 PM
|
| |
Internal Inflationary Pressures vs External ones though are at play here...
China's "Inflationary Issue" is not relevant to the US correct - however the US is *impacted* by that because it will drive up their cost of goods, regardless of exchange rate. Then there is the increasing value of the Yuan, which creates further price rises.
People in China wanting higher Salaries is "Inflation" in China . In the US though, it equates to just higher prices! :) You can record that against the CPI because they wont get 'cheaper' again will they? Your economies might be inter-dependent, but they are not linked sufficiently such that a wholly 'internal' discussion of inflation can be applied...
Also - Don't confuse a Falling Dollar vs an Increasing Yuan - if the prices went up because the US Dollar fell - thats NOT inflation... But if the prices go up because of an Increasing Yuan that stays there - that IS Inflation
Then there is internal stuff like QE..
What is posted above is relevant to an Internal economy so to speak... What I spoke about was one countries Internal Inflationary issues driving another countries separate inflation issues combined with the obvious high cost to the other country.
Now logically - If the US wages are not increasing correspondingly to the Chinese wages, as the cost of Chinese goods increases, combined with the genuine inflationary issues I referred to such as increasing Rent (as measured against the CPI - which means it is an inflationary pressure) is going to compound the issue.
Dr. Ed's Blog: US Inflation Indicators |
|
Forum: Pentax DSLR Discussion
07-11-2011, 08:19 AM
|
| |
I have both, although my K10D is currently awaiting me to pull my finger out and finish fixing it.. The K10D I found was much better at low-iso or long-shutter operations - i.e, at night.
But it sort of peaked at around ISO400 before noise started being something that had to be 'fixed' in post..
The K20D is however, much better to being able to push it a lot more to ISO800 - except where there is shadows, where the noise seems to be worse than the K10D.
Build wise, they are identical I would say externally, however, there is obviously fixes to some of the known problems with the K10D - that being things like the onboard flash that quite often failed in the K10D's doesnt seem to be as prevalent in K20D's.
My K10D does have a dead onboard flash - which isn't an issue as I use proper flashes from a 'flash' perspective - but sucks because the onboard flash is used as the low-light AF Assist... My K10D also no longer works off the internal battery compartment - its spent its life with the BG attached and I suspect this issue is just terminal corrosion and should be sorted with some liberal cleaning of the contacts.... When I get round to it .. ;)
So from my limited experience - go the K10D if you want to do low-light or long exposure stuff.. The K20D if you want a tad more DR over the K10D or the higher ISO. But having said that - I also found ironically the K20D *easier* to use in low-light though, due to the LiveView, as I could still focus using it on zoom where the K10D would risk being a black nothing in the viewfinder....
I personally also think the K20D perhaps produces 'nicer' images than the K10D as a general rule - but not sure I can definitely say it provides 'better' IQ at all (I could just be imagining it based on the extra MPs when I view the previews in LR....) - However not being able to turn off Dark Frame Subtraction (DFS, in-camera NR) on the K20D makes it tedious over and above the sensor differences for long exposure stuff...
The above though is obviously based on my own experiences with my own particular cameras - neither of which came to me 'brand new' either....
|
|
Forum: Photographic Technique
07-02-2011, 05:43 PM
|
| |
I was looking for some stuff to muck around with using some Gels a few months back, and shot a few frames like this:

If I redid them, I'd drag the shutter a little longer to get some more ambient glow on the candles.. I'd also fix the WB in the pics I posted ;) lol...
To help with focus, I used a Torch...
A tripod of course is a must if there was no strobes - but I ended up shooting this at Flash-Sync so it would have worked hand held as well...
Quickest way to 'get close' would be set to Spot Meter, center over the 'warm glow' you want to capture, and then take a shot and chimp it.... adjust as necceasry...
Using the "Green Button" setup to TV Shift in Manual could be a rapid way to knock in a 'first pass' and then easily adjust things as needed...
|
|
Forum: Pentax Q
06-23-2011, 07:06 AM
|
| |
Lol - I hadn't got that gist from you in your 29 other posts of the same nature to this thread (or the other thread of an almost identical nature) :p :lol:
At least you just said IMO instead of IMHO... ;) ;) You really want everyone to know you don't like this system....
Seriously - Why the hatred ? Did Pentax run over your dog this morning ?
|
|
Forum: Pentax K-5 & K-5 II
06-20-2011, 09:15 PM
|
| |
Impossible! We all know from the Giveaway Thread that FB and the like are entirely useless, do nothing to attract new members to the community, and is just there to harvest your email addresses for spam! :D
|
|
Forum: Flashes, Lighting, and Studio
01-30-2011, 01:59 PM
|
| |
Hey All. Just wanted to shared a slightly different way I used to 'fix' the 1/180 problem on the RF-602's.
Using the Nikon triggers, with a matching pinout, they freak out a little 'from the factory' and the green light flashes (however, when fitted to a Nikon, its on Solid). This is because the ready pin is just a High/Low signal on a Nikon. However Pentax's send a digital signal to this pin, which is what causes the erratic light pulsing when light metering is happening on the Body.
So if that signal is smoothed out, and kept constant above the threshold, then the green light will stay on solid and the flashes will work at 1/180. :)
I cracked open my one, and have attached a 16V 10uF Electrolytic Capacitor (had it literally at arms reach at the time) between the "Wake-up" Pin (pin at top on right all by itself on the row) and the Negative of the battery - You have a nice little filter that will smooth the 'rippled' TTL signal on the pentax to a nice flat (comparatively ;) ) constant source.
No switches to forget to turn off (Did this to the Cannon variety of Transmitter due to pin incompatibilities - and promptly forgot to turn off the transmitter one time ;) ) and it all works 'as it should' - a half press from the camera causes all remotes and transmitters to go "Green" for as long as the Light Meter is running and shots taken are good at 1/180.
I'll post up some pics of the inside shortly - But basically the Cap is on top of the board (held in place with some Kapton Tape) with some short wire leads to the PCB contacts for the Battery Negative Terminal and the Wake-Up Pin on the underside.
|


