I didn't set out to write an article when putting in a meandering mini-review for my trusty SMC 18-55 AL II WR, but that's how it ended up. I thought I would repost it here to share my journey thus far with the Pentax brand, and how this old reliable machine helped me to reconnect with photography both as a hobbyist and a desire to be a more artful-minded shooter.
Original link:
______________________________
Sometimes this little lens can really deliver the goods.

When I picked up my K-5 as a kind of experiment with DSLRs, I didn't want to be one of those shooters that buys a kit lens and then blames it for their bad photography, then ditches it for an expensive lens only to wildly proclaim how much better their images were now and how rubbish the kit lens is. This pattern I've seen played out over decades of shooting and I'm here to tell you: it's a trap.
In fact, I purposefully sought out the kit lens as my only lens to force improvement both behind the camera and behind the screen in post processing, an area of expertise that I had grievous shortcomings. I went out of my way to order the most up-to-date 18-55 I could find separately from the K-5 body, fully understanding the lackluster reputation of this lens when I ordered it. Such are the reputations also for many lenses in the Canon and Nikon inventories. Luckily my copy didn't appear to be decentered or have any major focusing issues, but it does seem to back-focus just a bit. To date I haven't successfully set the micro-focusing adjustment to correct it out, being too lazy to order or print up a proper scale. If it is off it's just by a very tiny bit, barely correctable with manual focusing so I haven't been bothered too much about it.
Learn and know what you have
In my film days I'd often been in the situation where I had a bevy of new and new-to-me lenses and spent a lot of time taking random shots with random results, using random film on multiple systems and all from different makers. The results were, quite predictably, random. I failed to really learn what each lens was capable of or what their individual strengths and limitations were. After a long lull in film shooting I noted that I'd been loving the shots taken with a Lumix LX7 pocket cam, a quite capable 10MP digital beast I'd bought to take during travel. I foolishly sold that camera and went mirrorless with micro-4/3 and decided up-front that I would not repeat the same mistake I'd made with my film equipment. I cut out all of the variables and went with just one lens, before the "one lens" thing became a trend. That strategy turned out to be a good one to really learn what my Olympus bodies could do, and I figured it would work equally well also with the Pentax.
I'm soon now about to be a two-lens photographer again with the Pentax, so I figured a little note was in order here in the lens sample thread because I know that I probably won't return to shooting it that much.
"It isn't sharp!"
Most folks immediately complain about the 18-55's lack of sharpness, and indeed it can appear that way with casual use. The reality is that this lens does not tolerate mistakes nor respond well to thoughtless usage, and that's how a "beginner" lens should remain. In adequate light it produces good colors and relatively strong contrast - but you can't just aim with one hand and rely on 6+ stops of IBIS to correct out motion blur in the center and let f2.8 take care of the rest, which sometimes feels like how all the world wants to shoot. My baseline has always been f8 if the sun is showing anywhere, and that's served me well. I rarely shoot below f5.6, and rarely go above F11, but have shot as high as f16 with usable results.
Contrast: my theory as to why the 18-55 gets a bad rap
Is the 18-55 soft? Not by 1970s standards. I shot Minolta and Canon before and those all had great sharpness on film, but I'm not sure how well most of my old collection would fare on digital and pixel peeping at 150%. I believe this lens' biggest shortcoming comes down to two issues:
1) it has a very low amount of micro-contrast, per its budget roots
2) this is compounded by at-times very harsh macro-contrast
As mentioned earlier, under the right lighting conditions this lens will produce beautiful colors and great overall contrast - but the optical tuning the engineers used to get average results under ideal light averaged out across all shooting conditions will bite back when the clacker starts pushing the lens or wants to get creative. These kind of kit lenses do not take kindly to a careless exposure, and I am reminded of this often in reviewing bracketed shots where both the under and over frames are virtually unusable, but I can still manage to process the best exposed of the lot into a good image, thanks to a healthy 14 stops of DR on the K-5. The hardest part for beginners I think is in figuring out when the light meter is lying to them while in one of the auto or semi-auto modes, and then the image falls apart because the lens just can't rescue a bad exposure.
It all comes back to basic contrast - because a kit lens has a lot of it to make vacation images look acceptable with a minimum of processing. Because of this sensitivity to contrast, what often happens in post-processing is that if you just start yanking sharpening / texture / contrast tools around then the image will quickly fall apart into 1 of 2 messes: crispy 'n crunchy, or soupy. I find that I really have to take care to match the exposure triangle with the subject and lighting conditions, and when I shoot the lens correctly then the lens will reliably produce good, usable images. If I am careless judging the shot, it's immediately obvious when I start editing and I can narrow down a problem in the photograph to a problem I made in gauging the exposure almost every time.
Flaring, Fringing, and Distortion
The SMC isn't there on the barrel for nothing. I've found this lens to actually be quite good shooting into direct sunlight and dealing with harsh specular highlights through trees and foliage. These all correct out 100% with the usual buttons in image editors, and it just hasn't been an issue. Likewise for distortion, there is verry little to complain about at the wide end, and again it's easily correctable by most editing software.
Lens Hood:
If there is one thing I have learned with this lens it's that using the excellent factory supplied tulip style lens hood matters a lot. Don't shoot and judge this lens without its hood. The original hood also has a nice feature with a removable tab on the bottom to adjust a polarizer or ND gradient filter if so equipped. About that ...
If you take photographs of the water in harsh sunlight (as I have here), shiny rooftops / oily skin / painted surfaces / bright beaches / glassy buildings - expect a lot of blown out highlights and crunchy looking images whilst trying to process them. We dress up expensive lenses with filters and polarizers - why not the "kit" lens, also? They go just as far here as on a premium lens. The thing to remember about polarizers - is that they often need attention to make sure they're oriented correctly and that it will rob you of precious speed if shooting in lowlight conditions.
Auto-Focus
Zero complaints. It hunts in low-light, which is more the K-5's issue than anything to do with the lens. With adequate light it locks on and is quick to rack, and the noise is what I'd describe as normal for an older design. It's not silent and instant like a mirrorless, but I have no issues with it.
WR and Handling
If I have gripes to air, it's that the handling of the lens feels cheap and it kinda sucks. The zoom ring is okay, but the focus ring is tiny and has a short throw making it difficult to focus accurately while in manual focus. There is no aperture ring, and no distance scale as we had on just about ALL lenses prior to 1990. I don't know why the manufacturers all suddenly forced us to be dumb, but here we are.
Weather Resistance, on the other hand, blows my mind. I have had the camera and lens out in sustained downpours and didn't give any care about racking through the zoom range - no water ingress, and no humidity afterwards. I was worried a bit that the lens hood wouldn't protect the front element from ingress between the barrel and the hood, but it wasn't a problem. If you're going to be shooting for a full day in the rain I wouldn't push it - an elastic (aka rubber band) at the hood-to-lens surface might be good insurance, and I'd be careful about zooming in and out. For durations of about an hour I had no issues. One tip: zoom slow.
Budget lenses and Bad Habits make for Bad Photos
In my opinion the 18-55 is not a bad lens, but shooting with it means that there is no wiggle room that we might otherwise enjoy when shooting with a superb lens. With the 18-55, either you had a good composition and nailed the exposure, or you didn't. What I quickly came to discover is how much I'd been relying on the lens quality in my m43 to provide visual interest in analyzing cards full of pictures. I am convinced that the m43 system has some of the sharpest lenses that have ever been made. What I'd lost the habit for is in creating photographs.
If your goal is to fill up an SD card on Program mode as a walk-around lens, the 18-55 will happily oblige, but the results are going to be pretty flat and often times washed out as it tries to keep up with careless pointing and clicking. I think we fall into a trap as photographers to rely on premium gear to shoot ultra-sharp, contrasty images that all look good on the jpegs and are fun to look at. But ultimately these images aren't really pushing our skillset forward in the intellectual process of creating good images, not just blithely capturing what's in front our noses.
What the 18-55 excels at, and the reason everyone should have one, is that shooting with it sends you back to photography school. I find the best results are obtained shooting in spot metering and taking care that there's a central subject in the image with plenty Depth of Field. Unlike the modern engineering marvels coming out at 2-3 thousand euros/dollars per lens, you need to paint like the gods do and really search out the light to bake the contrast into the image in-camera, and above all, focus on building an interesting photograph through composition first. With this lens there will be no amazing tonal gradients and micro-contrast there to carry a boring composition into something that's still cool to look at 1:1 on our monitors. And likewise, there will be virtually zero happy accidents to be discovered reviewing a shooting session. If you take boring photographs, they will be boring also when taken straight off the card.
Going back to shool with Pentax
As a result of using this lens, I've really been forced to break some of those bad, terrible, no-good habits that I developed with my previous micro-4/3 camera and its un-earthly sharp Zuiko 45mm. When I bought that camera I knew I wanted some reach and that I liked ~85mm, and I knew that I wanted a prime to get the most out of its smaller sensor. It also made me very lazy, and looking back it seems as if I practically forgot everything required to competently evaluate a scene and take a technically correct photograph as I'd once mastered in film.
Now that I've learned again and got used to the controls on the K-5, and despite both of these systems being 16MP, I just don't bother with my Olympus at all after shooting on the Pentax. The colors, dynamic range, and latitude in post from the RAWs is really second to none, even for a 12 to 13 year-old sensor. I have really come to cherish the K-5 and expect to add a K-5IIs at some point, but I don't think the AA filter is really holding me back, either. It's the sharpness trap, again.
Having an abundance of convenient sharpness on tap when we click the shutter gives us confidence, but it makes us lazy. I'm sure a 20-40 Ltd on the K-3 Mk3 is back to those EZ button days I enjoyed on the Olympus, but you know what? I don't really want to go back. If my pictures suck due to a lack of effort, they probably don't deserve to be saved.
Notes in Post
Develop your 18-55 images as if they were taken with a sharp lens, not a dull one. Begin by adding a small-to-moderate amount of global sharpness in the RAW converter, then start in by adding small amounts of local contrast (or structure), and tiny selective bits of clarity and dehaze. If you abuse those sliders and go crazy in your edit, the lack of micro-contrast will destroy the image.
When it comes to sharpening you want to selectively sharpen the image at the end of your adjustments, not at the beginning. Because sharpness is a perception about fine contrast, what you want to focus on first is building in good contrast to the image, which can be challenging but isn't any more difficult than other average lenses in my opinion. 5 minutes spent with dodging-and-burning will go a long way.
If you rely on ultra-fine contrast to give the impression of a good image, that can fool a lot of people on social media, but it will not fool a legion of experienced photographers on sites like this one. Develop the photograph for good macro level contrast and composition, then polish it with sharpening. I've not found any image with adequate light that couldn't be sharpened, and the images will clean up just fine with average amounts of care taken in post. I snapped this on a walk-about through a neighborhood and processed it in Luminar Neo. A sharp, messy image will in fact look dull - I've made liberal use of the "remove" tool in Luminar here to tidy it up, and the result is a sharp, bold looking image that did not have a great deal of effort put in when I snapped it.

suburban look book
I find that Topaz Sharpen AI often overcooks the image, so I just let it bake in whatever it wants with the optimizer choices and then load it as a layer to then mask in the parts that need it, leaving out the parts that don't. This is an old habit I had from m43 days when I used to have to BLUR a copy of the image to selectively de-sharpen it to make it look less grainy. With the 18-55, the sharpening tools in your favorite editor are all quite good enough to get the job done when used responsibly with time-tested and proven techniques with unsharp mask.
Know this: you will not get sharp images when the scene is in full shadow. That goes for this lens and any other lens of its ilk. I know the more modern glass somehow miraculously captures fine detail as if had been telegraphed back to the camera by a grey-goo of nano-bots, but that's not going to work here. Balancing ISO noise with a "full" exposure is critical, even for the relatively low noise on the K-5's large, pillow like pixels. The denoise tools are so good now that if you denoise it first, save to TIFF, then re-import for final sharpening you'll probably still be alright even for moderately underexposed or shadow heavy images.
Special Cheat Code for Darktable users: find the "diffuse or sharpen" module, then find "AA demosaic" filter presets in the dropdown. Click this at the beginning and it will instantly knock the "hair" off everything for just the right amount. It's like magic.
Orton Effect
This old technique is really coming back into style, and the good news here is that you have to work more to get an expensive lens to look good than you do with a kit lens that's already soft! There are myriad ways to pull it off - just remember that less is more, but I have become something of a self-professed expert in pulling out that "dreamy" kind of vibe in images with this lens, and the images take to that style of processing really well. Along these same lines, I am guessing that portraits made with 2:1 lighting at the 55mm long end will come out with pleasing skin textures. Nobody should really shoot be shooting portraits under f4, anyway.
There are some images I've been very happy with the results of, this one of a church here in Brittany being one. I doubt that I could have ended up with the same image with a "better" lens - the color and the delicate contrast here came out just beautifully for my taste. At the end of the day we should be making photographs that first please ourselves, because the truth of it is that the world already has too much photography.
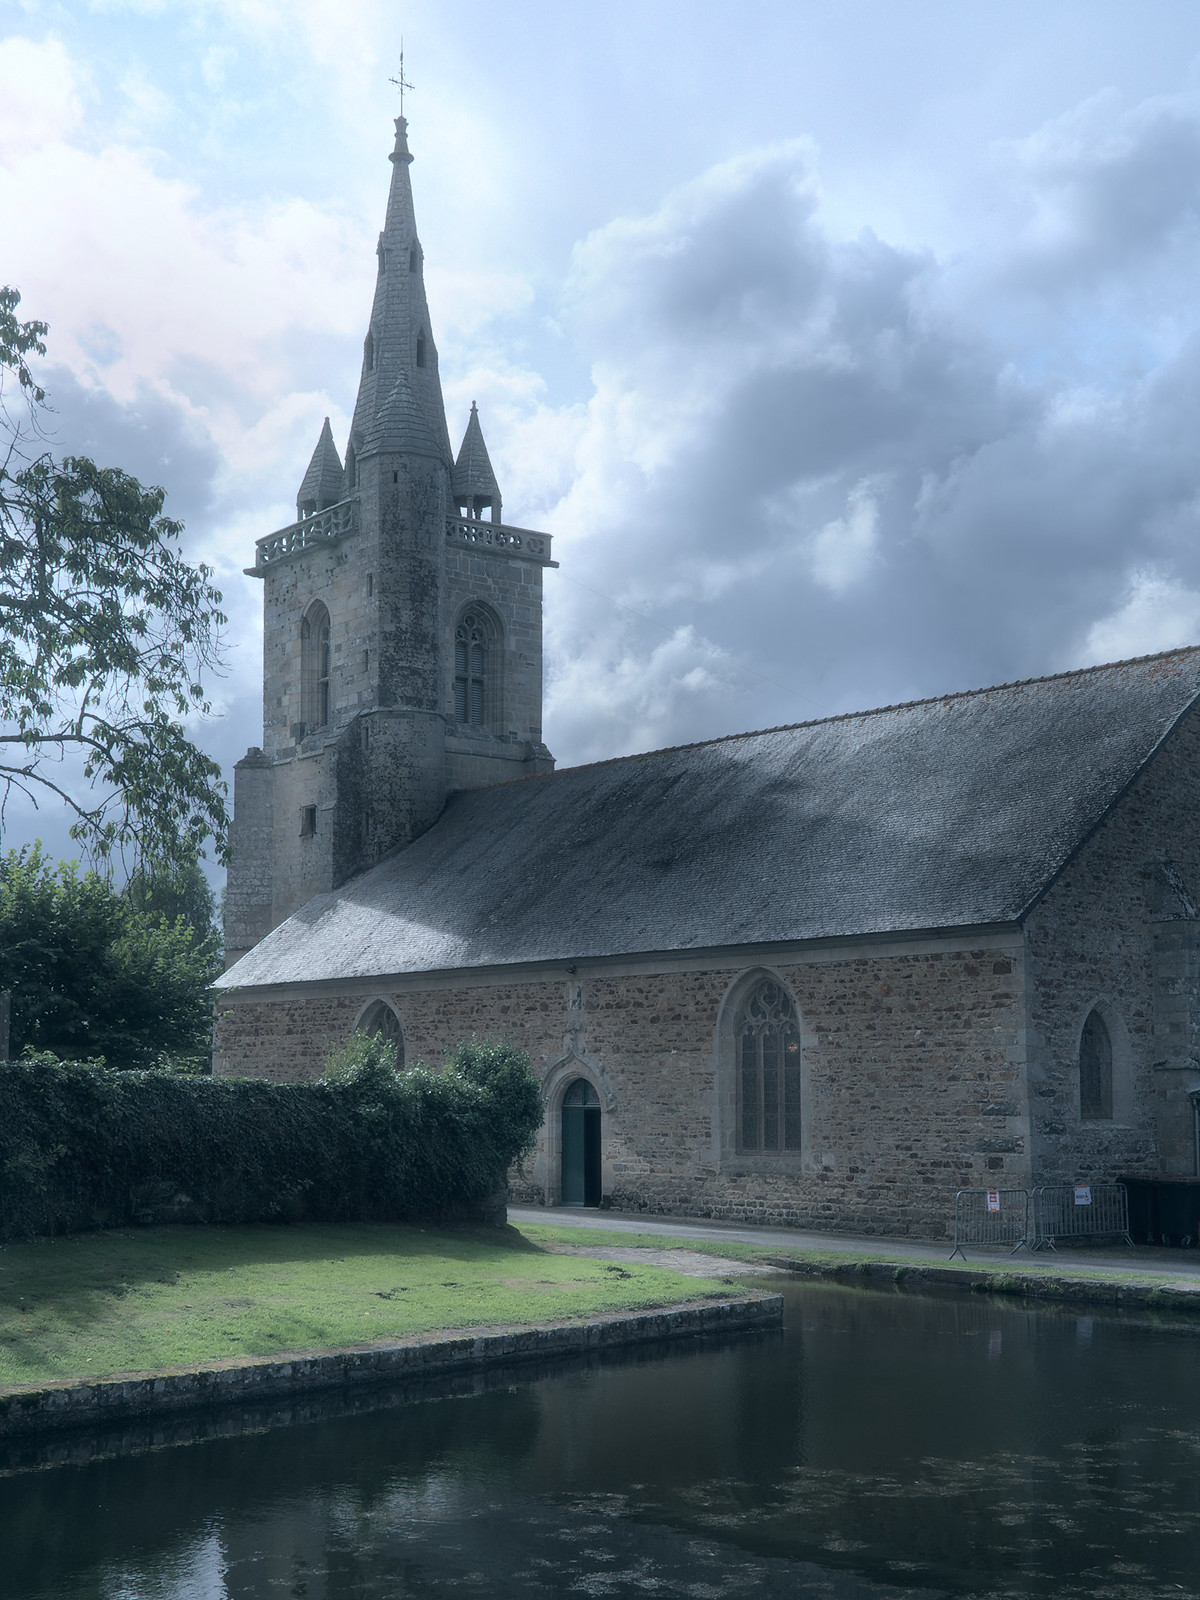
Chapelle Notre-Dame de l'Isle
Notes on the initial image:
Not a great composition, but it's what I had to work with when I spotted the light hitting the water at the place I was standing.
I'd deem this a light to medium-light edit that I made in Capture One 23. The most aggressive adjustment was pulling down the highlights and then the exposure to get some drama into the sky. I used C1's excellent color grading panel to bring out those gold tones that were already there, then added just a touch of C1s sharpening tool. To my surprise, the anchored cargo ship, sailboat, and rowboat in the central area there were all tack sharp in the RAW file before any adjustments. I don't tend to have the best results at infinity on this lens, but it worked here at f11, 1/500 & ISO100.
Summing up
If you feel like you've hit a slump in your photography and are tired of dreaming about the next bump in gear quality to lift your results, cut that out: buy one of these 18-55s and get back to basics, and focus on *why* you want to make images and what you find interesting. Whatever camera you've got is good enough. Happy shooting, and thanks for reading.
|


