
Cactus V6 Review
Remote Power Control
Shooting with multiple lights is fun and can produce nice results.
 |
| Multi-Light Shot |
The image above cycles through partial results I got by using:
- no light
- a key light (bounced flash)
- a back light (flash behind the candle holder)
- the key and back light
- the key and back light, plus a background light (snooted and gelled flash)
I could quickly establish the lighting ratios I wanted by controlling all three flashes from an on-camera V6.
The V6 manages up to four groups, labeled A—D. Each group can contain arbitrarily many flashes, but all flashes in the same group share the same power level. As a result, the V6 can remotely control a multi-light setup with up to four different power levels with as many individual flashes within one group as desired.
Reasons for using more than one flash in a group include:
- increasing the overall power level of a group,
- decreasing the recycling time of a group,
- creating softer light, and
- illuminating a larger area.
The flashes in one group need not be of the same type, in particular they don’t need to have the same maximum power level. They will just share the same power level and to all intents and purposes can be treated as one light source with a particular overall power level.
 |
| Control Cockpit A V6 in transmitter mode displaying four power levels for four active groups. |
The standard display of a V6 in transmitter mode shows up to four power levels A, B, C, and D, depending on whether the respective groups are active or not. Only an active group will fire upon a trigger signal.
One can quickly toggle the “active” status of a group by pressing the respective button. It is therefore easy to judge the contribution of each group individually or as part of a subset of groups by toggling groups on and off as needed by quick button presses.
Turning the dial changes the power levels of all active groups up or down, depending on the direction of the dial rotation. Hence, if all groups used in a particular lighting setup are active, a dial rotation will change the overall power level. The lighting ratios between the groups will be maintained by such a global adjustment.
 |
| Quick Single Light Adjustments Pressing one group button while turning the dial, adjusts the power level of the respective group only. |
One can quickly exclude a group from an overall level adjustment by deactivating it before the adjustment and activating it afterwards again.
The most common scenario, however, will be the adjustment of a single group, e.g., toning down just the key light a little, without affecting the fill, background and hair kicker lights. This can also quickly achieved by pressing a group button and turning the dial simultaneously. After one lets go off the button, the corresponding group will still be active, it will just have its power level changed. You can see a V6 alpha version in operation controlling the power of an RF60 and a Yongnuo YN568EX in a video by Brian Hursey.
There is another video by Peter Koerhuis demonstrating remote power control and the absolute power mode. Make sure to watch it in HD and you may want to read the respective explanation for the video in Peter Koerhuis' Cactus V6 review since the video itself does not feature sound nor captions.
 |
| Group Buttons The four group buttons illuminate if the respective groups are active. |
Operating one button and the dial is normally very easy to do by pressing the button with one’s left index finger and turning the dial with one’s left thumb. However, in case one finds oneself in a situation where this technique won’t work well, or one anticipates a sequence of adjustments to the same single light, one can alternatively long-press on a group button. This will cause the display of the group’s power level to be inverted and it will be singled-out for power level changes. All subsequent dial rotations will then only affect the selected group and one keep adjusting and making test shots until one short-presses on the group button to leave the single group adjustment mode. N.B., short-pressing the group button is not necessary if one wants to single-adjust another group straight away. In this case, a long-press on the new target group button automatically performs the desired switch.
Adjustment Accelerator
 |
| Front Controls Selection dial, "OK" button, and "Menu" button can all be operated with one’s left thumb. |
A menu setting controls whether one click of the dial causes power levels to change in stop steps of 0.1 (1/10), 0.3 (1/3), or 0.5 (1/2).
If the step size is 1/2 stop, one can skip through the whole range of levels from minimum to maximum very quickly. Smaller step sizes require more dial turns, which is why there is an “adjustment accelerator” that can be activated by briefly pushing in the dial once. Any subsequent dial turns will then cause full stop changes, however without erasing any fractional precision of the current levels. Once one is near the target level, one can push in the dial again and thus deactivate the “adjustment accelerator”, continuing with more fine-grained adjustments.
Supported Flash Models
A flash can have its power level remotely controlled in one of three ways:
- Directly via a built-in radio receiver.
Currently, only the Cactus RF60 supports this mode. Note that a V6 can change the power level of an RF60 in 0.1 steps even though the RF60 control only allow 1/3 steps. An RF60 directly displays the changed power level, but only with the 1/3 stop precision that its display supports. - Through a predefined flash profile on a V6 receiver.
See the below table for the flash models that are currently supported with a predefined profile. Some of these flash models are controlled via a digital protocol, in which case the flash display will show the change in power level as one turns the dial on the V6 transmitter. If the predefined profile supports analogue TTL then flashes will not display the power immediately, but on the plus side, the adjustment resolution increases from 1/3 EV to 1/10 EV and a special “Lo power” mode is supported.
Note that in the below table “flash system” only refers to the system dedication of the flash that sits on the V6 receiver. The brand of the flash itself does not matter at all. The V6 transmitter used for setting the power levels only requires the standard single pin firing from the camera and will thus work on almost every camera with a standard ISO hot-shoe.Flash System
(Hot-shoe type)Supported Flash Brand and Model
(as of May 2014, see past firmware releases for further additions, e.g., for Olympus and Panasonic)Canon
Cactus AF-45C, AF-50C
Canon 320EX, 430EX (II), 540EZ, 580EX (II), 600EX-RT
Godox V860C
Metz 36AF-5, 44AF-1, 50AF-1, 52AF-1, 58AF-1, 58AF-2
Nissin Di866 Mark II, MG8000
Phottix Mitros
Sigma EF-500 DG SUPER
Yongnuo YN568EX (II)
Nikon
Cactus AF45N, Cactus AF50N
Metz 36AF-5, 44AF-1, 50AF-1, 58AF-2
Nikon SB-24, SB-28, SB-600, SB-700, SB-800, SB-900, SB-910
Nissin Di700, Di866
Sigma EF-530 DG SUPER
Pentax
Cactus AF 45P, AF 50P
Metz 36AF-5, 44AF-1, 50AF-1, 58AF-2
Pentax AF 360FGZ, AF 540FGZ,
Pentax AF 360FGZ II, AF 540FGZ II - Through a user-created custom profile for one of a vast range of TTL flashes on a V6 receiver. Yes, you can stop rubbing your eyes now. ☺ See the following subsection for the details.
Custom Flash Profiles
Do you have an old work horse of a flash, e.g. a Nikon SB-26, and want to remotely control its power with a V6? Using 0.1 EV resolution for adjustments? This may be possible, as long as the flash fulfills the following requirements:
- It needs to support TTL, i.e., the old analogue TTL that was used for film cameras and that the Pentax *ist DS was the last DSLR from Pentax to support. If your flash only supports P-TTL and is not supported with a predefined profile yet, you will have to hope that Cactus will provide a predefined-profile through a firmware upgrade.
UPDATE: As of firmware version V1.1.008, the V6 supports the Pentax AF540FGZ II and the Pentax AF360 FGZ II flash models.
- The flash needs to support at least two standard manual power levels below full power. If the flash supports more manual levels then this will allow the creation of a more precise flash profile, but in a pinch two power levels below full power are sufficient.
- The V6 needs to support the particular TTL handshake protocol of your flash. Even the simple old analogue TTL protocol featured a number of variants and the V6 only has a limited repertoire. Before users start reporting the results of their attempts there is no way of knowing in advance whether your particular flash is covered or not, but the creation of a flash profile starts with a basic test that tells you whether the V6 can control your flash at all. It is fair to say that the majority of TTL flashes will be supported but given the breadth of models, there will be exceptions to the rule.
 |
| New Lease of Life Revitalise your old flash workhorse by creating a flash profile for it. |
Creating a custom flash profile is very easy. Just put the flash on a V6 into receiver mode and point it to a reflective surface at ~1m distance, using the flash’s maximum zoom setting (see the diagram to the right).
After choosing “FLASH SETUP” in the menu, the V6 display instructs you to put the flash into TTL mode. Once that is done, press “OK” and then select the flash’s system dedication, i.e., one of Canon, Nikon, or Pentax. Again, this brand choice does not refer to the brand of the flash, nor to the camera you are going to put the V6 transmitter on. It is easiest to think of this brand choice as telling the V6 receiver what the hot-shoe type of the flash is. If you have a Metz flash with Pentax dedication (it may say “for Pen” near the locking ring), choose “Pentax”. Once you have entered the flash’s system dedication, the V6 will perform the initial test.
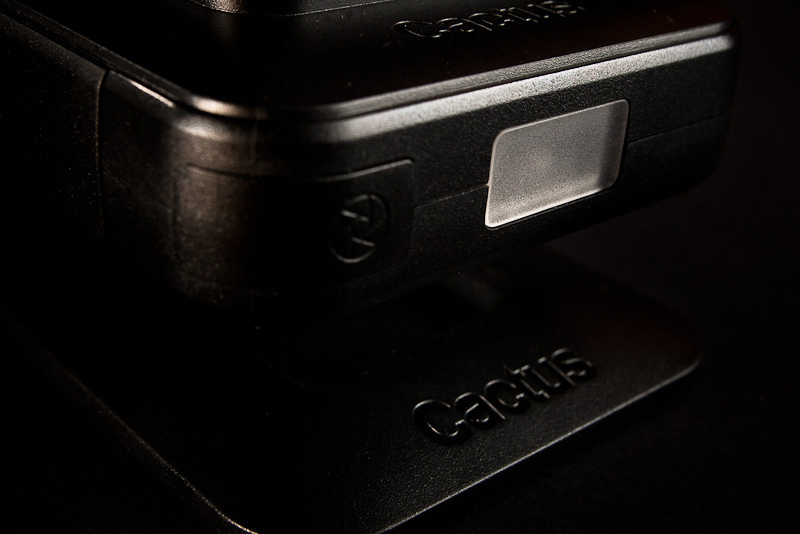 |
| Photo Sensor The optical sensor at the front of the V6 is used for creating flash profiles and optical triggering, e.g., from HSS flashes. |
If the V6 reports that the flash failed the test, but you nevertheless saw the flash fire twice with different levels of intensity, you should try reducing the distance to the reflective surface. Chances are that the reflection was just too weak to be registered by the V6’s sensor.
Note that the reflective surface does not need to be particularly flat or uniform in colour, as the V6 will measure relative light levels only. The surface should not be a mirror or another surface with specular reflections, though, because such direct reflections may throw off the V6’s sensor.
Once the flash has passed the test, you will be asked to input its maximum guide number, e.g., “54” for a Pentax AF-540 FGZ. This number is important for the absolute power mode.
Next, the V6 will instruct you to put the flash into manual mode and will then perform a series of calibration flashes, asking you to change power levels to “1/2”, “1/4”, down to “1/128”, etc. in between. You can skip power levels, if they are not available on your flash model.
 |
| Ready to Receive A V6 in receiver mode displaying the chosen flash profile (here for a Pentax AF-540 FGZ) and signalling the receipt of a trigger event through the green status LED. |
Finally, the V6 will ask you to put the flash into TTL mode again and will then fire off a series of flashes in order to learn the correct quench times for reproducing target levels such as “1/2”, “1/4”, etc. This phase is fully automated and will take a short while. Once it has completed, you are asked to input a name (six characters max., including numbers) for the profile. After entering the name, the V6 will return to its standard mode and will display the flash profile name since it is automatically selected for use after profiling. You are now ready to remote control the power levels of your flash with another V6 or an RF60 in master mode.
If you would like to use the new custom profile on other V6 receivers, you can copy the profile through wireless radio transfer to any number of other V6 receivers.
The whole profiling process does not take very long and is really easy to complete, given the clear instructions that are shown on the V6’s display. The V6 will even detect when the distance to the reflective surface is too small and ask you to adjust and retry. One should ensure, however, that the flash batteries are still in good shape. If they are too worn out already, recycling may take too long for the test shot intervals used by the V6.
Brian Hursey has created a video demonstrating the creation of a flash profile. When watching it, however, please note the following:
- the gap you can notice on the battery door was a “feature” of the alpha units; it does not exist on the production units.
- he could not use the “push-in” functionality of the dial as the alpha unit did not support it yet. Quickly pushing in the dial instead of pressing “OK” speeds up operation considerably, AFAIC.
- he could have set the backlight duration to “always on” in order to avoid the automatic turn off.
- for the “absolute power” mode to work well, it is important to enter the correct guide number for the flash model.
Relative Power Mode
The default mode for displaying power levels on the V6 is of the standard fractions-of-full-power type, e.g., “1/8”, “1/64”, etc. This system is used by most flashes in manual mode. Levels that do not correspond to full stop changes are shown with small decimal modifiers. For instance, “1/16 +0.5” means “one sixteenth of the maximum power, plus half a stop”.
This mode is referred to as the relative mode because the light output is relative to the flash’s maximum power. For instance, “1/2” means “half of the maximum power”. This standard system makes it difficult to combine flashes with different maximum power levels because the same light output does not equate to the same fractions. For instance, to match the light output of a GN 54 flash at 1/32 +0.6 power, one needs to set at GN 36 flash at 1/16 + 0.5. In order to release the user from calculating such matches, the V6 supports an “absolute power level” mode.
Absolute Power Mode
The absolute mode uses the EV (exposure value) level notation known from studio strobes and takes the maximum output level of a flash into account. For instance, the relative levels, “1/1”, “1/2”, “1/4”, etc. of a GN 58 flash map into “17.0”, “16.0”, “15.0”, etc. Any less than full stop changes naturally fit into with this system, e.g., “1/2 +0.3” becomes “16.3”.
The beauty of this system is that identical numbers now mean the same light output. For instance, the absolute power level “12.7” will (behind the scenes) be translated into “1/32 + 0.6” for a GN 54 flash, but into “1/16 + 0.5” for a GN 36 flash. In other words, one no longer needs to pay attention to which group / flash one is currently adjusting in order to know which fraction would be appropriate. Instead, one can simply use an absolute number.
In order for this system to work, a V6 transmitter needs to know the maximum power levels of all flashes it controls. Switching into “absolute power” mode hence requires a short polling of all V6 receivers (and RF60) that use the same channel as the transmitter. After this quick poll, the V6 transmitter displays how many flashes reported back their maximum power level. If there are multiple flashes with different maximum GNs within one group then the lowest maximum GN available in this group will be assumed to be the maximum setting for this group.
The absolute power system obviously only works with flashes for which a V6 flash profile (pre-defined or user created) exists. A V6 receiver can trigger any flash, even without having a profile for it, but in order to support it in the “absolute power” mode, it needs to know its maximum power level via a flash profile.
Note that one may need to adjust the “behind the scenes” translation of absolute values into flash-specific power fractions, e.g., when:
- the flash tube is aging
- the flash is used with a modifier
- the flash is used with a different zoom setting or at a different distance
- etc.
In such cases, one can either use a temporary offset (EV compensation) for the respective group, or associate a permanent offset with the flash profile. This works for both custom- and predefined flash profiles.

