
Pentax K-1 Review
Handling
In this section we will report on our experience with handling the K-1.
Built-in Grip
The Pentax K-1 has a fairly large grip with sufficient horizontal space between the grip and the mirror box. Add to that an amply sized thumb rest on the back and you have the recipe for a good secure hold of the camera.
 The grip is taller than the one on the K-3 since the camera body itself is taller. This means that there now is a place for the pinky on the grip and the optional battery grip is not needed just for the sake of getting a good hold on the camera.
While one-handed operation is possible with lighter prime lenses, we do recommend that you support the camera and lens with your left hand and let the left hand carry most of the weight.
Photographers with large hands would probably wish for a slightly deeper grip. This would also be beneficial for users of heavier lenses. We've found the grip on the Nikon D810 (which was redesigned following a rather poor grip design on the D800) to be slightly more comfortable than the one on the K-1.
Handling with Large and Heavy Lenses
The grip is sufficient to hold camera and a medium sized zoom like the D FA 24-70mm and D FA 15-30mm by the camera alone. The lenses should nevertheless be supported with the left hand during shooting. For larger lenses like the D FA 70-200mm F2.8 it is the other way around. If you need let go of a hand it is more convenient to hang on to the lens with the left hand and let go of the right hand. This also puts less strain on the lens mount.
We used the D FA 150-450mm zoom extensively with the K-1. This zoom is quite heavy and has various buttons spread over the lens barrel, hereunder several AF buttons. None of the AF buttons fall naturally under a finger when hand-holding the lens, though. AF is thus best achieved with the AF button (or shutter release) on the camera. We will discuss the handling of Pentax's two D FA telephoto zooms further in separate in-depth reviews.
Buttons and Dials
All buttons are placed within easy reach with the exception of the live view button (and the rarely used button for the meter pattern).
The mode dial has a locking mechanism which can optionally be disabled using a switch directly beneath it.
 Buttons and Dials (click to enlarge)
It is quite a trip for the left hand to move from supporting the lens to reaching the Live View button with the left thumb. Perhaps the thinking is that live view is often used with the camera on a tripod in which case the left hand is free to operate the live view button. Also, switching in and out of live view is not a frequent, repetitive event which makes the placement less important.
Switching between stills and movie mode is done by a lever on the top plate reachable by the right hand index finger. Should we make a suggestion it would be to let this switch have a third setting, namely live view, and this would easily permit one-handed operation.
The Play button is located in the cluster of buttons on the right hand side of the back. This is a change from the K-3/5/7, where the play button was where the live view button now is. We prefer the new placement since it makes reviewing images faster and there is no need to let go of the support of the lens with the left hand. This is in particular nice with the new, large and heavy zoom lenses. The new location does create confusion, though, when shooting with a K-1 along side a, say, K-3, and you'll find yourself hitting the wrong button over and over. Entry-level Pentax cameras have followed this layout for a while, though.
All push buttons have a good tactile feel, and the two traditional e-dials offer just the right resistance between click stops that they are convenient to operate while still retaining their setting when the camera is handled. The new settings dial is a tad on the stiff side, but it's still possible to operate it with the right hand thumb even when looking through the viewfinder. For ISO and EV compensation we prefer to use the old way with the push buttons and the rear e-dial, since that dial is easier to operate.
The shutter release has a half-press trigger point for turning metering on and only needs a soft press to trigger the shutter from that point on. This helps reduce camera shake. There is no firm stop or tactile feedback from the shutter release button at the point where it activates the shutter. This could take some getting used to.
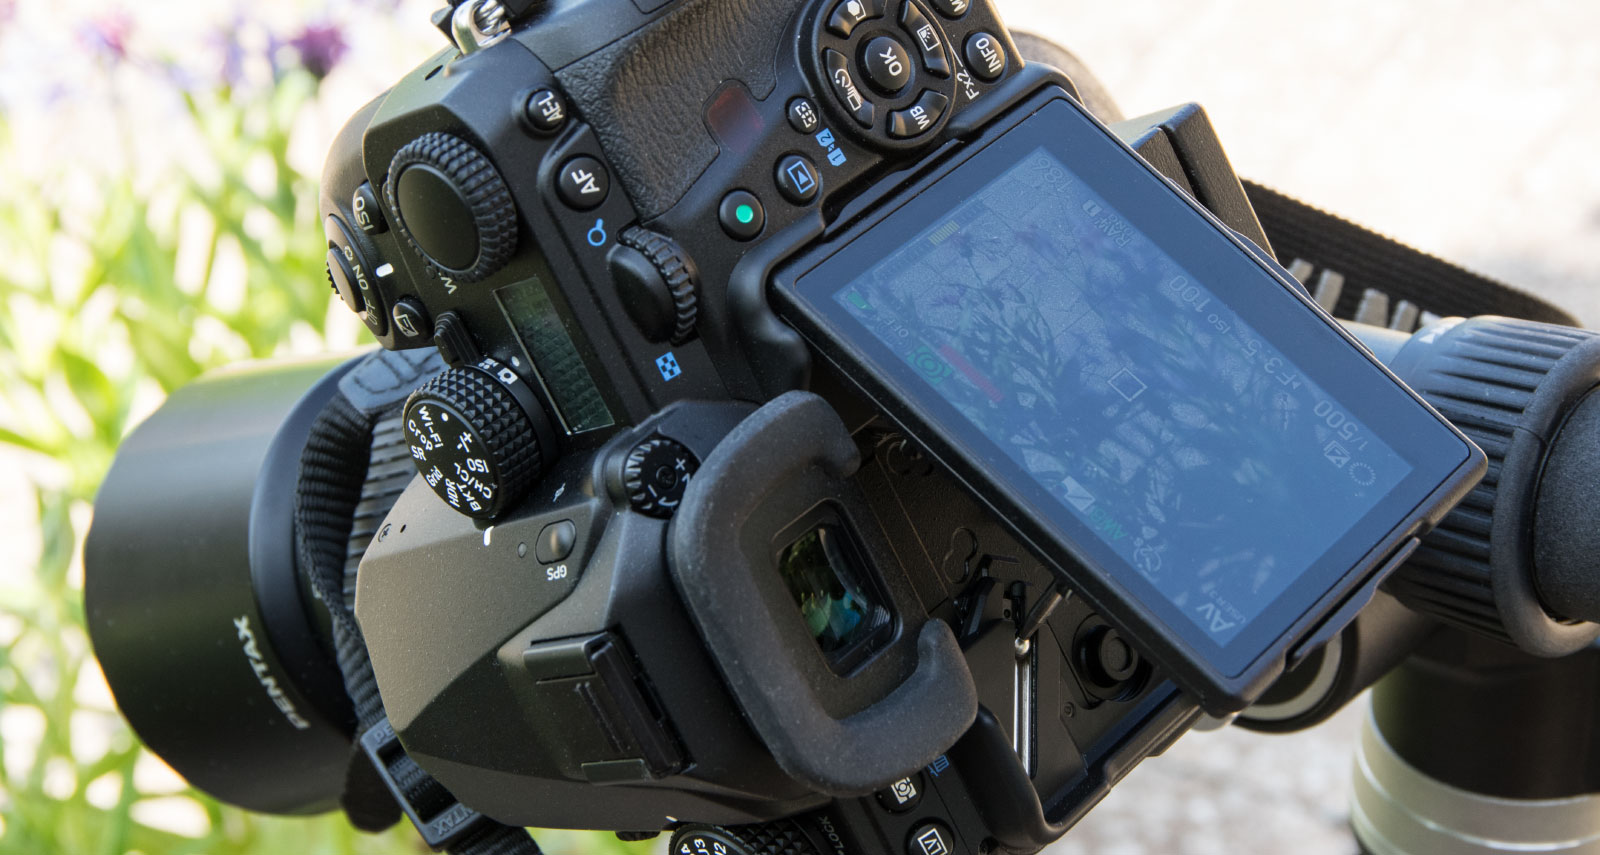
The Screen
A novelty on the K-1 is the way the rear monitor is mounted, but does it work in practice?

It is faster and easier to operate than the articulating "twist and turn" type on, say, the Pentax K-S2; you just pull it out and position it and push it back in. As shown above it can be turned upwards which works well for macro shooting near the ground or when otherwise shooting with the camera from a low position. The screen can be turned a bit farther than 90 degrees when facing upwards.
If you want the screen turned to the right, say, you just place your finger under the tab on the left hand side of the monitor and pull. The screen opens as if there were a hinge on the right hand side. Quick and easy.
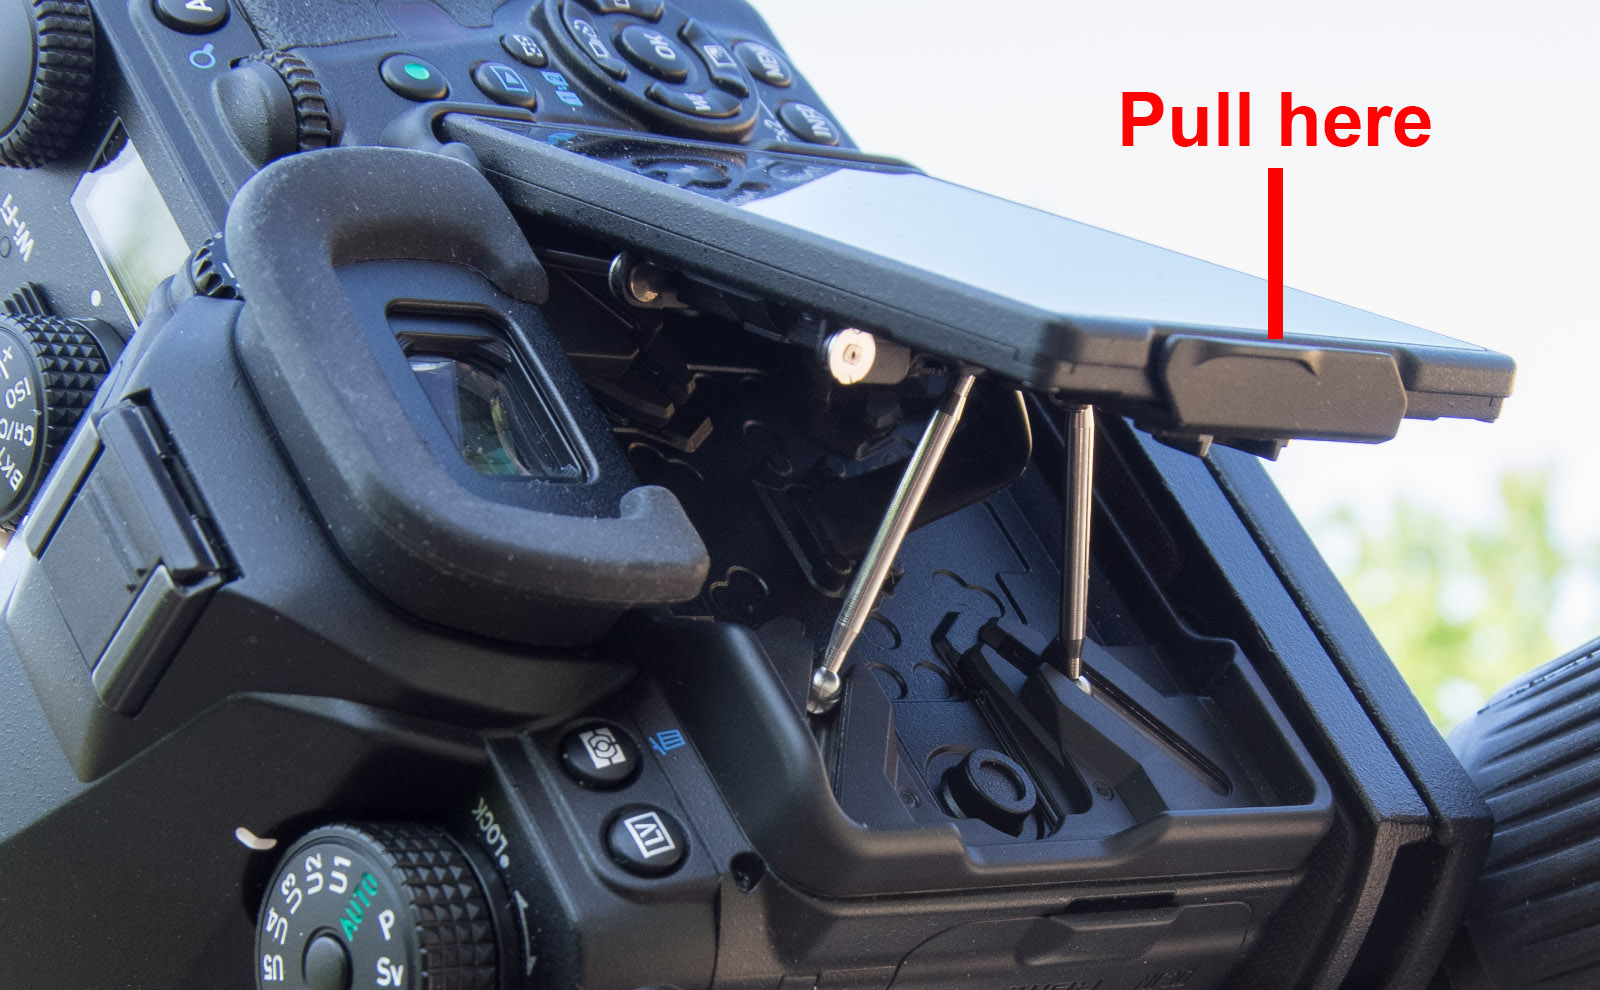
Pulling the screen out so that faces the top at an 90 degree angle is a two step process. Fist pull out on the tab at the bottom of the monitor back plate as far as it goes, then flip the monitor plastic casing further up.
The limitation of the design shows in the sideways and downward positions, where the screen turns out to an angle of about 40 degrees sideways and 45 degrees downward. The downward movement of 45 degrees is sufficient for shooting over the top of crowds, however, and the sideways movement is adequate for shooting verticals except perhaps when shooting verticals very close to the ground. Here one could wish for a bit more movement.
All in all, this new design works great and we prefer it to the flip and twist design of the K-S2, though your mileage may vary depending on your needs.
Viewfinder
 The diopter correction is done with a dial to the right of the viewfinder which is convenient to operate while looking through the viewfinder. It is much better than the slider seen on most earlier models of Pentax DSLRs.
The adjustment range has been augmented over the K-3 in the nearsighted end, but is too narrow when it comes to the adjustment against farsightedness. The range is -3.5 to 1.2, where the K-3 handles -2.5 to +1.5. There is no acceptable first-party solution if your eyesight falls outside of the adjustment range if you don't want to wear eyeglasses or contact lenses. Pentax does occasionally mention diopter correction lenses in their literature, but they are hard to find and they do not allow for using the eyecup at the same time.
One cannot see all four corners of the viewfinder at the same time with eyeglasses and the eyecup mounted. Removing the eyecup is not a viable solution due to the risk of scratches. We hope that Pentax eventually would introduce diopter correction lenses with built-in eyecup. For now, the only real solution is to turn to third-party eyecup replacements that fit.
Illumination
The K-1 is unique in that it offers bright white LED lighting for various external components. In addition to a dedicated light above the lens mount (shown below), there are 4 LEDs mounted on the back of the rear LCD.
 K-1 Lens Mount Illumination
With the LCD pulled out, the monitor can illuminate the controls on the back of the camera as well as the CD card slots and remote connector port. This illumination can be invaluable when working in the dark, i.e. when shooting photos of stars.
 Four LEDs are mounted on the back side of the screen
Although the lighting can be disabled altogether via the camera's menu, the LEDs will only come on when the illumination button (behind the ISO button) is pressed. The camera also provides options to disable the Wi-Fi, GPS, and flashing self-timer/remove lights.
Finally, it's possible to dim the lights.
|
|
|


These seemingly minor options show the attention to detail that Pentax engineers applied while designing the K-1.
Conveniently, all external lighting can be used even when the camera is otherwise powered off.
Handling at Night
From a handling perspective the K-1 is the best ever Pentax for shooting at night due to a set of new features that has been added to what was available on previous bodies:
- Lamp on the front illuminates the lens mount making it less of a hassle to change lenses in the dark (new)
- The SD card compartment and the electrical contacts on the left can be lit (new)
- The buttons on the back can be lit by LEDs placed on the back of the rear monitor (new)
- The top LCD can be lit
- A dedicated button for turning the above lights on (new)
- The rear monitor can be turned off so that it doesn't blind you. Alternatively the strength of the backlight can be reduced and the color skin changed to a more night friendly red skin
- The third control wheel can be set to control crop, say, for easy access without having to open the control panel (and ruin your night vision in the process) (new)
- Bulb mode can be configured to open the shutter at the first push of shutter release and close at the second push. The same functionality is available with the infrared remote
- Slow shutter speed noise reduction (dark frame subtraction) can be turned off
Add to this the excellent high ISO capabilities which we'll cover later, and the built Astrotracer feature.
Battery Grip
The optional D-BG6 grip greatly improves handling for verticals and offers better balance with heavier lenses, though due the the K-1's increased base size and weight, having a grip isn't as important as it might otherwise be on a crop body.
 BG6 Grip
The grip has a slightly different button layout than the body: the AF button is takes the place of the green button, the green button takes the place of the playback button, and the AE-L button takes the place of the AF button. The placement of the ISO and exposure compensation buttons, depth of field preview button, and e-dials on the grip mirrors the layout of the buttons on the camera.
Conveniently, the covers for the grip connector and camera terminal can be stowed in special slots on the top surface of the grip while the grip is mounted. Exercise caution while mounting the grip, as a dirty connector can potentially cause erratic behavior.
 Grip button layout
The bottom of the grip has a plate-friendly texture, unlike the bottom of the camera itself.
The grip effectively doubles the battery life of the camera. We strongly recommend configuring the camera to prioritize using the battery in the grip, since if the battery in the camera runs dry first, the camera will not power on reliably.
While the grip does not include a D-Li90 battery, it does come with two trays: one for a second D-Li90, and one for 6 AA's. The D-Li90 tray can also hold an extra memory card, which can be a life-saver in case you forget to re-insert your main cards into the camera after downloading.
Verdict
It is hard to find any flaws in how the K-1 handles. We used it with everything from compact lenses like the FA 43mm F1.9 Limited to the beefy D FA 70-200mm F2.8 and 150-450mm F4.5-5.6 lenses. Our only wish is that the LV button would move to the right hand cluster of buttons or become a setting on the stills/movie switch and that the range of the viewfinder diopter correction would be increased. The settings dial could also be easier to turn.


